Embarking on a celestial digital adventure, the art of simulating the ethereal beauty of the night sky in Photoshop is both a creative pursuit and a technical challenge. In this exploration, we aim to demystify the process, transforming rookies into masters of the virtual firmament. By delving into the intricacies of layers and blend modes, aspiring digital artists will learn to wield these tools with finesse, layering stars, moons, and cosmic tapestries into a harmonious nocturnal tableau. The journey continues as we finesse the use of brushes and noise filters to create our own constellations and celestial bodies, paying homage to the breathtaking complexity of our universe. Through an understanding of layers, blending, and digital brushwork, anyone can create a sky brimming with stardust and cosmic wonder.
Understanding Layers and Blend Modes
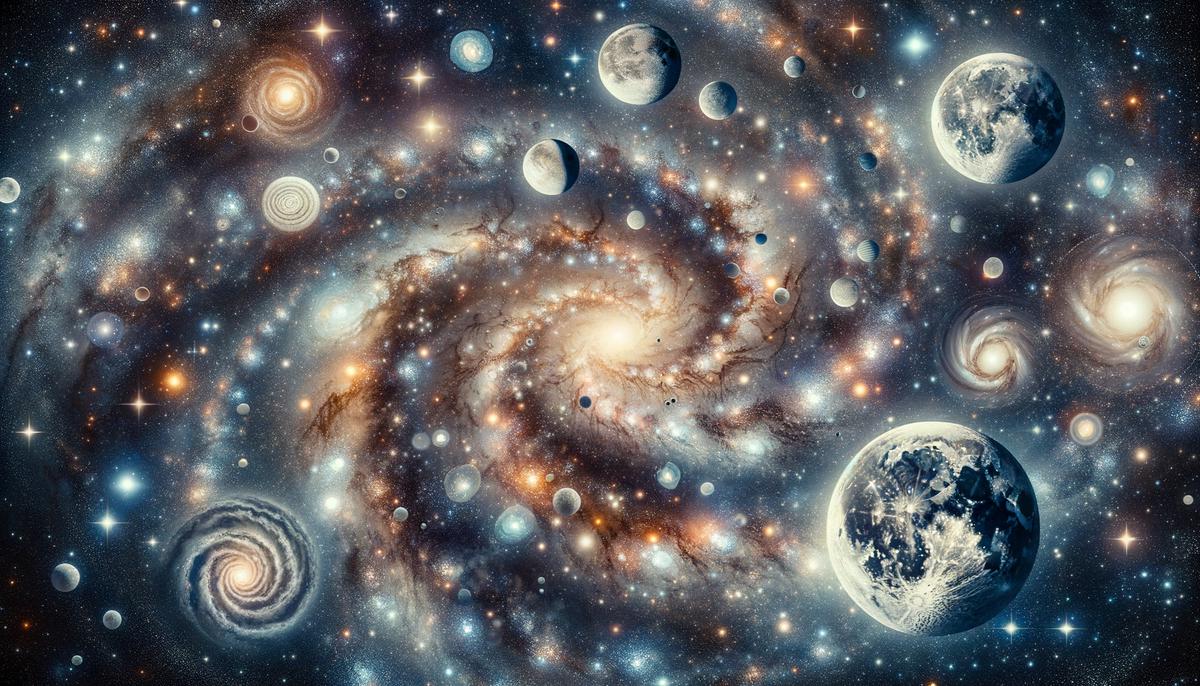
Painting with Pixels – Crafting the Cosmos in Photoshop
When night drapes the sky in its star-studded shroud, it’s only natural for the artistically inclined soul to want to capture that fleeting beauty. To the digital artist, Adobe Photoshop is the canvas, and layers along with blend modes are the brushes and hues that bring the nocturnal spectacle to vivid life. Let’s dive into the magical process of enhancing night sky visuals by artfully using these digital tools.
Starting with a Strong Foundation – The Base Layer
The base layer is your starting point, the blank canvas that sets the scene for your nocturnal masterpiece. Consider this the backdrop of your composition, often a photograph of the night sky you wish to enhance or even a solid color for a more imagined work. This initial layer holds all the potential for what’s to come – a sky awash with galactic wonder.
Depth and Complexity through Additional Layers<
Introducing new layers is akin to adding brushstrokes to your painting. Each layer can contain elements that add depth and richness to your visual. Stars can twinkle on one layer while nebulae can swirl on another, each element independently crafted to create a sense of complexity and wonder that the night sky naturally evokes. By keeping different elements of your image separate, you gain intricate control over the final composition.
Blend Modes – The Alchemy of Visuals
This is where the true magic begins, for blend modes are the alchemists of imagery, transforming separate entities into a cohesive and striking scene. Each blend mode tells your layers how to interact with the ones below it:
- Screen Mode for Stars and Meteors: This mode is perfect for bright elements like stars. It effectively ‘screens’ the darkness, allowing only the light to shine through, mirroring a night sky where twinkling stars puncture the dark void.
- Multiply Mode for Shadows and Silhouettes: Use this mode when working with layers that contain darker elements. It’s as if you’re projecting shadows upon the base layer, deepening its mystery, adding the silhouette of a mountain range or the dark side of the moon.
- Overlay Mode for Atmospheric Effects: When you wish to imbue your night sky with a touch of otherworldly atmosphere, this mode combines the colors and lights of your base and the layers above it in a way that maintains the integrity of both, enhancing the overall effect without overpowering it.
Adjustment Layers for the Finishing Touch
Like the soft glow of a meteor streaking across the firmament, adjustment layers provide nuances that can change the entire mood of your image. Want to adjust the contrast or brightness? Add an adjustment layer. Curious to see how a cooling filter might transform your night scene into a moonlit wonder? Apply another. With these, you retain the flexibility to trial different effects, never committing to one until you find the perfect astral configuration.
Painting with Light – Shaping Your Starscape
Ultimately, your creativity is the limit as you paint with light and shadow. Experiment with different combinations of blend modes and layers until the stars align in exactly the configuration that resonates with your creative spirit. As the canvas flickers to life with your personal cosmos, remember that each layer, each mode, contributes to a story only you can tell – a universal tale pixelated on the screen but boundless in the imagination.
Remember, night skies are deep, profound, and full of mystery. By harnessing the power of layers and blend modes, Photoshop can become not just a tool, but a collaborative partner in your quest to recreate the majesty of the cosmos. Create, explore, and let the heavens be your guide.
Creating Stars and Astro Elements
Creating a universe within the digital canvas of Photoshop can be an invigorating journey, as one conjures stunning nebulas, sparkling stars, and magnificent cosmic vistas from the ether of imagination. To breathe life into celestial scenes so they are vibrant with realism, there are specific techniques that artists can harness. Let’s dive into how these are executed to ensnare the majesty of the cosmos in your artwork.
Crafting the Stellar Glow with Gaussian Blur
For stars to shimmer, they must radiate light. Utilize the Gaussian Blur filter to transform a spatter of pixels into glowing celestial bodies. Create a new layer and use a hard-edged brush to dot your starscape. Navigate to ‘Filter,’ choose ‘Blur,’ and then ‘Gaussian Blur.’ Adjust the radius until each star achieves the perfect halo of light; this glow is what gives your stars dimension and luminosity.
Gradients Define the Ambience
Gradients are the unsung heroes when modeling the color transitions typical of deep space. Select the Gradient Tool to meld hues in a radial fashion, emanating from the bright centers of nebulae or the harsh edges of a planet’s atmosphere. A subtle gradient can mimic the dispersal of light from a star or the soft blend from the dark vacuum of space to the vibrant bands of an alien world’s sky.
Rendering Textures for Planets and Moons
To give planets and moons a rugged texture befitting a celestial giant, clever use of Photoshop’s noise and spherize effects can yield surprisingly authentic surfaces. Start with a circular selection filled with a base color. Add noise (‘Filter’ > ‘Noise’ > ‘Add Noise’) to generate a rocky or grainy texture. Then, apply the ‘Spherize’ effect (‘Filter’ > ‘Distort’ > ‘Spherize’) to warp the flat circle into a rounded, three-dimensional form. For finishing touches, utilize the Dodge and Burn tools to sculpt the highlights and shadows that define the contours and features of your planetary bodies.
Starbursts for Dramatic Flares
For the brilliant effect of a twinkling star or the flare of a distant sun, the time-honored ‘Starburst’ effect comes in handy. With a simple brush stroke and some radial blurring (‘Filter’ > ‘Blur’ > ‘Radial Blur’), one can infuse a static scene with the vibrant energy of a star at its most visually captivating moment. Alter the intensity and length of the burst to mirror the star’s luminance and distance.
Custom Brush Presets for Speed and Consistency
Harnessing the power of custom brushes can expedite the creation process while maintaining consistent quality. Design star brushes with varied shapes and sizes, creating random scatter and opacity. This array of brushes can then be employed to sprinkle your starscape with stars that truly look individualized, rather than uniformly duplicated across the expanse of your digital sky.
Gravity with Lens Flare for the Final Sparkle
In the quest for ultimate realism, the lens flare feature can emulate how light interacts with lenses in the natural world. Though often subtle, employing a lens flare (‘Filter’ > ‘Render’ > ‘Lens Flare’) at key points—perhaps at the apex of a bright star or reflected on a satellite—can contribute a dimension of depth and movement that simulates how our eyes might perceive these distant, sunlit bodies.
One is reminded, through the crafting of these digital galaxies, that artistry is not solely found in the broad brushstrokes of creation but also in the minutiae of details that coalesce to depict a universe suspended in eternal majesty. The use of these techniques will arm both novice and seasoned artists with the ability to transform their celestial visions into striking digital realities. Creativity is the vessel, Photoshop the tool, and the cosmos the canvas.
 Save
SaveColor Grading and Atmosphere Adjustment
Title: The Subtle Art of Night Sky Mastery in Photoshop: Color Grading’s Role in Mood and Authenticity
Color grading is a pivotal step in the transformation of a digital night sky from a plain canvas to a storytelling masterpiece. It’s the process where hues, tones, and contrast interplay to evoke emotions and reinforce the narrative of the image.
When it comes to color grading a Photoshop night sky, every subtle tweak matters. Begin by considering the temperature. Cooler tones like blues and purples can instill a sense of calm, encapsulating the serenity of the night, or convey chillier weather conditions. Conversely, adding warmer tones with hints of pinks or oranges can reflect the remnants of a sunset or introduce a fantastical, otherworldly milieu.
The use of selective color adjustments can further enhance the realism or contribute to the desired atmosphere. Subdued greens can hint at the presence of the aurora borealis for a touch of magic, while increasing the luminance of the blues may produce a more realistic, deep nocturnal sky.
Contrast is another critical character in this visual narrative. A high contrast night sky can suggest a clear, crisp evening filled with an air of mystery, amplifying the luminosity of the stars against the dark backdrop. On the flip side, a lower contrast can mimic a hazy or overcast night, full of whispers and softness.
Do not overlook the emotional tone that color grading can set. The right balance can turn a static image into a dynamic scene where viewers can almost hear the celestial music and feel the expansive silence of the cosmos.
A vital aspect of grading is maintaining authenticity while adjusting hues. Pay attention to the natural color palette of the night. Veering too far from a believable spectrum can disrupt the realism and distract from the immersive experience of the piece.
Sharpening highlights selectively, especially around key features like the moon or bright stars, can grant an image the clarity that makes the scene pop. It can capture the viewer’s gaze and lead it through the vastness of the visual journey.
Remember, color grading is not just about changing colors for aesthetic pleasure. It’s a deliberate act of communication through visual means. It sets the mood, accentuates the focal points, and grounds the artwork in a relatable or purposefully alien reality.
In the vastness of the digital canvas, color grading the night sky in Photoshop is much like conducting a symphony; each adjustment creates a note, each layer a verse, composing a celestial opus that resonates with the soul of the beholder. The brush may be virtual, the palette a series of sliders, but the artistry is as real and boundless as the stars themselves.
 Save
SaveWith the veil of night drawn back, we emerge with newfound knowledge and skills—a digital canvas alight with our own vibrant interpretation of the cosmos. Our digital sojourn has not only equipped us with the technical know-how to recreate the night sky but has also instilled in us a greater appreciation for the artful balance of light, shadow, and cosmic color. Whether seeking solace in a tranquil galaxy or pursuing awe in the chaotic beauty of a starburst, the skills honed here offer a boundless conduit to manifest the majesty of the stars. The night sky, once a distant spectacle, is now ours to craft and reshape, guided by imagination and the powerful digital tools at our fingertips.


