
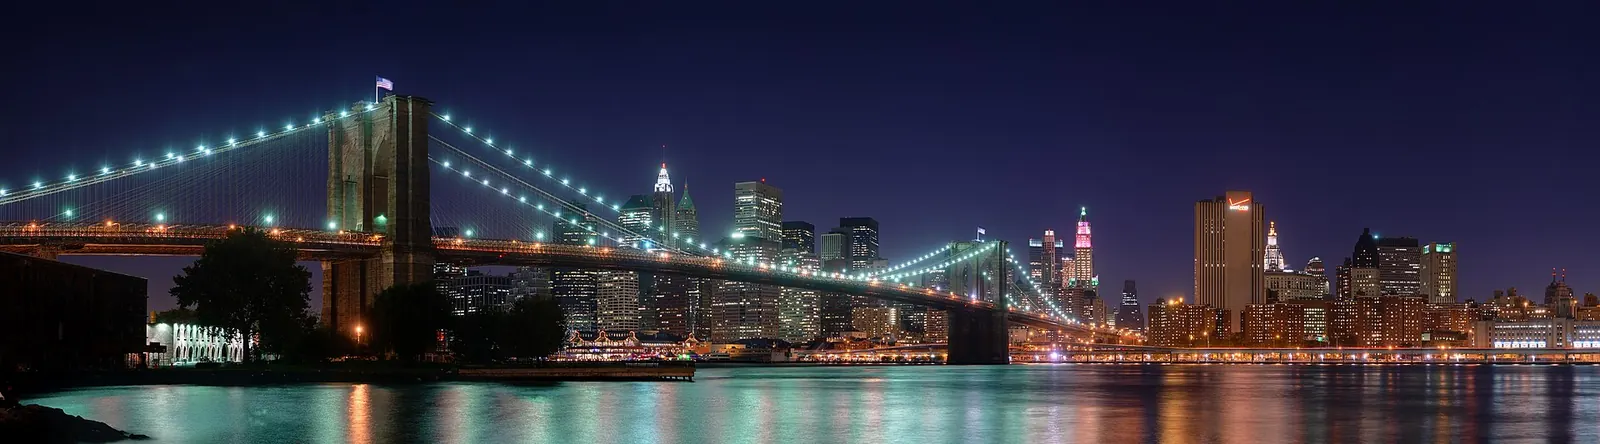
The Brooklyn Bridge opened in 1883 and its gothic stone towers and radiating steel cables remain among the most photogenic structures in New York City. There are three main approaches: walking the pedestrian promenade, shooting from DUMBO’s cobblestone streets with the Manhattan Bridge as a frame, or shooting from the water on a boat tour. Each gives a fundamentally different image.
Best Time to Shoot
Blue hour after sunset from the DUMBO side (Washington Street) is the classic shot: the Manhattan Bridge frames the Brooklyn Bridge with the Manhattan skyline behind it, all lit from within. Sunrise from Brooklyn Bridge Park waterfront gives the bridge backlit against the towers in warm morning light. Avoid the pedestrian walkway on weekends between 10 a.m. and 6 p.m. For practitioners, see our breakdown of shutter for hand-held wildlife. For practitioners, see our breakdown of aperture for night cityscapes. For practitioners, see our breakdown of ISO for street photography.
How to Get There
DUMBO is accessible via the A/C to High Street-Brooklyn Bridge or F train to York Street. The Brooklyn Bridge walkway entrance is at Centre Street in Manhattan or Tillary Street in Brooklyn. Brooklyn Bridge Park is a short walk from either end. No permits needed for personal photography.
Camera Settings
For the Washington Street shot: 24-35mm, f/11-f/16, ISO 100-400 at blue hour, 5-15 second exposure on a tripod. For the walkway cables: 16mm looking up the cable run, f/11 for convergence depth. From the waterfront: 70-200mm to compress the bridge spans against the skyline.
Recommended Gear for This Spot
Common Mistakes
- Shooting the Washington Street shot at midday: it requires darkness behind and street lights on.
- Ignoring the underside of the bridge: the stone arches and cable anchors at street level are unexplored by most visitors.
- Not timing for a gap in pedestrian traffic on the walkway to shoot the cable perspective.
- Forgetting a wide angle for the cable radial shot from the center span.
A Brooklyn Bridge photography tour departs after sunset and covers Washington Street, the Fulton Ferry Landing riverfront, and the walkway cable shot in under two hours. Browse Brooklyn Bridge photography tours to find options that fit your schedule.
For more location guides like this, see the Travel Photography Guide on Shut Your Aperture. Browse all spots on the USA NY photo spots hub.
What to Pack
Urban photography rewards a small, fast, flexible kit. Here is what travels well to Brooklyn Bridge — links go to B&H Photo Video (our primary supplier) and Amazon for accessories.
| What & Why | B&H | Amazon |
|---|---|---|
Standard zoom (24-70mm) The single best urban walkaround lens. Wide enough for streets, tight enough for portraits and details. | Shop B&H → | Shop Amazon → |
Fast prime (35mm or 50mm) For low-light blue-hour streetwork and cafe interiors where a tripod is not welcome. | Shop B&H → | Shop Amazon → |
Compact travel tripod For blue-hour skylines and long exposures from bridges and rooftops. | Shop B&H → | Shop Amazon → |
Variable ND filter Cuts daytime light for slow-shutter motion in busy urban scenes. | Shop B&H → | Shop Amazon → |
Extra batteries (3 minimum) A full day of street shooting drains two batteries minimum. Carry three. | Shop B&H → | Shop Amazon → |
Lens cleaning kit Fingerprints and urban grime appear fast. Clean between every coffee stop. | Shop B&H → | Shop Amazon → |
Anti-theft camera strap Quick-release plus security cable. Worth the investment in any major city. | Shop B&H → | Shop Amazon → |
B&H and Amazon links are affiliate links. We earn a small commission on purchases at no extra cost to you. We only recommend gear we use or would buy ourselves.