
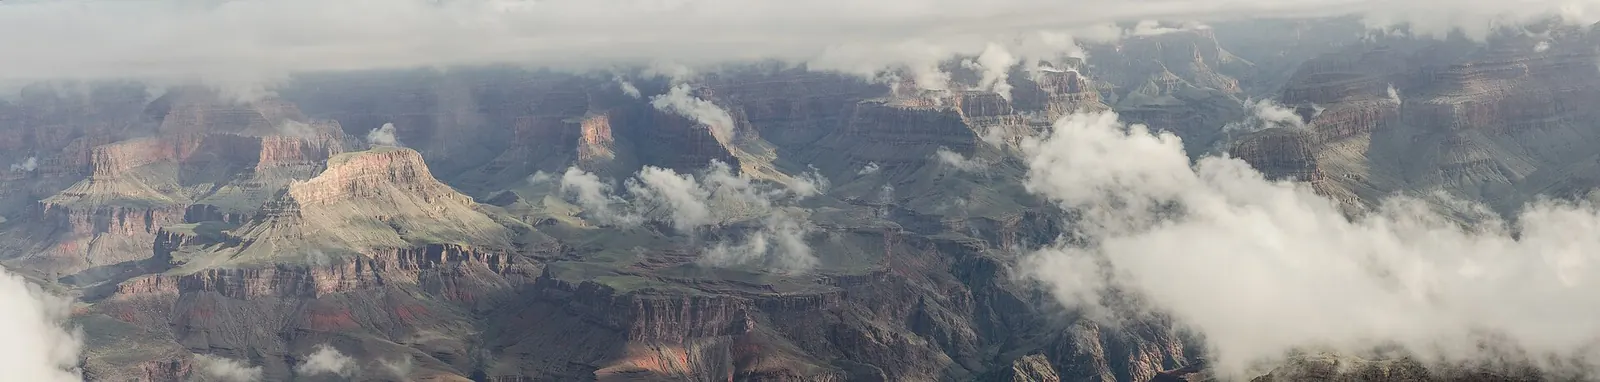
Mather Point is the most-visited overlook on the Grand Canyon South Rim, sitting adjacent to the main visitor center. That accessibility means crowds, but it also means reliable infrastructure and a north-facing perspective across the inner canyon that catches direct sunrise light in a way that more dramatic overlooks do not. The challenge here is not finding the light — it is managing the scale.
Best Time to Shoot
Sunrise: the canyon shadows recede from east to west as the sun rises, creating a moving wall of light that takes about 30 minutes to reach the inner gorge. Golden hour at sunset works from the western overlooks but Mather Point itself goes into shadow from the south rim cliffs. Avoid midday in summer completely — flat light and temperatures above 100°F on the rim. For practitioners, see our breakdown of range mask for shadows. For practitioners, see our breakdown of ISO for astrophotography. For practitioners, see our breakdown of shutter for light painting.
How to Get There
Mather Point is accessible via the Grand Canyon Visitor Center on the South Rim, 80 miles north of Flagstaff on AZ-64. Park entry is $35 per vehicle (7-day). No additional permit needed. Rim Trail connects Mather Point to Yavapai Point (0.7 miles east) and Bright Angel (2 miles west) for better foreground options.
Camera Settings
The Grand Canyon’s tonal range exceeds what any single exposure handles gracefully. Shoot RAW and bracket three exposures at 2-stop intervals, then blend. At sunrise, expose for the canyon walls (not the sky), which will be slightly darker than your meter suggests. 16-24mm for establishing shots; 70-200mm to isolate layered canyon bands and the river far below.
Recommended Gear for This Spot
Common Mistakes
- Using Auto White Balance at sunrise: the canyon glows orange-red and AWB will cool it down. Set to Daylight.
- Shooting only with a wide lens and missing the telephoto compositions of isolated canyon layers.
- Standing at the crowded main platform when Yavapai Point, 0.7 miles east, offers better foreground rocks and fewer people.
- Not shooting after sunset: the 20-minute window after the sun drops produces saturated purple and blue tones across the canyon walls.
A sunrise photography tour of the South Rim positions you at three overlooks including Mather and Yavapai with a guide who tracks the light movement. Browse Mather Point photography tours to find options that fit your schedule.
For more location guides like this, see the Landscape Photography Guide on Shut Your Aperture. Browse all spots on the USA AZ photo spots hub.
What to Pack
A focused landscape kit handles every shot at Mather Point without breaking your back. Here is the working photographer's pack list — every link goes to B&H Photo Video (our primary supplier) or Amazon (for accessories and same-day delivery in the US).
| What & Why | B&H | Amazon |
|---|---|---|
Wide-angle zoom (14-35mm range) The single most important lens for sweeping vistas. Pair with a circular polarizer for skies and water. | Shop B&H → | Shop Amazon → |
Sturdy travel tripod Carbon fiber, packs to 15 inches, holds steady in wind off the coast. Essential for blue-hour and long-exposure work. | Shop B&H → | Shop Amazon → |
Circular polarizer (77mm or 82mm) Cuts haze, deepens sky, reveals texture in water. Non-negotiable for landscape work. | Shop B&H → | Shop Amazon → |
10-stop ND filter For 30-second exposures that turn moving water and clouds into silk. | Shop B&H → | Shop Amazon → |
Extra batteries (3 minimum) Cold weather and long exposures eat batteries. Carry triple what you think you need. | Shop B&H → | Shop Amazon → |
Fast SD/CFexpress cards V90 or CFexpress depending on your body. Two cards minimum so a failure mid-trip is recoverable. | Shop B&H → | Shop Amazon → |
Microfiber lens cloths Salt spray, mist, and dust will ruin every shot if you don't carry a cloth. | Shop B&H → | Shop Amazon → |
B&H and Amazon links are affiliate links. We earn a small commission on purchases at no extra cost to you. We only recommend gear we use or would buy ourselves.