
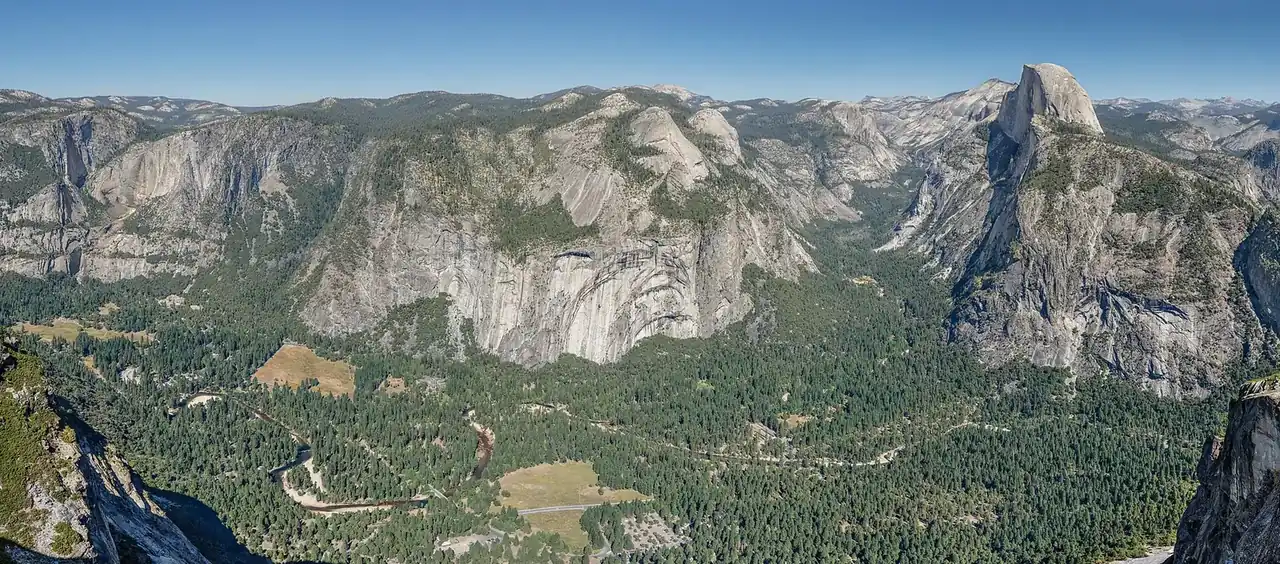
Glacier Point is a rock promontory at 7,214 feet in Yosemite, offering a face-on view of Half Dome and a direct overhead view of Nevada and Vernal Falls below. The perspective here is fundamentally different from the Valley floor: you are at eye level with Half Dome’s northwest face, and the waterfalls are visible thousands of feet below. A telephoto lens reveals geological scale that wide-angle work cannot.
Best Time to Shoot
Sunset for the Half Dome alpenglow — the northwest face catches warm light in the last 30-60 minutes before the sun drops. Star trails: the dark sky above the valley makes Glacier Point one of the best Milky Way shooting locations in the Sierra Nevada from June through August. The road typically opens in late May and closes with the first heavy snow. For practitioners, see our breakdown of ISO and shadow recovery. For practitioners, see our breakdown of exposure triangle anchored by aperture. For practitioners, see our breakdown of export presets for the web.
How to Get There
Glacier Point Road branches off Wawona Road inside the park, reaching the overlook in 16 miles. Timed entry reservations are required in summer for the Glacier Point area. Bus tours from Yosemite Valley serve the point. In winter when the road is closed, the Panorama Trail from Nevada Fall provides a strenuous 8-mile round-trip alternative.
Camera Settings
Sunset: 70-200mm for Half Dome face compression; 16-24mm for the full valley sweep with waterfalls below. ISO 100, f/11, expose for the lit cliff face. Star trails: ISO 800-1600, f/2.8-f/4, 20-minute exposures on a tracking mount, or 30-second sequences stacked in post.
Recommended Gear for This Spot
Common Mistakes
- Arriving at sunset without a wide-angle option: the full panoramic sweep requires 16-24mm.
- Shooting only toward Half Dome and missing the valley floor composition looking west.
- Not checking the road opening date before planning a spring visit — the road routinely opens 1-3 weeks later than expected after heavy snow years.
- Underexposing the Milky Way: ISO 1600-3200 at f/2.8 for 20-25 seconds is the starting point for astrophotography here.
A Glacier Point astrophotography workshop runs from sunset through midnight, covering the alpenglow sequence and then transitioning to Milky Way shooting over the valley. Browse Glacier Point photography tours to find options that fit your schedule.
For more location guides like this, see the Landscape Photography Guide on Shut Your Aperture. Browse all spots on the USA CA photo spots hub.
What to Pack
A focused landscape kit handles every shot at Glacier Point without breaking your back. Here is the working photographer's pack list — every link goes to B&H Photo Video (our primary supplier) or Amazon (for accessories and same-day delivery in the US).
| What & Why | B&H | Amazon |
|---|---|---|
Wide-angle zoom (14-35mm range) The single most important lens for sweeping vistas. Pair with a circular polarizer for skies and water. | Shop B&H → | Shop Amazon → |
Sturdy travel tripod Carbon fiber, packs to 15 inches, holds steady in wind off the coast. Essential for blue-hour and long-exposure work. | Shop B&H → | Shop Amazon → |
Circular polarizer (77mm or 82mm) Cuts haze, deepens sky, reveals texture in water. Non-negotiable for landscape work. | Shop B&H → | Shop Amazon → |
10-stop ND filter For 30-second exposures that turn moving water and clouds into silk. | Shop B&H → | Shop Amazon → |
Extra batteries (3 minimum) Cold weather and long exposures eat batteries. Carry triple what you think you need. | Shop B&H → | Shop Amazon → |
Fast SD/CFexpress cards V90 or CFexpress depending on your body. Two cards minimum so a failure mid-trip is recoverable. | Shop B&H → | Shop Amazon → |
Microfiber lens cloths Salt spray, mist, and dust will ruin every shot if you don't carry a cloth. | Shop B&H → | Shop Amazon → |
B&H and Amazon links are affiliate links. We earn a small commission on purchases at no extra cost to you. We only recommend gear we use or would buy ourselves.