 Save
SaveSanta Fe rewards the photographer who slows down. The light here is different from anywhere else in the American Southwest — partly because the city sits at 7,200 feet and the air thins out the haze, partly because everything is built from adobe and adobe takes warm light better than any building material on earth. At sunrise the entire downtown core glows the color of a brown paper bag held up to a candle. At sunset the Sangre de Cristo mountains pick up alpenglow that lasts maybe 12 minutes if you are lucky. The trick is knowing where to be in those windows.
I have shot Santa Fe in summer monsoon season, in fall when the aspens turn, and in winter when the snow piles up on the Plaza bandstand. Each visit taught me which spots reward repeat visits and which are one-and-done tourist captures. Below are the locations I would send any working photographer to, with notes on access, timing, and the gear that actually matters for each. Skip the “best Instagram backdrops in Santa Fe” listicles. This is a guide for people who care about light.
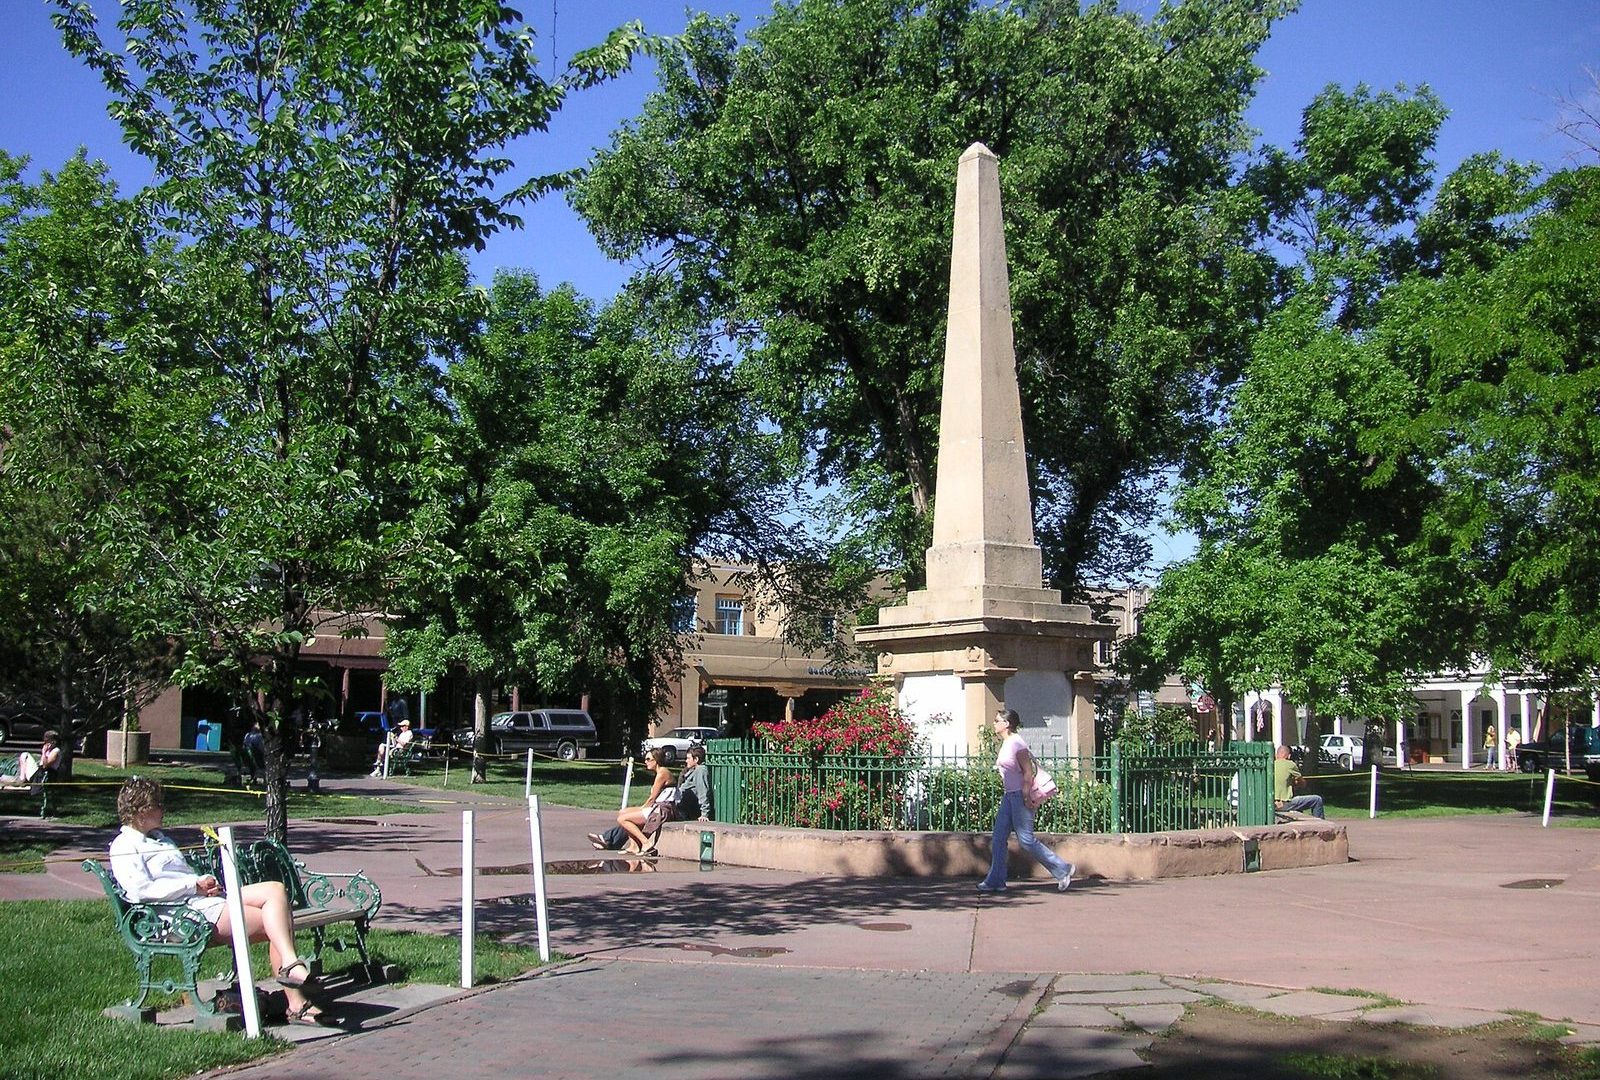
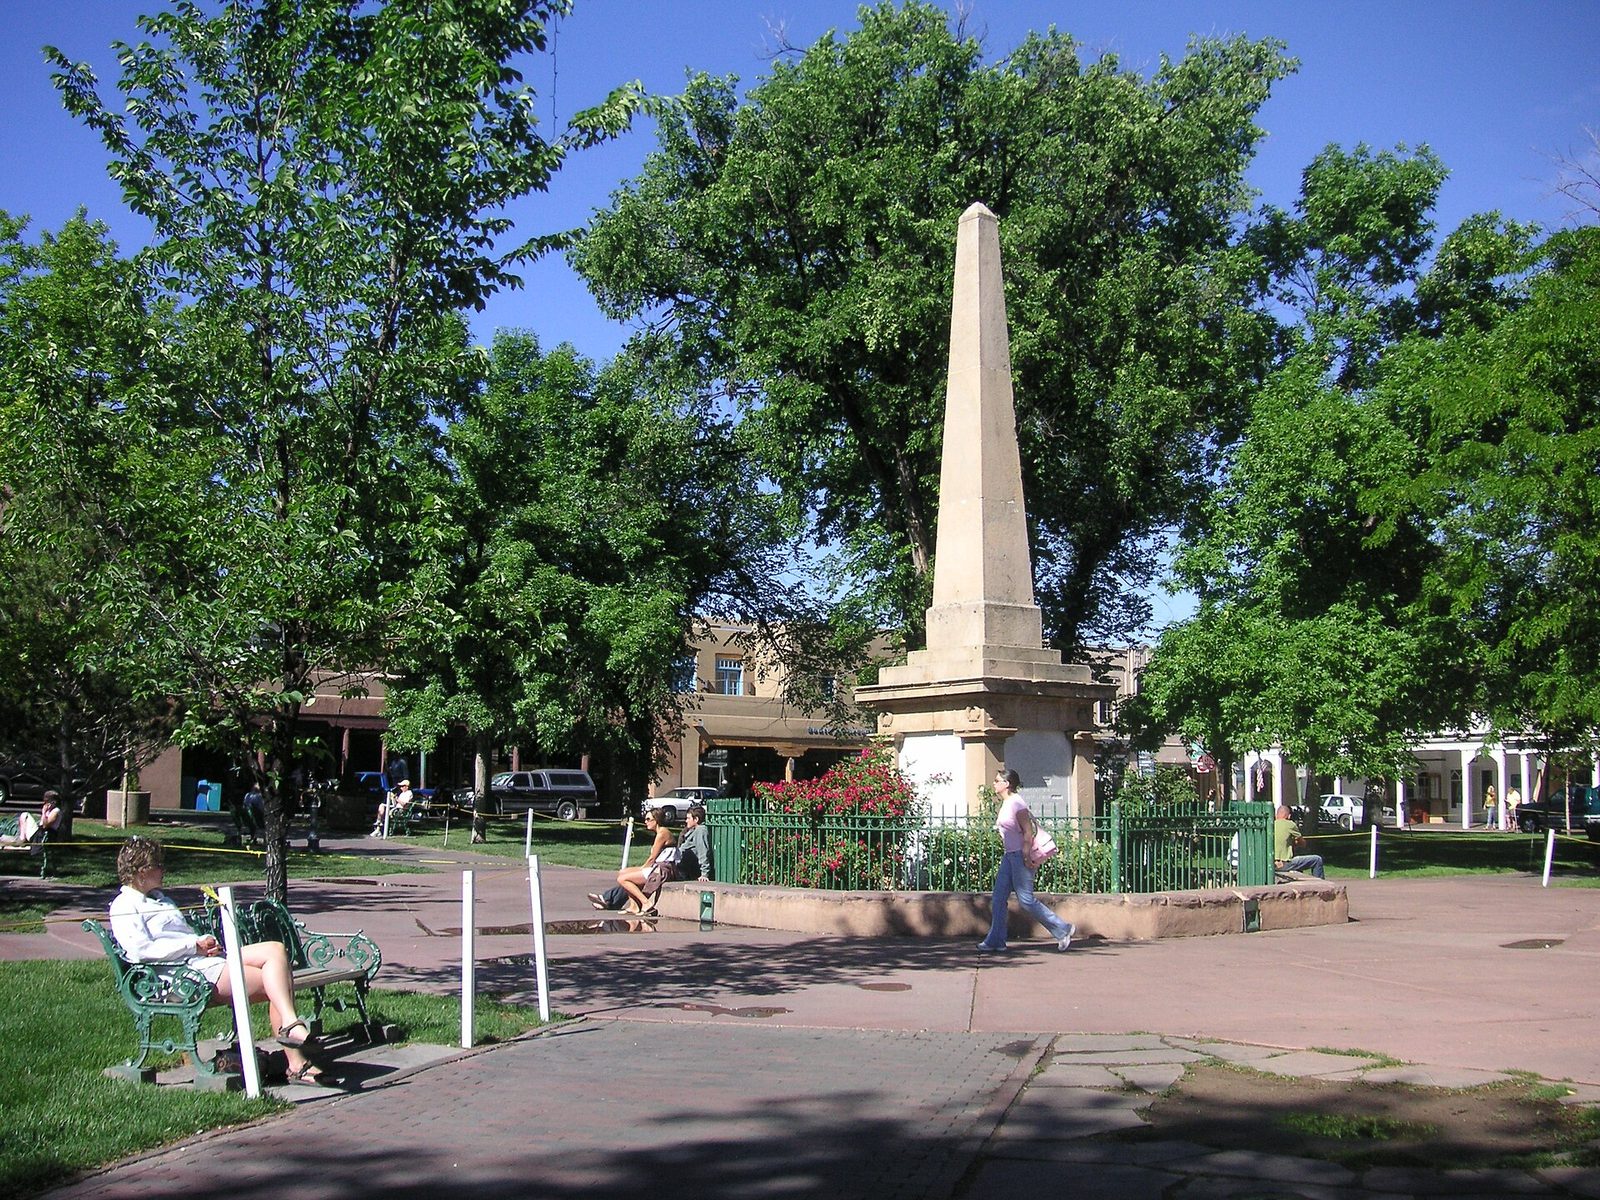
Historic Santa Fe Plaza
The Plaza is the obvious starting point and most photographers blow through it in 20 minutes. Do not do that. The Palace of the Governors covers the entire north side of the Plaza and is the longest continuously occupied public building in the country — the portal in front has Native American artisans selling jewelry on blankets every day. Photograph it at 6:30 AM when the vendors are setting up and the light grazes the adobe at a 15-degree angle. By 10 AM the light goes flat and stays flat until 5 PM.
The bandstand in the center of the Plaza is photogenic in winter snow and during the August Indian Market. Find the diagonal corner of the Plaza near the New Mexico Museum of Art for clean compositions including both the bandstand and the cathedral spire in the background.
 Save
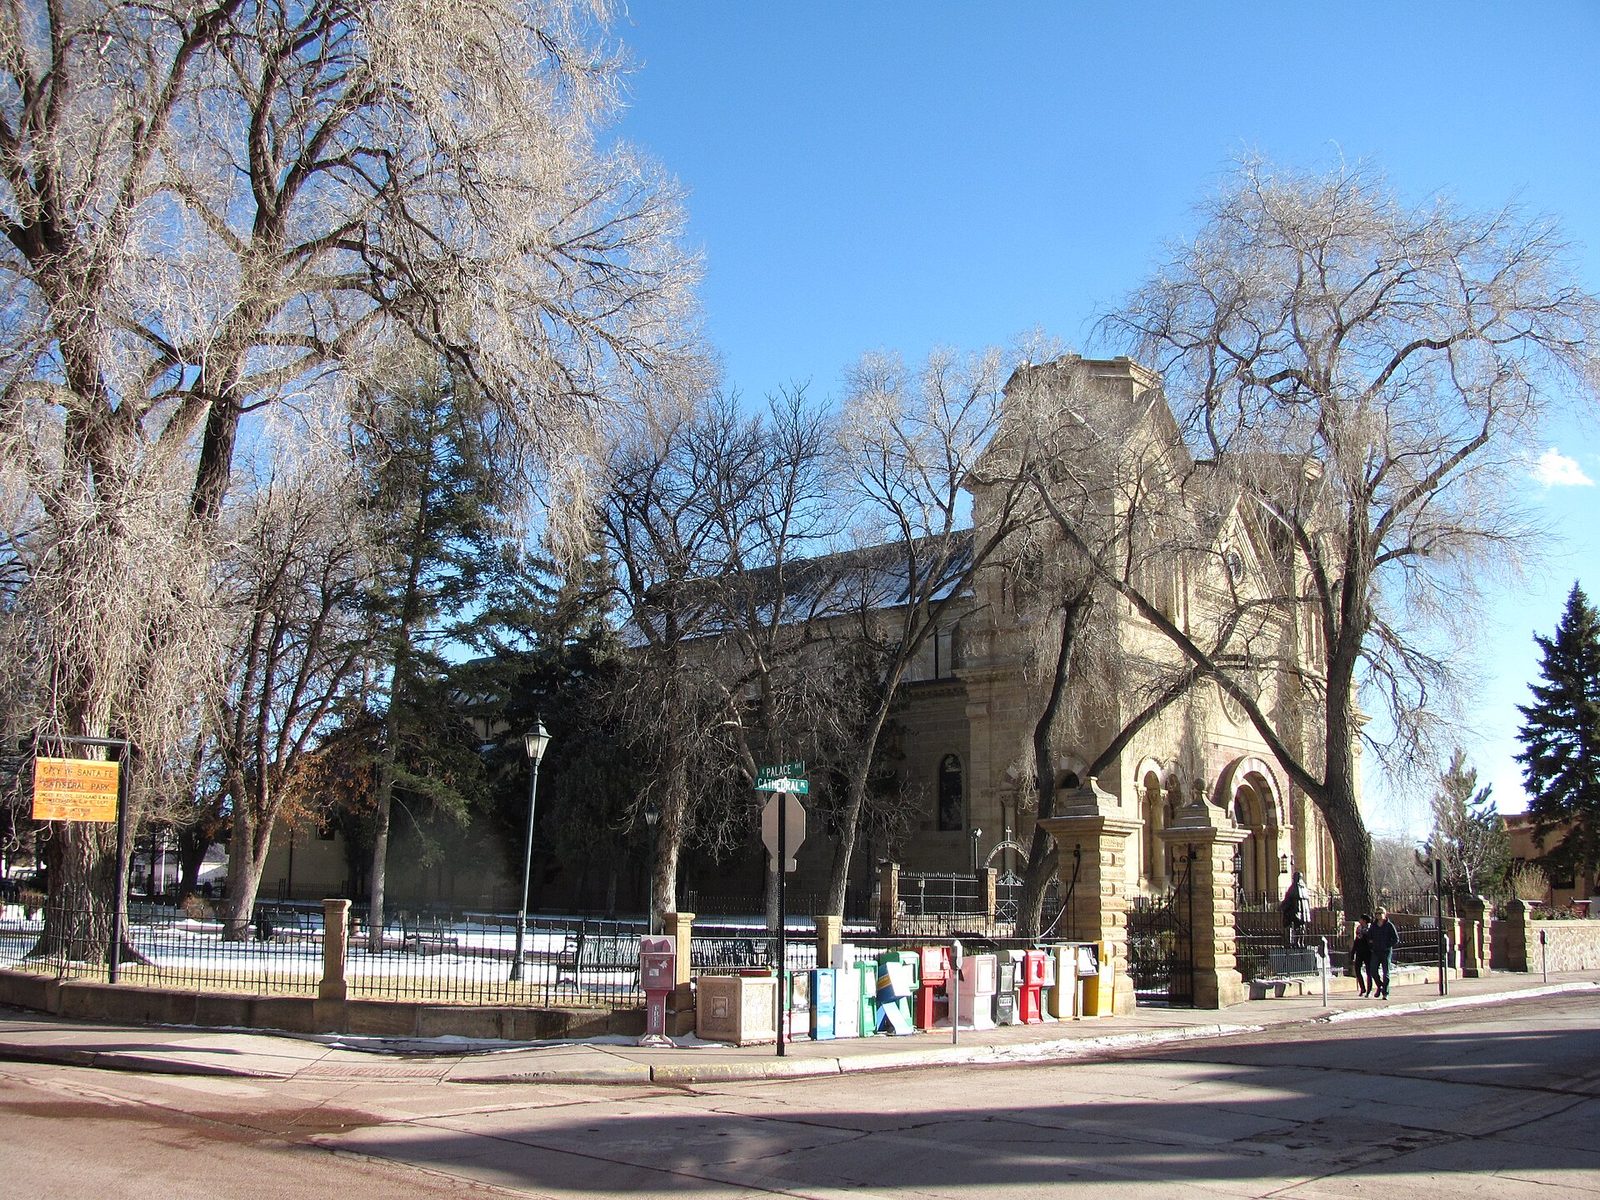
SaveCathedral Basilica of St. Francis of Assisi
One block east of the Plaza. The cathedral is Romanesque Revival, not adobe, which gives you a totally different texture to work with than the rest of downtown. The two bell towers on the front face frame nicely with a 35mm lens from the across-the-street side. For the best shot, walk to the corner of Cathedral Place and East Palace Avenue right before sunset — you get the warm cathedral facade against the cool darkening sky behind, which gives you about four stops of natural contrast separation.
Interior photography is technically allowed during non-service hours, no flash. The light inside is dim. You will be at ISO 3200 with a fast prime; do not try to handhold a slow zoom.
Canyon Road
Half a mile of art galleries, sculpture gardens, and adobe row houses with bright blue doors and turquoise window frames. Walk it from the bottom (Paseo de Peralta end) up — the climb is gentle and the light gets better as you go. The galleries themselves usually do not allow interior photography, but the courtyards and the sculptures out front are fair game.
Canyon Road on a Friday evening between 5 and 8 PM during the warmer months has live music and gallery openings; that is when the doors are open and the street has the most life in it. For golden hour color on the adobe walls, plan to be there one hour before sunset. The angle of the road faces roughly east-west, so the side light works.
 Save
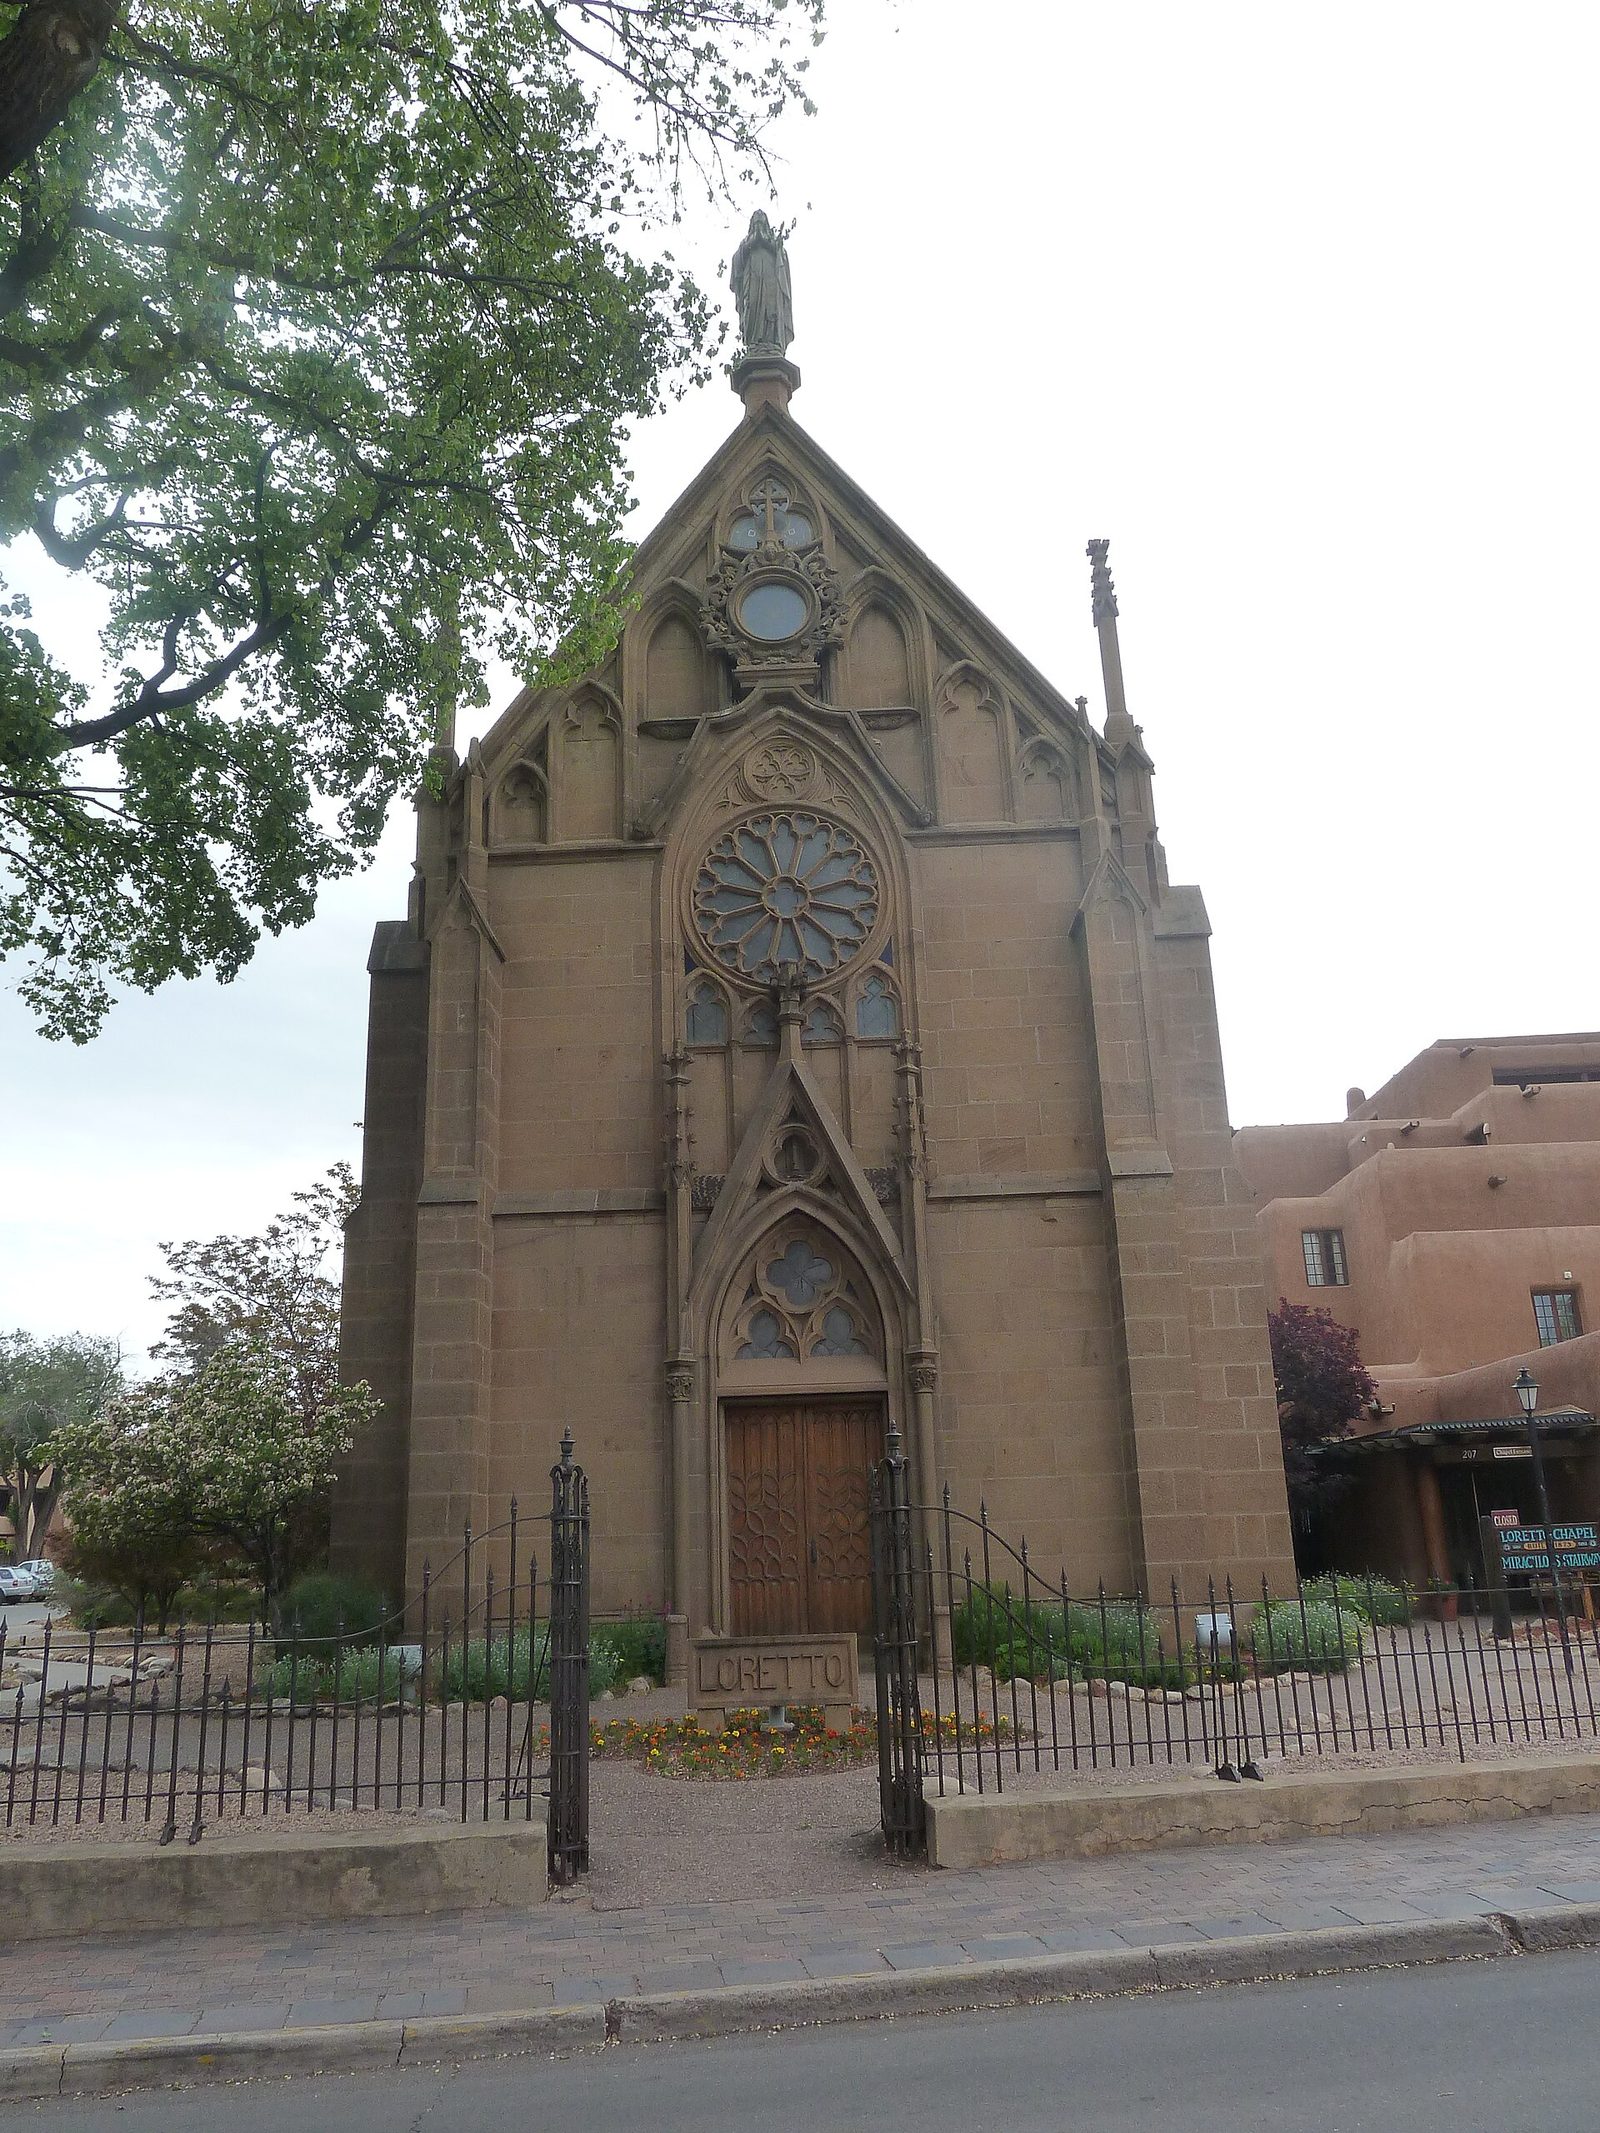
SaveLoretto Chapel and the Miraculous Staircase
One block south of the Plaza. The Gothic Revival chapel is famous for the helical staircase inside, built without a central support column. It is a difficult shot because the chapel is small and crowded with visitors, and the staircase itself sits in a corner with limited working room.
The trick: arrive at 9 AM when it opens, before the tour buses unload. Bring a wide-angle prime (24mm or 28mm equivalent) and shoot from below looking up — the curve of the staircase wrapped against the chapel’s stained glass makes the composition. You will be at f/4 or wider; no tripods allowed. Entry is $5.
Cross of the Martyrs
A 12-minute walk northeast of the Plaza in Old Fort Marcy Park. There is a 15-foot stone cross at the top of a short paved hill, and the view from the top includes all of downtown Santa Fe with the Sangre de Cristo mountains behind. This is the best sunset overlook in the city center.
Time it for 30 minutes before sunset. The downtown rooftops light up warm; the cathedral spire pokes out from the right-center of the frame, and on a clear evening the alpenglow on the mountains lasts long enough to grab three or four bracketed exposures. A 35-50mm equivalent is the right focal length for the full view.
 Save
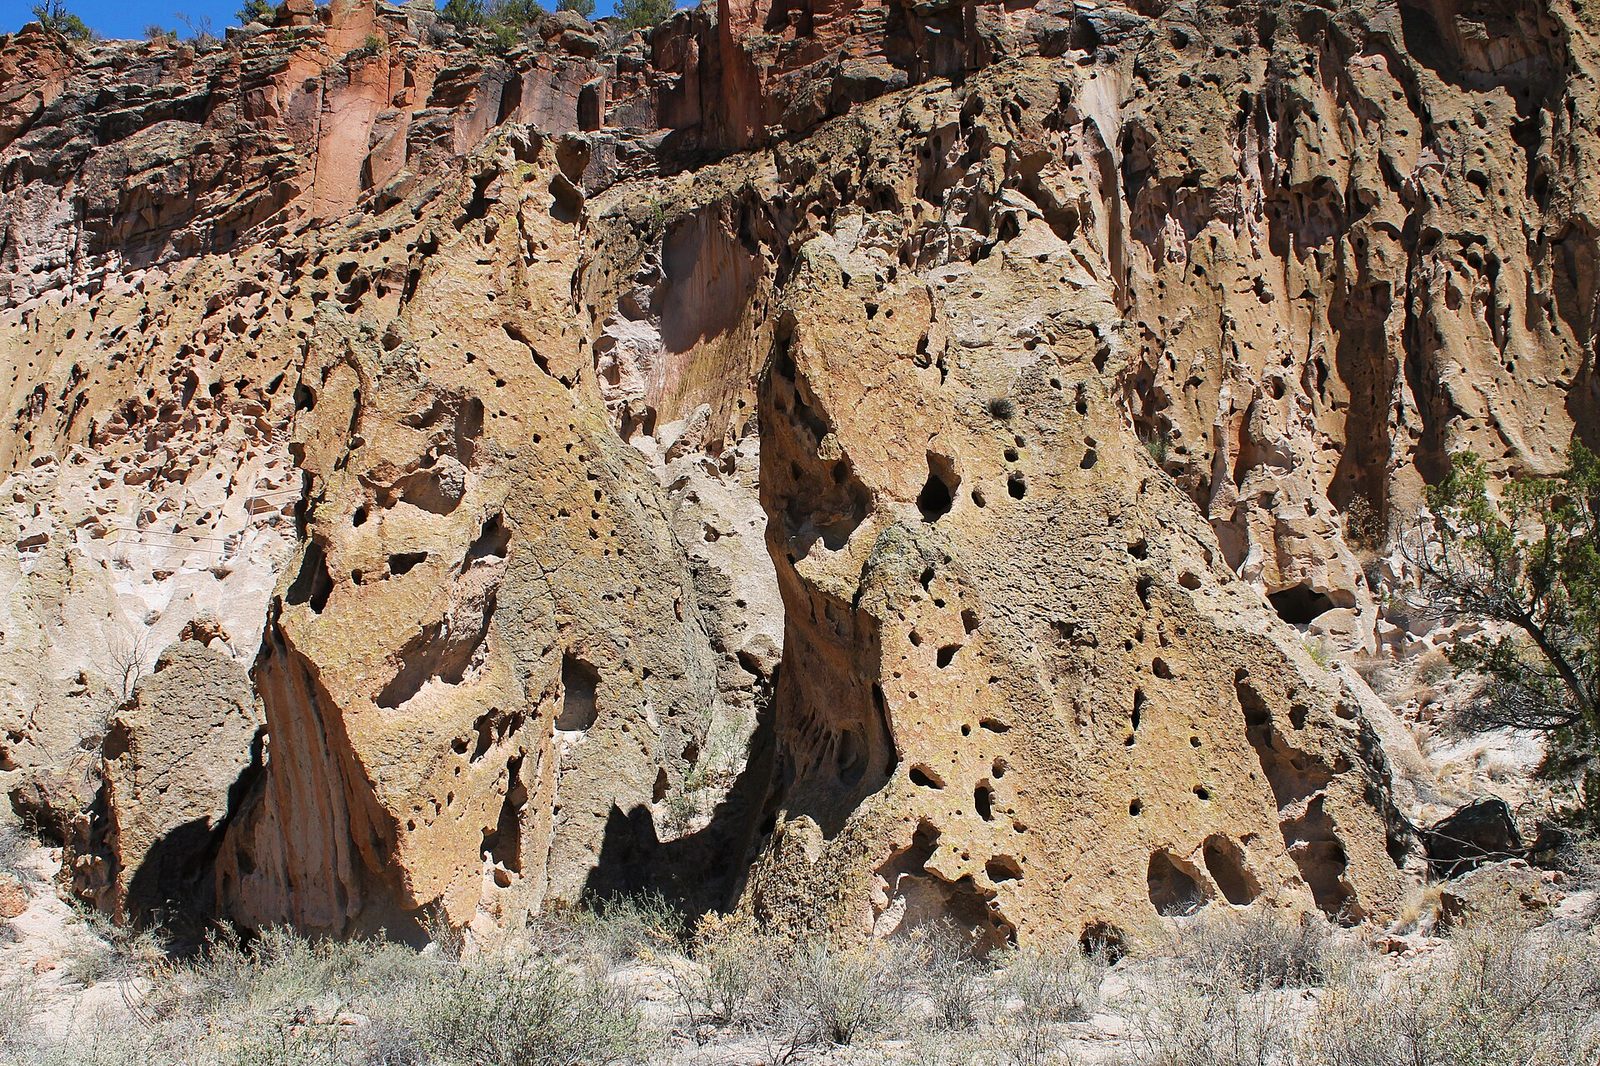
SaveBandelier National Monument
45 minutes northwest of Santa Fe, near Los Alamos. Ancestral Puebloan cliff dwellings carved into volcanic tuff. The main loop trail is paved and easy, but the photography here gets serious if you climb the ladders up to the Alcove House — 140 feet of vertical ladder ascent to a kiva built into the cliff face.
Best light: late afternoon. The cliffs face roughly south, so the sun moves across them from morning until late afternoon, with the deepest shadows and richest color about 90 minutes before sunset. The park requires shuttle access from the visitor center during peak season; arrive before 8 AM if you want to drive your own vehicle in.
Kasha-Katuwe Tent Rocks National Monument
One hour southwest of Santa Fe. Tent-shaped hoodoos formed from volcanic ash, with a slot canyon trail that ends at the top of a mesa overlooking the field of formations. This is the best landscape day-trip from Santa Fe and one of the most underrated spots in the Southwest.
The slot canyon section needs a wide-angle lens and is best shot mid-morning when the sun is high enough to send light down into the slot but not yet directly overhead. The hoodoos themselves are best at golden hour from the top of the mesa — late afternoon side-light gives them dimensionality. Note: as of mid-2026, the monument has had ongoing access restrictions; check the BLM site for current status before you go.
Ghost Ranch
90 minutes northwest of Santa Fe in Abiquiu — Georgia O’Keeffe’s old painting territory. The landscape here is what she was painting: layered red, orange, and white sandstone cliffs called Chimney Rock and the Pedernal mesa. Half-day, full-day, and overnight options.
Best photography: late afternoon side-light on Chimney Rock and the cliffs around the main visitor area. The hike to Chimney Rock is moderate, about 3 miles round trip with some climbing. Bring water — at 6,500 feet of elevation, dehydration sneaks up.
Santa Fe Railyard and the Farmers Market
Walking distance south of the Plaza. The Railyard is where modern Santa Fe lives — galleries (SITE Santa Fe, the second-floor contemporary spaces), restaurants, the weekend farmers market, and Vladem Contemporary. The farmers market on Saturday mornings is the best people-photography setting in the city: vendors, growers, locals, food trucks, all in one walkable space.
Shoot the market between 8 and 10 AM. The light comes in low through the open shed and falls on the produce stands at an angle that makes color photography work. A 35mm prime or a 24-70 zoom both work. Be respectful — ask the vendors before shooting close-ups; most will say yes if you have shown actual interest in their booth.
Aspen Vista (Sangre de Cristo Mountains)
30 minutes from downtown Santa Fe up the Ski Basin road. A six-mile gravel road that climbs through some of the best aspen groves in northern New Mexico. In late September and the first week of October the aspens turn screaming yellow against the dark conifers. Outside of fall color season this is also a great wildflower spot in July.
Park at the Aspen Vista trailhead and walk the road. The aspens are best photographed in overcast or shade — direct midday sun blows out the yellow. A telephoto (70-200mm range) lets you isolate single trees against the dark background for the most graphic compositions.
Meow Wolf — House of Eternal Return
Immersive art installation in a converted bowling alley. Photography is allowed inside (no flash). The room with the mammoth, the room with the glowing trees, the underwater room — all of it is a feast for low-light shooters who want something other than landscapes. Bring a fast prime (35mm f/1.4 or 50mm f/1.8), shoot at ISO 3200-6400, and embrace the noise. ($45 entry; book online ahead.)
When to visit Santa Fe for photography
Best months: late September through mid-October (aspen color, low-angle light, cool temperatures). Second best: April and May (high-desert spring, fewer crowds than summer). Avoid: July and August unless you specifically want the monsoon-storm cloud structure, which can be excellent for landscape work but unpredictable. Winter (December to February) is quiet, sometimes snowy on the Plaza, and lighting is great if you do not mind cold.
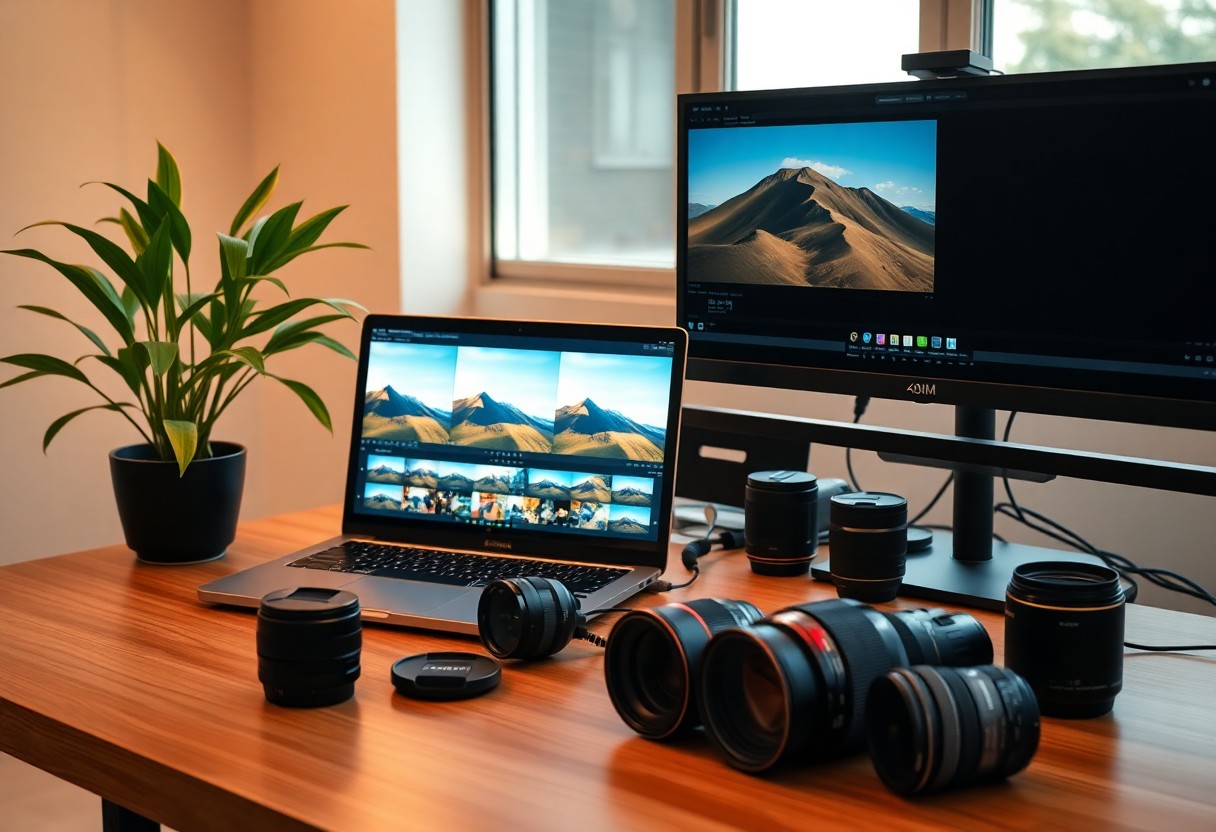
What to Pack for Santa Fe Photography
The mix is full-frame body, two zooms or a fast prime kit, sturdy tripod for the landscape day-trips, and a polarizer. Below is the full kit list with dual-affiliate options.
- Wide zoom for architecture and Plaza work: Sony 16-35mm GM II at B&H or Canon RF 15-35 at Amazon
- Telephoto for landscape compression at Aspen Vista and Ghost Ranch: Sony 70-200 GM II at B&H or Tamron 70-180 at Amazon
- Travel tripod: Peak Design Travel Tripod at B&H or the budget pick: Leofoto Ranger at Amazon
- Circular polarizer (mandatory at altitude): Breakthrough X4 CPL at Amazon
- High-capacity SD cards: SanDisk Extreme Pro 128GB at Amazon
- Sun hat and water (7,200 ft elevation, dry, deceptive sun): non-photography essential — bring real ones
For guided access to spots that need permits or insider knowledge — Bandelier-area tribal lands, certain Pueblo events, or photography workshops — consider a local-led tour: Santa Fe photography tours on Viator. The local operators know fence lines, ranger schedules, and the seasonal access changes that the listicles never mention.
One more thing: light at altitude
Santa Fe is 7,200 feet above sea level. Your exposures will look different here than at sea level — the air has 25% less density, which means less light scatter, less haze, and harder shadow edges. Bracket more than you think you need to, especially mid-day. A polarizer is mandatory; without one, the desert sky photographs almost white instead of the deep blue you saw with your eyes.
For more on light and exposure technique at high altitude, see the ISO pillar guide and the broader travel photography pillar.