Photography Guide to Nepal
Last updated: 2026-05-22 For practitioners, see our breakdown of editing on a tablet. For practitioners, see our breakdown of focal length plus aperture for compression. For practitioners, see our breakdown of keyword shortcuts.
shutyouraperture-20). Buying through these links costs you nothing extra and helps fund our free guides.
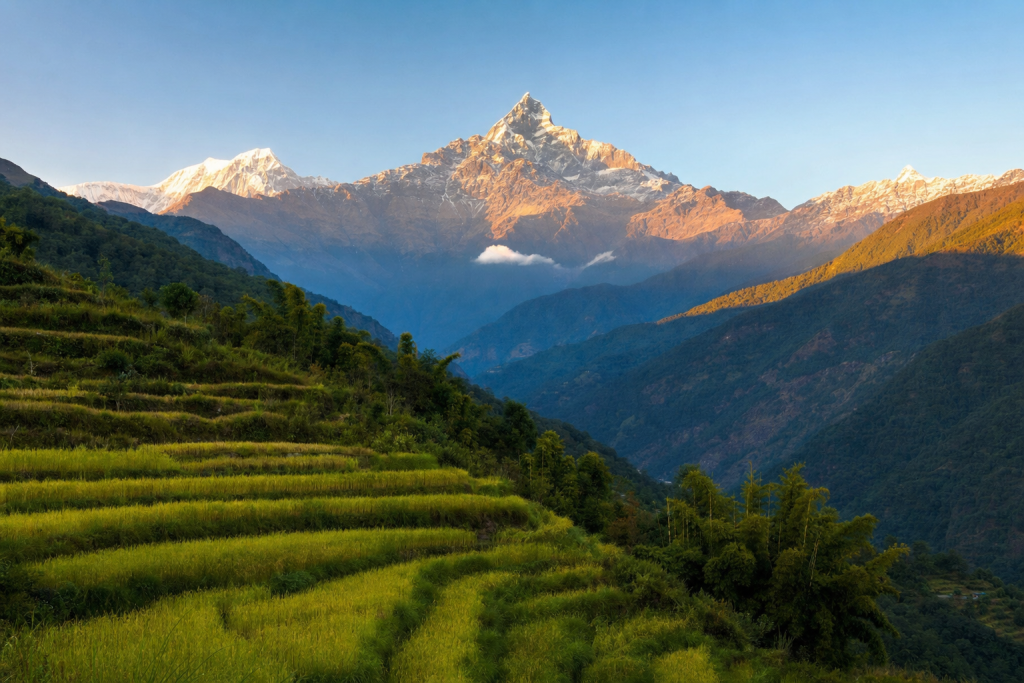
Nepal is one of the most rewarding places on Earth to photograph: Himalayan peaks at sunrise, prayer flags in mountain villages, saffron-robed monks at monasteries, and the humid wildlife of the Terai. This guide is designed for photographers who want a practical plan—where to go, when to go, and how to come home with sharp, well-exposed images in extreme conditions.
Want the printable version? Grab the Nepal Photography Guide PDF (checklists, shot-lists, maps) and the Nepal Lightroom Preset Pack (clean mountain contrast + warm temple tones).
 Save
SaveQuick facts for photographers
- Capital: Kathmandu (excellent for street + temple photography)
- Best light: early mornings in the hills/mountains; late afternoons in Kathmandu Valley
- Altitude: many iconic viewpoints are above 2,000m; plan for slower pacing and battery performance drops
- Currency: Nepalese Rupee (NPR); carry small bills for local transport + entry tickets
Entry, permits, and common restrictions (high-level)
Most travelers arrive via Kathmandu and use a tourist visa. Requirements change, so treat this as an overview and confirm the latest instructions on Nepal’s official immigration portal before travel. For trekking regions, you’ll often need additional permits (national park / conservation area permits, and sometimes local municipality permits).
Photography restrictions to be mindful of
- Security-sensitive sites: avoid photographing military, police, checkpoints, and some government buildings.
- Temples/monasteries: ask before photographing ceremonies; respect no-flash rules; dress modestly.
- People: Nepal is generally photographer-friendly, but always ask for close portraits and offer to share a photo.
Drone photography in Nepal (plan ahead)
Drone rules are paperwork-heavy in Nepal—especially for foreign nationals and especially inside protected areas. In practical terms: assume you need advance permission and that some high-profile zones (Kathmandu heritage areas, near airports, sensitive sites, and national parks) require extra approvals. If drones are core to your project, build an alternative plan (telephoto landscapes, stitched panoramas) in case permits aren’t granted.
Rule-of-thumb: verify current requirements with the Civil Aviation Authority of Nepal and the relevant local authority for your intended flight locations.
Best time to visit Nepal for photography
Nepal’s photography seasons are driven by off-season and Himalayan visibility.
- Oct–Nov: classic “post-off-season” clarity; crisp mountain views; busy trekking season.
- Dec–Feb: colder and sometimes hazy in valleys; great for low-crowd city/temple scenes and clear mornings.
- Mar–Apr: spring trekking; rhododendrons at mid-elevations; occasional haze and pre-off-season weather swings.
- Jun–Sep: off-season (lush landscapes, dramatic clouds, leeches on trails); mountains often obscured.
Top photography regions (where to base yourself)
Kathmandu Valley (Kathmandu, Patan, Bhaktapur)
Start here for a dense mix of street, architecture, and culture. Early mornings are your friend: markets wake up, courtyards are quieter, and the light is soft. In crowded alleys, shoot with a small prime and keep your kit tight.
- Shot list: incense and prayer wheels, brick courtyards, artisans at work, evening aarti, rooftop city layers.
- Lens picks: 24–70mm (or 28/35mm prime), plus a small tele (85–135mm) for candid compression.
Everest (Khumbu) region
If you want iconic Himalayan scale, Khumbu delivers: ridgelines at dawn, villages like Namche, and monasteries with mountain backdrops. Conditions are harsh on gear: cold mornings, dust on trails, and strong UV. Use a UV filter if you like, but prioritize a rain cover and disciplined sensor protection during lens changes.
- Shot list: prayer flags against peaks, yak caravans, teal-blue shadows on snow, headlamps on early starts.
- Composition tip: add scale with people or ridgeline silhouettes; don’t rely on the peak alone.
Annapurna region (Pokhara as a hub)
Pokhara’s lakeside is an easy base with quick access to sunrise viewpoints and trekking routes. Mountain reflections on Phewa Lake can be spectacular at first light when winds are calm.
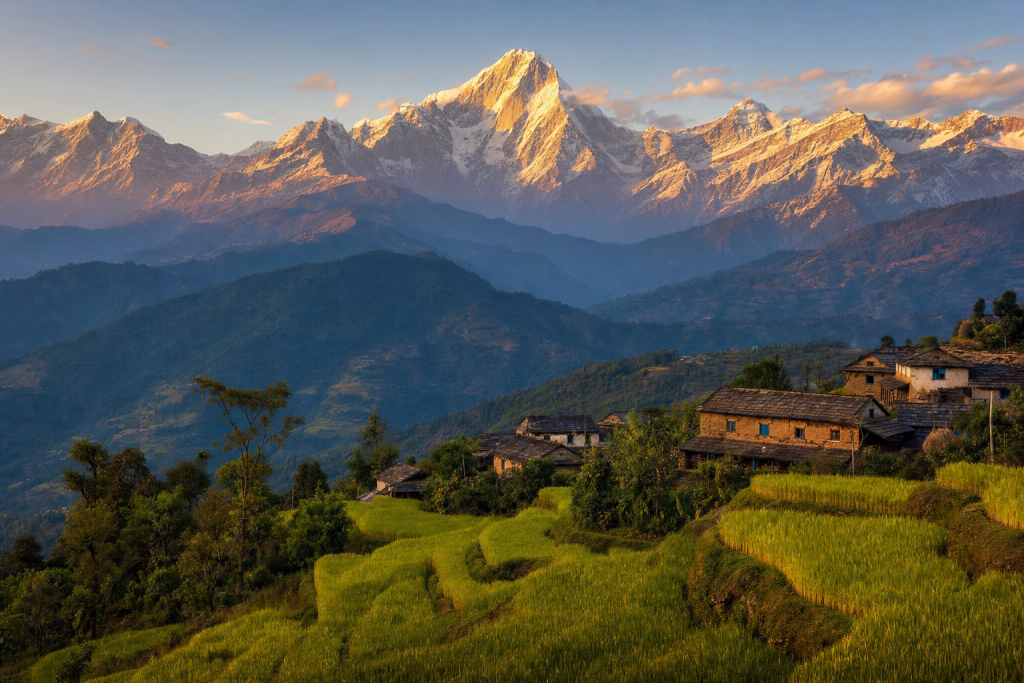
- Shot list: lake reflections, paragliders, terraced fields, tea houses, low clouds wrapping hills.
- Best time of day: dawn for reflections; late afternoon for layered ridgelines.
Chitwan and Bardia (Terai wildlife)
Nepal isn’t only mountains. In the Terai you can photograph rhinos, elephants, crocodiles, and birdlife. Bring longer glass and plan for dust and humidity. Many wildlife experiences are guided; follow rules around distance and noise.
- Shot list: rhinos in tall grass, golden-hour river edges, birds in soft dawn fog.
- Lens picks: 100–400mm or 150–600mm; a fast normal prime for lodge scenes and portraits.
Suggested itineraries (photography-first)
7 days (Kathmandu + one region)
- Days 1–3: Kathmandu Valley dawn streets + temples + Bhaktapur blue hour.
- Days 4–7: Choose Pokhara/Annapurna foothills (easy) or short Everest region hop (more logistics).
10–14 days (classic Nepal photographer loop)
- Kathmandu Valley (3–4 days)
- Pokhara + Annapurna viewpoints/short treks (3–5 days)
- Chitwan wildlife (2–3 days)
- Buffer days for weather and travel delays (1–2 days)
Gear recommendations (what matters in Nepal)
- Weather/dust protection: rain cover, microfiber cloths, blower, and a small dry bag inside your daypack.
- Power: extra batteries (cold drains fast) and a power bank. Keep batteries warm in an inner pocket.
- Stability: a compact tripod helps for dawn city scenes and long-lens landscapes; a lightweight travel tripod is plenty.
- Filters: CPL for haze control and reflections; a 3–6 stop ND if you like long exposures of waterfalls/streams.
Camera settings & field technique
High-contrast mountain light
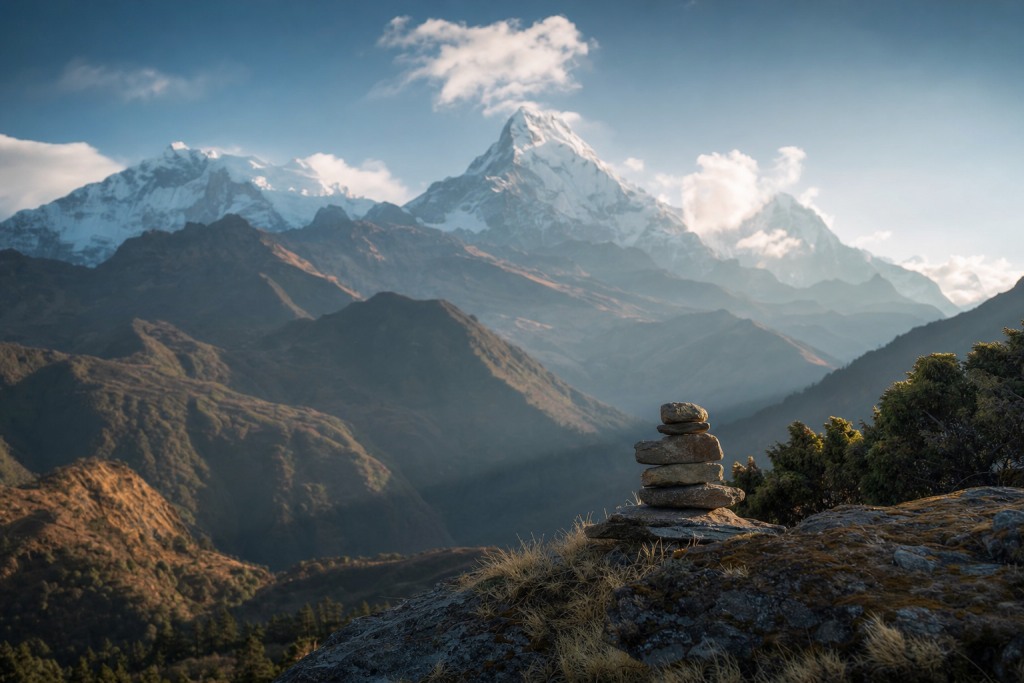
- Expose to protect highlights on snow and clouds; recover shadows in RAW.
- Use exposure bracketing for sunrise ridgelines; blend subtly.
Temples and indoor scenes
- Prefer fast primes (f/1.8–f/2.8) and higher ISO rather than flash.
- Watch mixed lighting (tungsten + daylight). Set WB in post with a neutral reference.
Street photography in Kathmandu
- Work corners and light shafts; keep your pace slow; shoot with a single lens for less attention.
- Use burst mode for passing moments in tight alleys.
 Save
SaveEditing approach (Lightroom)
Nepal photos often benefit from controlled dehaze (don’t overdo it), warm highlights for temple interiors, and careful blue shadow management in mountain scenes. If you’re processing a mixed set (city + mountains + wildlife), build 2–3 separate presets or profiles and apply them by location.
Bundle and save time: get the PDF guide + preset pack.
Start here: Nepal Photography Guide PDF and Nepal Lightroom Preset Pack.
Quick Amazon shortcuts to the gear most useful for this kind of shot. Use them if Prime shipping or Amazon credit makes more sense than B&H. As an Amazon Associate ShutYourAperture earns from qualifying purchases.
FAQ
Is Nepal safe to photograph?
Most visits are trouble-free, but travel conditions vary by region, season, and altitude. Keep a low-profile kit in cities, secure backups nightly, and build buffer time for weather delays (especially if you fly to mountain airports).
Do I need permits for trekking photography locations?
Many trekking routes pass through national parks or conservation areas, and some areas require local permits. Confirm requirements for your exact route before starting a trek, and keep paper copies accessible.
Can I fly a drone in Nepal?
It’s possible, but assume you need prior approval and additional permissions in protected areas. If you can’t secure permits, you can still capture aerial-like perspectives from ridgelines and high viewpoints.
Take this guide offline: Download the Nepal Photography Guide PDF and the Nepal Lightroom Preset Pack for a faster edit workflow.
More photo locations and ideas (extended shot list)
Nagarkot and Dhulikhel (sunrise viewpoints near Kathmandu)
These hill towns are popular for sunrise views over layered ridges. Arrive the night before, scout a clear eastern view, and plan for a fast start. Even on hazy days, you can make compelling images by leaning into silhouettes, telephoto compression, and minimalist compositions. If you get a clear morning, treat it like a studio shoot: pick 2–3 compositions and repeat them as the light changes minute-by-minute.
- Shot list: ridgeline layers, villagers walking in morning mist, prayer flags at overlooks, morning tea scenes by window light.
- Technique: use a longer lens (70–200mm) to simplify the frame; underexpose slightly to deepen mood; bracket 3 frames for safety.
Gosaikunda and Langtang-side villages (alpine lakes + culture)
The Langtang area combines high mountain scenery with culturally rich villages. For photography, the key is pacing: plan mid-day for travel, and reserve sunrise and late afternoon for deliberate shooting. In shoulder season you may get dramatic cloud breaks that create spotlight effects—work with a telephoto and wait for the light to hit your subject.
- Shot list: yak pastures, stone walls and prayer flags, wide alpine valleys, lake reflections when winds drop.
- Technique: shoot panoramas with 35–50mm for ultra-high resolution prints; keep the horizon consistent and lock exposure.
Upper Mustang and restricted areas (if you go with the proper permits)
Some regions in Nepal are restricted and require additional permits and, in many cases, an agency/guide. If your trip includes one of these areas, treat it as a dedicated photo project: build a visual brief in advance (textures, portraits, landscapes, ritual scenes) so you can work efficiently once you’re there.
- Shot list: eroded cliffs, ancient monasteries, desert-meets-Himalaya horizons, warm evening street scenes.
- Technique: carry a small LED for fill (where respectful and allowed) and keep dust covers ready for wind.
Lumbini (pilgrimage and calm architectural details)
Lumbini offers a different rhythm: quiet gardens, monasteries from different Buddhist traditions, and reflective water surfaces. Midday light can be harsh, so prioritize dawn, late afternoon, and blue hour when the grounds are calmer. A tripod can help for calm, symmetrical frames at blue hour—just be mindful of crowds and local rules.
- Shot list: repeating columns, monks walking pathways, candlelight and prayer scenes (where permitted), minimalist architectural details.
- Composition: search for symmetry, reflections, and leading lines; keep horizons perfectly level; watch for distracting signage.
Bandipur (heritage town textures)
Bandipur is ideal for slower street photography and architectural detail. Think window patterns, carved wood, hanging laundry, and warm evening light in pedestrian lanes. It’s also a great place to practice photographing daily life without rushing—sit, observe, and let moments come to you.
- Shot list: doorways, street vendors, layered rooftops, night scenes with practical lights, small indoor portraits by doorway light.
- Settings: ISO 1600–6400 is common at dusk; stabilize your shooting stance and use IBIS if available; aim for 1/250s for moving subjects.
Advanced field technique (altitude, cold, and hard contrast)
Altitude pacing for better photos
At altitude, the most common “photo mistake” is moving too fast: you arrive out of breath, you rush frames, and you miss the best micro-light. Build short rest stops into your shooting plan. Use those pauses to check edges of frame, clean lenses, and confirm exposure.
- Micro-routine: stop → breathe → wipe front element → check histogram → shoot 3 variations (wide/medium/tight).
- Protect batteries: keep spares warm; swap only when needed; avoid leaving the camera hanging outside your jacket for long periods.
Cold mornings and condensation
Going from a warm lodge to a freezing morning can fog lenses. Put your camera in a bag before moving between temperature extremes so it acclimates slowly. If you see fog, don’t wipe aggressively—wait a few minutes and let it clear naturally.
Snow, sky, and glare control
Bright snow can trick meters into underexposing. For clean snow detail, add a little exposure compensation, then verify with histogram. A circular polarizer can deepen skies but can also create uneven polarization on ultra-wide lenses—test and dial back if the sky looks blotchy.
Workflow: backup and file safety on the road
- 3-2-1 mindset: keep a working card set, a daily backup drive, and a second copy (or cloud) when connectivity allows.
- Daily cull: flag obvious misses nightly so you’re not overwhelmed later; keep “maybe” shots for home review.
- Label by day and location: Kathmandu_01, Pokhara_02, Chitwan_03—simple naming prevents mistakes later.
- Protect from dust: don’t change lenses in windy conditions; step into a tea house or turn your back to the wind.
- Carry a small card wallet: keep full cards separate from empty ones; use a simple rotation so you never format the wrong card.
More photo locations and ideas (extended shot list)
Nagarkot and Dhulikhel (sunrise viewpoints near Kathmandu)
These hill towns are popular for sunrise views over layered ridges. Arrive the night before, scout a clear eastern view, and plan for a fast start. Even on hazy days, you can make compelling images by leaning into silhouettes, telephoto compression, and minimalist compositions. If you get a clear morning, treat it like a studio shoot: pick 2–3 compositions and repeat them as the light changes minute-by-minute.
- Shot list: ridgeline layers, villagers walking in morning mist, prayer flags at overlooks, morning tea scenes by window light.
- Technique: use a longer lens (70–200mm) to simplify the frame; underexpose slightly to deepen mood; bracket 3 frames for safety.
Gosaikunda and Langtang-side villages (alpine lakes + culture)
The Langtang area combines high mountain scenery with culturally rich villages. For photography, the key is pacing: plan mid-day for travel, and reserve sunrise and late afternoon for deliberate shooting. In shoulder season you may get dramatic cloud breaks that create spotlight effects—work with a telephoto and wait for the light to hit your subject.
- Shot list: yak pastures, stone walls and prayer flags, wide alpine valleys, lake reflections when winds drop.
- Technique: shoot panoramas with 35–50mm for ultra-high resolution prints; keep the horizon consistent and lock exposure.
Upper Mustang and restricted areas (if you go with the proper permits)
Some regions in Nepal are restricted and require additional permits and, in many cases, an agency/guide. If your trip includes one of these areas, treat it as a dedicated photo project: build a visual brief in advance (textures, portraits, landscapes, ritual scenes) so you can work efficiently once you’re there.
- Shot list: eroded cliffs, ancient monasteries, desert-meets-Himalaya horizons, warm evening street scenes.
- Technique: carry a small LED for fill (where respectful and allowed) and keep dust covers ready for wind.
Lumbini (pilgrimage and calm architectural details)
Lumbini offers a different rhythm: quiet gardens, monasteries from different Buddhist traditions, and reflective water surfaces. Midday light can be harsh, so prioritize dawn, late afternoon, and blue hour when the grounds are calmer. A tripod can help for calm, symmetrical frames at blue hour—just be mindful of crowds and local rules.
- Shot list: repeating columns, monks walking pathways, candlelight and prayer scenes (where permitted), minimalist architectural details.
- Composition: search for symmetry, reflections, and leading lines; keep horizons perfectly level; watch for distracting signage.
Bandipur (heritage town textures)
Bandipur is ideal for slower street photography and architectural detail. Think window patterns, carved wood, hanging laundry, and warm evening light in pedestrian lanes. It’s also a great place to practice photographing daily life without rushing—sit, observe, and let moments come to you.
- Shot list: doorways, street vendors, layered rooftops, night scenes with practical lights, small indoor portraits by doorway light.
- Settings: ISO 1600–6400 is common at dusk; stabilize your shooting stance and use IBIS if available; aim for 1/250s for moving subjects.
Advanced field technique (altitude, cold, and hard contrast)
Altitude pacing for better photos
At altitude, the most common “photo mistake” is moving too fast: you arrive out of breath, you rush frames, and you miss the best micro-light. Build short rest stops into your shooting plan. Use those pauses to check edges of frame, clean lenses, and confirm exposure.
- Micro-routine: stop → breathe → wipe front element → check histogram → shoot 3 variations (wide/medium/tight).
- Protect batteries: keep spares warm; swap only when needed; avoid leaving the camera hanging outside your jacket for long periods.
Cold mornings and condensation
Going from a warm lodge to a freezing morning can fog lenses. Put your camera in a bag before moving between temperature extremes so it acclimates slowly. If you see fog, don’t wipe aggressively—wait a few minutes and let it clear naturally.
Snow, sky, and glare control
Bright snow can trick meters into underexposing. For clean snow detail, add a little exposure compensation, then verify with histogram. A circular polarizer can deepen skies but can also create uneven polarization on ultra-wide lenses—test and dial back if the sky looks blotchy.
 Save
SaveWorkflow: backup and file safety on the road
- 3-2-1 mindset: keep a working card set, a daily backup drive, and a second copy (or cloud) when connectivity allows.
- Daily cull: flag obvious misses nightly so you’re not overwhelmed later; keep “maybe” shots for home review.
- Label by day and location: Kathmandu_01, Pokhara_02, Chitwan_03—simple naming prevents mistakes later.
- Protect from dust: don’t change lenses in windy conditions; step into a tea house or turn your back to the wind.
- Carry a small card wallet: keep full cards separate from empty ones; use a simple rotation so you never format the wrong card.
All links go to B&H Photo Video, the trusted pro source. Tagged as affiliate per FTC.
All links go to Viator (a TripAdvisor company), the world’s largest marketplace for guided experiences. Tagged as affiliate per FTC.
What to Pack
A focused landscape kit handles every shot at Nepal without breaking your back. Here is the working photographer's pack list — every link goes to B&H Photo Video (our primary supplier) or Amazon (for accessories and same-day delivery in the US).
| What & Why | B&H | Amazon |
|---|---|---|
Wide-angle zoom (14-35mm range) The single most important lens for sweeping vistas. Pair with a circular polarizer for skies and water. | Shop B&H → | Shop Amazon → |
Sturdy travel tripod Carbon fiber, packs to 15 inches, holds steady in wind off the coast. Essential for blue-hour and long-exposure work. | Shop B&H → | Shop Amazon → |
Circular polarizer (77mm or 82mm) Cuts haze, deepens sky, reveals texture in water. Non-negotiable for landscape work. | Shop B&H → | Shop Amazon → |
10-stop ND filter For 30-second exposures that turn moving water and clouds into silk. | Shop B&H → | Shop Amazon → |
Extra batteries (3 minimum) Cold weather and long exposures eat batteries. Carry triple what you think you need. | Shop B&H → | Shop Amazon → |
Fast SD/CFexpress cards V90 or CFexpress depending on your body. Two cards minimum so a failure mid-trip is recoverable. | Shop B&H → | Shop Amazon → |
Microfiber lens cloths Salt spray, mist, and dust will ruin every shot if you don't carry a cloth. | Shop B&H → | Shop Amazon → |
B&H and Amazon links are affiliate links. We earn a small commission on purchases at no extra cost to you. We only recommend gear we use or would buy ourselves.