Best Photography Spots in Bali: 14 Locations With GPS

Tours & experiences disclosure: This guide includes affiliate links to Viator, the world’s largest tour and experiences marketplace. If you book through these links, ShutYourAperture may earn a small commission at no extra cost to you.

Bali photography guide hero imageSave

Amazon Associates disclosure: ShutYourAperture is a participant in the Amazon Services LLC Associates Program. As an Amazon Associate we earn from qualifying purchases. Some links below go to Amazon (Store ID edinchavez01-20). Buying through these links costs you nothing extra and helps fund our free guides.
Skip the planning. Get the Bali PDF. All locations, GPS coordinates, golden-hour times, gear tips. Instant download.

Bali, Indonesia is one of the most photogenic cities in the world. If you have a camera and the patience to show up before dawn, Bali will give you images that last a career — but only if you know where and when to point it.

This is the definitive field guide to the 14 best photography spots in Bali, with GPS coordinates you can drop straight into Google Maps, exact camera settings tuned to Bali’s unique light, precise timing for every location, and the access notes nobody else bothers to document. It mirrors the intel inside our Bali Ultimate Photographer’s Guide ($47 PDF) — a downloadable field guide with full-page hero images, GPS maps, seasonal tables, a city safety briefing, and a complete photographer’s packing list. Get the guide →

Planning multi-city travel? See also: U.S. cities photography hub and the National Parks Photography Guides.

Bali Ultimate Photographer’s Guide — $47
14 GPS-mapped locations · Exact camera settings · Multi-season shooting calendar · Free annual updates

Download the PDF guide →
Skip the planning

Get the Bali Ultimate Photographer’s Guide

Every location below — pre-mapped with GPS, golden-hour timing, gear recommendations, cultural rules, and a 14-day itinerary. Downloaded by 200+ working photographers.

Get the PDF · $47
Instant download · Lifetime updates

Quick jump to the 14 spots

  1. Tegallalang Rice Terraces
  2. Tirta Empul Water Temple
  3. Tanah Lot Temple — Sunset Cliff
  4. Uluwatu Temple — Clifftop Sunset
  5. Lempuyang Temple — Gates of Heaven
  6. Pura Ulun Danu Beratan — Lake Beratan
  7. Mount Batur Sunrise Hike
  8. Sekumpul Waterfall
  9. Tegenungan Waterfall
  10. Kelingking Beach — T-Rex Cliff Viewpoint
  11. Diamond Beach — Nusa Penida
  12. Jatiluwih Rice Terraces — UNESCO Subak Landscape
  13. Campuhan Ridge Walk — Ubud
  14. Sanur Beach — Sunrise Boardwalk

A look inside the Bali Photographer’s Guide

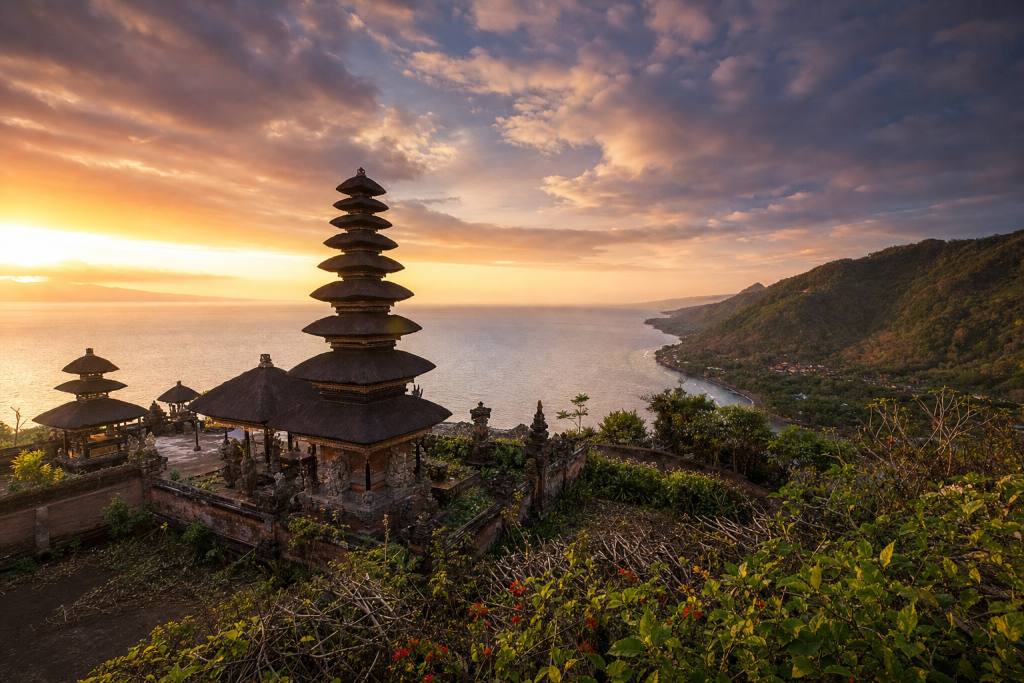
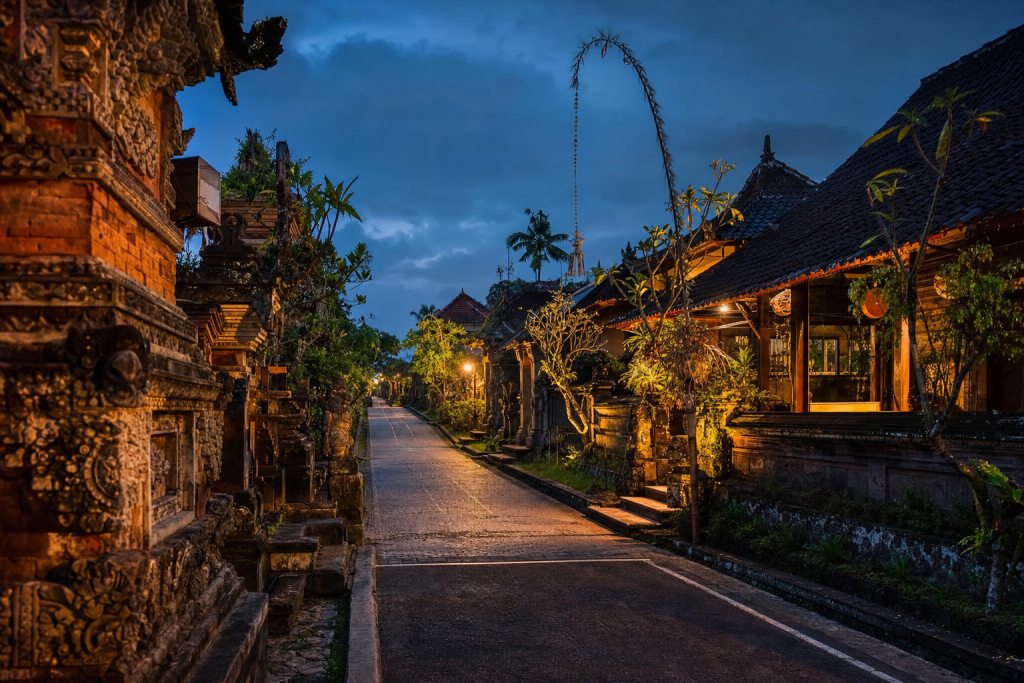
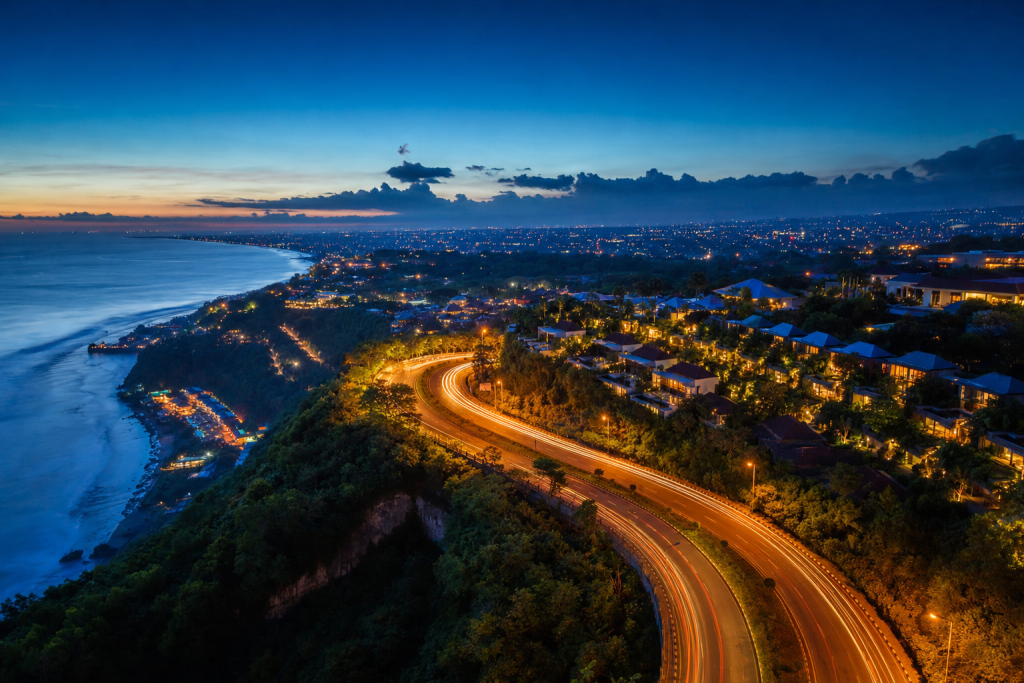
Here are three of the actual shots you’ll find inside the PDF — cinematic full-page references for the exact spots, lenses, and lighting conditions documented in the guide. The full guide includes 14 locations, each with a hero image, GPS map, settings table, and a five-shot list.

Tegallalang Rice Terraces — from the Bali Photographer's GuideSave
Tegallalang Rice Terraces — sample reference photo from the Bali Photographer’s Guide PDF

Before you shoot Bali: the essentials

  • Free public access: Campuhan Ridge Walk in Ubud, Sanur Beach boardwalk, and public beach sections at Seminyak and Kuta are free. Temple entries carry fees: Uluwatu IDR 60,000 (2025/2026), Tanah Lot IDR 75,000, Tirta Empul IDR 75,000, Ulun Danu Beratan IDR 75,000, Lempuyang IDR 100,000 + IDR 50,000 mandatory shuttle, Besakih/Pura Penataran Agung IDR 150,000. Rice terrace fees: Tegallalang IDR 15,000–25,000, Jatiluwih IDR 75,000. Nusa Penida island tourism fee IDR 25,000 applies island-wide (2024 onward).
  • Commercial permits: Personal and tourist photography in all public spaces is unrestricted. Commercial shoots (advertising, fashion campaigns, film crews) in temple complexes require prior coordination with the local desa adat (village council) and submission to the relevant Regency Tourism Office. Drone regulations in Bali: drones must be registered with the Indonesian DGCA (Directorate General of Civil Aviation) via its online portal; operators must hold a remote pilot certificate for commercial use. Drones are prohibited within 5 km of Ngurah Rai International Airport and banned outright at all active Hindu temple ceremonies. Most rice terraces and viewpoints permit recreational drone use; Jatiluwih (UNESCO site) and Nusa Penida require confirmation with site staff. Commercial drone permits cost IDR 200,000–500,000 per location.
  • Best photography seasons: April–June (dry season onset, lush post-rain green, thinner crowds than peak July–August) and September–October (dry season end, vivid rice terraces, clear sunrise skies over Mount Agung)
  • Blue hour notes: Bali sits at approximately 8.4°S — a near-equatorial latitude where blue hour is brief, typically 15–20 minutes after sunset rather than the 25–35 minutes at European latitudes. Sunset ranges from roughly 5:45 PM (June–July) to 6:35 PM (December–January). The shorter blue-hour window demands pre-focused, pre-composed setups. The west-facing coastline (Seminyak, Tanah Lot, Uluwatu) gives spectacular tropical blue-hour skies with warm horizon afterglow, while east-coast Sanur and Lake Beratan are best exploited at dawn rather than dusk.
  • Drone policy: Drone laws vary widely by country and city — many capital and tourist zones are no-fly. Verify the local civil aviation authority’s current rules before launching.
  • Local resource: Official visitor information

The full-resolution version of every map below — plus seasonal calendars, gear notes per location, sun-angle diagrams, and a complete photographer’s packing checklist — is inside the Bali Photographer’s Guide PDF ($47).

1. Tegallalang Rice Terraces

Tegallalang is Bali’s most photographed rice landscape — the UNESCO-recognized subak irrigation system has carved cascading emerald stairways into a steep valley sided by towering coconut palms and jungle canopy. Unlike the flatter fields of Jatiluwih, Tegallalang’s dramatic vertical drop into the river gorge creates a natural amphitheater of layered terraces that photograph with extraordinary depth. The terraces change color through the rice cycle — brilliant fluorescent green when newly planted, golden yellow at harvest, and rich brown earth when fallow — so no two visits look identical.

  • GPS: -8.4439, 115.2806
  • Elevation: 1,378 ft
  • Best time of day: golden hour at dawn — arrive by 6:00 AM when the terraces glow with warm amber light and mist fills the valley; also beautiful in late afternoon (4:30–5:30 PM) when shadows deepen the stepped contours
  • Sun direction: The main terrace valley opens roughly to the west, meaning the east-facing walls of the rice paddies catch direct morning sunlight from around 7:00 AM onward, creating crisp shadows that emphasize the stepped geometry. The sun rises to the east-southeast (azimuth ~70° in dry season) and arcs high and steeply overhead at this equatorial latitude. By mid-morning the shadows flatten. Late afternoon provides warm directional light from the west that rims the palm canopy crowning the terraces and casts long valley shadows — a second-best window after dawn.
  • Access: Jalan Raya Tegallalang, approximately 9 km north of Ubud center (20–25 minute drive by scooter or car). No public transport; hire a Gojek/Grab driver or rent a scooter. Multiple entry points along the main road — the most popular section is at the Uma Ceking viewpoint and the Abian Desa entrance. Entrance fee: IDR 15,000–25,000 per person (paid at informal booths to local landowners; Uma Ceking charges IDR 50,000 for its premium clifftop platform). Additional small fees (IDR 10,000–50,000) at individual swing platforms and deeper path checkpoints. Parking: IDR 5,000–10,000. Open daily approximately 6:00 AM–6:00 PM.
  • Difficulty: easy
  • Recommended settings: Golden Hour Wide: f/8, 1/250 sec, ISO 100, 24mm  ·  Misty Dawn Long Exposure: f/11, 1/15 sec, ISO 200, 35mm, tripod  ·  Compressed Telephoto Layers: f/8, 1/500 sec, ISO 100, 200mm  ·  Overcast Saturated Green: f/8, 1/125 sec, ISO 200, 16mm

Shots to chase:

  • Low-angle composition from the valley floor looking up through the stepped terraces with a lone palm silhouetted against the sky at golden hour
  • Telephoto compression (150–200mm) from the Uma Ceking viewpoint platform that stacks 8–10 terrace tiers into a compressed flat-plane graphic pattern
  • Wide-angle pre-dawn shot of mist filling the gorge with the terraces visible just above the fog line and the first pink light on the sky
  • A single farmer in traditional clothing tending the paddies in the foreground with the full terrace cascade receding behind — human scale context
  • Aerial drone composition looking straight down into the geometric spiral of the terraces for an abstract topographic map effect

Pro tip: Arrive before 6:30 AM on a weekday to have the terraces largely to yourself before tour-group vans arrive from Ubud hotels. The Abian Desa entrance (south of the main strip) tends to be less crowded and offers a slightly different southern perspective. The swing operators usually don’t set up until 8–9 AM, so early arrivals avoid the swing-queue noise. Dry season (April–October) produces the most vivid green; the terraces are at peak beauty about 6–8 weeks after planting.

Common mistake to avoid: Visiting at midday when the overhead sun flattens all shadows and the heat makes the walk uncomfortable. Shooting only from the main road viewpoint — the most interesting compositions require descending into the valley on the narrow footpaths, which takes 10–15 minutes. Confusing the expensive Uma Ceking swing platform fee with general access — basic terrace entry remains IDR 15,000–25,000 at the ground-level booths.

2. Tirta Empul Water Temple

Tirta Empul dates to 962 CE and is fed by a sacred spring that has flowed continuously for over a millennium. The main photographic subject is the two large purification pools — stone-lined rectangles lined with 30 holy water spouts (pancuran) from which worshippers and visitors perform ritual cleansing. The sight of dozens of sarong-clad figures standing beneath the fountain jets, with incense smoke and offerings surrounding the pools, creates an atmosphere of living spiritual practice unmatched at any other Balinese site. The backdrop of ancient moss-covered shrines and Tampaksiring Palace ridge adds architectural depth.

  • GPS: -8.4164, 115.3147
  • Elevation: 741 ft
  • Best time of day: early morning — arrive at 8:00 AM when the temple opens for the purest light on the courtyard and the fewest visitors in the purification pools; the open-air bathing courtyards are north-facing, receiving soft diffused morning light ideal for pool reflections
  • Sun direction: Tirta Empul is oriented broadly north-south with the main purification pools in a central courtyard open to the sky. Morning sun rises to the northeast and strikes the stone fountainheads from the east, casting long horizontal shadows across the pool surface that emphasize the fountain channels. By 10:00 AM the sun climbs overhead, producing specular glare on the water and harsh shadows. Late afternoon (3:00–5:00 PM) brings warm western light back into the courtyard from over the temple’s western wall — a workable second window though crowds are heavier.
  • Access: Jalan Tirta, Tampaksiring, Gianyar Regency, approximately 18 km north of Ubud (30–40 minute drive). No public bus; hire a driver or rent a scooter. Entrance fee: IDR 75,000 for adults, IDR 50,000 for children aged 5–12 (updated January 2025). Free parking on-site. Sarong and sash mandatory — included with ticket or available at entrance. BRI ATM near ticket counter. Open daily 8:00 AM–6:00 PM. Melukat purification ceremony participation requires separate sarong rental and locker fee.
  • Difficulty: easy
  • Recommended settings: Pool Reflection Morning: f/8, 1/250 sec, ISO 200, 35mm  ·  Fountain Long Exposure: f/11, 1/8 sec, ISO 100, 50mm, tripod (smooths water)  ·  Worshippers Environmental Portrait: f/4, 1/500 sec, ISO 400, 85mm  ·  Overhead Courtyard Drone: f/8, 1/800 sec, ISO 100, drone — check current temple drone policy with staff

Shots to chase:

  • Low-angle shot from the pool edge at the level of the water surface with the fountain jets creating arcing water streams against a sky-reflected pool background
  • Telephoto (85–135mm) environmental portrait of a Balinese worshipper in prayer beneath a fountain spout, with incense smoke diffusing the background
  • Wide-angle view from the second-floor walkway (when accessible) looking down across the full extent of both purification pools at the peak of morning activity
  • Close-up abstract of a single stone fountain head with its arc of holy water backlit by morning sun, isolating the carved naga serpent or garuda relief detail
  • Blue-hour exterior shot of the temple gates with the surrounding trees and stone carvings illuminated by warm uplighting against a cobalt sky

Pro tip: Walk to the large spring-fed pond at the very back of the complex — most visitors stop at the pools and miss this quieter, less crowded area where the sacred spring first emerges. Photography of worshippers performing rituals is acceptable from a respectful distance without flash; never photograph the inner sanctum areas restricted to Balinese Hindus. Hire a local guide (IDR 100,000–150,000) to understand the meaning of each fountain spout, which makes both the visit and captions more meaningful. The temple gets extremely busy 10:00 AM–2:00 PM with tour buses.

Common mistake to avoid: Using flash in the bathing courtyard — strictly disrespectful and prohibited. Arriving after 10:00 AM and finding both pools at maximum tourist capacity. Forgetting that menstruating women are traditionally not permitted to enter temple areas — this is actively enforced. Shooting only the pools and missing the extraordinary 10th-century candi bentar (split gate) entrance and inner courtyard shrines.

3. Tanah Lot Temple — Sunset Cliff

Tanah Lot (‘land in the middle of the sea’) is an offshore Hindu sea temple perched on a dramatic black volcanic rock formation, accessible only at low tide via a coral causeway. Dating to the 16th century and attributed to the priest Dang Hyang Nirartha, it is one of Bali’s six directional sea temples and the most visited site on the island. The image of its silhouetted multi-tiered pagoda against a fiery Pacific sunset has become the single globally recognized symbol of Bali. The adjacent Batu Bolong temple on a natural rock arch offers a complementary composition.

  • GPS: -8.6215, 115.0866
  • Elevation: 33 ft
  • Best time of day: sunset — arrive by 4:00 PM to secure cliff positions at Sunset Corner and Batu Bolong before crowds peak; the silhouette of the sea temple against orange-to-crimson sky with Indian Ocean waves crashing the rocks is Bali’s single most published image
  • Sun direction: Tanah Lot sits on a sea rock approximately 70 meters offshore from the west-facing Tabanan coastline. The sun sets to the northwest in dry season (azimuth ~290°–310° in May–July), placing it directly behind and slightly to the right of the temple when viewed from the main cliff viewing area — creating a perfect silhouette backlight. In December–January, sunset swings to azimuth ~240°, slightly to the south, so the temple appears more side-lit than fully backlit; still beautiful but less iconic. Best silhouette angles occur May–September. Tide levels dramatically alter the foreground: low tide exposes the coral causeway and allows close approach, while high tide isolates the rock in churning white water.
  • Access: Jalan Raya Tanah Lot, Beraban, Kediri, Tabanan Regency, approximately 20 km northwest of Seminyak (40 minutes by car) and 45 km from Ubud (1.5 hours). No public transport; hire a driver or take a Grab. Entrance fee: IDR 75,000 for foreign adults, IDR 40,000 for foreign children (2024–2026). Indonesian adults IDR 30,000. Parking: IDR 5,000 (scooter), IDR 3,000 (car). Kecak dance show (6:00 PM): separate IDR 100,000 ticket. Open daily 7:00 AM–7:00 PM. Cash only at gate.
  • Difficulty: easy
  • Recommended settings: Sunset Silhouette: f/11, 1/500 sec, ISO 100, 70mm (expose for sky)  ·  Blue Hour Long Exposure: f/11, 6 sec, ISO 100, 24mm, tripod (silky water blur)  ·  High Tide Wave Drama: f/8, 1/1000 sec, ISO 400, 24mm (freeze wave impact)  ·  Kecak Dance Low Light: f/2.8, 1/200 sec, ISO 1600, 50mm

Shots to chase:

  • Classic silhouette composition from Sunset Corner (the far western end of the grounds, identifiable by pink umbrellas) with the sun setting directly behind the temple pagoda
  • Long-exposure blue-hour shot from the main viewing cliff with the temple illuminated by uplighting and smooth 4–6 second water blur wrapping the rock base
  • Low-tide approach to the rock base (guided by temple guardians) to photograph the green sea snakes living in the cave — macro or standard lens
  • Wide-angle high-tide composition from Batu Bolong temple arch with waves crashing through the rock arch in the foreground and Tanah Lot visible across the bay
  • Kecak dance performance at 6:00 PM with the sea-and-sky background — underexpose the sky to preserve color and let fire torches rim-light the dancers

Pro tip: The very best silhouette angle is from Sunset Corner, not the main central viewpoint — walk the full length of the grounds to the western end. Use a 70–200mm lens for the iconic tight silhouette shot, then switch to a wide 16–24mm for the environmental context shot with waves. Check tide tables before going: the Bali Tide Chart app or BMKG website gives accurate Tabanan times — low tide 2–3 hours before sunset provides the most varied foreground. The Kecak performance stage faces the sunset, so the audience has backlit sky during the show — choose seats on the western side of the amphitheater for both dance and sky in a single frame.

Common mistake to avoid: Arriving at 5:30 PM and finding every cliff spot taken by hundreds of visitors who got there two hours earlier. Shooting only at sunset and missing the dramatically less-crowded early morning when mist hangs over the water and warm golden light hits the temple’s eastern face. Buying Kecak tickets at the gate and sitting in the middle of the amphitheater where the sunset is blocked by other heads.

4. Uluwatu Temple — Clifftop Sunset

Pura Luhur Uluwatu is one of Bali’s six directional sea temples (sad kahyangan), positioned at the southwest corner of the island at the edge of sheer 70-meter limestone cliffs plunging directly to the Indian Ocean. The temple complex dates to the 11th century. The clifftop path — a 400-meter walk around the sea promontory — offers continuously changing views of the temple silhouetted against the ocean from angles unavailable from the main entrance. The daily Kecak dance performed in an open-air amphitheater literally on the cliff edge at sunset is among the most atmospheric cultural performances in Indonesia.

  • GPS: -8.8291, 115.0849
  • Elevation: 230 ft
  • Best time of day: 1.5 hours before sunset — arrive by 4:30 PM to walk the full clifftop path and photograph the temple from multiple angles before the Kecak dance crowd fills the amphitheater at 5:30 PM; the clifftop at golden hour with the Indian Ocean 70 meters below is among the most dramatic viewpoints in all of Southeast Asia
  • Sun direction: Uluwatu sits on the southwestern tip of the Bukit Peninsula. The cliff faces due west over the Indian Ocean, making it a nearly perfect sunset-facing viewpoint. In May–August, the sun sets to the northwest (azimuth ~300°), so it descends just slightly to the right of the ocean horizon viewed from the main temple — the temple itself is side-lit from the north. In December–January, sunset swings to azimuth ~240° (southwest), putting the descending sun almost directly in front of the camera from the central path — producing superb sky-and-ocean compositions. The Kecak dance amphitheater faces due west over the cliff, so performers are lit by the setting sun during the entire show.
  • Access: Pura Luhur Uluwatu, Pecatu, South Kuta, Badung Regency, southern Bukit Peninsula. Approximately 1 hour from Seminyak, 1.5 hours from Ubud by car. No public transport. Entrance fee: IDR 60,000 for foreign adults, IDR 40,000 for foreign children aged 4–12 (2025–2026 rate, updated from the earlier IDR 50,000 rate). Kecak dance ticket: IDR 100,000–150,000 (purchased separately). Open daily 7:00 AM–7:00 PM, last entry before 6:00 PM. Cash only. Sarong and sash provided at entrance. Parking: IDR 5,000–10,000. Monkey-safe: do not hold food, sunglasses, or loose items in hand near the monkey forest sections.
  • Difficulty: easy
  • Recommended settings: Cliff Sunset Silhouette: f/11, 1/500 sec, ISO 100, 50mm (expose for sky)  ·  Ocean Blue Hour: f/11, 8 sec, ISO 100, 24mm, tripod  ·  Kecak Dance Fire: f/2.8, 1/500 sec, ISO 1600, 85mm  ·  Temple Gates Portrait: f/5.6, 1/250 sec, ISO 200, 35mm

Shots to chase:

  • Walk the full loop path to find the angle where the main Meru (multi-tiered) shrine is framed against the open ocean horizon with cliff vegetation in the foreground
  • Kecak dance telephoto (135–200mm) from the back rows of the amphitheater to compress the fire, dancers, and sunset sky into a single saturated frame
  • Blue-hour long exposure from the clifftop path looking along the cliff face with the temple illuminated and orange afterglow still on the western horizon
  • Early morning (7:00–8:00 AM) when the path is nearly empty: wide-angle shot of the temple gates with mist below the cliffs and Lombok visible on clear days
  • Vertical portrait using the candi bentar split gates of Uluwatu as a framing device with the Indian Ocean visible between the stone pillars

Pro tip: The single best clifftop photography position — not the Kecak amphitheater — is the rocky promontory about 200 meters along the south side of the loop path where the main Meru shrine appears to float above the ocean. Bring a 50–135mm lens for this composition. For the Kecak dance, the western seats in the outer rows have the best ocean-backdrop framing; the close central seats give more immersive dancer shots but less sky. Monkeys are bold and fast — keep camera straps around wrist, not shoulder, and never take out food near the tree sections of the path.

Common mistake to avoid: Arriving at 5:30 PM and finding the best cliff spots already occupied by earlier visitors. Bringing a very wide lens for the Kecak dance and getting a distorted perspective of the circular performance — an 85mm or 135mm works far better for isolating the fire and dancers. Leaving immediately after sunset without staying for the blue-hour window, which transforms the lit temple against the cobalt sky.

Want this in your pocket on the street?
The full-resolution version of every spot above — with full-page hero photography, GPS maps with gold location pins, sun direction diagrams, multi-season tables, and a complete safety + packing checklist — is inside the Bali Ultimate Photographer’s Guide PDF ($47). Print it, save it offline, take it on the walk. Get the guide →

5. Lempuyang Temple — Gates of Heaven

Lempuyang Temple — Gates of Heaven Bali photography sampleSave
Lempuyang Temple — Gates of Heaven — cinematic reference from the Bali Photographer’s Guide PDF

The candi bentar (split gate) at Pura Penataran Agung Lempuyang frames a perfectly aligned view of Mount Agung — Bali’s highest and most sacred volcano — between its two symmetrical stone towers. A staff photographer uses a small mirror placed beneath the camera lens to create a reflection effect that makes it appear the gate and volcano are mirrored in a still pool of water. This single photograph has made Lempuyang one of the most recognizable images in all of travel photography. The real temple complex beyond the gate is also among Bali’s oldest and most spiritually significant, set at 600+ meters elevation on the slopes of Lempuyang mountain.

  • GPS: -8.3915, 115.6287
  • Elevation: 1,969 ft
  • Best time of day: early morning — arrive at the ticket terminal before 6:00 AM to receive a low queue number; the earliest morning light (6:30–8:00 AM) provides soft diffused illumination that reduces harsh shadows in the narrow gateway and Mount Agung often remains cloud-free before 9:00 AM
  • Sun direction: Pura Penataran Agung Lempuyang and its Gates of Heaven (candi bentar) face roughly west, meaning that the view from the gate looks west toward Mount Agung (located approximately 25 km away). Morning sun rises behind the camera (to the east), providing front-lit conditions on the gate and on Mount Agung’s face — ideal for revealing the volcano’s full profile without backlit silhouette loss. By mid-morning, the sun climbs steeply overhead and the gate interior goes into shadow while the sky brightens behind Agung — contrast becomes difficult. Overcast conditions are actually desirable here because they diffuse the harsh equatorial light and eliminate blown-out sky behind Agung.
  • Access: Pura Lempuyang, Datah, Karangasem Regency, East Bali. Approximately 2 hours from Ubud (75 km), 2.5 hours from Seminyak. Hire a private driver — no public transport. Terminal Utama Lempuyang is the mandatory starting point where tickets and shuttle buses originate. Entrance fee: IDR 100,000 per person (2024 rate). Mandatory return shuttle: IDR 50,000 per person. Sarong rental: included. Optional tip to mirror-photo photographer: IDR 10,000–20,000. Parking (scooter/car): IDR 5,000–10,000. Approximate total per person: IDR 160,000 (~$10 USD). Cash only. Queue system in operation: visitors receive a number and are called in groups of 5–10. Average wait: 2–4 hours; arrive before 6:00 AM for waits under 1 hour. Open approximately 6:00 AM–5:00 PM.
  • Difficulty: moderate
  • Recommended settings: Gates Reflection Photo: f/8, 1/250 sec, ISO 200, 24–35mm (staff photographer uses your phone/camera)  ·  Temple Environment Wide: f/8, 1/500 sec, ISO 100, 16mm  ·  Mount Agung Telephoto: f/8, 1/800 sec, ISO 100, 200–400mm  ·  Overcast Moody Gate: f/5.6, 1/125 sec, ISO 400, 35mm

Shots to chase:

  • The iconic Gates of Heaven reflection photo — let the temple photographer manage the mirror and composition; bring your own camera or phone for the shot
  • Wide-angle environmental composition stepping back from the immediate gate to include the stone Dragon Staircase (naga stairs) with the gate visible in the middle distance
  • Portrait framing using the gate as a natural symmetrical frame — stand between the two stone columns and have a companion photograph from the exterior with Agung behind
  • Atmospheric black-and-white conversion of the stone carvings on the gate pillars during overcast light emphasizing the lichen-covered relief details
  • View from Pura Lempuyang Luhur (the uppermost of the seven temples, requiring a 90-minute hike) looking back down the dragon-stair axis with Agung in the distance

Pro tip: The queue number system means that even if you arrive at opening, you may not reach the gate itself for 30–90 minutes. Use that waiting time to explore the lower temple courtyards, gardens, and Pura Pasar Agung (the first gate level). Wear red, white, or yellow clothing — these colors photograph brilliantly against the grey stone and the blue sky. There is no official online booking: any website claiming to sell advance tickets is a private tour agency at a premium. The reflection photo requires the local staff photographer — you cannot position your own mirror.

Common mistake to avoid: Arriving after 9:00 AM and facing 3–5 hour queues in full tropical heat with little shade. Expecting to photograph without waiting — the queue system is mandatory and strictly managed. Wearing dark or camouflage-pattern clothing that disappears against the stone. Missing the other six temple levels of the Lempuyang complex by leaving immediately after the gate photo.

6. Pura Ulun Danu Beratan — Lake Beratan

Pura Ulun Danu Beratan is a 17th-century water temple dedicated to the goddess Dewi Danu, built on a promontory extending into the crater lake of Lake Beratan at 1,240 meters elevation. The 11-tiered Meru shrine appears to float on the lake surface in still-water conditions — a photograph that appears on Indonesian 50,000 rupiah banknotes and is one of the most reproduced images in Indonesian tourism. The cool highland setting, often with morning mist rising from the lake and volcano-ringed horizons, creates an atmosphere fundamentally different from Bali’s better-known southern temples.

  • GPS: -8.2753, 115.1665
  • Elevation: 4,593 ft
  • Best time of day: sunrise and early morning — arrive by 6:30 AM before the mist burns off Lake Beratan; the tiered Meru pagodas appear to float on the glassy lake surface at dawn when there is no wind and morning fog wraps the surrounding Bedugul mountains; crowds arrive after 9:00 AM
  • Sun direction: Ulun Danu Beratan sits on the southwestern shore of Lake Beratan, with the main 11-tiered Meru shrine facing the open lake to the north. The sun rises to the northeast and strikes the temple’s east face from around 7:00 AM, creating warm directional light on the pagoda while the lake surface remains in soft shade. By 10:00 AM, the sun is directly overhead and the Bedugul area typically begins to cloud over — morning is almost always the best window. Afternoon is frequently overcast or rainy at this 1,200-meter elevation. In dry season (June–September) mornings are more consistently clear.
  • Access: Pura Ulun Danu Beratan, Danau Beratan, Candikuning, Baturiti, Tabanan Regency. Approximately 1.5 hours north of Seminyak, 1 hour north of Ubud. Private car or scooter required. Entrance fee: IDR 75,000 for foreign adults, IDR 50,000 for foreign children (2025 rate; card or cash accepted). Parking: IDR 3,000 (scooter), IDR 5,000 (car). Open daily 7:00 AM–7:00 PM. Ceremonies may close certain sections temporarily.
  • Difficulty: easy
  • Recommended settings: Dawn Reflection Long Exposure: f/11, 1/4 sec, ISO 100, 50mm, tripod  ·  Mist Atmospheric: f/5.6, 1/250 sec, ISO 400, 85mm  ·  Full Temple Complex Wide: f/8, 1/500 sec, ISO 100, 24mm  ·  Overcast Flat Light: f/8, 1/125 sec, ISO 400, 35mm

Shots to chase:

  • Dawn long-exposure from the garden shoreline with the 11-tiered Meru perfectly reflected in glass-still lake water, with morning mist at the base
  • Telephoto compression (135–200mm) from the western garden path where the full pagoda lineup — a smaller 3-tiered Meru and the large 11-tiered shrine — stacks into a single layered composition
  • A small traditional canoe being paddled across the lake in the foreground with the temple cluster in the middle distance and Bedugul’s forest-covered slopes behind
  • Looking through the ornate Kori Agung (decorated inner gate) toward the lake with the Meru visible beyond the gate’s intricate stone carvings
  • Aerial drone shot from directly above the lake surface capturing the temple promontory, the garden gardens, and the full circular crater lake with its forested rim

Pro tip: The best reflection shot requires still lake water — this occurs almost exclusively in the first hour after dawn, before morning breezes begin. Arrive before the temple gate opens (7:00 AM) and photograph from the public lakeshore path that runs along the western boundary before entering. The temple is closed when certain major ceremonies are scheduled (check with your accommodation the day before). A small wooden canoe (jukung) can sometimes be arranged informally with local fishermen near the northwest corner of the lake for a water-level perspective.

Common mistake to avoid: Visiting in the afternoon and finding heavy cloud cover, rain, and zero reflections — Bedugul is Bali’s wettest highland area and afternoons are almost always overcast. Shooting only from the garden path and missing the exterior lakeshore view from the western road. Not bringing a tripod and getting blurred shots of the reflection in pre-dawn low light.

7. Mount Batur Sunrise Hike

Mount Batur is Bali’s most active volcano — its last major eruption was in 2000 — and the 1,717-meter summit offers one of the most accessible volcano sunrise experiences in Southeast Asia. The classic image is a silhouette of trekkers against an intensely colored sky with the still, black-surfaced Lake Batur 700 meters below and Mount Agung’s perfect cone rising from the clouds on the horizon. Active fumaroles near the crater rim vent sulfurous steam that catches and refracts morning light into painterly columns. The entire hike is non-technical and accessible to any reasonably fit person.

  • GPS: -8.2403, 115.3775
  • Elevation: 5,614 ft
  • Best time of day: summit at first light — guides position trekkers to reach the crater rim approximately 15–20 minutes before sunrise (~5:45–6:00 AM), which requires departing the base village (Toya Bungkah or Pura Jati) at 3:30–4:00 AM; dry season (April–October) offers the most reliably cloud-free sunrises
  • Sun direction: Mount Batur’s summit at 1,717 meters sits within a caldera on Bali’s northern highlands. Sunrise azimuth in April–September is approximately 75–85° (east-northeast). At the summit, the view at sunrise encompasses: Lake Batur glowing in the caldera below, Mount Abang (2,153 m) to the southeast, Mount Agung (3,142 m) further south rising above clouds, and on clear days the Lombok strait and Mount Rinjani beyond. The sun rises behind the camera for compositions looking west across the caldera toward the mountains — the caldera and lake catch the first orange light spectacularly. Smoke and steam from Batur’s active vents are often backlit by sunrise to create atmospheric plumes.
  • Access: Toya Bungkah base village, Kintamani, Bangli Regency, North-Central Bali. Approximately 1.5–2 hours from Ubud by car. A licensed guide is mandatory (enforced by the Batur guide association). Tour packages: IDR 400,000–600,000 per person for a standard shared sunrise trek (includes guide, headlamp, trekking poles, simple summit breakfast, Kintamani national park entry fee of IDR 100,000–150,000, hotel pickup from Ubud-area). Private hike: IDR 650,000–850,000. Jeep sunrise tour (no hiking): IDR 800,000–1,200,000. Park entrance fee (Kintamani): IDR 100,000–150,000 (often included in tour price). Total hike duration: approximately 2 hours ascent, 1.5 hours descent. Distance: ~4–5 km round trip.
  • Difficulty: moderate
  • Recommended settings: Pre Dawn Blue Hour: f/2.8, 20 sec, ISO 1600, 24mm, tripod (star trails over caldera)  ·  Sunrise Silhouette: f/8, 1/250 sec, ISO 100, 35mm (expose for sky)  ·  Steam Vent Backlit: f/8, 1/500 sec, ISO 200, 85mm  ·  Lake Batur Wide: f/11, 1/250 sec, ISO 100, 16mm

Shots to chase:

  • Silhouette of 2–3 trekkers standing on the crater rim against the full sunrise sky, with Lake Batur catching early orange light in the valley below
  • Pre-dawn star trail composite — set up 60–90 minutes before sunrise with a wide lens at f/2.8 for 10–15 second exposures showing Milky Way over the caldera
  • Steam vent telephoto (85–200mm) with the active fumarole’s plume backlit by the rising sun to create glowing golden smoke columns
  • Mount Agung framed beyond steam plumes with its snow-free summit rising above the cloud layer at 3,000 meters elevation — best in dry season before 7:00 AM
  • Looking down the western slope of Batur with the black 2000-era lava field filling the middle ground and Lake Batur’s silver surface beyond

Pro tip: Request your guide to pause at the black lava field section on the ascent for a headlamp-lit pre-dawn composition of the glowing trail against the stark volcanic terrain. The summit is divided into several sectors — the highest point (western crater rim) and a lower flat section; the lower section near the small summit warung has the clearest south-facing view toward Agung. Summit temperature can drop to 10–15°C before sunrise — bring a thermal layer. Budget tours use large shared groups of 20+ people; private guides allow personal pacing and photography stops.

Common mistake to avoid: Booking the cheapest budget tour and being forced to keep pace with a large group that cannot stop for photography. Expecting summit conditions in rainy season (November–March) — cloud is almost guaranteed and the view is often completely obscured. Not bringing a headlamp and arriving without light before dawn. Leaving without waiting for the caldera to fill with light after the initial sunrise — the 30 minutes after the sun clears the horizon are sometimes more photogenic than the sunrise itself.

8. Sekumpul Waterfall

Sekumpul is widely considered the most beautiful waterfall in Bali — a group of six separate streams plunging 80 meters down a jungle-draped cliff face into a single palm-filled canyon. Unlike single-drop waterfalls, Sekumpul’s multi-stream character creates a complex, layered composition of independent white columns against a lush green backdrop. The 30–45 minute hike down through rice paddies, bamboo groves, and river crossings to the base is a photographic journey in itself. The Hidden Waterfall — a 10-minute walk further — is often as spectacular as Sekumpul and sees fewer people.

  • GPS: -8.1453, 115.1615
  • Elevation: 820 ft
  • Best time of day: early morning — arrive at the official ticket booth by 7:30–8:00 AM to photograph the falls before crowds arrive; the sun enters the narrow canyon and directly illuminates the falls for approximately 45 minutes around 9:00–10:00 AM in dry season, creating a dramatic top-lit spotlight effect
  • Sun direction: Sekumpul’s multi-fall canyon runs roughly north-south with the main falls facing east-northeast. The canyon walls are high and steep, keeping the falls in shade for most of the day. In dry season (June–September), the sun is high enough to clear the eastern canyon rim from approximately 9:00 AM and provide 45–60 minutes of direct light on the main falls face before the angle becomes too high. Morning is also the optimal wind-free period for long-exposure compositions with silky water. The Hidden Waterfall, a 10-minute walk south from the main falls, faces more directly east and catches better morning light from 8:00 AM.
  • Access: Desa Lemukih or Desa Sekumpul, Buleleng Regency, North Bali. Approximately 2.5 hours from Ubud, 1 hour from Singaraja by car. Hire a private driver or rent a scooter. Mandatory guide system in place at the official entrance. Entrance options: (1) View only from upper platform: IDR 20,000 per person; (2) Medium trekking — hike down, visit Sekumpul and Hidden Waterfall with guide: IDR 125,000–150,000 per person; (3) Long trekking — all three falls including Fiji Waterfall with guide: IDR 200,000–250,000 per person. Medium trekking is the recommended option. Beware fake registration checkpoints several km before the official entrance — ignore these and proceed to the official booth near Spice Restaurant (GPS: -8.1453, 115.1615). Open 8:00 AM–5:00 PM.
  • Difficulty: moderate
  • Recommended settings: Long Exposure Silky Water: f/11, 1 sec, ISO 100, 24mm, tripod  ·  Wide Falls Environmental: f/8, 1/30 sec, ISO 200, 16mm  ·  Individual Falls Detail: f/8, 1/500 sec, ISO 400, 85mm (freeze individual streams)  ·  Sunlit Spotlight: f/8, 1/250 sec, ISO 100, 35mm (9:00–10:00 AM direct sun)

Shots to chase:

  • Classic tripod long-exposure (1–3 seconds) from the valley floor showing all six streams as smooth white ribbons against the dark green canyon walls
  • Wide-angle composition (16mm) from the base of the falls with a shallow foreground river pool reflecting the falls in the lower quarter of the frame
  • The canyon entrance shot — hiking down the last switchback where the full 80-meter multi-stream panorama is revealed for the first time through a frame of overhanging palms
  • Slow shutter sunrise shot during the 9:00 AM sunlight window when a single spotlight of direct sun illuminates the central streams while the canyon walls remain in shade
  • Hidden Waterfall composition with the narrow 20-meter single-stream fall catching morning backlight through the jungle canopy

Pro tip: Tell your driver to navigate to ‘Spice Restaurant Sekumpul’ on Google Maps — this places you at the correct official entrance and avoids the scam checkpoints. A private driver who waits (~IDR 500,000 for the day) allows efficient timing. The medium trekking package guide will carry your heavy gear down and back up — the descent is steep and the return ascent at midday is hot. Wear water shoes: there are at least 3 river crossings that require wading to shin depth. Rainy season (November–March) increases waterfall volume but the path becomes very slippery.

Common mistake to avoid: Stopping at one of the fake ‘registration’ checkpoints on the access road and paying an unauthorized fee for an unnecessary guide. Visiting at midday when the canyon is fully shaded, hot, and crowded with tour groups. Doing only the ‘view only’ option from the upper platform — the base-level perspective is incomparably better. Not bringing water shoes and ruining regular footwear in the river crossings.

9. Tegenungan Waterfall

Tegenungan Waterfall Bali photography sampleSave
Tegenungan Waterfall — cinematic reference from the Bali Photographer’s Guide PDF

Tegenungan is the most accessible major waterfall in Bali — a 40-meter cascade in a jungle gorge just 30 minutes from central Ubud. Unlike the remote northern waterfalls, it is easily combined with an Ubud day trip. The falls feed a swimmable pool, a panoramic upper viewpoint, and several distinctive Instagram perches including a bird-nest swing above the pool. The nearby glass bridge (IDR 250,000) offers an aerial view of the canyon. Despite heavy visitor traffic, early-morning sessions can produce outstanding landscape images before the crowd arrives.

  • GPS: -8.5754, 115.2825
  • Elevation: 427 ft
  • Best time of day: early morning (7:00–9:00 AM) when the eastern-facing falls catch direct morning sunlight, creating a bright foreground against the shadowed canyon walls; mid-morning (9:00–10:00 AM) the sun angle provides direct illumination on the falls face — the peak photography window
  • Sun direction: Tegenungan’s single-drop falls face east-southeast, meaning the sun strikes the falls’ face directly from approximately 8:00–10:30 AM in dry season. After 11:00 AM the sun climbs overhead and the falls move into partial shade from the canyon walls. Late afternoon (3:00–5:00 PM) brings warm backlight from the west that illuminates the surrounding jungle canopy and mist above the pool. The Blangsinga entrance on the opposite (west) side of the canyon provides a backlit composition of the falls, which can be striking in late afternoon.
  • Access: Kemenuh, Sukawati, Gianyar Regency, approximately 6 km south of Ubud center (25–30 minutes by car). Hire a Grab, private driver, or scooter. Main entrance: Tegenungan entrance, Jalan Raya Tegenungan. Entrance fee: IDR 20,000–30,000 per person (2024–2025; some visitors report IDR 30,000 in 2024 per TripAdvisor). Additional IDR 10,000 for parking (car). Open daily 7:00 AM–6:00 PM. Premium entry via OMMA Day Club (restaurant adjacent): dining with no minimum spend grants elevator access. Lockers and changing rooms available on-site.
  • Difficulty: easy
  • Recommended settings: Morning Long Exposure: f/11, 1/2 sec, ISO 100, 24mm, tripod  ·  Falls Freeze: f/5.6, 1/500 sec, ISO 400, 50mm  ·  Pool Reflection: f/8, 1/125 sec, ISO 200, 16mm  ·  Mist Atmosphere: f/5.6, 1/60 sec, ISO 400, 35mm

Shots to chase:

  • Classic tripod long-exposure from the central stone platform at the pool base with silky 0.5–1 second water blur and the full falls height in the frame
  • Wide-angle low composition from the pool’s edge looking up at the falls with water spray creating rainbow diffraction in the 9:00–10:00 AM direct sunlight
  • Upper viewpoint composition from the observation deck showing the full pool-and-falls ecosystem with jungle canopy framing both sides
  • Blangsinga (west) entrance crossing shot — photograph the falls from the opposite bank where they appear against the morning sky rather than the canyon wall
  • Long-exposure of the jungle pool at dawn with mist rising from the water surface before visitors arrive

Pro tip: The 200+ stairs to the pool base are steep — arriving early keeps the stairway empty for unobstructed shots and avoids the reverse crowd on the ascent. The OMMA Day Club restaurant on the upper terrace provides elevator access to a mid-level platform for guests who order food or drink — this angle is often superior to the main base composition and largely unknown to budget visitors. Rainy season (December–February) dramatically increases water volume, making the falls thunderously powerful — use a higher shutter speed (1/1000+) to freeze the torrent and use a lens cloth to manage spray on the front element.

Common mistake to avoid: Arriving between 11:00 AM and 3:00 PM when the site is at peak tourist density and the falls are in partial shade. Expecting solitude — even at 7:00 AM there will be 20–30 other photographers present. Using only a smartphone without a neutral density filter, which makes it impossible to achieve long-exposure waterfall effects in daylight.

Want this in your pocket on the street?
The full-resolution version of every spot above — with full-page hero photography, GPS maps with gold location pins, sun direction diagrams, multi-season tables, and a complete safety + packing checklist — is inside the Bali Ultimate Photographer’s Guide PDF ($47). Print it, save it offline, take it on the walk. Get the guide →

10. Kelingking Beach — T-Rex Cliff Viewpoint

Kelingking Beach is the most iconic viewpoint in Nusa Penida and among the top five most photographed places in all of Indonesia. The limestone peninsula is eroded into a shape uncannily resembling a T-Rex dinosaur skull — a massive curved promontory with a sheer 200-meter drop on all sides plunging to a crescent of pure white sand and intensely turquoise water. The geological formation, the color contrast of the ocean, and the sheer scale of the cliff create a composition with no equivalent anywhere in Southeast Asia.

  • GPS: -8.7506, 115.4747
  • Elevation: 387 ft
  • Best time of day: late afternoon to sunset (3:00–6:00 PM) — the beach lies in the shadow of the cliff in the morning, but afternoon light from the west illuminates the turquoise water and the T-Rex cliff face beautifully; arrive in the late morning to beat peak crowds (11:00 AM–3:00 PM) and stay into golden hour
  • Sun direction: Kelingking is on the west coast of Nusa Penida, with the viewpoint cliffside facing roughly northwest over the Indian Ocean. The beach cove below faces west-northwest, so it receives afternoon sun from around 2:00 PM until sunset. Morning (7:00–11:00 AM) the entire cove is in deep shadow from the eastern cliff face — the cliff itself appears in flat light and the beach water appears dark. From 1:00 PM onward, the sun moves west and the turquoise water begins to light up spectacularly. Sunset over the open ocean is visible from the clifftop but the sun sets to the right (north-northwest) of the T-Rex formation rather than directly behind it.
  • Access: Kelingking Beach, Bunga Mekar, West Nusa Penida, Klungkung Regency. Nusa Penida is a separate island reached by fast boat from Sanur Beach: approximately 30–45 minutes, tickets IDR 150,000–200,000 one-way. From Toyapakeh harbour (Nusa Penida): 45–60 minutes by scooter (IDR 70,000–100,000/day rental) or private car (IDR 500,000–700,000/day with driver). Nusa Penida island tourism fee: IDR 25,000 per person (paid at port or via e-ticket, introduced 2024). Kelingking Beach entrance: IDR 10,000–25,000 (varies by local fee) plus parking IDR 5,000–10,000. Total approximate cost per person for a day trip from Bali including fast boat: IDR 500,000–800,000. No trail fee for the steep cliff descent to the beach. Descent: moderate-difficult, 200–300 meters of steep stairs/path, 45–60 minutes one way.
  • Difficulty: moderate
  • Recommended settings: Cliff Overview Wide: f/8, 1/500 sec, ISO 100, 16–24mm  ·  Turquoise Water Telephoto: f/8, 1/1000 sec, ISO 100, 85–200mm (compresses the water color)  ·  Golden Hour Cliff: f/8, 1/250 sec, ISO 100, 35mm  ·  Beach Level Long Exposure: f/11, 2 sec, ISO 100, 24mm, tripod (from beach base)

Shots to chase:

  • The definitive full-T-Rex composition: position at the south end of the viewpoint fence where the entire cliff peninsula appears in profile with the white sand beach and turquoise cove below
  • Person-for-scale shot: have a companion stand on the cliff edge path with the full peninsula behind them to convey the jaw-dropping scale of the formation
  • Telephoto (135–200mm) compression of the turquoise water from the clifftop where the color appears almost impossibly saturated due to the shallow depth and white sand reflection
  • From the beach itself (after the cliff descent): wide-angle looking back up at the T-Rex cliff with the surf in the foreground — a completely different perspective not possible without the hike
  • Aerial drone composition directly overhead looking down at the white sand cove nestled within the turquoise water, with the cliff shadow visible

Pro tip: The new mechanized elevator system (installed 2024) on part of the descent path makes the beach more accessible but the full natural path remains available. The beach is in shadow before 1:00 PM — descend to the beach after 2:00 PM for the best water color. Nusa Penida day trips typically rush visitors through 3–4 sites in a single day; allocate at least 2 hours at Kelingking to allow time for the descent, beach time, and re-ascent. The viewpoint fence position for the T-Rex profile shot is approximately 50 meters south of the main entrance parking area, not at the obvious central platform.

Common mistake to avoid: Visiting between 11:00 AM and 2:00 PM at peak-crowd and poor-light times. Photographing the T-Rex cliff from the central platform where the peninsula appears foreshortened — the 50-meter walk south along the fence provides the true profile view. Booking a group day tour that allocates only 30–45 minutes at the site, preventing the beach descent.

11. Diamond Beach — Nusa Penida

Diamond Beach is a natural amphitheater — a small crescent of fine sand enclosed on three sides by sheer 100-meter limestone cliffs, accessible only via a spectacular wooden staircase that descends the cliff face in tight switchbacks. From the clifftop, the beach appears as a jewel-blue lagoon between white cliff walls. The staircase itself is now one of Bali’s most iconic photography subjects, frequently photographed as a vanishing-point perspective of switchbacks disappearing toward the turquoise water far below. The combination of cliff geology, staircase architecture, and Caribbean-quality water color makes Diamond Beach visually unique in Indonesia.

  • GPS: -8.7292, 115.5583
  • Elevation: 354 ft
  • Best time of day: mid-morning to early afternoon (9:00 AM–2:00 PM) — east Nusa Penida faces the Flores Sea and the beach receives morning light earlier than the west-coast sites; the wooden staircase and the turquoise cove are at their most dramatic when the morning-to-midday sun illuminates the cliff faces and the shallow water turns vivid cobalt
  • Sun direction: Diamond Beach is on the east coast of Nusa Penida, in a northeast-facing cove. The sun rises over the Flores Sea to the east and illuminates the beach from approximately 7:00 AM. The dramatic limestone staircase descends a northwest-facing cliff wall, which catches good light from mid-morning. By mid-afternoon the cliff shade encroaches on the beach. Aerial drone shots overhead are best from 9:00 AM–noon when the sun is high enough to saturate the shallow turquoise water but still angled enough to retain some cliff shadow texture.
  • Access: Diamond Beach, East Nusa Penida, Klungkung Regency. Reach Nusa Penida by fast boat from Sanur (45 min, IDR 150,000–200,000). From Toyapakeh: approximately 1 hour drive east along the coast to Diamond Beach. Both Diamond Beach and Atuh Beach share one parking area. Entrance fee: IDR 25,000–35,000 per person (as of 2025–2026 from multiple sources), plus IDR 5,000 parking. An additional IDR 50,000 is charged for 3-minute photo access on the iconic wooden staircase. Nusa Penida island tourism fee: IDR 25,000 (separate, paid at port). Cash only. No facilities on the beach itself; nearest food at the car park level.
  • Difficulty: moderate
  • Recommended settings: Staircase Vanishing Point: f/8, 1/500 sec, ISO 100, 24mm (from top of staircase looking down)  ·  Beach Level Wide: f/8, 1/1000 sec, ISO 100, 16–24mm  ·  Cliff Framing Telephoto: f/8, 1/500 sec, ISO 100, 85mm  ·  Drone Overhead Blue: f/8, 1/1600 sec, ISO 100, drone (9:00–11:00 AM)

Shots to chase:

  • Top-of-staircase perspective: position at the first landing looking down the full zig-zag staircase with the turquoise beach visible at the vanishing point — one of the most graphic compositions in Bali
  • Beach-level wide shot looking back up at the cliff walls with the wooden staircase visible as a thin white line against the grey limestone
  • Drone aerial looking straight down at the cove: the shallow water gradients from white sand to aqua to deep blue in visible bands — a natural color chart
  • Silhouette of a person standing on the staircase at sunrise with the sky behind them and the dark cliff in shadow beneath — low sun angle at 7:00–7:30 AM
  • Cliff-face framing shot: from the beach, photograph through the natural rock arch that partially frames the northern cliff face, adding layered depth

Pro tip: The IDR 50,000 staircase photo fee buys you only 3 minutes — pre-compose your shots mentally before reaching the staircase so you do not waste time. The beach is usually less crowded than Kelingking; arriving before 10:00 AM provides near-solitude at the beach base. Diamond Beach is most efficiently visited as part of an east Nusa Penida day combining Atuh Beach (5 minutes’ drive), the Rumah Pohon Treehouse, and Thousand Islands Viewpoint — all accessible from the same parking area.

Common mistake to avoid: Not factoring in the 3-minute limit on the staircase photography fee — arriving without pre-planned shots and wasting the entire time deciding. Visiting later in the day when afternoon shade from the western cliff wall darkens the cove. Attempting the descent in flip-flops — the wooden steps are steep and damp; closed shoes with grip are essential.

12. Jatiluwih Rice Terraces — UNESCO Subak Landscape

Jatiluwih (‘truly marvelous’ in Balinese) is Indonesia’s most extensive and best-preserved traditional rice terrace landscape — 600 hectares of working paddies sustained by the 1,000-year-old subak cooperative irrigation system that earned the site UNESCO World Cultural Landscape status in 2012. Unlike the more intimate terraces at Tegallalang, Jatiluwih provides vast open-horizon vistas in which the terraces stretch from the volcanic peaks of Batukaru (2,276 m) in the north to the southern coastal plain, creating a genuinely cinematic scale. The relative absence of swing platforms and tourist infrastructure preserves an authentic agricultural atmosphere.

  • GPS: -8.3696, 115.1333
  • Elevation: 2,559 ft
  • Best time of day: early morning (6:00–8:30 AM) or late afternoon (4:00–6:30 PM) at golden hour — the terraces face a broad southern panorama and receive beautiful low-angle light from both the eastern and western ends of the day; the elevation (700 m) keeps temperatures 5–7°C cooler than Ubud
  • Sun direction: Jatiluwih’s 600-hectare terrace system is oriented across a broad south-facing hillside in the foothills of Batukaru mountain. The terraces face south-southwest, meaning they are lit from the east in morning and from the west-northwest in afternoon. Morning golden hour (6:00–8:00 AM) provides dramatic side-angled light that carves deep shadows along every terrace bund (earthen wall), emphasizing the stepped geometry. Late afternoon golden hour (4:30–6:30 PM) provides warm front-lighting from the west as the sun descends toward the Tabanan coast — this window often produces vivid orange-lit water in flooded fields. Jatiluwih is a working farm, so the terrace appearance varies with the rice cycle.
  • Access: Jatiluwih, Penebel, Tabanan Regency, Central Bali. Approximately 1.5–2 hours from Seminyak, 1.5 hours from Ubud, 40 minutes from Ulun Danu Beratan by car. Private car or scooter required. Mandatory checkpoint entrance fee: IDR 75,000 per person (2025), applied to all visitors including those driving through. Domestic visitors pay less. Parking: small fee at various points. Open daily 6:00 AM–7:00 PM. Five self-guided walking trails (1.5–5 km) are marked from the main road. No tripod or drone permit required for personal use; commercial permits require consultation with Jatiluwih Village administration.
  • Difficulty: easy
  • Recommended settings: Golden Hour Wide Landscape: f/11, 1/250 sec, ISO 100, 16–24mm  ·  Terrace Detail Side Light: f/8, 1/500 sec, ISO 100, 50mm  ·  Flooded Reflection: f/11, 1/30 sec, ISO 100, 35mm, tripod  ·  Batukaru Background: f/11, 1/500 sec, ISO 100, 50–85mm (clear morning only)

Shots to chase:

  • Panoramic wide-angle composition from Restaurant Warung Sari Jatiluwih (at 4.5 km on the main terrace road) where the terraces sweep from foreground to horizon with Batukaru framing the upper left corner
  • Low-angle shot in a flooded field period (planting season: ~October and ~April) using a still paddy as a foreground mirror reflecting the sky and terraces above
  • Lone farmer in traditional attire — often visible in the early morning hours — photographed with a long lens (200mm) against the vast terrace backdrop
  • Golden-hour timing on the main walking trail with warm side-light casting terrace bund shadows across the stepped hillside — best from path section 2–4 km mark
  • Aerial drone shot from 100–200 meters altitude capturing the full curve of the hillside, the irrigation channels visible as silver lines, and Batukaru in the background

Pro tip: The rice cycle at Jatiluwih runs on a staggered schedule through the subak system — different sections are at different stages simultaneously, meaning you will almost always find both green and golden paddies in the same scene. The terraces look brightest green approximately 3–5 weeks after planting (usually around November and May for the two main cycles); they turn gold around harvest (approximately March and August). The main walking trail passes several small warungs (traditional cafes) — take a break at Restaurant Warung Bonjol (km 3.2) for the best terrace panorama from a seated position.

Common mistake to avoid: Arriving, paying the entrance fee at the checkpoint, and then only viewing the terraces for 10 minutes from the car window before driving on — Jatiluwih requires at least a 2-hour walk to appreciate at photography depth. Visiting during harvest when the fields are bare brown stubble. Confusing the entry fee with permission to access specific private farm paths — stay on designated public trails to avoid disrupting active farming.

13. Campuhan Ridge Walk — Ubud

The Campuhan Ridge Walk is Ubud’s most beloved photographic trail — a narrow paved path along the spine of a ridge that separates two river valleys, offering 180-degree jungle panoramas from a car-free environment just 10 minutes from the center of Bali’s cultural capital. The path is lined with wild grass, coconut palms, and occasional rice terraces, with Mount Agung appearing as a distant pyramid on clear mornings. The complete absence of traffic noise, the sound of both rivers below, and the rare open-sky ridge exposure create an experience distinctly different from Bali’s more famous terraced landscapes.

  • GPS: -8.5061, 115.253
  • Elevation: 564 ft
  • Best time of day: sunrise (5:45–7:30 AM) — arrive at the trailhead 20 minutes before sunrise for the best soft light and the fewest people; the ridge runs roughly north-south and catches warming light from both east (morning) and west (evening); dry season provides clearer views of Mount Agung on the eastern horizon
  • Sun direction: The Campuhan Ridge runs north-south with the valley floor of the Wos River to the east and the Cerik River to the west. Sunrise (azimuth ~75° in dry season) lights the eastern valley face and the palm canopy from behind the camera when walking north, producing clean front-lit compositions of the rolling grass hills and valley jungle below. The grassy ridge path faces east and northeast, making dawn the prime photography window. Sunset (azimuth ~285° in June) illuminates the western valley from behind the camera when facing south, turning the grass golden at 5:00–6:30 PM. Mount Agung is visible to the east-northeast on clear dry-season mornings, appearing at the end of the ridge axis.
  • Access: Trailhead: Jalan Raya Ubud, near Warwick Ibah Luxury Villas, central Ubud (look for ‘Going to the Hill’ sign). Walk or take a short Grab from Ubud Palace (10–15 minutes on foot). Free entrance — no ticket, no gate. Distance: 2 km one way (4 km return). Duration: 1.5–2 hours return at walking pace with photography stops. No facilities on the ridge; nearest cafes at Bangkiang Sidem village (1.5 km end). Parking: informal spots near Pura Gunung Lebah or Warwick Ibah driveway. Open 24 hours (no lighting — do not attempt after sunset without a torch). Drones permitted for personal use; no formal permit required as of 2025.
  • Difficulty: easy
  • Recommended settings: Sunrise Golden Grass: f/5.6, 1/500 sec, ISO 100, 50mm  ·  Wide Valley Panorama: f/8, 1/500 sec, ISO 100, 16mm  ·  Mount Agung Telephoto: f/8, 1/800 sec, ISO 100, 200–400mm (clear mornings only)  ·  Drone Ridge Aerial: drone, f/8, 1/1000 sec, ISO 100, 9:00 AM (after crowds thin)

Shots to chase:

  • Drone shot looking north along the full ridge with the path visible as a thin white line splitting the valley — the most technically definitive view of Campuhan’s geography
  • Sunrise shot from the high grass section (approximately 1 km from the trailhead) with Mount Agung’s pyramid visible at the end of the ridge axis on a clear morning
  • Lone figure walking the ridge path at golden hour with the valley mist below and the ridge path receding toward the horizon — conveying the sense of a walk above the clouds
  • Pura Gunung Lebah temple at the trailhead in the final minutes before sunrise when the stone carvings glow with warm pre-dawn light before the path crowds build
  • Telephoto compression (200mm) of the rolling grass ridgeline with individual palms at intervals creating a natural rhythm of vertical punctuation marks across the horizontal ridge

Pro tip: Arrive at the trailhead by 5:30 AM (20 minutes before sunrise) for guaranteed solitude on the first 500 meters of the ridge. The path has zero shade after 8:30 AM and temperatures rise rapidly — sunset and sunrise are genuinely the only viable photography windows. The best composition for the drone aerial is from the highest point of the ridge at approximately 1.2 km from the south trailhead, looking due north. The Pura Gunung Lebah temple at the trailhead entrance is beautifully photogenic at dawn before the crowds arrive — spend 5–10 minutes there before ascending.

Common mistake to avoid: Visiting between 9:00 AM and 4:00 PM when the exposed path is brutally hot, the light is flat, and the path is crowded with tour groups. Expecting rice terraces along the ridge — Campuhan’s primary visual elements are rolling grass hills and jungle valleys, not terraces. Not bringing a hat, sunscreen, and water — the path has no shade and no water sources for the entire 2 km.

14. Sanur Beach — Sunrise Boardwalk

Sanur is universally recognized as Bali’s best sunrise beach. Its east-facing orientation, protected reef (which tames the waves and creates reflective tidal pools), and consistent clear-sky mornings in dry season create near-perfect conditions for sunrise photography. The beach is lined with traditional Balinese gazebos and decorated wooden outrigger fishing canoes pulled up on the reef flat — foreground elements that give the sunrise images cultural depth rather than just sky-and-sea. On exceptionally clear mornings, both Mount Agung to the north and Mount Rinjani (3,726 m) on Lombok to the east are simultaneously visible.

  • GPS: -8.7028, 115.2618
  • Elevation: 5 ft
  • Best time of day: sunrise and the 20 minutes immediately before (5:15–6:30 AM) — Sanur is Bali’s premier sunrise beach, east-facing across the Lombok Strait with Mount Agung visible to the northeast and the islands of Nusa Penida and Nusa Lembongan on the southern horizon; traditional fishing outriggers (jukung) are best photographed at low tide when they rest on exposed reef sand
  • Sun direction: Sanur Beach faces due east along Bali’s southeastern coast. Sunrise azimuth ranges from approximately 63° (June) to 117° (December), meaning the sun rises directly over the Lombok Strait and Nusa Penida — almost perfectly in front of the camera for east-facing compositions. At low tide, the reef flat extends 200–400 meters from the beach, allowing photographers to position on dry sand far out toward the water with reflective tidal pools as foreground. The traditional gazebos (bale) along the beach boardwalk provide compositional framing elements. Mount Agung (3,142 m) is visible to the north-northeast and catches the first pre-sunrise alpenglow before the sky color builds.
  • Access: Sanur Beach boardwalk, Sanur Kaja / Sanur Kauh, South Denpasar. Free public access 24 hours. Best access points for sunrise photography: Jalan Pantai Karang (central Sanur, near the Museum Le Mayeur). Parking at several beach entrances: IDR 5,000–10,000. No entry fee for the beach or boardwalk. Fast boat terminal to Nusa Penida and Nusa Lembongan is at the northern end of the Sanur boardwalk (useful as a trip combination). Grab and Gojek ride-shares serve Sanur from Ubud (45 min) and Seminyak (30 min).
  • Difficulty: easy
  • Recommended settings: Sunrise Long Exposure: f/11, 2 sec, ISO 100, 24mm, tripod (silky tidal pool reflection)  ·  Fishing Boat Golden Hour: f/8, 1/250 sec, ISO 100, 50mm  ·  Mount Agung Telephoto: f/8, 1/500 sec, ISO 100, 200–400mm  ·  Gazebo Silhouette: f/8, 1/500 sec, ISO 100, 35mm (expose for sky)

Shots to chase:

  • Long-exposure composition from a tidal pool on the reef flat, using the reflected sunrise colors in the water as the primary foreground element with silhouetted gazebos at the mid-ground
  • A traditional jukung (outrigger) silhouetted exactly against the rising sun disk, with Mount Agung’s outline visible in the far background — a quintessential Bali image
  • Telephoto (300–400mm) of Mount Agung pre-dawn, when alpenglow turns its summit orange-pink while the rest of the sky is still dark blue
  • Wide-angle shot incorporating the full arc of the beach boardwalk curved into the distance with multiple fishing boats and the sunrise sky simultaneously
  • Wading fishermen shot at low tide — locals often wade the reef flat before dawn; photographed with a 85mm at f/2.8 creates an environmental portrait with the sunrise bokeh behind them

Pro tip: Check tide tables before going — low tide at sunrise gives access to the reef flat 200–300 meters beyond the beach, dramatically increasing the range of compositions. Arrive 20–25 minutes before calculated sunrise to set up on the reef flat and establish your composition before the sky begins to color. The Jalan Pantai Karang access point (central Sanur) places you in front of 4–5 gazebos and typically 2–3 fishing boats — the best single starting point. During peak dry season (July–September), bring an extra memory card — the quality of the light justifies shooting extensively.

Common mistake to avoid: Arriving exactly at sunrise and missing the 10–15 minutes of pre-dawn sky color that often surpasses the actual sunrise in dramatic pink-to-orange gradients. Shooting only from the boardwalk/beach sand and missing the expanded reef-flat vantage points available at low tide. Not checking tide tables: high tide at sunrise covers the reef flat completely, limiting all compositions to the beach itself.

When to photograph Bali: a year-round breakdown

Bali is photogenic every month of the year — but the conditions differ radically by season. Here is what to expect:

April–June (dry season onset, lush post-rain green, thinner crowds than peak July–August) and September–October (dry season end, vivid rice terraces, clear sunrise skies over Mount Agung)

Photographer safety in Bali: read this

City photography has its own risks: gear visibility, neighborhood timing, traffic, weather. Read the briefing before you go.

  • Gear visibility: Use a discreet bag with no obvious camera branding. Keep a body strapped under a jacket on transit.
  • Neighborhood timing: Pre-dawn and post-sunset shoots reward early scouting. Cross-reference each location with current local guidance and choose well-lit transit routes.
  • Situational awareness: Headphones out. One eye in the viewfinder, one on the street.
  • Traffic: Bridges, medians, and bike lanes are not setup zones. Shoot from sidewalks and pedestrian areas only.
  • Weather: Summer storms move quickly; winter cold drains batteries. Layer up, keep gear dry, watch for ice on cobblestones at blue hour.

The complete safety briefing is inside the Bali Photographer’s Guide PDF.

Take this guide into the city

This post is the complete field reference. The Bali Ultimate Photographer’s Guide PDF is the field-deployable version: full-page resolution hero photography, GPS maps with gold pins for every location, multi-season shooting calendars, gear notes per location, sun-angle diagrams, the full city safety briefing, and a print-ready editorial layout in Framehaus black and gold. Save it offline. Print it. Take it on the walk.

Bali Ultimate Photographer’s Guide
Downloadable PDF · 14 GPS-mapped locations · Multi-season calendar · City safety briefing · Packing checklist

Get the Bali guide — $47

Combo Deal

Get the Bali Guide + Preset Pack

Photograph it. Edit it. Done.

$66
$54
Save $12
PDF Guide Every spot, GPS, golden hour
Preset Pack 20 Lightroom presets
Book your tours & experiences in Bali

All links go to Viator (a TripAdvisor company), the world’s largest marketplace for guided experiences. Tagged as affiliate per FTC.

Also on Amazon: gear that helps with this technique

Quick Amazon shortcuts to the gear most useful for this kind of shot. Use them if Prime shipping or Amazon credit makes more sense than B&H. As an Amazon Associate ShutYourAperture earns from qualifying purchases.

Take Bali home in your pocket.

Every shot location, every angle, every time of day worth shooting. Printable PDF + GPS-tagged map.

Instant download. Works on phone, tablet, and printed.

Continue reading

← Back to International Cities Photography Guides

Related guides nearby

Three more photography guides within striking distance — perfect for combining into one trip.

Browse all 78 guides → · Open the map

Save your trip-planning hours

The complete Bali guide is $47

All vantage points above + 5 bonus secret spots, printable map, gear pack list, and editing recipes. One-time payment, instant download, lifetime updates.

Buy Bali PDF →

Common questions about the Bali guide

Is the Bali photography guide worth $47?

For most photographers, yes. The guide saves 8-12 hours of trip-planning research and prevents the most common mistake of Bali photography: shooting at the wrong time of day. If a single better frame is worth $47 to you, the guide pays for itself on day one. Buyers get every GPS coordinate, every golden-hour window, every cultural rule, and a printable shot list.

Does the Bali guide include GPS coordinates?

Yes — every vantage point in the guide has Google Maps-ready GPS coordinates so you can pin them before you fly. The guide also includes a printable map showing all locations clustered by walking distance, so you can build efficient half-day routes.

What's in the Bali PDF that isn't in this article?

The article shows the highlights. The PDF includes: 5 additional secret spots not published online, a 14-day itinerary with daily routes, the full camera-settings cheat sheet for every scenario in Bali, a printable gear packing list, post-processing recipes with screenshot examples, and a list of local guides we trust for portrait commissions.

Do I get the Lightroom presets too?

The $47 guide is the PDF only. The matching Bali preset pack is a separate $19 download — most buyers grab both as a bundle and save the editing time. Both are instant download, both work on Lightroom Classic and Lightroom Mobile.

Will the guide work for a Bali trip in 2026?

Yes. The guide is updated annually as fees, restrictions, and new vantage points change. All buyers get free lifetime updates. The 2026 edition includes the latest drone rules, museum photography policies, and seasonal light data for the year.

Get the Bali guide · $47