Best Photography Spots in Sydney: 10 Locations With GPS

Tours & experiences disclosure: This guide includes affiliate links to Viator, the world’s largest tour and experiences marketplace. If you book through these links, ShutYourAperture may earn a small commission at no extra cost to you.

Sydney photography guide hero imageSave

Amazon Associates disclosure: ShutYourAperture is a participant in the Amazon Services LLC Associates Program. As an Amazon Associate we earn from qualifying purchases. Some links below go to Amazon (Store ID edinchavez01-20). Buying through these links costs you nothing extra and helps fund our free guides.
Skip the planning. Get the Sydney PDF. All locations, GPS coordinates, golden-hour times, gear tips. Instant download.

Sydney, Australia is one of the most photogenic cities in the world. If you have a camera and the patience to show up before dawn, Sydney will give you images that last a career — but only if you know where and when to point it.

This is the definitive field guide to the 10 best photography spots in Sydney, with GPS coordinates you can drop straight into Google Maps, exact camera settings tuned to Sydney’s unique light, precise timing for every location, and the access notes nobody else bothers to document. It mirrors the intel inside our Sydney Ultimate Photographer’s Guide ($47 PDF) — a downloadable field guide with full-page hero images, GPS maps, seasonal tables, a city safety briefing, and a complete photographer’s packing list. Get the guide →

Planning multi-city travel? See also: U.S. cities photography hub and the National Parks Photography Guides.

Sydney Ultimate Photographer’s Guide — $47
10 GPS-mapped locations · Exact camera settings · Multi-season shooting calendar · Free annual updates

Download the PDF guide →
Skip the planning

Get the Sydney Ultimate Photographer’s Guide

Every location below — pre-mapped with GPS, golden-hour timing, gear recommendations, cultural rules, and a 14-day itinerary. Downloaded by 200+ working photographers.

Get the PDF · $47
Instant download · Lifetime updates

Quick jump to the 10 spots

  1. Sydney Opera House from Mrs Macquarie’s Chair
  2. Sydney Harbour Bridge from Milsons Point and Kirribilli
  3. The Rocks and Argyle Cut
  4. Bondi to Coogee Coastal Walk (Bondi Icebergs Pool)
  5. Sydney Tower Eye Observation Deck
  6. Royal Botanic Garden
  7. Manly Beach and Ferry Views
  8. Watson’s Bay, Hornby Lighthouse and The Gap
  9. Darling Harbour — Pyrmont Bridge and Cockle Bay
  10. Barangaroo Reserve and Observatory Hill

A look inside the Sydney Photographer’s Guide

Here are three of the actual shots you’ll find inside the PDF — cinematic full-page references for the exact spots, lenses, and lighting conditions documented in the guide. The full guide includes 10 locations, each with a hero image, GPS map, settings table, and a five-shot list.

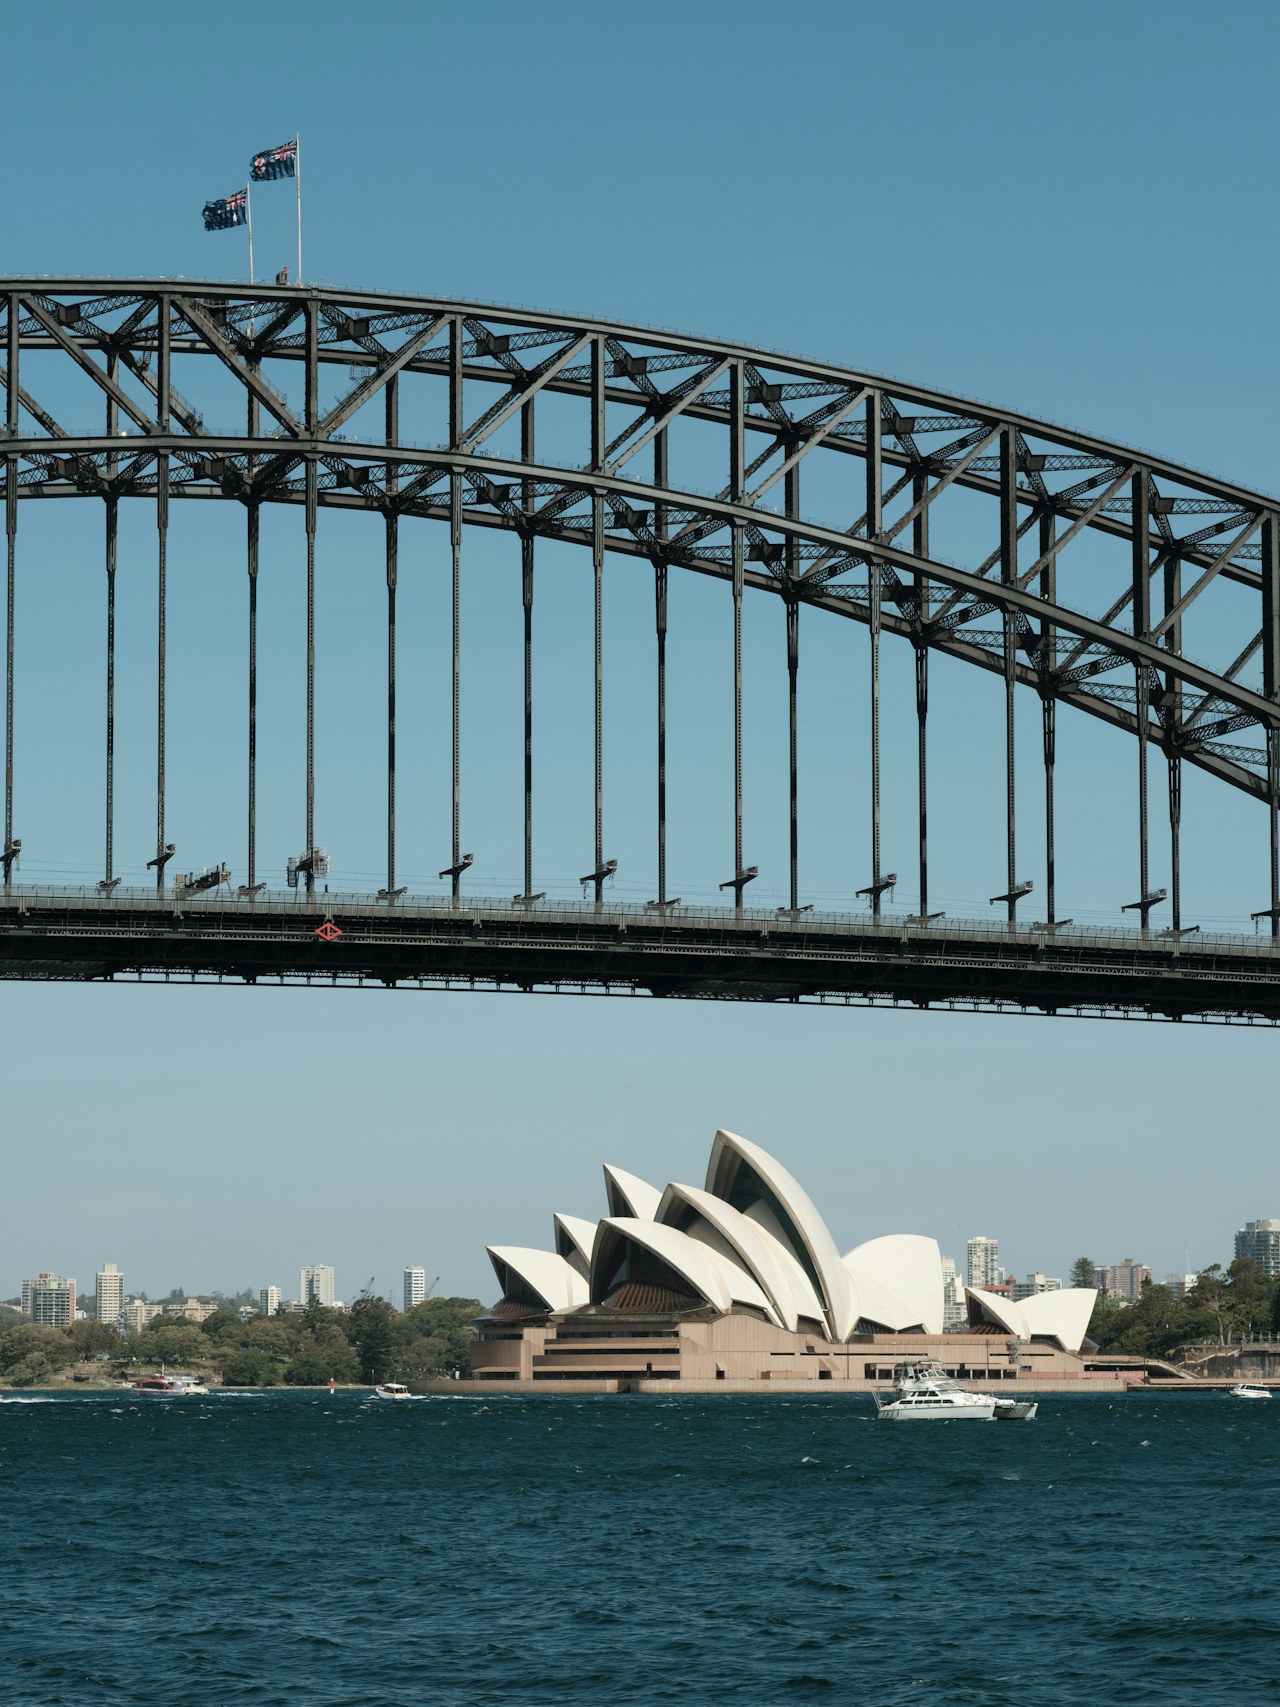
Sydney Opera House from Mrs Macquarie's Chair — from the Sydney Photographer's GuideSave
Sydney Opera House from Mrs Macquarie’s Chair — sample reference photo from the Sydney Photographer’s Guide PDF

Before you shoot Sydney: the essentials

  • Free public access: Mrs Macquarie’s Chair, Royal Botanic Garden, The Rocks streets, Argyle Cut, Milsons Point foreshore, Luna Park entry, Barangaroo Reserve, Observatory Hill Park, Hickson Road Reserve, Pyrmont Bridge (pedestrian), Bondi to Coogee coastal walk, and Manly Beach are all free; Bondi Icebergs pool swim AUD 10/adult; Sydney Tower Eye observation deck from AUD 29 (online advance, weekday) to AUD 42 (walk-up); Sydney Opera House guided tour AUD 50 pre-book / AUD 55 on the day
  • Commercial permits: Personal and tourist photography in all public spaces is unrestricted. Commercial shoots on City of Sydney Council land require a filming permit application via the City of Sydney Council at least 7 days in advance; aviation specific public liability insurance of minimum AUD $20 million is required. Drones are strictly prohibited over Sydney Harbour and crowded beaches (Bondi, Manly, Bronte) without CASA approval; approximately 75% of the Sydney CBD and harbour is classified as ‘Fly Under Conditions’ or ‘No Fly Zone’ under CASA rules. Commercial drone operators must hold a Remote Pilot Licence (RePL) and operate under a Remotely Piloted Aircraft Operator’s Certificate (ReOC). On-the-spot fines up to AUD $1,650; court penalties up to AUD $16,500 for serious violations. Use CASA’s ‘Can I Fly There?’ app to check zones before any flight. Source: City of Sydney Drone Guidelines March 2025 (cityofsydney.nsw.gov.au) and CASA (casa.gov.au).
  • Best photography seasons: October–November (spring: warm light, blooming gardens, manageable crowds) and March–April (autumn: golden tones, clear skies, fewer summer tourists)
  • Blue hour notes: Sydney sits at 33.87°S — the sun arc is higher than European cities but lower than tropical destinations. Blue hour lasts approximately 20–30 minutes after sunset year-round. In summer (December–January) sunset falls around 8:00 PM AEDT; in winter (June–July) around 5:00 PM AEST, giving a shorter window before full dark. The harbour acts as a natural reflector, amplifying blue-hour colours across the water. East-facing locations (Mrs Macquarie’s Chair, Bondi) catch the sunrise best; west- and northwest-facing positions (Observatory Hill, Darling Harbour, Barangaroo) are ideal for sunset and blue hour.
  • Drone policy: Drone laws vary widely by country and city — many capital and tourist zones are no-fly. Verify the local civil aviation authority’s current rules before launching.
  • Local resource: Official visitor information

The full-resolution version of every map below — plus seasonal calendars, gear notes per location, sun-angle diagrams, and a complete photographer’s packing checklist — is inside the Sydney Photographer’s Guide PDF ($47).

1. Sydney Opera House from Mrs Macquarie’s Chair

The only location on the southern harbour shoreline where both the Sydney Opera House and Sydney Harbour Bridge appear together in a single composition, unobstructed. The sandstone bench carved in 1810 for Governor Macquarie’s wife is itself a historic subject. The protected harbour water in front acts as a mirror during calm mornings, doubling the sail reflections. This is the most-photographed vantage point in Australia and the defining ‘postcard’ shot of Sydney.

  • GPS: -33.8594, 151.2223
  • Elevation: 16 ft
  • Best time of day: sunrise — arrive 30 minutes before first light to capture pink and gold tones on the Opera House sails with the Harbour Bridge as backdrop; blue hour (15–20 min after sunset) for city lights reflecting on the harbour
  • Sun direction: Mrs Macquarie’s Point faces northwest across the harbour. At sunrise the low eastern sun rises behind the photographer’s right shoulder, lighting the Opera House sails from the southeast and raking warm gold across the white tile surface. The Harbour Bridge sits behind and to the left of the Opera House in frame. At sunset the sun sets to the west-northwest, behind the Bridge and CBD, silhouetting both icons against orange and pink skies. Best shooting direction is approximately west-northwest (280–300°).
  • Access: Mrs Macquaries Rd, Sydney NSW 2000, within the Royal Botanic Garden. The point is accessible 24 hours, 7 days (outside the Botanic Garden gates). Free entry. Walk 15–20 minutes from Circular Quay through the Botanic Garden gates; the path is signed. Bus routes 441 and 389 pass nearby. Parking at Domain Car Park (off Art Gallery Rd). Bring a tripod — a concrete bench/wall near the chair provides a rest for cameras.
  • Difficulty: easy
  • Recommended settings: Sunrise Harbour Panorama: f/8, 1/250 sec, ISO 100, 24mm  ·  Blue Hour Long Exposure: f/11, 15 sec, ISO 100, 24mm, tripod  ·  Telephoto Opera House Compression: f/8, 1/500 sec, ISO 100, 200mm  ·  Pre Dawn Star Trails: f/2.8, 25 sec, ISO 1600, 14mm, tripod

Shots to chase:

  • Classic wide-angle sunrise composition with Opera House in foreground and Harbour Bridge behind, reflected in calm harbour water
  • Long-exposure blue-hour shot with city lights streaking across the harbour surface at f/11 for 15–30 seconds
  • Telephoto compression (200mm) of the Opera House sails against the steel arch of the Harbour Bridge
  • Vertical portrait orientation showing the full sweep from Circular Quay ferry terminals to the Bridge arch
  • Pre-dawn 14mm wide-angle with Milky Way arc (winter, clear nights) above the Opera House sails

Pro tip: Arrive at least 30 minutes before sunrise to claim a front-row position on the low stone wall directly in front of the sandstone chair — this spot fills quickly and photographers are protective of their position. In winter (June–August) the sunrise is around 7 AM, making it more accessible; summer sunrise is as early as 5:40 AM. Check the Bureau of Meteorology (bom.gov.au) the night before — clear mornings after rain give the most vibrant pre-dawn colours. For the reflection shot, wait for a lull between harbour ferries to settle the water.

Common mistake to avoid: Arriving at sunrise instead of before it — the golden pre-dawn colours last only 5–8 minutes. Shooting at midday produces harsh overhead light that bleaches the white tiles and creates no mood. Forgetting a tripod for the blue-hour long-exposure shots — handheld at 15 seconds is impossible. Standing behind the concrete bench at the Chair rather than walking 20–30 metres east along the shoreline, which provides a cleaner, lower angle with better water reflections.

2. Sydney Harbour Bridge from Milsons Point and Kirribilli

The northern foreshore provides the most dramatic low-level perspective of the Harbour Bridge — the steel arch towers 134 metres overhead and the entire span is visible from one bank. Luna Park’s iconic smiling face entrance adds a playful foreground element unique to Sydney. From Kirribilli’s Mary Booth Reserve, the view west across to the Opera House at golden hour — with cruise ships passing between — is one of the most dramatic harbour compositions in the city.

  • GPS: -33.8527, 151.2106
  • Elevation: 10 ft
  • Best time of day: golden hour / sunset — the northern foreshore faces south toward the CBD and the bridge is bathed in warm western light from 4–6 PM; blue hour for city light reflections on the harbour
  • Sun direction: From Milsons Point (north shore), the camera faces south toward the bridge and CBD. At sunset, the sun descends to the west-southwest, lighting the left flank of the bridge’s steel arch in warm gold. The CBD towers behind glow amber. From Kirribilli (Mary Booth Reserve), the camera faces west-southwest for golden hour shots of the Opera House opposite with passing ferries. Blue hour from the Milsons Point wharf gives long-exposure ferry-light trails under the arch.
  • Access: Milsons Point Station (train, North Shore Line) drops you at the northern foot of the bridge, a 2-minute walk to the foreshore. Ferry from Circular Quay to Milsons Point Wharf (Opal card accepted, approx. AUD $4). Luna Park is immediately adjacent (free entry to park). Kirribilli is a 20-minute waterfront walk east from Milsons Point Station. Mary Booth Reserve and Jeffrey Street Wharf in Kirribilli are free, open public areas. No permit required for photography.
  • Difficulty: easy
  • Recommended settings: Bridge Arch Wide Angle: f/8, 1/250 sec, ISO 100, 16mm  ·  Blue Hour Ferry Light Trails: f/11, 20 sec, ISO 100, 24mm, tripod  ·  Luna Park Entrance Dusk: f/5.6, 1/60 sec, ISO 400, 35mm  ·  Telephoto Kirribilli Opera House: f/8, 1/500 sec, ISO 100, 135mm

Shots to chase:

  • Low-angle wide shot from the Milsons Point wharf looking south under the full span of the arch with CBD towers beyond
  • Luna Park’s smiling face entrance in sharp foreground with the bridge steel arch rising behind at dusk
  • 20-second blue-hour exposure from the wharf capturing ferry light trails under the bridge on still harbour water
  • Telephoto shot from Mary Booth Reserve, Kirribilli, compressing the Opera House and a departing cruise ship against the CBD
  • Looking straight up at the bridge undercarriage from Hickson Road Reserve on the south side for abstract structural geometry

Pro tip: The Milsons Point ferry wharf railing at blue hour — set a tripod and expose for 15–20 seconds to capture ferry light streaks under the arch against deep indigo sky. Check P&O and Carnival cruise ship departure schedules (portauthority.nsw.gov.au) if visiting Kirribilli; ships depart through the heads between 5–7 PM and pass close to shore for dramatic scale shots. The bridge footpath (eastern side) is free to walk and gives 50-metre-high moving perspectives — press lens against the mesh fence to minimise wire in the shot. Note: the Pylon Lookout is closed for renovations until mid-2026.

Common mistake to avoid: Shooting the bridge at midday in flat overhead light with no shadow depth. Missing the ferry timing for light-trail shots — ferries run roughly every 15 minutes so exposure planning is essential. Shooting only from the south (city) side and missing the unique north-shore perspectives. Expecting the Pylon Lookout to be open — check current status before planning a visit as it remained closed for renovations as of 2025.

3. The Rocks and Argyle Cut

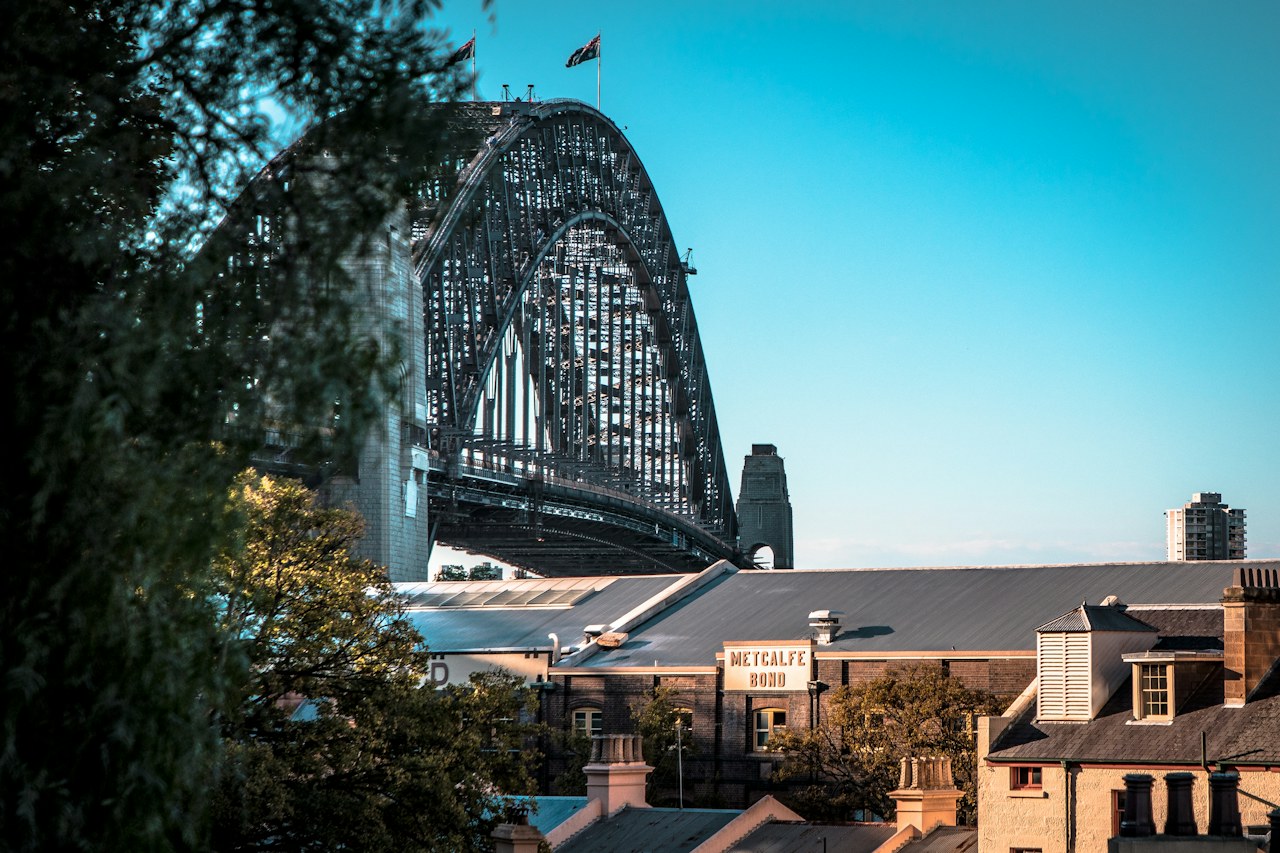
Sydney’s oldest district, with colonial-era sandstone buildings, cobblestone laneways, and a hand-cut tunnel (Argyle Cut, hewn through solid rock by convicts 1843–1867) that creates a dramatic barrel-vault framing device for portraits and architectural shots. The fusion of 200-year-old heritage buildings, the looming Harbour Bridge visible between rooftops, and active urban life gives The Rocks a layered visual depth found nowhere else in Australia.

  • GPS: -33.8588, 151.2066
  • Elevation: 30 ft
  • Best time of day: early morning (7–9 AM) — low-angle light rakes across 1800s sandstone facades, cobblestones reflect overnight moisture, and streets are empty of tourists; also blue hour after sunset for lit laneway atmosphere
  • Sun direction: The Rocks sits on the western side of Sydney Cove. The main streets (George St, Argyle St, Playfair St) run roughly north-south. Morning sun from the east-southeast provides low-angle side lighting on sandstone buildings and creates deep shadows in narrow laneways. The Argyle Cut tunnel opening faces southeast, giving a natural frame of morning light from one end. At sunset the western facades warm up; Observatory Hill (to the southwest) offers elevated golden-hour views of the Rocks below.
  • Access: The Rocks is a freely accessible historic district 5 minutes’ walk north of Circular Quay. Argyle Cut is on Argyle Street between Playfair Street and Cumberland Street, open 24/7. Closest train: Circular Quay. Bus routes 324, 325. The Rocks Discovery Museum (Kendall Lane) is free entry. Weekend markets (Fri–Sun) bring vendors and crowds from 10 AM; weekday mornings offer empty streets. No photography permit required for public spaces.
  • Difficulty: easy
  • Recommended settings: Morning Sandstone Facade: f/8, 1/400 sec, ISO 100, 35mm  ·  Argyle Cut Tunnel Interior: f/2.8, 1/60 sec, ISO 800, 24mm  ·  Cobblestone Laneway Blue Hour: f/5.6, 4 sec, ISO 100, 24mm, tripod  ·  Bridge Peek Between Buildings: f/8, 1/500 sec, ISO 100, 85mm

Shots to chase:

  • Looking through the sandstone Argyle Cut tunnel arch from the western end, framing a walker or cyclist against the bright eastern daylight
  • Ground-level cobblestone perspective along Playfair Street with terrace buildings converging toward the Harbour Bridge pylon
  • The Rocks Discovery Museum courtyard (Kendall Lane) — tight sandstone walls with potted plants for intimate architectural detail
  • Blue-hour laneway shot of Suez Canal laneway or Nurses Walk with lit pub and heritage lamp posts creating warm-cool contrast
  • ASN Co Building corner (George and Argyle Streets) — Victorian Italianate architecture with ornate cast-iron balconies at sunrise

Pro tip: Arrive at 7 AM on a weekday before the tourist buses. Argyle Street is wet with overnight moisture in winter (June–August) and the cobblestones produce excellent reflections of street lights and the Harbour Bridge. The Cahill Expressway walkway (above Circular Quay) gives an elevated perspective over the entire Rocks roofscape with the Bridge behind — free, rarely crowded. The Rocks Markets (Fri 9 AM–3 PM, Sat–Sun 10 AM–5 PM) provide vibrant candid street photography opportunities.

Common mistake to avoid: Arriving after 10 AM when tour buses fill George Street and crowds obscure building facades and laneways. Overlooking the Argyle Stairs (stone steps carved from the cliff, connecting Cumberland Street to The Rocks below) which provide a dramatic diagonal lead-in line. Shooting only in daylight and missing the blue-hour laneway atmosphere when heritage pub lights and lamp posts come on.

Want this in your pocket on the street?
The full-resolution version of every spot above — with full-page hero photography, GPS maps with gold location pins, sun direction diagrams, multi-season tables, and a complete safety + packing checklist — is inside the Sydney Ultimate Photographer’s Guide PDF ($47). Print it, save it offline, take it on the walk. Get the guide →

4. Bondi to Coogee Coastal Walk (Bondi Icebergs Pool)

The Bondi Icebergs saltwater pool — built into the rocky headland at the south end of Bondi Beach — is the most-photographed ocean pool in Australia and one of the most Instagrammed locations in the world. When large swells push water over the pool wall, the cascade creates dramatic white water against the turquoise pool below and the Pacific beyond. The 6-km coastal walk passes headlands, sea cliffs, rock pools, and cemetery views that provide sustained high-quality photographic subject matter.

  • GPS: -33.891, 151.2745
  • Elevation: 100 ft
  • Best time of day: morning (6–9 AM) — the ocean pools face northeast and morning sun illuminates the pools and sea spray with warm directional light; cliffs at Mackenzies Point glow gold; low tide reduces turbulent pool overflow
  • Sun direction: The Bondi to Coogee coastal walk runs roughly north-to-south along the eastern seaboard of Sydney. The Bondi Icebergs pool faces northeast — morning sun from the east-northeast rakes across the pool tiles and the crashing waves beyond. At Mackenzies Point (the headland between Bondi and Tamarama), the camera faces north with the full sweep of Bondi Beach behind; this works best in morning light. The clifftop walk generally has an eastern aspect, making sunrise the optimal light direction for all ocean pool and headland shots.
  • Access: Bondi Icebergs Pool: 1 Notts Ave, Bondi Beach NSW 2026. Pool open Mon–Fri 6:00 AM–6:30 PM, Sat–Sun 6:30 AM–6:30 PM, closed Thu for cleaning. Swim entry AUD 10/adult. The coastal walk itself is free and accessible 24/7 along cliff paths and public footpaths for the full 6 km. Bus 333 from the CBD to Bondi Beach (approx. 40 min), or train to Bondi Junction then bus 380/381 (10 min). No photography permit required. Drones are prohibited over the beach and populated cliff areas per CASA regulations.
  • Difficulty: moderate
  • Recommended settings: Wave Crash Ocean Pool: f/8, 1/1000 sec, ISO 200, 70mm  ·  Long Exposure Sea Mist: f/16, 2 sec, ISO 100, 24mm, ND filter, tripod  ·  Sunrise Headland Panorama: f/11, 1/250 sec, ISO 100, 16mm  ·  Pool Reflection Portrait: f/5.6, 1/500 sec, ISO 100, 50mm

Shots to chase:

  • Wave crashing over the Icebergs pool wall with the pool and Bondi Beach arc visible below, shot at 1/1000 sec to freeze the white water
  • Long-exposure 2-second shot of sea mist washing over the rocks around the pool creating silky foreground with sharp pool background
  • Mackenzies Point headland panorama looking north over the full sweep of Bondi Beach at sunrise
  • Top-down perpendicular shot of the empty Icebergs pool at sunrise with lane lines as leading geometry (from the pool deck above)
  • Waverley Cemetery headland — Victorian-era grave markers on the cliff edge with Pacific Ocean as backdrop at golden hour

Pro tip: Check surf forecasts (surf-forecast.com or coastalwatch.com) before visiting — a 2–3 metre swell at Bondi produces dramatic pool overflow and wave crash shots without being dangerous. The pool is most photogenic at low tide when the pool is full but waves are washing over predictably rather than torrentially. The pool deck above the change rooms provides a top-down geometric view without needing to be inside the pool facility. For the coastal walk, start at Coogee (taking Bus 373/374) and walk north to Bondi for better lighting angles and a beachside finish.

Common mistake to avoid: Arriving in the afternoon when the sun swings around to backlight the pool from the west, washing out detail and creating harsh glare on the water surface. Visiting at low swell (under 1 m) when there is no wave action over the pool wall — the dramatic overflow is the defining shot element. Shooting the pool at midday when the tile colours are bleached and shadows are minimal. Not walking beyond the Icebergs — Mackenzies Point, Tamarama, Bronte Baths, Clovelly, and Gordon’s Bay are all individually photogenic stops.

5. Sydney Tower Eye Observation Deck

Sydney Tower Eye Observation Deck Sydney photography sampleSave
Sydney Tower Eye Observation Deck — cinematic reference from the Sydney Photographer’s Guide PDF

At 309 metres, Sydney Tower is the tallest structure in Sydney and the third tallest observation tower in the Southern Hemisphere. The observation deck at 250 metres provides the only fully 360° unobstructed city panorama in Sydney, encompassing Darling Harbour, Bondi Beach, the harbour, the Blue Mountains, and Sydney Airport simultaneously. The glass floor sections create vertigo-inducing downward compositions of the CBD streets far below.

  • GPS: -33.8704, 151.2089
  • Elevation: 820 ft
  • Best time of day: 45 minutes before sunset — the city transitions from golden-lit rooftop panorama to blue-hour city lights; clear winter days also give superb daytime visibility to the Blue Mountains (80 km away)
  • Sun direction: The observation deck at 250 m provides a full 360° rotating platform. The sun sets over the Blue Mountains to the west, flooding the CBD towers and harbour in amber from approximately 4 PM onward. The Opera House and Harbour Bridge are visible to the north-northeast, while Bondi Beach lies to the east. At blue hour, the deck gives unobstructed 360° city-light exposure from 250 m — the highest unobstructed photography platform in Sydney.
  • Access: Sydney Tower Eye, 100 Market St (enter via Westfield Sydney, Level 5), Sydney CBD. Open daily 10 AM–8 PM (last entry 7:30 PM). General admission: AUD 29/adult online advance (weekdays), AUD 42/adult walk-up. Children (3–15 yrs) AUD 21 online advance. Includes Digi Photo Pass (8 digital photos). Train to Town Hall or St James stations (3-minute walk). No tripods are permitted on the observation deck — bring a monopod or use the glass barrier as a rest. SKYWALK (external glass platform at 268 m) available from AUD 84.
  • Difficulty: easy
  • Recommended settings: Golden Hour City Panorama: f/8, 1/250 sec, ISO 100, 24mm  ·  Blue Hour City Lights: f/11, 8 sec, ISO 100, 24mm, monopod braced on glass  ·  Telephoto Harbour Compression: f/8, 1/500 sec, ISO 100, 200mm  ·  Glass Floor Vertical Downward: f/8, 1/500 sec, ISO 400, 24mm

Shots to chase:

  • 360° panoramic stitch (9–12 shots at 24mm) at blue hour capturing the full city lit-up from Bondi to Parramatta
  • Telephoto compression (200mm) of the Opera House and Harbour Bridge framed against the North Shore suburbs from above
  • Straight-down shot through the glass floor panel showing ant-sized pedestrians and cars on Market Street 250 m below
  • Sunset time-lapse setup (requires booking ahead) showing sun dropping behind Blue Mountains with city glowing below
  • Rainy day moody cityscape — mist on the harbour and low cloud wrapping CBD towers makes for dramatic atmospheric shots

Pro tip: Pre-book online for weekday advance pricing (AUD 29 vs AUD 42 walk-up) and to select a sunset time slot. Arrive 15 minutes before your entry window and head straight to the west-facing side to set up before the sun drops — golden hour lasts only 20–25 minutes from the deck. Shoot through the glass at 90° (perpendicular) to minimise internal reflections; a polariser filter helps. The SKYWALK (external glass-floor platform at 268 m) provides fully open-air shots but tripods are also prohibited — use the handrail as support. Winter (June–August) typically offers the clearest visibility to the Blue Mountains.

Common mistake to avoid: Bringing a full-size tripod which is prohibited — use a monopod pressed against the glass or a GorillaPod on the railing. Arriving at peak hours (12–2 PM) when the deck is most crowded and photography is difficult. Shooting through the glass at an angle rather than perpendicularly, causing glare and reflections. Missing the blue-hour window by packing up at sunset — the city-lights phase that begins 10–15 minutes after sun disappearance is equally compelling.

6. Royal Botanic Garden

The Royal Botanic Garden is Australia’s oldest living scientific institution (established 1816) and occupies prime harbour-front land adjacent to the Opera House. Its position at Farm Cove gives harbour views, yet within the garden walls are formal rose gardens, a succulent walk, giant Moreton Bay fig trees (150+ years old), tropical glasshouses, and a lily pond. The Roman arch trellis walk near the Garden Restaurant — covered in climbing plants — is one of Sydney’s most photographed garden features and is completely free to access.

  • GPS: -33.8642, 151.2164
  • Elevation: 50 ft
  • Best time of day: morning (7–10 AM) — soft directional light, few visitors, and the harbour-facing lawn produces perfect reflections in the garden ponds; spring (Sep–Nov) for rose garden and frangipani blooms
  • Sun direction: The Botanic Garden wraps the eastern shore of Farm Cove. The main harbour-view lawn faces northwest toward the CBD. Morning sun from the east-southeast lights the formal gardens and pond surfaces from behind the photographer. The rose garden (near the main entrance off Art Gallery Rd) faces north, optimal in late morning. The waterfront path running from Farm Cove Gate to Mrs Macquarie’s Chair faces west across the harbour — afternoon sun creates backlit harbour silhouettes here.
  • Access: Mrs Macquaries Rd, Sydney NSW 2000. Free entry, open daily 7 AM to dusk (closing times vary by season, approximately 8 PM in summer to 5:30 PM in winter). Multiple gates: Macquarie St, Art Gallery Rd, and Farm Cove. Nearest train: Martin Place or Circular Quay. Free public WiFi. No tripods required for most landscape shots. The garden restaurant and café facilities provide good foreground elements (Roman arch trellises covered in climbing plants) at no charge. Photography of visitors and public art allowed without permit; commercial shoots require advance booking with the Garden.
  • Difficulty: easy
  • Recommended settings: Morning Harbour View Lawn: f/8, 1/400 sec, ISO 100, 24mm  ·  Rose Garden Bloom Detail: f/2.8, 1/500 sec, ISO 100, 100mm macro  ·  Moreton Bay Fig Canopy: f/8, 1/250 sec, ISO 200, 16mm (shoot straight up)  ·  Trellis Arch Walk Green: f/5.6, 1/250 sec, ISO 100, 35mm

Shots to chase:

  • Looking through the Roman arch trellis walk at the Garden Restaurant — green climbing plants framing a narrow corridor of light
  • Moreton Bay fig tree trunk base to canopy — shoot straight up with 16mm for abstract converging root and canopy geometry
  • The central lawn in morning light with CBD towers visible above the tree line for a nature-and-city contrast shot
  • Rose garden in spring (October–November) — macro detail of individual blooms with soft bokeh backgrounds
  • Long exposure of the harbour through the garden gate fence at blue hour with Opera House lit up across Farm Cove

Pro tip: The garden is open from 7 AM, well before most tourists arrive — the hour between 7 and 8 AM provides empty lawns and paths. The lily pond near the Macquarie St entrance produces stunning reflections of the Conservatorium of Music on calm mornings. In October–November the Camellia Garden and rose beds are in full bloom — check the Botanic Gardens seasonal calendar at rbgsyd.nsw.gov.au. The Flying Fox colony (grey-headed flying foxes roost in trees near the tropical glasshouse) makes for extraordinary wildlife photography from dusk.

Common mistake to avoid: Visiting in the middle of the day when harsh overhead light flattens the gardens and crowds fill the main paths. Going only to Mrs Macquarie’s Chair and missing the interior of the garden — the arched trellis, lily pond, and fig trees are all interior features often overlooked by tourists who walk the outer harbour path only. Leaving before dusk when the flying fox colony departs en masse — a dramatic wildlife spectacle.

Want this in your pocket on the street?
The full-resolution version of every spot above — with full-page hero photography, GPS maps with gold location pins, sun direction diagrams, multi-season tables, and a complete safety + packing checklist — is inside the Sydney Ultimate Photographer’s Guide PDF ($47). Print it, save it offline, take it on the walk. Get the guide →

7. Manly Beach and Ferry Views

Manly is Sydney’s most beloved beach suburb, with a 1.5-km arc of surf beach flanked by Norfolk Island pines, a pedestrian Corso linking harbour to ocean, and a renowned surf culture. The Manly Ferry ride across Sydney Harbour is widely considered one of the world’s best public transport journeys — passing directly under the Harbour Bridge and beside the Opera House — providing 30 minutes of rolling photography opportunities from water level. The ferry’s lower vantage point gives a unique perspective of the icons that is impossible from land.

  • GPS: -33.796, 151.2839
  • Elevation: 5 ft
  • Best time of day: morning (7–9 AM) for beach photography — east-facing shore gets direct sunrise light; return ferry at sunset (5–7 PM) — crossing the harbour at dusk yields Opera House and Bridge shots with pink-orange sky
  • Sun direction: Manly Beach faces due east, directly toward the Pacific. At sunrise the sun crests the horizon over the ocean and the entire beach glows from the front — ideal for 2–3 hours of side-lit beach photography. The Manly Wharf faces west toward the CBD across the harbour; afternoon and sunset from the wharf gives a direct shot toward the Sydney skyline silhouetted against the western sky. The Manly Ferry journey (30 minutes, Circular Quay to Manly) passes the Opera House and Harbour Bridge from the starboard (right) side heading north — position on the right side of the ferry for outbound shots.
  • Access: Manly Beach: North Steyne, Manly NSW 2095. Free public beach, open 24/7. Manly Ferry: departs Circular Quay Wharf 3 daily (Opal card accepted, AUD $4.10/single trip or approximately AUD $8.20 return as of 2025); journey time approximately 30 minutes. Fast Ferry (Manly Fast Ferry) AUD $15/adult, 20 minutes — does not accept Opal card. No entry fee to beach. Parking at North Head Scenic Dr or West Esplanade (metered). Photography on public beach unrestricted; no drone flights permitted over the beach per CASA regulations.
  • Difficulty: easy
  • Recommended settings: Sunrise Surf Beach: f/8, 1/500 sec, ISO 100, 24mm  ·  Ferry Harbour Telephoto: f/5.6, 1/1000 sec, ISO 400, 135mm (to compensate ferry vibration)  ·  Manly Wharf Sunset Silhouette: f/8, 1/500 sec, ISO 100, 24mm  ·  Shelly Beach Rock Pool: f/11, 1/250 sec, ISO 100, 16mm, polariser

Shots to chase:

  • Sunrise beach panorama from the south end of Manly Beach looking north with Norfolk Island pines lining the promenade
  • Ferry deck shot of the Opera House and Harbour Bridge together as the ferry rounds Bennelong Point — position on the starboard side departing Circular Quay
  • Manly Wharf at sunset — the ferry terminal structure framing the western horizon with CBD towers silhouetted
  • Fairy Bower rock pool (east of Shelly Beach headland) — a triangular ocean pool with Art Deco statues at the headland, shot with polariser to eliminate surface glare
  • Surfing action telephoto (200mm+) at North Steyne surf break in the morning golden light with lifeguard tower as foreground reference

Pro tip: Book the 5:30–6 PM return ferry from Manly to time the harbour crossing at golden hour — the Opera House is lit by the setting sun directly ahead as you approach Circular Quay, and this composition from mid-harbour is unavailable from any land-based position. Use a higher ISO (400–800) on the ferry to compensate for motion blur; brace against the railing. The walk from Manly to Shelly Beach (15 minutes south) provides secluded cove photography away from the crowds, with the South Pacific framing the limestone headland.

Common mistake to avoid: Taking the Fast Ferry rather than the regular Manly Ferry — the fast ferry routes away from the harbour icons and the journey is too brief for photography. Arriving at Manly Beach mid-morning when the sun is overhead and flattens the waves and sand. Shooting from inside the ferry cabin through glass, which produces reflections — always go outside to the deck for harbour shots.

8. Watson’s Bay, Hornby Lighthouse and The Gap

The Gap is Sydney’s most dramatic cliff formation — a 30-metre sheer sandstone drop into churning Pacific Ocean, with views south along the coast and north back toward Sydney Heads. Hornby Lighthouse (1858), Australia’s third oldest, sits on the very tip of South Head and produces one of Sydney’s most graphic red-and-white striped compositions against blue water. Camp Cove — a sheltered colonial-era beach just north — offers a tranquil contrast with protected turquoise water and views back to the CBD across the harbour.

  • GPS: -33.8431, 151.2826
  • Elevation: 125 ft
  • Best time of day: morning (6–9 AM) for the Gap cliffs and Hornby Lighthouse — dawn light from the east-northeast rakes across the sandstone cliffs; sunset (5–7 PM) from Camp Cove and Watson’s Bay Wharf for western harbour views
  • Sun direction: Watson’s Bay sits on the South Head peninsula, with the eastern ocean cliffs (The Gap) facing south-southeast toward the open Tasman Sea. Morning sun rises over the ocean to the east, lighting the Gap’s ochre-coloured sandstone cliffs from the side and illuminating Hornby Lighthouse’s red-and-white stripes. The camp cove beach and Watson’s Bay harbour side face west-northwest — afternoon and sunset light floods these calm protected cove areas. The South Head Heritage Trail runs along the clifftop from Camp Cove to Hornby Lighthouse.
  • Access: Watson’s Bay: 1 Marine Parade, Watson’s Bay NSW 2030. Bus 324/325 from Circular Quay to Watson’s Bay (approx. 45 min). Ferry: Watsons Bay Wharf (Circular Quay Ferry, Opal card accepted, approx. 30 min). Free access to The Gap park, South Head Heritage Trail, and Hornby Lighthouse exterior (heritage trail open daily 7 AM–7 PM). Camp Cove beach is free. Watson’s Bay Hotel and Doyles restaurant are landmarks adjacent to the wharf. No entry fee. Parking on Marine Parade (very limited; arrive before 8 AM).
  • Difficulty: moderate
  • Recommended settings: Gap Cliff Long Exposure: f/16, 1/2 sec, ISO 100, 24mm, ND filter, tripod  ·  Hornby Lighthouse Graphic: f/11, 1/500 sec, ISO 100, 50mm  ·  Camp Cove Morning Reflection: f/8, 1/250 sec, ISO 100, 24mm  ·  South Head Cliff Panorama: f/11, 1/400 sec, ISO 100, 16mm

Shots to chase:

  • Hornby Lighthouse from the heritage trail path — the red-and-white horizontal-banded tower against a deep blue Pacific Ocean, shot at 50mm for graphic clarity
  • The Gap from the platform looking south — long-exposure shot with wave surge blur and the ochre cliff faces converging
  • Camp Cove beach in morning light — clear turquoise water, small historic stone buildings, and the city visible across the harbour 10 km away
  • South Head Heritage Trail clifftop path with Hornby Lighthouse in background and the Pacific surf below — use trail walkers as scale elements
  • Sunset from Watson’s Bay Wharf looking west across the harbour toward the CBD and Bridge silhouette

Pro tip: Walk the full 1.5-km South Head Heritage Trail from Camp Cove north to Hornby Lighthouse for all the key compositions in sequence. The Gap platform (marked on the South Head Heritage Trail map) has a safety fence but sufficient viewing angles for cliff and ocean shots. Early morning (6–7 AM) on a weekday gives you the trail almost entirely to yourself. Check swell forecasts — a 3+ metre swell at the Gap creates dramatic spray and surge worth the trip. The heritage trail continues past HMCS Watson naval facilities (exterior photographable from the path).

Common mistake to avoid: Arriving at midday when overhead sun bleaches the sandstone cliffs and removes the warm ochre tones. Visiting only The Gap and missing Hornby Lighthouse and Camp Cove 1.5 km north — these are equally photogenic and are on the same free walking trail. Leaving before sunset when Watson’s Bay Wharf transforms into one of Sydney’s most atmospheric waterfront dining and harbour-view locations.

9. Darling Harbour — Pyrmont Bridge and Cockle Bay

Darling Harbour — Pyrmont Bridge and Cockle Bay Sydney photography sampleSave
Darling Harbour — Pyrmont Bridge and Cockle Bay — cinematic reference from the Sydney Photographer’s Guide PDF

Pyrmont Bridge — a heritage-listed pedestrian swing bridge built in 1902 (the world’s oldest electrically operated swing bridge still in use) — is the centrepiece of Darling Harbour, and from its midpoint provides one of Sydney’s most versatile city photography positions: looking east toward the CBD skyline with Sydney Tower above; looking north to Barangaroo and the upper harbour; looking south over Cockle Bay marina. The entire precinct transforms at blue hour into a high-contrast cityscape with reflections.

  • GPS: -33.8749, 151.2008
  • Elevation: 10 ft
  • Best time of day: blue hour (15–30 minutes after sunset) — the Cockle Bay water reflects the CBD skyline; Pyrmont Bridge lights up; the entire precinct transitions from golden to indigo with continuous visual interest; weekend evenings for the Vivid Sydney light festival (late May–mid-June)
  • Sun direction: Darling Harbour is a northwest-facing inlet on the western edge of the CBD. At sunset the sun descends to the west behind Pyrmont, warming the entire eastern CBD face that overlooks the harbour. The camera faces east-northeast from the western (Pyrmont) side of the bridge, or west-southwest from the CBD (eastern) side. The reflective Cockle Bay surface — when calm — mirrors the lit skyline and Sydney Tower directly above. The best position for a balanced composition is the midpoint of Pyrmont Bridge facing north toward Barangaroo.
  • Access: Pyrmont Bridge Rd, Sydney NSW 2009. The bridge is free, open to pedestrians and cyclists. Multiple entry points: Darling Harbour foreshore (10-min walk from Town Hall station); Metro: Pyrmont Bay Light Rail Stop; Bus routes 389, 501. Darling Harbour itself is a free public precinct. The IMAX Theatre, Australian National Maritime Museum, Sea Life Aquarium, and Wild Life Sydney Zoo are separately ticketed attractions adjacent to the harbour. Photography in the public precinct is unrestricted.
  • Difficulty: easy
  • Recommended settings: Blue Hour Cockle Bay Reflection: f/11, 20 sec, ISO 100, 24mm, tripod  ·  Daytime Pyrmont Bridge Structure: f/8, 1/500 sec, ISO 100, 24mm  ·  Vivid Sydney Light Trails: f/8, 15 sec, ISO 100, 24mm, tripod  ·  Sydney Tower Compression: f/8, 1/500 sec, ISO 100, 135mm

Shots to chase:

  • Blue-hour 20-second exposure from Pyrmont Bridge midpoint looking east — CBD skyline with Sydney Tower reflected symmetrically in still Cockle Bay water
  • Daytime architectural shot of the historic Pyrmont Bridge swing mechanism (the steel pivot at the Cockle Bay end) as an abstract industrial composition
  • Vivid Sydney (late May–mid-June) — long-exposure light installation projections on the Maritime Museum building from the bridge, with colourful reflections in the harbour
  • Looking north from the bridge toward Barangaroo Reserve and the Headland Park — the green canopy against modern Barangaroo towers and the harbour
  • Telephoto (135mm) of the Sydney Tower framed precisely through the bridge’s pedestrian suspension cables

Pro tip: The Pyrmont Bridge opens (swings) periodically to allow large vessels to pass — ask staff at the Maritime Museum for the next scheduled opening, and photograph the bridge gap with vessels passing below for a unique composition. For the best Cockle Bay reflection shot, walk to the southern end of the east foreshore (near the convention centre promenade) and shoot north at blue hour — this gives a wider water surface than the bridge midpoint. Vivid Sydney (late May–June annually) transforms the entire precinct into a free outdoor light festival — the best photography week of the year in Darling Harbour.

Common mistake to avoid: Shooting in the middle of the day with harsh overhead sun reflecting white glare off the water surface. Missing the bridge-swing event — a rare mechanical spectacle that most visitors never witness. Arriving on a weeknight and expecting solitude — the Friday–Saturday evening dining crowds are substantial; Thursday evenings are quieter for photography.

10. Barangaroo Reserve and Observatory Hill

Observatory Hill is the highest natural point in central Sydney (47 metres) and the site of Sydney Observatory (1858) — Australia’s oldest working observatory. It provides an elevated view of the Harbour Bridge from the southwest with The Rocks neighbourhood and the historic Garrison Church in the foreground — a composition that feels quintessentially Sydney yet is rarely crowded. Barangaroo Reserve, opened in 2015, is a beautifully restored Aboriginal headland with 2,300 newly planted sandstone and native vegetation, offering clean modern waterfront views toward the Harbour Bridge and Kirribilli from the north.

  • GPS: -33.8591, 151.2012
  • Elevation: 155 ft
  • Best time of day: late afternoon / golden hour (4–6 PM) — Observatory Hill faces west and gives the best elevated golden-hour light on the Harbour Bridge; Barangaroo Reserve headland at blue hour for the upper harbour and North Shore lights
  • Sun direction: Observatory Hill (47 m elevation) sits directly southwest of the Harbour Bridge, facing north-northwest. At golden hour the low western sun illuminates the bridge’s western face and the sandstone of The Rocks below the hill. The rotunda (an 1870s Victorian bandstand) and large Moreton Bay fig trees add foreground interest. Barangaroo Reserve headland is on the western CBD waterfront facing northwest across Darling Harbour toward the North Shore — sunset positions the sun to the right, lighting the harbour surface and Barangaroo tower skyline.
  • Access: Observatory Hill: Upper Fort Street, Millers Point NSW 2000. Free public park, open daily sunrise to sunset. Access via stairs from Cumberland Street (west) or Argyle Road (east, opposite Garrison Church). Closest train: Circular Quay (15-min walk). Barangaroo Reserve: 1 Merriman St, Millers Point NSW 2000. Free public headland park, open daily 24 hours. Access via Barangaroo Ave from Wynyard station (10 min walk); or via the waterfront promenade from The Rocks. No entry fee. No permit required for personal photography. Drones are prohibited in the Barangaroo Reserve per park management.
  • Difficulty: easy
  • Recommended settings: Bridge Golden Hour Elevated: f/8, 1/400 sec, ISO 100, 50mm  ·  Rotunda Foreground Bridge: f/8, 1/250 sec, ISO 100, 35mm  ·  Barangaroo Blue Hour Harbour: f/11, 15 sec, ISO 100, 24mm, tripod  ·  Observatory Building Night: f/4, 8 sec, ISO 400, 24mm, tripod

Shots to chase:

  • Observatory Hill rotunda with the Harbour Bridge arch visible behind it through Moreton Bay fig tree branches at golden hour
  • Elevated view from the hill’s north face looking down Argyle Street with heritage sandstone buildings converging toward the Bridge
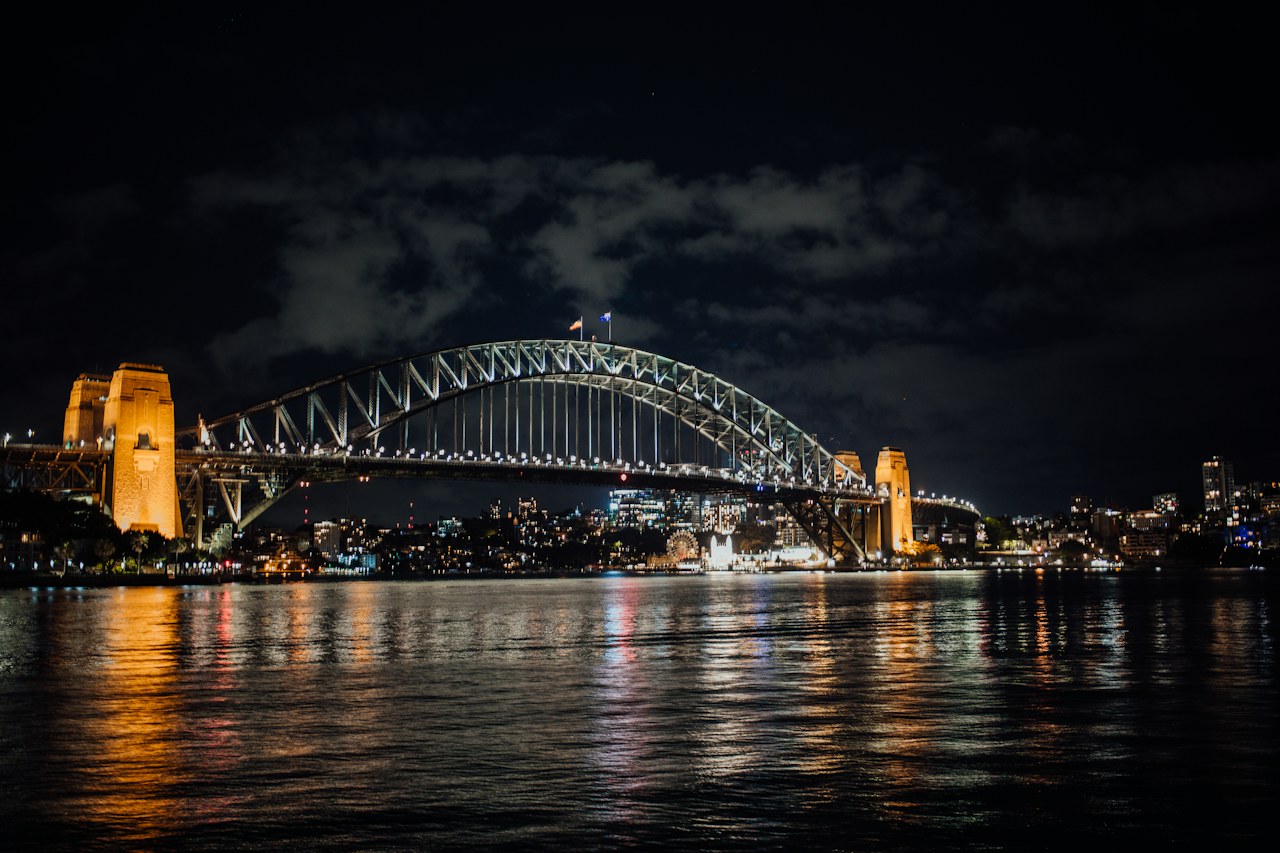
  • Barangaroo Reserve headland at blue hour — wide-angle shot north along the harbour with the Bridge, Luna Park, and North Shore lights reflected in the water
  • Sydney Observatory copper dome at twilight against a deep blue sky — the dome opens for evening stargazing programs
  • The view south from Barangaroo Reserve toward Darling Harbour and the CBD tower skyline from the waterfront promenade at dusk

Pro tip: For Observatory Hill, the best position is on the north-facing slope (not the summit, which has trees blocking the bridge view) — a low stone wall along the north perimeter provides a tripod rest for long exposures. Arrive 45 minutes before sunset and move from the hill to Barangaroo Reserve (10-minute walk downhill and north) for the blue-hour harbour sequence. The Sydney Observatory (sydneyobservatory.com.au) offers evening public programs with telescope access — a unique night photography opportunity. Barangaroo Reserve path lighting is excellent after dark, making the northern tip accessible for night photography.

Common mistake to avoid: Standing at the very summit of Observatory Hill, which is obscured by dense tree coverage — the photogenic views are from the north-facing slope. Confusing Barangaroo Reserve (the free public headland park at the north end) with the Barangaroo commercial precinct (casino and towers to the south) — the reserve is the photography-worthy destination. Attempting drone photography in either location, which is prohibited.

When to photograph Sydney: a year-round breakdown

Sydney is photogenic every month of the year — but the conditions differ radically by season. Here is what to expect:

October–November (spring: warm light, blooming gardens, manageable crowds) and March–April (autumn: golden tones, clear skies, fewer summer tourists)

Photographer safety in Sydney: read this

City photography has its own risks: gear visibility, neighborhood timing, traffic, weather. Read the briefing before you go.

  • Gear visibility: Use a discreet bag with no obvious camera branding. Keep a body strapped under a jacket on transit.
  • Neighborhood timing: Pre-dawn and post-sunset shoots reward early scouting. Cross-reference each location with current local guidance and choose well-lit transit routes.
  • Situational awareness: Headphones out. One eye in the viewfinder, one on the street.
  • Traffic: Bridges, medians, and bike lanes are not setup zones. Shoot from sidewalks and pedestrian areas only.
  • Weather: Summer storms move quickly; winter cold drains batteries. Layer up, keep gear dry, watch for ice on cobblestones at blue hour.

The complete safety briefing is inside the Sydney Photographer’s Guide PDF.

Take this guide into the city

This post is the complete field reference. The Sydney Ultimate Photographer’s Guide PDF is the field-deployable version: full-page resolution hero photography, GPS maps with gold pins for every location, multi-season shooting calendars, gear notes per location, sun-angle diagrams, the full city safety briefing, and a print-ready editorial layout in Framehaus black and gold. Save it offline. Print it. Take it on the walk.

Sydney Ultimate Photographer’s Guide
Downloadable PDF · 10 GPS-mapped locations · Multi-season calendar · City safety briefing · Packing checklist

Get the Sydney guide — $47

Combo Deal

Get the Sydney Guide + Preset Pack

Photograph it. Edit it. Done.

$66
$54
Save $12
PDF Guide Every spot, GPS, golden hour
Preset Pack 20 Lightroom presets
Book your tours & experiences in Sydney

All links go to Viator (a TripAdvisor company), the world’s largest marketplace for guided experiences. Tagged as affiliate per FTC.

Also on Amazon: gear that helps with this technique

Quick Amazon shortcuts to the gear most useful for this kind of shot. Use them if Prime shipping or Amazon credit makes more sense than B&H. As an Amazon Associate ShutYourAperture earns from qualifying purchases.

Take Sydney home in your pocket.

Every shot location, every angle, every time of day worth shooting. Printable PDF + GPS-tagged map.

Instant download. Works on phone, tablet, and printed.

Continue reading

← Back to International Cities Photography Guides

Related guides nearby

Three more photography guides within striking distance — perfect for combining into one trip.

  • Bali 4630 km away · city · Indonesia
  • Jakarta 5501 km away · city · Indonesia
  • Manila 6267 km away · city · Philippines

Browse all 78 guides → · Open the map

Save your trip-planning hours

The complete Sydney guide is $47

All vantage points above + 5 bonus secret spots, printable map, gear pack list, and editing recipes. One-time payment, instant download, lifetime updates.

Buy Sydney PDF →

Common questions about the Sydney guide

Is the Sydney photography guide worth $47?

For most photographers, yes. The guide saves 8-12 hours of trip-planning research and prevents the most common mistake of Sydney photography: shooting at the wrong time of day. If a single better frame is worth $47 to you, the guide pays for itself on day one. Buyers get every GPS coordinate, every golden-hour window, every cultural rule, and a printable shot list.

Does the Sydney guide include GPS coordinates?

Yes — every vantage point in the guide has Google Maps-ready GPS coordinates so you can pin them before you fly. The guide also includes a printable map showing all locations clustered by walking distance, so you can build efficient half-day routes.

What's in the Sydney PDF that isn't in this article?

The article shows the highlights. The PDF includes: 5 additional secret spots not published online, a 14-day itinerary with daily routes, the full camera-settings cheat sheet for every scenario in Sydney, a printable gear packing list, post-processing recipes with screenshot examples, and a list of local guides we trust for portrait commissions.

Do I get the Lightroom presets too?

The $47 guide is the PDF only. The matching Sydney preset pack is a separate $19 download — most buyers grab both as a bundle and save the editing time. Both are instant download, both work on Lightroom Classic and Lightroom Mobile.

Will the guide work for a Sydney trip in 2026?

Yes. The guide is updated annually as fees, restrictions, and new vantage points change. All buyers get free lifetime updates. The 2026 edition includes the latest drone rules, museum photography policies, and seasonal light data for the year.

Get the Sydney guide · $47