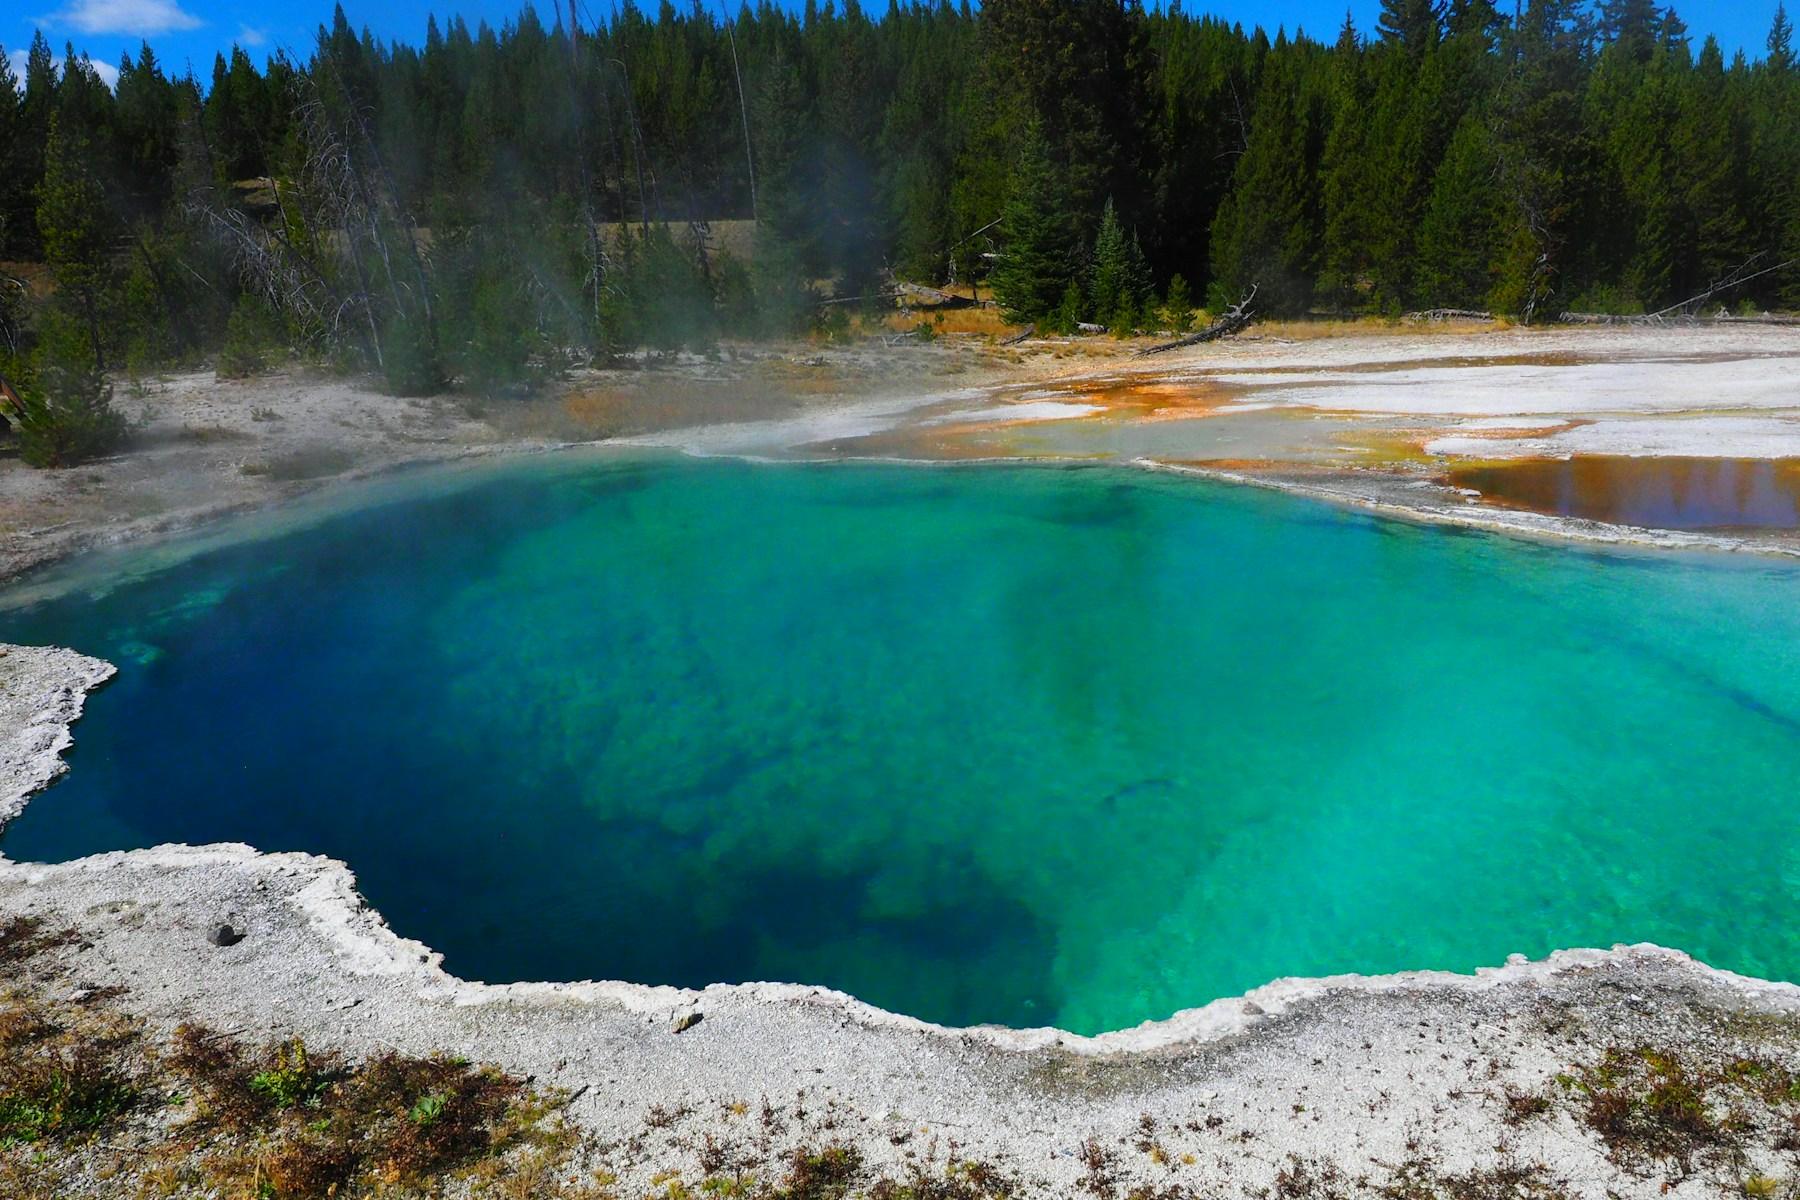
Best Photography Spots in Yellowstone National Park: 12 Locations With GPS

Tours & experiences disclosure: This guide includes affiliate links to Viator, the world’s largest tour and experiences marketplace. If you book through these links, ShutYourAperture may earn a small commission at no extra cost to you.

Yellowstone National Park — photographer's guide hero imageSave

Amazon Associates disclosure: ShutYourAperture is a participant in the Amazon Services LLC Associates Program. As an Amazon Associate we earn from qualifying purchases. Some links below go to Amazon (Store ID shutyouraperture-20). Buying through these links costs you nothing extra and helps fund our free guides.
Editing software disclosure: This guide includes affiliate links to Skylum (Luminar Neo, Aperty, Luminar Mobile). If you buy through these links, ShutYourAperture may earn a commission at no extra cost to you. We only recommend tools we use ourselves.
Skip the planning. Get the Yellowstone National Park PDF. All locations, GPS coordinates, golden-hour times, gear tips. Instant download.

Yellowstone National Park is one of the most photogenic landscapes in the United States. If you have a camera and the patience to show up before dawn, Yellowstone will give you images that last a career — but only if you know where and when to point it.

This is the definitive field guide to the 12 best photography spots in Yellowstone National Park, with GPS coordinates you can drop straight into Google Maps, exact camera settings tuned to Yellowstone’s unique light, precise timing for every location, and the access notes nobody else bothers to document. It mirrors the intel inside our Yellowstone Ultimate Photographer’s Guide ($47 PDF) — a downloadable field guide with full-page hero images, GPS maps, seasonal tables, a safety briefing, and a complete photographer’s packing list. Get the guide →

Planning multiple parks? See also: best photography spots in Zion, Grand Canyon, and the full National Parks Photography Guides hub.

Yellowstone Ultimate Photographer’s Guide — $47
12 GPS-mapped locations · Exact camera settings · Multi-season shooting calendar · Free annual updates

Download the PDF guide →
Skip the planning

Get the Yellowstone Ultimate Photographer’s Guide

Every location below — pre-mapped with GPS, golden-hour timing, gear recommendations, cultural rules, and a 14-day itinerary. Downloaded by 200+ working photographers.

Get the PDF · $47
Instant download · Lifetime updates

Quick jump to the 12 spots

  1. Grand Prismatic Spring
  2. Old Faithful
  3. Lower Falls of the Yellowstone — Artist Point
  4. Upper Falls of the Yellowstone
  5. Lamar Valley
  6. Hayden Valley
  7. Mammoth Hot Springs Terraces
  8. Norris Geyser Basin
  9. Grand Canyon of the Yellowstone
  10. Lake Yellowstone (West Thumb Geyser Basin Shoreline)
  11. Tower Fall
  12. Slough Creek (Wildlife & Sunrise Meadows)

Before you shoot Yellowstone: the essentials

  • Park entrance fee (2026): $35 per vehicle (7-day pass); $20 per motorcycle (7-day pass, up to 2 motorcycles and 4 passengers); $20 individual/pedestrian/cyclist (age 16+); $70 Yellowstone Annual Pass; $80 America the Beautiful Annual Pass (US residents); $250 America the Beautiful Annual Pass (non-US residents). Children under 16 free. Cash and credit/debit accepted at all five entrance stations. Current rates at nps.gov.
  • Best photography seasons: Late May–June for wildflowers, newborn wildlife, and manageable crowds; September–early October for elk rut, fall foliage, and thinner visitation; Winter (Dec–Mar, oversnow travel only) for frozen thermal steam, rime-ice trees, and solitude; Summer (Jul–Aug) for peak Milky Way and accessible backcountry.
  • Drone policy: Drones are completely prohibited on all NPS land under 36 CFR § 1.5. Fines up to $5,000.

The full-resolution version of every map below — plus seasonal calendars, gear matrices per location, sun-angle diagrams, and a complete photographer’s packing checklist — is inside the Yellowstone Photographer’s Guide PDF ($47).

1. Grand Prismatic Spring

At 370 feet wide, Grand Prismatic is the largest hot spring in the United States and the third-largest on Earth, its concentric rainbow rings — deep blue at center (superheated sterile core), green, yellow, orange, and brown at edges — produced by temperature-specific thermophilic bacteria. From the Fairy Falls overlook trail, photographers capture the full spectrum in a single frame with steam billowing against forested ridges and the Firehole River snaking below. No other geothermal feature in North America offers this scale, color saturation, or photogenic aerial-like vantage point from a legal, non-restricted position.

  • GPS: 44.52521, -110.83827
  • Elevation: 7,270 ft
  • Best time of day: Sunrise (primary) / blue hour / Milky Way (secondary)
  • Sun direction: The spring faces generally north-northeast. Sunrise light (azimuth ~60–80° in summer) grazes the colored microbial mats from the east at a low angle, igniting the orange and yellow rings before steam obscures the view by mid-morning. For the iconic rainbow-ring overhead shot from the Fairy Falls overlook, shoot in the 2–3 hours after sunrise when sun is high enough to saturate the blue-green core while illuminating the rings. Late afternoon and sunset bring backlit steam for impressionistic layers but lose ring color detail. Milky Way core rises to the south-southeast in July, ideally framed over the spring from the boardwalk’s southern end.
  • Access: From West Yellowstone: 10 miles north on US-191/Grand Loop Rd to Midway Geyser Basin parking lot (~15-min drive). Trailhead is the Fairy Falls parking area (44.5153, -110.8326) for the overlook hike: 1.0 mile one-way, 105 ft elevation gain. Boardwalk loop at spring level is 0.6 miles flat. Parking jammed 10am–5pm daily in summer; arrive by 7am or after 6pm.
  • Difficulty: Easy (boardwalk level); Moderate (Fairy Falls overlook hike, 2.0 miles RT, minimal gain)
  • Recommended settings: Sunrise: aperture: f/8–f/11, shutter: 1/60–1/250s, iso: 100–400, lens: 16–35mm wide-angle for full spring from boardwalk; 70–200mm for compressed layers from overlook trail  ·  Blue Hour: aperture: f/4–f/5.6, shutter: 1/15–1s (tripod required), iso: 400–1600, lens: 16–35mm; capture steam glow against blue sky  ·  Milky Way: aperture: f/2.8, shutter: 15–20s (use 500 rule: 500÷focal length), iso: 3200–6400, lens: 14–24mm ultra-wide; align Milky Way core above spring center from boardwalk south end; light-paint steam faintly with red torch

Shots to chase:

  • Fairy Falls overlook: 14mm wide-angle capturing the complete rainbow ring of the spring set against the Firehole River and conifer ridges — the signature ‘map view’ shot
  • Boardwalk level at sunrise: ultra-wide low angle with steam rising through backlit orange microbial mat in foreground, blue core receding to infinity
  • 20mm detail shot of the color transition zone at the spring’s edge — compressed bands of orange, yellow, and green against the cobalt water
  • Milky Way composited over the spring: 20mm f/2.8 ISO 6400 with Galactic core rising above steam in late July after midnight
  • Polarizer at mid-morning: reduce glare to penetrate the spring’s blue core and reveal the depth of the hydrothermal pool

Pro tip: Cold mornings (below 40°F) produce the densest steam columns, making the ring colors harder to see from the boardwalk — ascend the overlook trail for the color-versus-steam tradeoff. Arrive at the Fairy Falls parking area before 7am to secure a spot. Check PhotoPills or The Photographer’s Ephemeris to confirm solar azimuth: optimal overlook shooting occurs when sun is 25–40° above the eastern horizon. A circular polarizer cuts glare and deepens blue-green tones by 50%; rotate carefully for maximum effect. Tripod legs must stay on boardwalks per NPS regulations.

Common mistake to avoid: Shooting mid-morning from the boardwalk when steam completely veils the colored rings. Standing downwind of the spring on the boardwalk — walk upwind for clear views of the colors. Using a telephoto from the boardwalk instead of ascending the overlook trail for the only angle that shows the full spring geometry. Overexposing the white steam (use -1 to -1.5 EV exposure compensation in bright conditions).

2. Old Faithful

Old Faithful is the world’s most-studied geyser and Yellowstone’s iconic symbol, erupting 17–180 feet high for 1.5–5 minutes on predictable 60–110 minute intervals — a regularity unmatched by any other major geyser on Earth. At sunrise the steam column catches golden light while bison often wander the flat geyser basin, creating unique wildlife-geothermal compositions. Winter transforms the scene into a spectacle of superheated steam condensing instantly into ice crystals against subzero air, with frost-laden trees ringing the basin.

  • GPS: 44.46049, -110.82837
  • Elevation: 7,349 ft
  • Best time of day: Sunrise (primary) / blue hour / Milky Way
  • Sun direction: Old Faithful erupts toward the northeast. At sunrise in summer (azimuth ~60°), the low sun illuminates the eruption column from the east-northeast; position yourself to the west or southwest of the geyser to capture the backlit steam column with rim lighting. The main visitor boardwalk sits to the west and north, giving southeast-to-northwest shooting angles. The Hill Overlook (0.5-mile switchback trail) faces southwest and gives a top-down view with the geyser basin behind at dawn. For Milky Way, the galactic core rises south in summer — set up from the visitor boardwalk’s eastern end for south-facing compositions with the cone silhouetted against the galaxy.
  • Access: From West Entrance: 30 miles east on Grand Loop Rd (~35-min drive). Large Old Faithful Visitor Education Center parking area. Main viewing boardwalk is 0.5-mile flat loop around the geyser. Hill Overlook via switchback trail: 0.5 miles one-way, 130 ft gain. Check NPS geyser prediction hotline (307-344-2751, option 2) or the Geyser Activity page for next eruption time (average interval: ~90 minutes, range 60–110 min).
  • Difficulty: Easy (boardwalk); Moderate (Hill Overlook)
  • Recommended settings: Sunrise: aperture: f/8, shutter: 1/250–1/500s (freeze eruption column), iso: 200–800, lens: 70–200mm for tight eruption column; 24–70mm for basin context with bison  ·  Blue Hour: aperture: f/4, shutter: 1–4s (tripod), iso: 800–1600, lens: 24mm for wide blue-hour glow over geyser basin; 50mm for atmospheric steam-and-sky balance  ·  Milky Way: aperture: f/2.8, shutter: 15–20s, iso: 3200–6400, lens: 14–24mm ultra-wide; align galactic core directly above eruption for once-per-interval 5-min eruption opportunity

Shots to chase:

  • Eruption at sunrise with bison silhouetted in foreground grass — 200mm compressed telephoto with geyser column catching first golden rays
  • Wide-angle pre-dawn blue hour with steam backlit by ambient Visitor Center light and star trails above — 14mm, 30s, f/2.8
  • Vertical portrait: 70mm tight on the white eruption column against a pure blue morning sky for graphic minimalism
  • From Hill Overlook at sunrise: 24mm capturing the full Upper Geyser Basin with steam plumes from multiple geysers extending to the Madison Plateau
  • Winter oversnow trip: 50mm capturing the eruption column against rime-ice coated lodgepole pines in white silence

Pro tip: Arrive 20–30 minutes before predicted eruption to secure a front-row boardwalk position. Pre-eruption ‘splashing’ water from the vent signals an imminent full eruption — have your shutter finger ready. The eruption peaks in the first 20 seconds; don’t chimp (review images) during the peak. Shoot a burst at 1/500s to freeze individual water jets, then switch to 1/30s on tripod to show steam motion. For Milky Way, you must be in position during a predicted eruption window — check prediction within 10 minutes of arrival. Cold air (below freezing) produces dramatically denser steam for all shots.

Common mistake to avoid: Arriving right at the predicted time and getting stuck behind crowds without a clear sightline. Exposing for the bright eruption column and silhouetting everything else — use spot metering on the column and apply -1 EV. Shooting only with a wide angle and missing the graphic power of a compressed 200mm column-against-sky composition. Forgetting to note eruption duration (short eruptions under 2.5 min predict the next interval at 60–70 min; longer eruptions predict 90–110 min intervals).

3. Lower Falls of the Yellowstone — Artist Point

Artist Point is Yellowstone’s most iconic overlook, framing the 308-foot Lower Falls — twice the height of Niagara — within a canyon of brilliantly colored rhyolite walls stretching to the horizon. The hydrothermal alteration has stained the canyon walls in bands of yellow, orange, and white, giving the Grand Canyon of the Yellowstone its singular palette that Thomas Moran famously captured in 1871. The 9:45am summer rainbow over the falls is one of the most photographed natural phenomena in any national park.

  • GPS: 44.7203, -110.47977
  • Elevation: 7,734 ft
  • Best time of day: Sunrise (primary) / mid-morning for rainbow
  • Sun direction: Artist Point faces west-northwest, looking upstream into the Grand Canyon of the Yellowstone. At sunrise the canyon walls — rhyolite tinted yellow-orange by hydrothermal alteration — ignite in warm light while the falls remain in shadow, creating dramatic canyon illumination with a dark waterfall. By 9:45–10:15am on sunny summer mornings, the sun angle produces a rainbow arcing across the base of the 308-foot Lower Falls — a Yellowstone signature shot requiring a precise sun elevation around 40°. The south-facing canyon walls below receive the best warm light in mid-to-late morning. Avoid midday flat overhead light and afternoon shadows that obscure the falls.
  • Access: From Canyon Junction: 2.2 miles south on Grand Loop Rd, then left on South Rim Drive for 1.6 miles to parking lot end. 0.1-mile paved flat walk to overlook. Canyon Village is 3 miles north. Drive time from Old Faithful: ~55 min. Drive time from Lamar Valley: ~45 min.
  • Difficulty: Easy (0.2 miles RT, paved, wheelchair accessible)
  • Recommended settings: Sunrise: aperture: f/11, shutter: 1/30–1/125s, iso: 200–400, lens: 70–200mm to isolate the falls against the canyon walls; 24–70mm for wide canyon context  ·  Blue Hour: aperture: f/4–f/5.6, shutter: 1–4s, iso: 800–1600, lens: 24mm wide to capture the full canyon sweep in pre-dawn blue tones  ·  Sunrise Rainbow: aperture: f/11, shutter: 1/125s, iso: 200, lens: 70mm to frame rainbow over the waterfall base; circular polarizer to intensify rainbow saturation by ~40%

Shots to chase:

  • Classic 70mm: falls, rainbow, canyon walls — arrive by 9:30am in summer for the 9:45–10:15am rainbow window; CPL filter essential
  • Pre-dawn blue hour wide shot: 16mm capturing the full canyon sweep with a faint lavender glow over the rhyolite walls
  • Sunrise warm light on canyon walls while falls remain dark — dramatic tonal contrast, f/11, graduated ND to balance brightness
  • Telephoto compression: 200mm isolating just the lower plunge pool with mist-shrouded base and ochre canyon walls
  • Point Sublime hike extension (2.7 miles from Artist Point): superior elevated west-facing canyon view for afternoon golden hour compositions

Pro tip: For the rainbow shot: arrive by 9:30am in summer; position at the main overlook railing center for the best framing; mount a circular polarizer and rotate until the rainbow pops; bracket 3 exposures across ±1 stop. The rainbow is only visible when the sun is at the right angle (clear skies required) — use PhotoPills ‘Rainbow’ feature to predict exact times. Shoot early (pre-8am) if you want the canyon walls lit and falls in shadow — the contrast is extraordinary. Bring a 10-stop ND filter for a 2–4s silky waterfall effect.

Common mistake to avoid: Arriving at noon under flat overhead light when the canyon loses its golden color saturation. Missing the rainbow by arriving after 10:30am. Using a wide angle only and losing the falls’ scale against the canyon. Not using a polarizer, resulting in washed-out rainbow and hazy canyon colors.

4. Upper Falls of the Yellowstone

The 109-foot Upper Falls is dramatically different from the Lower Falls just downstream: a narrow, high-velocity chute that compresses the full force of the Yellowstone River through a basalt slot before exploding into a cauldron of white water and mist. From the Brink Trail, photographers can station themselves 30 feet above the lip of the falls — a heart-pounding vantage that conveys the raw hydraulic power of the river in a way no other accessible viewpoint does. The contrast with the gentler river above makes for a compelling sequence with Artist Point.

  • GPS: 44.71281, -110.49985
  • Elevation: 7,618 ft
  • Best time of day: Morning (primary) / overcast for even light on water
  • Sun direction: The Upper Falls viewpoint faces west, with the river flowing north before plunging 109 feet. Morning sun comes from the east-northeast, backlighting the falls and creating dramatic rim lighting on the plunge. The Brink of Upper Falls trail (0.25 miles RT from the spur road parking area) looks directly down the falls at close range — best in morning when spray reflects sunrise light. The Upper Falls viewpoint pullout on South Rim Drive sees the falls broadside at its most photogenic angle in the two hours after sunrise. Overcast is ideal for even, glare-free exposures on the white water.
  • Access: From Canyon Junction: 1.6 miles south on Grand Loop Rd, turn left onto Brink of Upper Falls spur road for 0.25 miles to parking. Brink trail: 0.25 miles RT, 75 ft drop, steep. Upper Falls viewpoint pullout: on South Rim Drive, no hiking required. Both accessed before reaching Artist Point on the South Rim route.
  • Difficulty: Easy (viewpoint pullout); Moderate (Brink trail, steep stairs)
  • Recommended settings: Sunrise: aperture: f/11–f/16, shutter: 1/250s (freeze) or 1–2s (silk), iso: 100–400, lens: 24–70mm for brink viewpoint at normal range; 70–200mm from Upper Falls viewpoint for compressed falls  ·  Blue Hour: aperture: f/4, shutter: 2–8s, iso: 400–800, lens: 24mm wide for brink with river disappearing into blue-hour mist

Shots to chase:

  • Brink of Upper Falls trail: 24mm ultra-wide looking straight down the falls plunge with Yellowstone River receding upstream — use a sturdy tripod, 2s at f/16 for silky water
  • Upper Falls viewpoint: 100mm capturing the broadside falls profile with mist-shrouded canyon below and conifer ridge above
  • Slow shutter abstract: f/22, 4s with a 6-stop ND filter — the falls become a white feather against dark basalt
  • Spray rainbow at brink: position upwind of the mist plume; a small rainbow forms in the spray cone on sunny mornings before 10am
  • Bracketed HDR sequence: canyon rock face, falls, and river above — combine for maximum dynamic range

Pro tip: The Brink of Upper Falls trail has steep, slippery steps near the bottom — wear grippy shoes, not sandals. Mist coats lens glass within seconds at the brink; bring a microfiber cloth and shoot quickly. Use a slower shutter (1–2s at f/16, ND filter in bright conditions) to show the river’s flow rather than freezing individual droplets. The Upper Falls is often overlooked by visitors rushing to Artist Point — arrive before the day-tripper rush (before 8:30am) for solitude.

Common mistake to avoid: Going straight to Artist Point without stopping at the Upper Falls — the brink perspective is entirely different and overlooked. Shooting in flat midday light when the basalt walls lose their texture. Forgetting lens protection from mist spray on the Brink Trail.

Want this in your pocket on the trail?
The full-resolution version of every spot above — with full-page hero photography, GPS maps with gold location pins, sun direction diagrams, multi-season tables, and a complete safety + packing checklist — is inside the Yellowstone Ultimate Photographer’s Guide PDF ($47). Print it, save it offline, take it into the park. Get the guide →

5. Lamar Valley

Called ‘America’s Serengeti,’ the Lamar Valley hosts the densest concentration of large mammals in the lower 48 states — bison herds sometimes numbering in the hundreds, wolves from the Lamar Canyon and Junction Butte packs, grizzly and black bears, elk, pronghorn, and bighorn sheep — all viewable from roadside pullouts within a glacially carved valley of extraordinary scale. It is the premier wolf-watching location in the world outside of Alaska. Mornings in May and June, when calves are newborn and wolves are denning, offer multi-species action that rivals an East African game drive.

  • GPS: 44.885, -110.215
  • Elevation: 6,969 ft
  • Best time of day: Sunrise (primary — wildlife most active) / blue hour / Milky Way
  • Sun direction: The Lamar Valley runs broadly east-west along the Lamar River. Sunrise light (azimuth ~60° in summer) illuminates the valley from the east, painting the hillsides and bison herds in warm golden tones while the valley bottom is still in cool shadow — a classic split-tone wildlife image. The valley faces generally east-southeast from the main pullouts on the Northeast Entrance Road, so sunrise shooters should position on the west side of the valley to shoot eastward. For Milky Way, the valley’s north-south orientation and minimal light pollution (Bortle 2) makes it one of the best dark-sky locations in the lower 48 — the galactic core rises to the southeast above the Absaroka Mountains in July.
  • Access: From Gardiner (North Entrance): 18 miles east on Grand Loop Rd to Tower Junction, then 9 miles east on Northeast Entrance Rd to the valley (~45 min). The Northeast Entrance to Cooke City segment is one of two year-round paved roads in the park. Prime pullouts are scattered along a 15-mile stretch from Tower Junction to the Northeast Entrance, with roadside bison jams common. No hiking required for road-based photography.
  • Difficulty: Easy (roadside pullouts)
  • Recommended settings: Sunrise: aperture: f/5.6–f/8, shutter: 1/500–1/2000s, iso: 800–3200, lens: 500–600mm for wolves and distant bears; 200–400mm for bison herds; 70–200mm for valley landscapes  ·  Blue Hour: aperture: f/2.8–f/4, shutter: 1/60–1/125s, iso: 3200–6400, lens: 70–200mm f/2.8 for pre-dawn wildlife silhouettes; 20mm for valley-with-stars blue hour  ·  Milky Way: aperture: f/2.8, shutter: 15–20s, iso: 3200–6400, lens: 14–24mm; foreground options: bison silhouette, Lamar River curve, or gnarled cottonwood tree

Shots to chase:

  • Bison herd at sunrise: 200mm with the herd backlit in golden light, valley mist rising from the Lamar River, Druid Peak in background
  • Wolves: 600mm + 1.4x TC (840mm equivalent) at f/8, 1/1000s — anticipate movement direction and leave composition space ahead of the subject
  • Milky Way over the valley: 20mm f/2.8, ISO 6400, 20s with a bison silhouette in foreground — July 1:00–3:00am for core high in the south
  • Grizzly bear on hillside: 400–600mm at f/6.3, 1/800s — fill the frame but leave space at top for the bear’s movement direction
  • Valley panorama at blue hour: 3-shot stitched panorama from a pullout, 24mm, 3s exposures capturing the pre-dawn purple sky over snow-capped ridgelines

Pro tip: For wolves, a spotting scope (60–80x) plus a digiscoping adapter is as important as a camera — locate wolves visually first, then photograph. Join the Yellowstone Wolf Project volunteer spotters who gather at roadside pullouts before dawn; they will share sightings generously. Use bean bags or window-mount heads for road-based telephoto shooting from your vehicle — vehicles count as a blind and wildlife is less disturbed. Wolf activity peaks during pup-rearing (May–June) and early morning pack movements. Bears with cubs appear on hillsides most reliably May–June.

Common mistake to avoid: Arriving at sunrise but stopping at the wrong (west) end of the valley where wildlife is less concentrated — the Confluence (where the Lamar and Soda Butte Creek meet) and Druid Flats area east of Pebble Creek are higher-yield zones. Using insufficient focal length (under 400mm) and getting only tiny-subject images of distant wolves. Creating a ‘wolf jam’ by stopping mid-road instead of a designated pullout — pull completely off the pavement.

6. Hayden Valley

Hayden Valley is the geologic remnant of a glacially expanded Yellowstone Lake, its fine-grained silty soils poor for tree growth but perfect for the sweeping grasslands that sustain the park’s densest bison concentration — herds of 500–2,000 animals during the July–August rut. Grizzly bears, wolves, elk, coyotes, and sandhill cranes frequent the valley daily. The Yellowstone River’s sweeping meanders through the valley create a compositional geometry unmatched anywhere in the park, with the river bends serving as leading lines into scenes of ungulate drama.

  • GPS: 44.64022, -110.45333
  • Elevation: 7,750 ft
  • Best time of day: Sunrise (primary) / sunset / blue hour
  • Sun direction: Hayden Valley runs roughly north-south along the Yellowstone River between Yellowstone Falls and Yellowstone Lake. Sunrise light from the east (azimuth ~65° in summer) illuminates the open grassland from the left when shooting north, casting long shadows across the valley floor and warming the bison silhouettes. The primary pullouts are on the east side of the road looking west across the river, meaning early-afternoon sun backlights subjects. Sunset (azimuth ~295° in summer) creates orange rim lighting on bison from the west — ideal for late-day compositions along the river bends near Alum Creek.
  • Access: From Canyon Village: 9 miles south on Grand Loop Rd. Valley stretches ~10 miles north-south between Canyon and Yellowstone Lake. Multiple signed pullouts along the road; Hayden Valley Pullout at approximately 44.65°N is the most productive for wildlife. No hiking required. Drive time from Canyon Junction: 15 min.
  • Difficulty: Easy (roadside pullouts)
  • Recommended settings: Sunrise: aperture: f/5.6–f/8, shutter: 1/500–1/1000s, iso: 400–1600, lens: 200–400mm for bison groups; 70–200mm for valley river bends; 500–600mm for bears and wolves  ·  Sunset: aperture: f/5.6, shutter: 1/250–1/500s, iso: 400–800, lens: 70–200mm for bison silhouettes against sunset; 400mm+ for mid-valley wildlife  ·  Blue Hour: aperture: f/2.8–f/4, shutter: 1/30–1/125s, iso: 1600–3200, lens: 70–200mm f/2.8 for pre-dawn wildlife with available twilight light

Shots to chase:

  • Bison rut in August: 400mm capturing two bulls in territorial standoff with golden valley grass and river in background — 1/1000s to freeze dust clouds
  • River bend aerial geometry: 24mm wide capturing the Yellowstone River oxbow meander with bison scattered across the foreground meadow
  • Grizzly bear fishing in the Yellowstone River at Alum Creek: 500mm+, 1/1000s, catching the bear mid-pounce
  • Sandhill crane pair at dawn: 300mm with slow river reflection behind, f/5.6, 1/500s
  • Sunset silhouette: lone bison against a tangerine sky over the valley’s western ridgeline — 200mm, f/11 for starburst sun

Pro tip: The bison rut (late July–mid August) transforms Hayden Valley into a primal theater — bulls bellow, charge, and roll in dust wallows. Position at a pullout by 5:30am (30 min before sunrise) to catch herds moving to the river to drink. The Alum Creek area (approximately 44.6150°N) is a reliable grizzly bear viewing zone May–September. Use your vehicle as a shooting platform — wildlife in Hayden tolerates cars far better than people on foot. Thermal activity from underground features creates ground fog on cool mornings that can add painterly atmosphere to otherwise straightforward bison shots.

Common mistake to avoid: Shooting bison from too far away when the valley’s scale flatters wider shots — bison at 300 feet need at least 400mm for frame-filling portraits. Stopping in the travel lane during wildlife sightings — Hayden Valley traffic can be dense; always use designated pullouts. Missing the sandhill cranes and coyotes by focusing exclusively on bison.

7. Mammoth Hot Springs Terraces

Mammoth Hot Springs is one of Earth’s premier travertine terrace systems — hot water supersaturated with calcium carbonate deposits up to two tons of travertite per day, building ever-changing stepped terraces in tones of white, cream, orange, and gray. Unlike the geysers of the Lower Basins, Mammoth’s terraces shift dramatically from year to year as flow channels divert; what is an active steaming cascade one season may be bone-dry bleached calcium the next. The juxtaposition of steam, mineral color, dead lodgepole snags, and the distant Gardner River canyon creates a compositional palette unlike any other feature in the park.

  • GPS: 44.96688, -110.70736
  • Elevation: 6,239 ft
  • Best time of day: Sunrise (primary) / sunset / blue hour
  • Sun direction: The Lower Terraces (Main Terrace, Canary Spring, Liberty Cap) face east-to-south and catch the first warm morning light from the east-northeast at sunrise. Upper Terrace Drive terraces face various directions; the Dead Trees in Travertine pool shot on the Upper Terrace Drive’s southern section faces west and is best in the hour before sunset. In summer, sunrise azimuth of ~60° grazes the stepped travertine at a raking angle that reveals every ridge and channel, making textures pop. For blue hour, steam above the terraces glows in the cool blue ambient light — particularly effective in cold mornings (below 30°F) when condensation is maximal.
  • Access: From North Entrance (Gardiner): 5 miles south on US-89 to Mammoth Hot Springs (~7 min drive). Lower Terraces boardwalk: 1.75-mile loop, flat. Upper Terrace Drive: 1.5-mile one-way paved loop accessible by car (also walkable). Open year-round as the North Entrance road is the only year-round paved access route. Mammoth Village has lodging (Mammoth Hot Springs Hotel), restaurant, visitor center.
  • Difficulty: Easy (boardwalk loops)
  • Recommended settings: Sunrise: aperture: f/11–f/16, shutter: 1/30–1/125s, iso: 100–400, lens: 24–70mm for terrace context; 70–200mm for compressed terrace layers and steam details  ·  Sunset: aperture: f/8–f/11, shutter: 1/60–1/250s, iso: 100–400, lens: 24mm for Upper Terrace dead-tree pool with sunset backlight; CPL to cut glare on water  ·  Blue Hour: aperture: f/4–f/5.6, shutter: 2–8s (tripod), iso: 400–1600, lens: 24mm for steam rising through blue-tinted ambient light over the terraces

Shots to chase:

  • Sunrise on Main Terrace: 24mm showing the tiered cascades of travertine with first golden light raking across each step, steam rising diagonally toward the top
  • Canary Spring detail: 70mm isolating the sulfur-yellow-and-orange microbial channels flowing down white travertine — polarizer for color saturation
  • Dead trees in travertine pool (Upper Terrace Drive, southern section): 24mm at sunset with bleached snags reflected in the steaming, rust-colored pool
  • Cold morning blue hour: 20mm with steam columns backlit against the pre-dawn blue sky creating an ethereal vertical composition above the terraces
  • Liberty Cap monolith: 35mm with the 37-foot cone-shaped dormant hot spring in foreground, Mammoth Hotel in background — sunrise side-lighting for dimensional texture

Pro tip: The active terraces change dramatically season to season — check recent trip reports or the NPS Mammoth page before visiting to confirm which pools are actively flowing. Elk frequently graze on the terrace boardwalks at dawn and dusk (especially September–October rut) — this wildlife-plus-thermal combination is uniquely Mammoth. Bring a CPL filter; travertite in bright sun generates significant glare. For the dead-trees shot on the Upper Terrace Drive, you need the pools to have water actively flowing — not always the case in drought years.

Common mistake to avoid: Shooting only the Lower Terraces and missing the Upper Terrace Drive’s more intimate and less-visited perspectives. Shooting at midday when the terraces are bleached white and lose color. Not cleaning lens glass after working near steam vents — calcium deposits leave permanent marks.

8. Norris Geyser Basin

Norris Geyser Basin is Yellowstone’s hottest, oldest, and most dynamic thermal area — ground temperatures exceed 459°F (237°C) just meters below the surface, and the basin undergoes cyclical ‘disturbance’ events (annual or bi-annual) when thermal activity surges across the basin simultaneously. Steamboat Geyser is the world’s tallest active geyser, capable of eruptions to 400 feet lasting 3–40 minutes — unpredictable but spectacular when it fires. Porcelain Basin’s open, barren silica landscape is the most extraterrestrial-looking terrain in the park, with hissing fumaroles, boiling mudpots, and neon-turquoise pools arranged across a stark white mineral crust.

  • GPS: 44.726, -110.70278
  • Elevation: 7,484 ft
  • Best time of day: Sunrise (primary) / blue hour
  • Sun direction: Norris Geyser Basin is divided into Porcelain Basin (open, lunar landscape) and Back Basin (forested). Porcelain Basin faces broadly south with its white silica and turquoise pools — sunrise light from the east illuminates the basin at a low raking angle that creates extraordinary texture across the silica-mineral crusts. The Back Basin’s Steamboat Geyser (world’s tallest active geyser, erupting irregularly to 300–400 feet) faces north; best backlit shots come when you position south of the vent to catch eruption columns backlit by morning sun. Ledge Geyser and Echinus Geyser in Back Basin respond best to side lighting in early morning or late afternoon.
  • Access: From Canyon Junction: 12 miles west on Norris Canyon Rd (~15 min). From Mammoth: 21 miles south on Grand Loop Rd (~25 min). Large parking lot at Norris Junction. Porcelain Basin loop: 0.75 miles, flat. Back Basin loop: 1.5 miles, flat. Both boardwalk trails. Norris Museum is the oldest remaining park museum building (1930).
  • Difficulty: Easy (flat boardwalk loops)
  • Recommended settings: Sunrise: aperture: f/8–f/11, shutter: 1/60–1/250s, iso: 100–400, lens: 16–35mm for Porcelain Basin’s vast white silica landscape; 70–200mm for thermal pool detail and steam columns  ·  Blue Hour: aperture: f/4, shutter: 1–4s (tripod), iso: 800–1600, lens: 20mm for blue-tinted steam columns rising above Porcelain Basin before dawn; 50mm for atmospheric steam layering

Shots to chase:

  • Porcelain Basin at sunrise: 16mm ultra-wide with the white silica crust as foreground, multiple steam vents rising, Roaring Mountain ridge on skyline
  • Steamboat Geyser eruption (when active): 70–200mm capturing the dual-phase eruption — water phase (first 3–40 min) followed by the prolonged steam phase — position downwind and 50+ yards back
  • Ledge Geyser pooling: 24mm close-up of the turquoise-blue pool edge with mineral deposits and steam wisps in morning side light
  • Blue hour Porcelain: 20mm, 3s at f/4, ISO 1600 — the entire basin glows with bioluminescent-seeming blue steam in pre-dawn ambient light
  • Black and white abstract: 70–200mm isolating the cracked silica mineral patterns on the Porcelain Basin floor — textures recall a lunar surface

Pro tip: Check the Steamboat Geyser eruption log (USGS Yellowstone Volcano Observatory) before visiting — eruptions now occur on irregular multi-week intervals. If you can time a Norris visit within 48 hours of a Steamboat eruption, the basin’s activity is elevated and many other features are more dramatic. Porcelain Basin has almost no shade; bring sun protection for mid-morning visits. The basin ‘disturbance’ events (usually late summer) alter the entire basin’s behavior — these periods produce the most dynamic photography but require current information from the Norris Museum staff.

Common mistake to avoid: Visiting Norris only briefly en route to Old Faithful and missing the Back Basin entirely. Standing downwind of fumaroles — the hydrogen sulfide gas is nauseating at close range and harmful with extended exposure. Not having a wide-angle lens for Porcelain Basin’s scale.

Want this in your pocket on the trail?
The full-resolution version of every spot above — with full-page hero photography, GPS maps with gold location pins, sun direction diagrams, multi-season tables, and a complete safety + packing checklist — is inside the Yellowstone Ultimate Photographer’s Guide PDF ($47). Print it, save it offline, take it into the park. Get the guide →

9. Grand Canyon of the Yellowstone

The Grand Canyon of the Yellowstone stretches 20 miles long and 800–1,200 feet deep, its walls stained in 20+ shades of yellow, orange, red, pink, and white by millennia of hydrothermal alteration of rhyolite lava. The 308-foot Lower Falls is twice the height of Niagara and the park’s most photographed feature. The canyon geometry shifts at every overlook — from the dramatic falls-and-canyon sweep of Artist Point to the intimate river-far-below perspective of Inspiration Point — giving photographers an almost unlimited variety of compositions within a 5-mile circuit of rim roads.

  • GPS: 44.725, -110.495
  • Elevation: 7,734 ft
  • Best time of day: Sunrise (South Rim primary) / mid-morning for North Rim / afternoon (North Rim)
  • Sun direction: The canyon runs roughly north-south with the river flowing north. South Rim (Artist Point, Upper Falls viewpoint) faces west and northwest — catches morning light from the east on the opposite (north/east) canyon walls. For the best color on the yellow-orange rhyolite walls, shoot the South Rim in the first 3 hours after sunrise when the eastern walls glow in low-angle light. The North Rim (Lookout Point, Grand View, Inspiration Point) faces south and east — best lit from mid-morning through midday when the sun moves into the south. Grand View on the North Rim gives the most comprehensive canyon sweep at around 10–11am. Brink of Lower Falls faces down-canyon to the east — best backlit morning light.
  • Access: From Canyon Junction: North Rim Drive (one-way, 2.5 miles) begins 0.5 miles south of Canyon Village; South Rim Drive (1.6 miles one-way) starts 2.3 miles south of Canyon Junction. Canyon Village has a visitor center, lodging (Canyon Lodge), and full services. Drive time from Old Faithful: ~55 min.
  • Difficulty: Easy (viewpoint pullouts); Moderate (Brink of Lower Falls trail — steep switchbacks, 1.0 mile RT); Strenuous (Point Sublime, 5.4 miles RT from Artist Point)
  • Recommended settings: Sunrise: aperture: f/11, shutter: 1/60–1/250s, iso: 100–400, lens: 24–70mm for full canyon context; 70–200mm for compressed falls-and-wall details  ·  Blue Hour: aperture: f/4–f/5.6, shutter: 1–4s, iso: 800–1600, lens: 16–24mm for pre-dawn canyon sweep in cool blue tones from Artist Point  ·  Midday: aperture: f/11, shutter: 1/125–1/250s, iso: 100, lens: 70–200mm for canyon wall color detail from North Rim overlooks where south-facing light is optimal

Shots to chase:

  • Artist Point at dawn: 24mm capturing the Lower Falls plunge, the full width of the canyon, and sunrise-lit eastern walls in one frame — graduated ND to balance bright sky
  • Lookout Point mid-morning: 100mm compressing the Lower Falls against the deep-hued north canyon walls under high sun
  • Grand View panorama: 4-shot stitch at 35mm from the North Rim, capturing the river’s Z-shaped path through the canyon 800 feet below
  • Brink of Lower Falls: 16mm extreme wide-angle pointing straight down into the plunge pool — the most vertigo-inducing perspective in the canyon
  • Point Sublime at golden hour: 5.4-mile RT hike from Artist Point rewards with a cliff-edge, unobstructed canyon view without other visitors — ideal for sunset west-facing compositions

Pro tip: Do both rims in one day: South Rim in the morning (2–3 hours), North Rim in the late morning to early afternoon (2 hours), then return to Artist Point for the rainbow if conditions allow. A circular polarizer is essential on the North Rim to cut haze and saturate the wall colors. For Point Sublime, start by 2pm for a 5:30pm arrival at the overlook and sunset conditions. The canyon is never as good at midday from the South Rim (flat light), but the North Rim mid-morning works due to its south-facing orientation.

Common mistake to avoid: Doing only Artist Point and leaving — missing seven other significant viewpoints. Visiting the North Rim at 8am before the sun has moved far enough south to light the canyon. Using a polarizer at the wrong rotation angle and actually reducing color saturation instead of enhancing it.

10. Lake Yellowstone (West Thumb Geyser Basin Shoreline)

Yellowstone Lake is the largest high-altitude lake (above 7,000 ft) in North America, and West Thumb’s geyser basin is the only place on Earth where active geysers and hot springs sit directly on the shoreline of a large lake, with boiling water venting just feet from the cold lake surface. The Fishing Cone geyser — historically used to cook fish still on the hook — sits a few feet from the lake and creates steam columns rising directly from the lakewater. At sunrise, the thermal steam over the calm lake surface produces mirror-like reflections of the sky and the distant Absaroka Range peaks.

  • GPS: 44.4158, -110.57508
  • Elevation: 7,733 ft
  • Best time of day: Sunrise (primary) / blue hour
  • Sun direction: The West Thumb Geyser Basin sits on the western shore of Yellowstone Lake, with the lake extending to the east and northeast. Sunrise light (azimuth ~65° in summer) comes directly across the lake surface, illuminating the steaming geyser vents and creating golden reflections on the water’s surface. The boardwalk faces east to northeast — the optimal direction for catching the full sunrise drama with the Absaroka Range visible on the far eastern shore 20+ miles away. Blue hour is particularly potent here: the geothermal steam glows orange while the lake turns deep indigo, and the distant mountains catch alpenglow.
  • Access: From West Entrance via Old Faithful: 17 miles south on Grand Loop Rd (Craig Pass, 8,262 ft) to West Thumb Junction (~25 min). From South Entrance: 21 miles north on US-89/287 (~25 min). West Thumb Geyser Basin boardwalk: 0.7-mile loop, flat, fully accessible. Fishing Bridge is 21 miles north. West Thumb has a seasonal information station (mid-May to early October).
  • Difficulty: Easy (flat boardwalk loop, fully accessible)
  • Recommended settings: Sunrise: aperture: f/8–f/11, shutter: 1/30–1/125s (tripod), iso: 200–800, lens: 16–35mm for full lake/geyser/mountain panorama; 24–70mm for boardwalk-level thermal detail with lake backdrop  ·  Blue Hour: aperture: f/4, shutter: 2–8s, iso: 800–1600, lens: 20mm ultra-wide for pre-dawn deep blue lake with steaming geysers glowing orange in ambient thermal light; 10-stop ND for glassy lake surface in any light

Shots to chase:

  • Sunrise panorama: 16mm capturing the lake’s glassy surface, thermal steam in foreground, first golden light touching distant Absaroka peaks — 3-shot stitch at f/11
  • Fishing Cone: 35mm with the historic cone geyser steaming inches from the lakewater, sunrise alpenglow on the lake surface
  • Long-exposure blue hour: 20mm, 8s, f/11, CPL — lake turns glassy, steam blurs into gossamer layers above the boardwalk
  • Reflection shot: position camera inches above the lake surface at a shoreline thermal pool edge — sky and steam reflected in the pool create a double-world composition
  • Lake Yellowstone Overlook trail (1.9-mile loop from West Thumb trailhead, summit at 8,013 ft): panoramic lakeside elevated view for a completely different angle than the boardwalk

Pro tip: Calm mornings (little wind) are essential for mirror reflections on the lake surface — arrive before 6:30am in summer before convective winds develop. The West Thumb boardwalk is entirely flat and faces east: this is one of the easiest sunrise shoots in the park requiring zero elevation gain. Bring mosquito repellent — the West Thumb area is buggy June–July. Winter visits (oversnow access only) produce some of the most dramatic imagery: geysers steaming into -20°F air above an ice-edged lake.

Common mistake to avoid: Arriving after 9am when convective winds roughen the lake surface and kill reflections. Shooting only the boardwalk and missing the Lake Yellowstone Overlook trail’s elevated perspective. Not using a circular polarizer, which can reduce surface glare and reveal the extraordinary blue depth of the lake.

11. Tower Fall

Tower Fall is framed by a dramatic colonnade of andesite breccia columns (volcanic spires) on both sides — rock pinnacles that give the falls its name. These columnar basalt-like formations are unique in the park and create a natural ‘gateway’ composition where the waterfall appears to tunnel through stone pillars. Unlike the high-volume Lower Falls, Tower Fall has an intimate scale and is positioned within a narrow forested canyon that concentrates its acoustic power, making it a viscerally immersive waterfall experience rather than a distant panoramic one.

  • GPS: 44.89361, -110.38722
  • Elevation: 6,600 ft
  • Best time of day: Morning (primary) / overcast for waterfall detail
  • Sun direction: Tower Fall drops 132 feet from Tower Creek into the Yellowstone River. The main viewpoint overlook faces south-southwest, with the waterfall positioned in a narrow rhyolite column-framed slot. Morning light from the east-northeast reaches into the canyon slot by 8–9am in summer, illuminating the mist at the waterfall base while the rhyolite columns remain in rim light. The trail down to the river (partially restored 2024) offers a north-looking perspective into the plunge pool — better midday when the sun is high enough to reach down into the canyon. Overcast conditions produce the most even light for the waterfall’s full dynamic range.
  • Access: From Tower-Roosevelt Junction: 2.5 miles south on Grand Loop Rd. Tower Fall parking lot and small store on the east side of the road. Overlook: 100 yards from parking, paved. Trail to the falls base: 0.8 miles one-way, steep descent 200 ft — check NPS for current trail status as erosion periodically closes it. Tower-Roosevelt Junction has a lodge, cabins, and dining. Open approximately May 8–October 31.
  • Difficulty: Easy (overlook); Moderate (base trail, steep)
  • Recommended settings: Sunrise: aperture: f/11–f/16, shutter: 0.5–2s (slow for silk) or 1/250s (freeze), iso: 100–400, lens: 50–100mm from overlook to fill frame with falls and columns; 24mm for wider canyon context  ·  Blue Hour: aperture: f/4, shutter: 4–8s, iso: 400–800, lens: 35mm from overlook; blue-tinted mist below framed by dark column silhouettes

Shots to chase:

  • Overlook classic: 70mm with both rhyolite pinnacles flanking the waterfall — slow shutter (1s) for silky water, f/11 for column sharpness
  • Base trail (when open): 24mm looking up at the 132-foot drop with mist-shrouded foreground pool and the narrow canyon walls towering above
  • Detail shot: 100mm isolating a single rhyolite spire against the falls and canyon — textures and geology foreground with motion blur background
  • Overcast long exposure: 6-stop ND filter, 4s at f/16 — completely silky waterfall, maximum textural detail in the volcanic columns
  • Black and white conversion: high-contrast monochrome accentuating the dark basalt columns versus bright waterfall — Ansel Adams-style tonal drama

Pro tip: Check NPS trail status before planning a base trail descent — erosion events have repeatedly closed or rerouted the lower trail. Arrive at the overlook by 7am to avoid the line of summer visitors that forms by 9am at this popular quick stop. Use a polarizing filter from the overlook to cut glare on the wet rock faces and deepen the green of the surrounding conifers. A 6-stop ND filter allows long exposures in bright midday conditions.

Common mistake to avoid: Shooting only from the overlook without a telephoto and missing the columnar detail. Shooting at a shutter speed that produces neither clean freeze nor silky silk — the ‘in-between’ blur at 1/30s looks like a mistake. Not checking trail status for the base access.

12. Slough Creek (Wildlife & Sunrise Meadows)

Slough Creek is the quietest, most productive wildlife photography location in the northeastern range — a less-trafficked alternative to the main Lamar Valley road with superior access to wolf denning areas. The creek’s First and Second Meadows are ancient glacial flood plains that have never been farmed, creating a pristine riparian habitat where wolves, grizzly bears, sandhill cranes, moose, and bison share an intimate valley at manageable distances. The dirt access road filters out casual visitors, leaving serious photographers with far less competition for sightlines and parking.

  • GPS: 44.91833, -110.3475
  • Elevation: 6,240 ft
  • Best time of day: Sunrise (primary — optimal for wolves and bears) / blue hour
  • Sun direction: Slough Creek runs roughly southeast to northwest through a glacially carved valley. The campground and trailhead parking area face east, directly into the sunrise. Sunrise azimuth in summer (~60°) illuminates the open meadows and creek bends in warm golden tones within minutes of dawn, with long shadows defining the rolling terrain. Wolf-watchers typically position on the low hills north of the creek mouth, giving a southeast-facing view that maximizes backlit morning animal silhouettes. The valley is in shadow until approximately 7am in early summer due to surrounding ridges — plan exposure for 7–8am as the light descends the western slopes.
  • Access: From Tower-Roosevelt Junction: 6 miles east on Northeast Entrance Rd, then 2 miles north on Slough Creek dirt road to the campground and trailhead. The 2-mile dirt access road is rough but passable by regular 2WD vehicles in dry conditions. Slough Creek Campground (29 sites, first-come first-served, no reservations) is the base for wolf and bear photographers staying multiple days. The first meadow is 1.8 miles one-way from the trailhead (relatively flat, 200 ft gain).
  • Difficulty: Easy (campground area pullouts); Moderate (First Meadow hike, 3.6 miles RT, 200 ft gain)
  • Recommended settings: Sunrise: aperture: f/5.6–f/8, shutter: 1/500–1/1000s, iso: 800–3200, lens: 500–600mm + 1.4x TC for wolves; 200–400mm for bears and moose; 70–200mm for landscape context with wildlife  ·  Blue Hour: aperture: f/2.8–f/4, shutter: 1/60–1/125s, iso: 3200–6400, lens: 400mm+ for pre-dawn wildlife silhouettes; 20mm for valley panorama with first light on ridgeline

Shots to chase:

  • First Meadow at dawn: bison and sandhill cranes sharing the riparian meadow with low mist rising from Slough Creek — 300mm, f/5.6, 1/500s
  • Wolf crossing the creek: 600mm + 1.4x at 840mm, 1/1000s, f/8 — pre-position at a known crossing point from reports by experienced spotters at the campground
  • Grizzly bear foraging in the First Meadow: 500mm at f/6.3, 1/800s — frame with creek willows in foreground blur
  • Sandhill crane pair: 300mm vertical portrait with the creek shallows reflecting the soft morning sky
  • Valley sunrise panorama: 24mm from the trailhead knoll capturing the Slough Creek drainage, ridgeline bathed in alpenglow, and fog in the creek bottom — 3-shot stitch

Pro tip: Camp at Slough Creek Campground (book far in advance or arrive by 9am to grab a site) to be positioned before dawn without a long drive. The campground hosts a community of serious wildlife photographers who share morning sightings generously — introduce yourself the evening before. Bring bear spray and be vigilant: this is active grizzly territory and wolves may approach the campground at night. The access road can become impassable in rain/snow — check conditions before driving in. First Meadow hike is worth it for superior distance from the road-traffic noise.

Common mistake to avoid: Driving the rough access road in a low-clearance vehicle and bottoming out. Arriving after sunrise and missing the optimal light and wolf-activity window. Forgetting bear spray — Slough Creek has one of the highest grizzly encounter rates in the park. Not connecting with other photographers at the campground for critical real-time wildlife intelligence.

When to photograph Yellowstone: a year-round breakdown

Yellowstone is photogenic every month of the year — but the conditions differ radically by season. Here is what to expect:

Spring (March–May)

Snow persists on high-elevation roads through May; Dunraven Pass typically opens late May. West Entrance opens mid-April. Lower elevations (Mammoth, Lamar Valley) show green-up by early May. Snowstorms possible any month through June.

Highlights: Newborn bison calves (mid-April to late May) in Lamar and Hayden Valleys. Wolf pup-rearing at dens — Lamar Canyon Pack historically denned in visible locations. Grizzly bears emerge from dens March–April and are highly active and visible. Wildflowers begin at Mammoth (April) and move upslope through June. The park is far less crowded than summer, and meadows retain snowmelt water for stunning reflective pools.

Challenges: Many facilities closed until mid-May. Limited lodging options. Roads may be muddy or require AWD. Unpredictable weather requires layered clothing and flexible itineraries. Some boardwalks may have ice or snow requiring microspikes.

Summer (June–August)

Peak visitation (80%+ of annual visitors concentrated in 3 months). All roads open. High temperatures 70–85°F at lower elevations; 50–65°F at elevation. Afternoon thunderstorms develop regularly July–August. Long daylight hours (sunrise ~5:30am, sunset ~8:45pm in midsummer).

Highlights: All park facilities, roads, and lodges open. Bison rut in Hayden Valley (late July–mid August) is a highlight for wildlife photographers. Peak wildflowers on Dunraven Pass (July). Milky Way core visible from late May through October. Maximum geyser steam visibility in cool morning air. Full range of wildlife active.

Challenges: Extreme crowds: Old Faithful parking may be full by 9am; Artist Point by 8:30am. Wildlife jams can create road delays of 30–60 minutes. Hotel and campsite reservations must be made 6+ months in advance. Afternoon lightning limits alpine ridge shooting. Mosquitoes peak June–July.

Fall (September–November)

Crowds thin dramatically after Labor Day. Temperatures cool to 40–60°F days, 20–35°F nights. First frost in mid-September at elevation. First snow events possible October. Aspen and cottonwood color peaks late September to mid-October in the lower valleys.

Highlights: Elk rut (September–October): bulls bugling and sparring at Mammoth, Madison, and around Yellowstone Lake — one of the great wildlife spectacles in North America. Fall foliage: aspens and cottonwoods in the Lamar and Gibbon River drainages peak mid-September to early October. Lower crowd levels allow extended access to prime overlooks without competition. Wolf activity increases as packs reunite after summer dispersal. Fewer insects.

Challenges: Some facilities begin closing October 1. Dunraven Pass closes in mid-October. South and East Entrances close October 31. Campground closures begin late September. Weather can turn rapidly from warm to blizzard conditions.

Winter (December–February)

Interior roads close to wheeled vehicles in early November. Oversnow (snowcoach/snowmobile) season runs mid-December to mid-March. Temperatures range from -20°F to 30°F. Snow accumulation can reach 600 inches/season at elevation. The Northern Range (Lamar Valley, Mammoth) remains accessible year-round by paved road.

Highlights: Rime-ice or ‘hoarfrost’ encases lodgepole pines and thermal features in crystals visible only in winter. Geothermal steam condensing in -20°F air creates dramatic columns and frost fog. Bison coated in snow and frost. Foxes making ‘mousing’ pounces through snowpack. The park is nearly empty and profoundly peaceful. Wolves are highly visible against white snow backgrounds in the Lamar Valley. Winter light stays low on the horizon all day — perpetual golden hour for low-angle photography.

Challenges: Oversnow travel requires guided snowcoach or snowmobile reservation (book months ahead). Very limited lodging — Mammoth Hot Springs Hotel and Old Faithful Snow Lodge only. Extreme cold requires serious cold-weather camera preparation: keep spare batteries inside jacket, use hand warmers, protect lens from thermal shock. Camera electronics may fail below -20°F without cold-weather preparation.

How to get to Yellowstone National Park

Nearest airports

  • BZN — Bozeman Yellowstone International Airport: . Most flights, best year-round access, served by all major carriers. Primary hub for Lamar Valley-focused trips.
  • JAC — Jackson Hole Airport: . Closest airport for Old Faithful, West Thumb, and southern park. Inside Grand Teton National Park. Limited winter operations.
  • COD — Yellowstone Regional Airport: . Best access for Canyon, Hayden Valley, and eastern park. Open seasonally (May–October primarily). Smaller carrier options.
  • WYS — Yellowstone Airport: . Summer-only (June–September). Closest airport to Old Faithful and geothermal basins. Very limited service.
  • BIL — Billings Logan International Airport: . Backup option if BZN is full; also good for Beartooth Highway scenic approach (open late May–early October).

Photographer safety at Yellowstone: read this

Every national park has its own hazards. Read the briefing before you go.

  • Thermal Feature Dangers: {‘boardwalk_rule’: ‘Always walk on boardwalks and designated trails in all thermal areas without exception. The ground adjacent to thermal features may appear solid but is often just a thin crust of silica or carbonate over superheated water. Stepping off a boardwalk can result in a ground collapse and immediate scalding. Tripod legs must remain on boardwalks at all times per NPS photography regulations.’, ‘water_temperature’: “Yellowstone’s hot springs reach temperatures of 199°F (93°C) — near the boiling point at 7,000+ ft elevation. More than 20 people have died from burns after falling or entering hot springs. Many hot springs have near-neutral pH (unlike acidic mudpots) and contain thermophilic bacteria found nowhere else on Earth; contact destroys these unique organisms.”, ‘runoff_hazard’: ‘Even thermal runoff channels crossing boardwalks are extremely hot. Do not touch any water in thermal areas.’, ‘toxic_gases’: ‘Hydrogen sulfide and carbon dioxide can accumulate in depressions and poorly ventilated areas of geyser basins. If you feel nausea, headache, or dizziness, leave the thermal area immediately.’, ‘cold_morning_steam’: ‘Cold mornings produce the densest steam, reducing visibility of the ground and boardwalk edges. Step carefully and keep children close.’, ‘pets’: ‘Pets (including leashed pets) are not allowed in thermal areas or on boardwalks — thermal runoff and thin crusts are fatal to animals. Trained service animals with specific disability-related tasks are permitted and must remain leashed.’}
  • Wildlife Distance Rules: {‘bears_wolves_cougars’: ‘Maintain a minimum 100 yards (91 meters) at all times from bears (grizzly and black), wolves, and cougars. This is not a guideline — it is a federal regulation under 36 CFR § 2.2. Approaching within 100 yards of a bear to photograph it is illegal and subject to citation and fine.’, ‘bison_elk_all_other’: ‘Maintain a minimum 25 yards (23 meters) from bison, elk, pronghorn, and all other wildlife. If any animal changes its behavior because of your proximity, you are too close and must back away. Bison are responsible for more visitor injuries in Yellowstone than any other animal, despite their apparently docile appearance.’, ‘photography_principle’: ‘Zoom with your lens, not your feet. Use telephoto lenses of 500–600mm+ for compelling wildlife portraits at legal distances. A 600mm lens at 100 yards produces the same apparent magnification as a 150mm lens at 25 yards.’, ‘vehicle_wildlife_encounters’: ‘Stay in or next to your vehicle when viewing bears. Vehicles function as effective blinds — wildlife tolerates cars more than people on foot. Pull completely off the pavement into designated pullouts; never stop in the travel lane. Report wildlife conflicts: call 307-344-7381.’}
  • Drone Policy: The launching, landing, or operation of unmanned aircraft (drones) is prohibited throughout Yellowstone National Park. This ban is enforced under 36 CFR § 1.5 (NPS Policy Memorandum 14-05, June 2014), which grants park superintendents authority to prohibit activities that harm resources or visitor experience. Additional violations may be cited under 36 CFR § 2.2 (wildlife harassment), 36 CFR § 2.34 (disorderly conduct/public alarm), and 36 CFR § 2.12(a)(3) (motorized devices in non-developed areas). Penalties include fines up to $5,000, up to six months in jail, confiscation of the drone and all recorded media, and park bans. No exceptions exist for recreational or commercial photography — only NPS-authorized scientific research with written superintendent approval may be exempt.
  • Winter Access: {‘road_closures’: ‘Most park roads close to wheeled vehicles from early November through mid-April. The only year-round paved road is from the North Entrance at Gardiner, MT through Mammoth Hot Springs to Cooke City, MT via Tower Junction.’, ‘oversnow_travel’: ‘From mid-December to mid-March, interior roads (Old Faithful, Grand Canyon, Hayden Valley) are accessible only by commercially guided snowmobile or snowcoach tours, or through the Non-Commercially Guided Snowmobile Access Program (permit lottery). Up to 4 non-commercial groups are allowed per day, one from each entrance.’, ‘spring_opening_2026’: ‘West Entrance (West Yellowstone) and North Entrance opened April 17, 2026. East Entrance opened May 1; South Entrance opened May 8. Dunraven Pass (Canyon to Tower Fall) opens approximately May 22. Check NPS road status at nps.gov/yell/planyourvisit/parkroads.htm before visiting.’, ‘winter_photography_value’: “Winter produces some of Yellowstone’s most dramatic photography: rime-ice coated trees, superheated steam condensing instantly against -20°F air, bison crusted in frost, and foxes pouncing through snow. The Northern Range (Lamar Valley, Mammoth) is accessible year-round by wheeled vehicle.”}
  • Lightning: Yellowstone’s high plateau elevation (avg. 8,000 ft) and afternoon convective activity make it a lightning-prone environment, especially July–August. Afternoon thunderstorms develop rapidly — 30 minutes from clear to severe. Leave exposed ridges (Mount Washburn, Dunraven Pass) and open valleys by 1pm on unstable days. Avoid lone trees, metal equipment, and hilltops. Count the seconds between lightning and thunder: divide by 5 for miles. Seek shelter in a hard-topped vehicle if caught in the open.
  • Geyser Eruption Timing: {‘old_faithful’: ‘Average interval 90 minutes; range 60–110 minutes. Predicted within ±10 minutes using eruption duration: short eruptions (under 2.5 min) indicate shorter next interval (~65 min); long eruptions (over 3.5 min) indicate longer next interval (~90–110 min). Check nps.gov/yell/planyourvisit/geyseractivity.htm or call 307-344-2751 option 2.’, ‘steamboat_geyser’: “World’s tallest active geyser (up to 400 ft) at Norris Geyser Basin. Eruption intervals are irregular — from days to years. Check USGS Yellowstone Volcano Observatory geyser log for recent activity. During active periods, eruptions may occur every 3–17 days. Steam phase can last 3–40 minutes after the initial water phase.”, ‘grand_geyser’: “Upper Geyser Basin, 5–6 hour intervals, predicted by NPS. One of the world’s most predictable geysers beyond Old Faithful — erupts in a series of bursts reaching 150–200 ft.”}

The complete safety briefing is inside the Yellowstone Photographer’s Guide PDF.

Edit smarter: AI tools for landscape photography

Luminar Neo’s Sky AI, atmosphere AI and SuperSharp are designed for landscape work — replace flat skies, add depth, and recover detail in seconds. Tagged as affiliate per FTC.

Related guides nearby

Three more photography guides within striking distance — perfect for combining into one trip.

Browse all 78 guides → · Open the map

Also on Amazon: gear that helps with this technique

Quick Amazon shortcuts to the gear most useful for this kind of shot. Use them if Prime shipping or Amazon credit makes more sense than B&H. As an Amazon Associate ShutYourAperture earns from qualifying purchases.

Frequently asked questions

What is the single best time of year for photography in Yellowstone?

Late September to early October combines the elk rut (bugling bulls, sparring males), fall foliage, moderate temperatures, dramatically reduced crowds (60–70% fewer visitors than peak summer), and excellent Milky Way conditions before the galactic core sets. Wolf and bear activity is high before their winter behavioral shifts. Sunrise comes at a civil hour (~6:45–7:00am) rather than the brutal 5:30am of midsummer, making early-morning shoots more sustainable across a week-long trip. May is a close second for newborn wildlife and wildflowers with similarly manageable crowds.

What focal length range do I need for a Yellowstone photo trip?

For the full Yellowstone experience, bring three ranges: (1) Ultra-wide 14–24mm for geothermal features (Grand Prismatic, Old Faithful, Grand Canyon of the Yellowstone) and Milky Way. (2) Standard zoom 24–70mm for landscapes, waterfalls, and environmental context shots. (3) Super-telephoto 400–600mm for wildlife — the 100-yard bear rule and 25-yard bison rule make shorter lenses inadequate for frame-filling animal portraits. A 1.4x teleconverter extends your telephoto range cost-effectively. If you must prioritize, rent a 500–600mm telephoto for wildlife and own a 16–35mm for everything else.

Can I photograph geysers erupting at night?

Yes, and night geyser photography is among Yellowstone’s most spectacular specialties. Old Faithful erupts after dark approximately 8–10 times nightly May–October; consult the eruption prediction board at the visitor center for the schedule. Shoot from the main boardwalk viewing area (which stays open at night). Use 14–24mm at f/2.8, ISO 3200, 15–20s to capture the Milky Way above the eruption column. A second shooter can light-paint the steam with a low-power warm flashlight from the boardwalk side to add dimension. Always carry bear spray at night — the Upper Geyser Basin has active bear activity after dark.

Are commercial photography permits required in Yellowstone?

A permit is required for commercial still photography and filming that uses models, actors, props, or equipment that requires a location agreement or script. Recreational photography by individuals — even with professional-grade equipment and tripods — does not require a permit. Commercial video/film productions, advertising shoots, and news gathering with large crews and equipment require written authorization from the NPS. Contact the Yellowstone Special Use Permits office at 307-344-2019 or yellows_public_use@nps.gov for specific situations. Drones are banned for all users — commercial and recreational — without a specific superintendent’s written authorization.

What is the Grand Prismatic Spring Overlook and how do I get the ‘rainbow view’ shot?

The Grand Prismatic Overlook is a natural ridge above the Midway Geyser Basin reached via the 2.0-mile round-trip Fairy Falls Trail, departing from the Fairy Falls Trailhead parking area (44.5153°N, -110.8326°W), 1.0 mile north of the Grand Prismatic Midway Basin parking lot. From the overlook (GPS: 44.5235°N, -110.8400°W, 7,341 ft), you gain a true overhead perspective showing the spring’s concentric rainbow rings in their full diameter. Best shooting conditions occur 1–3 hours after sunrise when the sun is 25–40° above the eastern horizon — the angle that maximizes the color contrast between blue core and orange-yellow mats. Cold mornings produce more steam (which can obscure colors from the boardwalk below but is manageable from above); warm midday reduces steam for cleaner ring visibility. Arrive at the trailhead by 6:30am to beat parking shortages. No off-trail travel is permitted — the hill immediately behind the Midway Basin parking lot is an illegal approach.

Take this guide into the park

This post is the complete field reference. The Yellowstone Ultimate Photographer’s Guide PDF is the field-deployable version: full-page resolution hero photography, GPS maps with gold pins for every location, multi-season shooting calendars, gear matrices per location, sun-angle diagrams, the full safety briefing, and a print-ready editorial layout in Framehaus black and gold. Save it offline. Print it. Take it into the park.

Yellowstone Ultimate Photographer’s Guide
Downloadable PDF · 12 GPS-mapped locations · Multi-season calendar · Safety briefing · Packing checklist

Get the Yellowstone guide — $47   Or get the National Parks Bundle — $197

Book your tours & experiences in Yellowstone National Park

All links go to Viator (a TripAdvisor company), the world’s largest marketplace for guided experiences. Tagged as affiliate per FTC.

Take Yellowstone National Park home in your pocket.

Every shot location, every angle, every time of day worth shooting. Printable PDF + GPS-tagged map.

Instant download. Works on phone, tablet, and printed.

Continue reading

← Back to National Parks Photography Guides

Save your trip-planning hours

The complete Yellowstone guide is $47

All vantage points above + 5 bonus secret spots, printable map, gear pack list, and editing recipes. One-time payment, instant download, lifetime updates.

Buy Yellowstone PDF →

Common questions about the Yellowstone guide

Is the Yellowstone photography guide worth $47?

For most photographers, yes. The guide saves 8-12 hours of trip-planning research and prevents the most common mistake of Yellowstone photography: shooting at the wrong time of day. If a single better frame is worth $47 to you, the guide pays for itself on day one. Buyers get every GPS coordinate, every golden-hour window, every cultural rule, and a printable shot list.

Does the Yellowstone guide include GPS coordinates?

Yes — every vantage point in the guide has Google Maps-ready GPS coordinates so you can pin them before you fly. The guide also includes a printable map showing all locations clustered by walking distance, so you can build efficient half-day routes.

What's in the Yellowstone PDF that isn't in this article?

The article shows the highlights. The PDF includes: 5 additional secret spots not published online, a 14-day itinerary with daily routes, the full camera-settings cheat sheet for every scenario in Yellowstone, a printable gear packing list, post-processing recipes with screenshot examples, and a list of local guides we trust for portrait commissions.

Do I get the Lightroom presets too?

The $47 guide is the PDF only. The matching Yellowstone preset pack is a separate $19 download — most buyers grab both as a bundle and save the editing time. Both are instant download, both work on Lightroom Classic and Lightroom Mobile.

Will the guide work for a Yellowstone trip in 2026?

Yes. The guide is updated annually as fees, restrictions, and new vantage points change. All buyers get free lifetime updates. The 2026 edition includes the latest drone rules, museum photography policies, and seasonal light data for the year.

Get the Yellowstone guide · $47