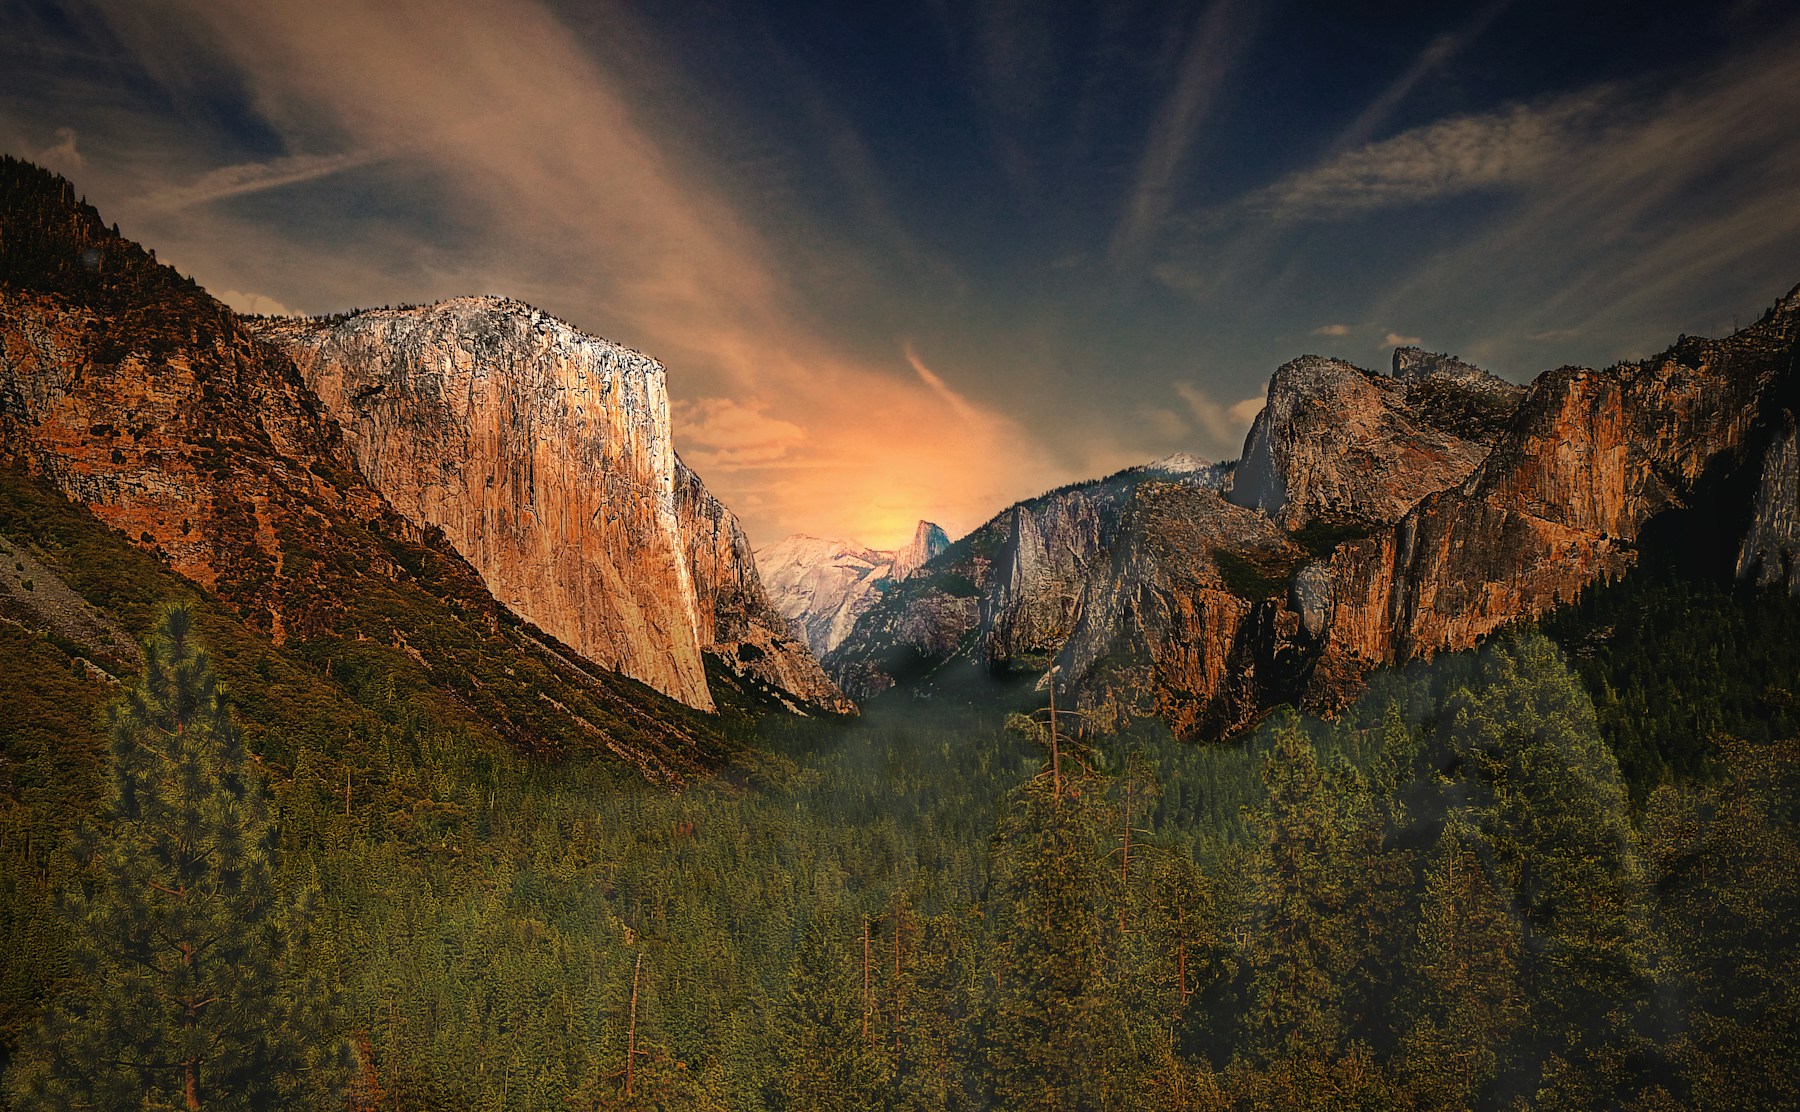
Best Photography Spots in Yosemite National Park: 12 Locations With GPS

Tours & experiences disclosure: This guide includes affiliate links to Viator, the world’s largest tour and experiences marketplace. If you book through these links, ShutYourAperture may earn a small commission at no extra cost to you.

Yosemite National Park — photographer's guide hero imageSave

Amazon Associates disclosure: ShutYourAperture is a participant in the Amazon Services LLC Associates Program. As an Amazon Associate we earn from qualifying purchases. Some links below go to Amazon (Store ID edinchavez01-20). Buying through these links costs you nothing extra and helps fund our free guides.
Editing software disclosure: This guide includes affiliate links to Skylum (Luminar Neo, Aperty, Luminar Mobile). If you buy through these links, ShutYourAperture may earn a commission at no extra cost to you. We only recommend tools we use ourselves.
Skip the planning. Get the Yosemite National Park PDF. All locations, GPS coordinates, golden-hour times, gear tips. Instant download.

Yosemite National Park is one of the most photogenic landscapes in the United States. If you have a camera and the patience to show up before dawn, Yosemite will give you images that last a career — but only if you know where and when to point it.

This is the definitive field guide to the 12 best photography spots in Yosemite National Park, with GPS coordinates you can drop straight into Google Maps, exact camera settings tuned to Yosemite’s unique light, precise timing for every location, and the access notes nobody else bothers to document. It mirrors the intel inside our Yosemite Ultimate Photographer’s Guide ($47 PDF) — a downloadable field guide with full-page hero images, GPS maps, seasonal tables, a safety briefing, and a complete photographer’s packing list. Get the guide →

Planning multiple parks? See also: best photography spots in Zion, Grand Canyon, and the full National Parks Photography Guides hub.

Yosemite Ultimate Photographer’s Guide — $47
12 GPS-mapped locations · Exact camera settings · Multi-season shooting calendar · Free annual updates

Download the PDF guide →

Quick jump to the 12 spots

  1. Tunnel View
  2. Glacier Point
  3. Half Dome (from Sentinel Bridge)
  4. El Capitan Meadow
  5. Yosemite Falls
  6. Bridalveil Fall
  7. Mirror Lake (Half Dome Reflection)
  8. Olmsted Point
  9. Tuolumne Meadows
  10. Cathedral Beach
  11. Valley View
  12. Taft Point

Before you shoot Yosemite: the essentials

  • Park entrance fee (2026): $35 per vehicle (7-day pass); $20 per motorcycle; $20 per individual/pedestrian/cyclist (ages 16+); children under 16 free; $70 Yosemite Annual Pass; $80 America the Beautiful Annual Pass (US residents); $250 America the Beautiful Annual Pass (non-US residents). Additionally, non-US residents ages 16+ must pay an extra $100 per-person surcharge on top of the standard entrance fee effective January 1, 2026. No cash accepted — credit/debit and mobile payments only. Current rates at nps.gov.
  • Best photography seasons: Spring (Apr–Jun) for waterfalls at peak and lush greenery; Fall (Sep–Nov) for golden foliage and smaller crowds; Winter (Dec–Mar) for snow scenes, firefall window, and near-empty valley; Summer (Jul–Aug) for High Country and Tioga Road access but maximum crowds.
  • Drone policy: Drones are completely prohibited on all NPS land under 36 CFR § 1.5. Fines up to $5,000.

The full-resolution version of every map below — plus seasonal calendars, gear matrices per location, sun-angle diagrams, and a complete photographer’s packing checklist — is inside the Yosemite Photographer’s Guide PDF ($47).

1. Tunnel View

The definitive Yosemite composition: El Capitan, Bridalveil Fall, Half Dome, and the valley floor all visible in a single wide-angle frame. Ansel Adams immortalized this view. Valley fog at dawn and sunset glow create near-mythical conditions several times per year.

  • GPS: 37.7155, -119.6776
  • Elevation: 4,000 ft
  • Best time of day: Sunset (primary); sunrise also excellent but requires precise timing before backlight overwhelms shadows
  • Sun direction: Faces west into the valley interior. At sunset the western sun illuminates El Capitan (left), Bridalveil Fall (right), and Half Dome (center-distant) simultaneously — the classic balance shot. At sunrise the scene is backlit; best light comes in the 15–20 minutes of blue-hour glow before the sun crests the valley walls. Winter morning fog pooling in the valley creates exceptional atmospheric layering visible from this viewpoint.
  • Access: Drive-up. Large parking lot at the east portal of Wawona Tunnel on Wawona Road (Hwy 41). Year-round access. No shuttle stop — vehicle or walk from nearby pullouts. Arrive 45–60 minutes before sunset to secure a spot.
  • Difficulty: None — paved viewpoint directly from parking lot
  • Recommended settings: Wide-angle 16–24mm (full-frame equivalent). Tripod essential at blue hour. Aperture f/8–f/11 for maximum depth of field. 0.5–4 sec exposures for fog motion at dawn. Polarizer useful in afternoon to saturate the granite and deepen sky. Graduated ND to balance bright sky vs. shaded valley floor.

Shots to chase:

  • Classic symmetrical composition with El Capitan left, Bridalveil right, Half Dome centered
  • Long exposure at blue hour capturing valley fog as a silky sea
  • Winter storm clearing — cloud wisps at cliff level with snow on valley walls
  • Zoom 70–200mm on Bridalveil Fall catching the rainbow in afternoon mist (spring)
  • Vertical portrait framing using the tunnel portal edge as leading element

Pro tip: [‘Arrive 90 minutes before sunset to scout composition and claim a central rail position’, ‘Stay 20–30 minutes after sunset: purple/magenta afterglow on Half Dome often outperforms the sunset itself’, ‘Morning fog is most common Oct–Mar; check valley webcam before driving up’, “Artist’s Point Trail (0.5 mi from Tunnel View lot) gives an elevated, crowd-free angle — access via the use trail starting at the north end of the parking lot”, ‘In spring, a 200–300mm lens at Tunnel View isolates Bridalveil Fall and captures rainbow effect around 3–4 pm on sunny days’]

Common mistake to avoid: [‘Shooting midday: harsh top-light flattens the valley and blows out the sky’, ‘Not waiting for post-sunset afterglow — many photographers pack up too early’, ‘Using too wide a focal length without foreground interest creates an empty lower third’, ‘Blocking fellow photographers on the narrow wall — be mindful of gear sprawl at peak times’]

2. Glacier Point

3,200+ feet above the valley floor, offering the only drive-up vantage point at similar altitude to Half Dome. From here Half Dome appears in profile, Vernal and Nevada Falls are both visible, Yosemite Falls stands across the valley, and Clouds Rest frames the skyline. The premier Milky Way location in the park.

  • GPS: 37.7281, -119.5731
  • Elevation: 7,214 ft
  • Best time of day: Sunrise (primary — warm alpenglow on Half Dome); sunset (secondary — golden light on valley, fewer clouds)
  • Sun direction: Faces northeast toward Half Dome. Sunrise direction is roughly east-northeast, sending the first alpenglow directly onto the sheer NW face of Half Dome. By mid-morning Half Dome is in full shade. At sunset the western light catches the valley floor and far granite walls, but Half Dome’s face goes into shadow — sunset here is best for valley panorama, not the dome itself. Milky Way rises over Half Dome from roughly April through October.
  • Access: Glacier Point Road (off Hwy 41). Road is seasonally closed — typically open late May or June through late October or November depending on snowpack. No winter vehicle access beyond Badger Pass Ski Area. In season: drive 30 min from Yosemite Valley, park in the lot (often full by 8 am in summer). No valley shuttle connection — must drive or take the seasonal Glacier Point Tour bus.
  • Difficulty: Easy — short paved walk under 0.25 miles from parking to overlook railing
  • Recommended settings: Wide-angle 16–24mm for panorama. Telephoto 100–400mm to isolate Nevada/Vernal Falls or zoom into Half Dome’s cables. Night: ISO 3200–6400, f/2.0–f/2.8, 15–25 sec shutter for Milky Way. Use 500 Rule: 500 ÷ focal length = max shutter seconds before star trails. Tripod essential.

Shots to chase:

  • Sunrise alpenglow on Half Dome from the main overlook railing (16–35mm)
  • Half Dome close-up with telephoto showing cable route and summit hikers in season
  • Milky Way arching over Half Dome on a new-moon night (late June–August peak)
  • Star trails concentric around North Star with Half Dome silhouette
  • Nevada and Vernal Falls stacked in the valley below, zoomed to 200–300mm
  • Panoramic stitch of the full 180° valley sweep at blue hour

Pro tip: [‘Arrive at least 1 hour before sunrise in summer to find parking and set up — lot fills fast’, “Use PhotoPills or The Photographer’s Ephemeris to determine exact Milky Way position over Half Dome for your target date”, ‘Bring layers — temperatures at 7,200 ft can drop to near freezing even in July nights’, ‘The paved path extends east of the main overlook toward Glacier Point Road turnout; alternate compositions available with fewer people’, ‘On the Glacier Point Tour bus, book a one-way ticket down (hike Panorama Trail back to valley) for a full day of shooting’]

Common mistake to avoid: [“Expecting sunset alpenglow on Half Dome — the dome’s face is lit at sunrise, not sunset”, ‘Arriving after sunrise in summer and finding the lot full — no easy alternative parking nearby’, ‘Using too slow a lens (f/4 or slower) for Milky Way requires ISO above 6400, increasing noise’, ‘Road closure not checked — Glacier Point Road shuts weeks or months before Tioga Road’]

3. Half Dome (from Sentinel Bridge)

The most reproducible and iconic Yosemite Valley shot: Half Dome perfectly reflected in the glassy Merced River, framed by granite walls and conifers. Ansel Adams photographed this view repeatedly. The mirror-calm conditions of early morning in spring are extraordinary.

  • GPS: 37.7411, -119.5829
  • Elevation: 3,966 ft
  • Best time of day: Sunrise for reflection (calm water before wind ripples); sunset for alpenglow on Half Dome’s face
  • Sun direction: The bridge faces nearly due east toward Half Dome. At sunrise the dome catches early eastern light for warm alpenglow while the sky behind remains blue — creating the iconic warm-dome/cool-sky contrast. At sunset the dome’s sheer NW face glows orange-red in the last direct light, reflecting in the Merced River below when flow is calm. Spring snowmelt raises water level, strengthening the reflection. Fall offers color in riverside willows.
  • Access: Valley floor — year-round access. Yosemite Valley Shuttle Stop 6 (Sentinel Bridge). Small parking area adjacent to bridge on Southside Drive. Five-minute walk from Curry Village / Half Dome Village.
  • Difficulty: None — flat paved path to bridge
  • Recommended settings: Wide-angle 16–35mm to capture dome and reflection together. Polarizer to cut glare and deepen reflection. Long exposure 0.5–2 sec (tripod required on bridge) to smooth any surface ripple. Aperture f/8–f/11. Early morning before wind: ISO 100–200, 1/30–1/4 sec.

Shots to chase:

  • Classic morning reflection: Half Dome perfectly mirrored in calm Merced River
  • Long exposure at sunset showing golden dome and silky water motion
  • Telephoto compression of Half Dome rising behind the bridge railing
  • Winter reflection with snow frosting the granite and icy shallows
  • Vertical composition including foreground river rocks and overhanging branches

Pro tip: [‘Arrive before civil twilight (30+ minutes before sunrise) to capture pre-dawn blue-hour reflection before wind picks up’, ‘Highest and most photogenic water levels are mid-May through early June — the reflection is broadest and the dome appears largest relative to the foreground’, ‘Shoot from the downstream side of the bridge for the cleanest reflection angle’, ‘Moonrise over Half Dome from this location is a spectacular secondary subject — check lunar calendar’, ‘In fall, willows along the bank turn gold; position to include them as frame elements’]

Common mistake to avoid: [‘Arriving after 7 am in summer — valley winds pick up quickly and kill the reflection’, ‘Shooting with a polarizer at the wrong angle — rotate until reflection is maximized, not eliminated’, ‘Standing on top of the bridge railing (prohibited and dangerous) — the view from the walkway is sufficient’, ‘Ignoring foreground — stepping into the shallow river bank area for low-angle compositions can disturb riparian habitat’]

4. El Capitan Meadow

The only location to view and photograph the full 3,000-ft vertical face of El Capitan at close range. Climbers visible on the wall during climbing season (spring and fall) add human scale. Also the prime location for Horsetail Fall firefall viewing in mid-to-late February.

  • GPS: 37.7323, -119.6184
  • Elevation: 3,966 ft
  • Best time of day: Late afternoon to sunset (sun illuminates the sheer face); early morning for reflection in meadow ponds after rain
  • Sun direction: El Capitan faces roughly south-southwest. Morning light hits only the upper portions of the face; full face illumination occurs from approximately early afternoon onward. The famous El Capitan sunrise ‘alpenglow’ actually occurs on the east-facing Nose route — best seen from Sentinel Bridge, not the meadow. Afternoon sun from the west warms the entire 3,000-ft granite face from about 2 pm onward, peaking at golden hour. Horsetail Fall (firefall) is on the right side of El Cap as seen from the meadow.
  • Access: Valley floor — year-round. Park at El Capitan Picnic Area (Northside Drive) or designated roadside pullouts. Yosemite Valley Shuttle does not serve this meadow directly; walk from Shuttle Stop 7 (Yosemite Lodge) westward ~0.5 mi. Meadow is open; stay on trail edges to protect grass.
  • Difficulty: None — flat meadow walking
  • Recommended settings: Wide-angle 16–24mm for the whole face and meadow foreground. Telephoto 400–600mm to isolate climbers on the wall (climbers often spotted on Dawn Wall, Nose, and Salathé Wall routes). For firefall: 200–600mm from El Capitan Picnic Area; tripod essential. Aperture f/5.6–f/8.

Shots to chase:

  • Full face of El Capitan rising from meadow with wildflowers in spring foreground
  • Telephoto of climbers’ tiny silhouettes on the Nose route against the granite
  • Horsetail Fall firefall with 200–400mm telephoto from picnic area (mid-late February)
  • Long exposure at dusk with portaledge climbers’ headlamps dotting the cliff face
  • Reflected dawn glow in standing rainwater puddles in the meadow

Pro tip: [‘For firefall, arrive by noon to secure a spot at the El Capitan Picnic Area — photographers queue for hours’, ‘The glow lasts only 3–10 minutes; bracket exposures and shoot continuous burst’, ‘A 600mm lens (or 400mm + 1.4x teleconverter) is needed to fill the frame with Horsetail Fall from the picnic area’, ‘Valley-rim cloud cover at sunset blocks the firefall entirely — have a backup plan’, ‘Check Mountain Project or ElCapitanReport.com for current climber locations before shooting’]

Common mistake to avoid: [‘Walking on meadow grass — causes lasting damage to the ecosystem; stay on rocky edges’, ‘Shooting firefall with a wide-angle lens — Horsetail Fall is too small; telephoto is essential’, ‘Visiting the meadow at midday in summer — harsh overhead light whitewashes the granite’]

Want this in your pocket on the trail?
The full-resolution version of every spot above — with full-page hero photography, GPS maps with gold location pins, sun direction diagrams, multi-season tables, and a complete safety + packing checklist — is inside the Yosemite Ultimate Photographer’s Guide PDF ($47). Print it, save it offline, take it into the park. Get the guide →

5. Yosemite Falls

The tallest waterfall in North America at 2,425 ft total drop (Upper 1,430 ft + Middle Cascades + Lower 320 ft). When running at full spring capacity, the thunderous flow is both visible and audible from across the valley. The moonbow here is one of the rarest natural light phenomena in North America.

  • GPS: 37.7549, -119.5977
  • Elevation: 4,000 ft
  • Best time of day: Spring (Apr–Jun) for maximum flow; early morning for soft diffuse light; midday for rainbow in mist; full moon April–June for moonbow
  • Sun direction: Yosemite Falls faces generally north-northwest. Direct sunlight does not reach the falls themselves until late morning. A rainbow forms in the mist at the base of Lower Yosemite Falls when afternoon sun is at the correct angle — typically best around midday to early afternoon on sunny days in spring. The lunar rainbow (moonbow) forms at night when the full moon is low in the west-southwest during April–June.
  • Access: Lower Yosemite Falls: Yosemite Valley Shuttle Stop 6 (Lower Yosemite Falls). Paved 1-mile loop trail to the base — fully accessible. Upper Yosemite Falls viewpoint requires a strenuous 7.2-mile round-trip hike gaining 2,700 ft. No vehicle access to upper viewpoint.
  • Difficulty: Lower Falls: Easy (flat paved loop). Upper Falls: Strenuous (2,700 ft gain, 7.2 mi RT, allow 6–8 hours)
  • Recommended settings: Wide-angle 16–24mm to capture the full falls and surrounding cliffs from the base. For rainbow in mist: polarizer off (you want refraction, not elimination). Long exposure 0.5–3 sec for silky water motion. For moonbow: ISO 400–800, f/4, 30 sec from the footbridge; widest fast lens (28mm f/2.8 equivalent on full-frame).

Shots to chase:

  • Full falls with rainbow in the mist from the footbridge at the base (spring, afternoon)
  • Moonbow arching across the base of Lower Yosemite Falls (full moon, April–June)
  • Long exposure of roaring base pool with foreground boulders — polarizer to cut spray on lens
  • Upper Falls from Yosemite Valley floor using 200mm telephoto to compress canyon walls
  • Winter: ice columns form at the base of the falls — dramatic detail shots with macro/telephoto

Pro tip: [‘Moonbow is visible from the footbridge at the base — arrive 1 hour before moonrise and set up on the bridge; shoot facing west-southwest with a wide fast lens’, ‘Moonbow occurs approximately 2 nights before and after the full moon in April, May, and June’, ‘Carry lens wipes or a microfiber cloth — heavy mist at the base saturates front elements within minutes’, ‘The Upper Yosemite Falls trail opens a second footbridge viewpoint for a straight-on composition without base crowds’, ‘In dry years (Aug–Oct) the falls may be completely dry — check recent conditions on the NPS Yosemite current conditions page before visiting’]

Common mistake to avoid: [‘Visiting in late summer or fall expecting full flow — falls are often a trickle or dry’, ‘Standing too close to the base and getting sensor-fogging spray’, “Missing the moonbow window by not checking both the lunar calendar and the moon’s angle (must be below ~38° above horizon)”, ‘Shooting rainbow with polarizer — the filter eliminates the color effect you came to capture’]

6. Bridalveil Fall

At 620 ft, Bridalveil flows year-round and is often the first major waterfall visitors see entering the valley. High winds regularly catch the fall and billow it sideways in a ghostly veil — a visually distinctive behavior unique to Bridalveil among Yosemite waterfalls. The spring rainbow effect in afternoon light is spectacular.

  • GPS: 37.7165, -119.6468
  • Elevation: 4,000 ft
  • Best time of day: Spring (Mar–Jun) for maximum flow; late afternoon in spring and fall for rainbow effect; morning from Northside Drive for backlit mist
  • Sun direction: Bridalveil Fall faces approximately north-northeast. The fall itself is rarely in direct morning sun from the base viewpoint. From Tunnel View to the west, afternoon sun illuminates the fall from the side, creating the rainbow effect in the mist when viewed with the sun behind the photographer around 3–4 pm. From Northside Drive (across the valley) early afternoon sun backlights the fall mist beautifully. Bridalveil is one of the few Yosemite falls that flows year-round, though at reduced levels in summer and fall.
  • Access: Dedicated Bridalveil Fall parking area on Southside Drive (note: this parking area was under significant reconstruction in 2023–2025; check NPS.gov/yose for current status). Alternative: park at Tunnel View and walk. Valley Shuttle does not stop directly at Bridalveil; walk from nearby stops. The 0.5-mile round-trip trail to the viewpoint gains ~70 ft.
  • Difficulty: Easy — short paved trail with some steps
  • Recommended settings: Wide-angle 16–24mm from the base viewpoint. Telephoto 200–300mm from Tunnel View or Northside Drive to isolate the fall against the cliff. For rainbow: shoot at 1/500–1/1000 sec to freeze falling water and preserve rainbow colors. From base: 1/30–1/4 sec for silky flow. Expect spray on the lens — use lens hood and wipe frequently.

Shots to chase:

  • Classic view from Tunnel View with fall framed right of El Capitan — 50–100mm
  • Rainbow in the mist from Tunnel View (viewed westward, late afternoon, spring)
  • Close-up of the wind-billowed veil from the base viewpoint
  • Bridalveil in winter with snow on surrounding rock faces and icicles at base
  • Northside Drive backlit mist shot in early afternoon

Pro tip: [‘The rainbow at Tunnel View appears reliably at approximately 3 pm on sunny spring afternoons — this is NOT visible from the base trail’, ‘Wind direction matters: calm mornings give a straight, full-flow shot; afternoon winds create the signature sideways veil’, ‘Bring a rain jacket and pack cover to the base — mist is heavy in spring’, ‘Photograph from the turnout on Northside Drive (small gravel pullout) for the most dramatic angle with sky as background rather than rock face’]

Common mistake to avoid: [‘Only visiting the base viewpoint — the best photographic angles are from across the valley’, ‘Visiting in late summer expecting strong flow — reduced to a whisper by August’, ‘Shooting into the sun from the base in morning — backlit mist is beautiful, but expose for the mist not the sky’]

7. Mirror Lake (Half Dome Reflection)

Seasonal lake fed by Tenaya Creek snowmelt that transforms from a perfect mirror in spring to a dry meadow by late summer. When full, the reflection of Half Dome and the flanking canyon walls creates a vertically symmetrical composition unmatched in the valley. The lake is quiet at dawn with no vehicle noise.

  • GPS: 37.7456, -119.5583
  • Elevation: 4,098 ft
  • Best time of day: Early morning (6–8 am) in late April through mid-June when lake is full and calm
  • Sun direction: Faces southwest toward Half Dome. The dome is lit from the east at sunrise, and from Tenaya Creek at Mirror Lake the dome is visible to the southwest — meaning pre-sunrise and early morning light on the dome (facing the camera) produces the most dramatic reflection shots. By mid-morning the light is overhead and unflattering. In fall when the lake has shrunk or dried entirely, it becomes a meadow subject — use telephoto to compress Half Dome against pine-framed walls.
  • Access: No car access to the lake. Take Yosemite Valley Shuttle to Stop 17 (Mirror Lake Trailhead). Walk 0.5 miles on a paved service road to the lake. Shuttle runs daily in season. Alternative: walk from Curry Village / Half Dome Village (~1.5 mi). No parking at the trailhead.
  • Difficulty: Easy — flat paved and unpaved paths; 1-mile round trip to the lake
  • Recommended settings: Wide-angle 16–24mm for the full reflection. Polarizer can be used to either enhance or reduce reflection — rotate to taste. Long exposure not recommended when lake is perfectly calm (shutter not needed). For fall meadow: 70–200mm to compress Half Dome against the canyon walls. Tripod for pre-dawn shots.

Shots to chase:

  • Perfect morning reflection of Half Dome in calm lake surface (late April–early June)
  • Wide-angle composition with lake in foreground, Half Dome centered in frame
  • Telephoto of Half Dome framed by granite canyon walls in fall golden light
  • Winter scene with snow-dusted boulders along Tenaya Creek and ice forming at edges
  • Loop trail views: Half Dome visible from multiple north-side vantage points along 5-mile loop

Pro tip: [‘The 1–2 weeks around peak snowmelt (typically mid-May) offer the deepest, calmest lake — watch NPS conditions reports’, ‘Arrive via the shuttle at the first run to reach the lake before valley winds disturb the surface’, “The small puddle immediately north of the main lake sometimes holds the only full reflection of Half Dome’s top when the lake level drops in late May”, ‘Counter-clockwise loop hike yields additional reflection angles from the north bank of Tenaya Creek’, ‘In fall, the meadow version of Mirror Lake still has compelling Half Dome views framed by golden willows’]

Common mistake to avoid: [‘Visiting after July — the lake is frequently dry; check conditions before planning specifically for the reflection’, ‘Using the polarizer at full rotation to eliminate glare — this destroys the reflection; partial or no polarization is better’, ‘Arriving by midday in spring — wind invariably ripples the surface by 9–10 am’]

8. Olmsted Point

Offers the rarest angle on Half Dome: its rounded eastern back as seen from Tioga Road. Also frames the dramatic Tenaya Canyon glacially carved trough below, Clouds Rest above, and the sweep of the High Sierra. Far less crowded than valley viewpoints even in summer.

  • GPS: 37.7983, -119.4853
  • Elevation: 8,300 ft
  • Best time of day: Morning and evening golden hour; excellent midday for clouds and dramatic sky
  • Sun direction: Faces west-southwest toward a unique view of Half Dome’s back (eastern) face — the perspective most visitors never see. Morning light from the east illuminates Clouds Rest and the domes in the foreground. Evening light warms the granite and distant Half Dome from the west. The high elevation (8,300 ft) means the sun stays higher longer — good light occurs in a slightly wider window than valley locations. Summer afternoon thunderstorms build dramatically over the Sierra from this vantage.
  • Access: Tioga Road (Hwy 120), approximately 30 miles from Yosemite Valley turnoff or 18 miles west of Tioga Pass entrance. Large pullout with a 0.25-mile round-trip walk to the viewpoint. Seasonal access only — Tioga Road closed November through late May/early June. No shuttle service.
  • Difficulty: Easy — short walk on flat exposed granite, some scrambling optional
  • Recommended settings: Wide-angle 16–24mm for the full panorama. Telephoto 200–400mm to isolate Half Dome’s dome shape from the east. High elevation clear air makes colors sharp — a polarizer cuts haze and deepens blue sky dramatically. Tripod for long exposures at dusk.

Shots to chase:

  • Half Dome’s rounded eastern face framed by slabby foreground granite and Tenaya Canyon
  • Clouds Rest summit ridge with Half Dome behind — 50–100mm compression
  • High Sierra panorama stitch covering 180° from Clouds Rest to Cathedral Range
  • Dramatic summer storm building over the Sierra crest with lightning (safe from low viewpoint)
  • Erratic boulders (glacial relics) as foreground elements against the dome and sky

Pro tip: [‘This is the first High Country viewpoint encountered driving east from the valley on Tioga Road — stop here before proceeding to Tuolumne Meadows’, ‘The erratic boulders deposited by glaciers make excellent foreground compositional elements’, ‘In late May/early June right after road opening, snow patches linger on the viewpoint — extraordinary conditions and almost no crowds’, ‘Altitude can cause shortness of breath for those coming directly from sea level — allow time to acclimate’]

Common mistake to avoid: [‘Rushing past on the way to Tuolumne Meadows without stopping — Olmsted is a top-10 Yosemite viewpoint’, ‘Visiting when Tioga Road is closed (November through May/June) — check NPS road conditions before planning’, ‘Shooting only at the obvious overlook point — walk further along the granite slabs for better Half Dome angles’]

Want this in your pocket on the trail?
The full-resolution version of every spot above — with full-page hero photography, GPS maps with gold location pins, sun direction diagrams, multi-season tables, and a complete safety + packing checklist — is inside the Yosemite Ultimate Photographer’s Guide PDF ($47). Print it, save it offline, take it into the park. Get the guide →

9. Tuolumne Meadows

The largest subalpine meadow in the Sierra Nevada, 8,600 ft above sea level. The Tuolumne River meanders through the meadow, lined with golden willows in fall. Surrounded by iconic granite domes including Lembert Dome, Pothole Dome, and Cathedral Peak. Wildflowers peak in July. 90% of Yosemite visitors never reach Tuolumne — it is dramatically less crowded than the valley.

  • GPS: 37.8771, -119.3777
  • Elevation: 8,600 ft
  • Best time of day: Sunrise and sunset; summer (late June–September) for wildflowers; fall for golden grass against blue sky
  • Sun direction: The meadow opens in all directions, allowing compositions facing any compass heading. The Tuolumne River meanders east-west; morning light from the east warms the Lembert Dome (north) and Cathedral Peak (southwest). Sunrise creates strong reflections in river oxbows. The meadow is above treeline in places — the sky plays an enormous role, and dramatic cumulus clouds in summer afternoon elevate every composition. The Milky Way rises roughly south from this altitude, with Cathedral Peak as a foreground in summer.
  • Access: Tioga Road (Hwy 120), 55 miles from Yosemite Valley. Open late May or June through October/November. Free shuttle connects Tuolumne Meadows Visitor Center, campground, and trailheads during summer. Parking available at Lembert Dome parking and Cathedral Lakes trailhead. Road closed in winter — accessible only by cross-country ski.
  • Difficulty: Easy — flat meadow walking (2+ miles of gentle terrain); nearby domes require moderate scrambling
  • Recommended settings: Wide-angle 16–35mm for meadow-dome-sky compositions. Telephoto 70–200mm for Cathedral Peak and Lembert Dome compression. Polarizer essential — the blue sky contrast against granite and green meadow is exceptional. Split ND filter to balance bright sky vs. shadowed meadow. Night: ISO 3200, f/2.8, 20 sec for Milky Way.

Shots to chase:

  • Tuolumne River oxbow bend with Lembert Dome reflected in still water at sunrise
  • July wildflower bloom in the meadow with Cathedral Peak rising behind
  • Pothole Dome (easy scramble) at sunset with 360° view of the meadow and peaks
  • Fall golden willow foliage along the river bank with snow on the domes
  • Milky Way over Cathedral Peak from the meadow (summer nights)
  • Thunderstorm approaching from the south with dramatic cumulus anvil clouds

Pro tip: [‘The best photography area is the 2-mile stretch between Lembert Dome parking and Cathedral Lakes trailhead — park at either end and walk’, ‘Wildflower peak is typically the second half of July at this elevation — earlier than valley wildflowers’, ‘Pothole Dome at the west end of the meadow offers a 30-minute easy scramble and summit views’, ‘Altitude sickness is real at 8,600 ft — avoid strenuous activity on your first day up; hydrate aggressively’]

Common mistake to avoid: [‘Visiting after the Tioga Road closes (mid-October or earlier) — check NPS road conditions’, ‘Walking through the fragile meadow grass off-trail — stay on established paths to protect the ecosystem’, ‘Underestimating afternoon thunderstorm speed — storms build fast at altitude; descend from exposed areas by noon’]

10. Cathedral Beach

One of the valley’s most serene and less-photographed beaches, offering unique perspectives on Cathedral Rocks reflected in the Merced River with El Capitan visible in the distance. Wide sandy gravel bars in spring provide numerous foreground elements and the river runs broad. Less crowded than Sentinel Bridge or Tunnel View.

  • GPS: 37.7229, -119.6217
  • Elevation: 3,960 ft
  • Best time of day: Late afternoon and sunset; best in spring for Merced River volume and green foliage
  • Sun direction: Faces northeast. The Merced River here runs roughly east-west, and Cathedral Rocks rise to the north. Afternoon sun from the west lights up the south-facing granite walls of Cathedral Rocks beautifully. El Capitan is also visible to the northeast from the beach. Spring flow creates a broad, reflective river surface. Late afternoon is the ideal shooting window when warm light hits the riverside granite.
  • Access: Cathedral Beach Picnic Area on Southside Drive — year-round vehicle access with parking. Walk from the picnic area to the river’s edge (100–200 meters). Yosemite Valley Shuttle Stop 11 (Cathedral Picnic Area) is nearby.
  • Difficulty: None — flat sandy/rocky beach area
  • Recommended settings: Wide-angle 16–35mm for the full river-rock-cathedral scene. 70–200mm for detail shots of Cathedral Rock face. Long exposure (tripod) 1–4 sec to smooth river motion. Polarizer to manage water glare. Spring: high water for reflections; Fall: low water for rock exposure as foreground.

Shots to chase:

  • Cathedral Rocks reflected in a glassy section of the Merced River at dusk
  • El Capitan glimpsed downstream through riverside cottonwoods and willows
  • Long exposure of the river rushing over smooth granite slabs with Cathedral Rocks rising behind
  • Fall color: golden cottonwoods along the bank with cliffs above
  • Sunrise blue hour with the river and rocks in soft pre-dawn light

Pro tip: [‘Walk up and down the beach (east and west) from the picnic area to find the specific Merced bend where Cathedral Rocks reflect cleanly’, ‘This location is one of the least crowded in the valley even at peak times — an underrated gem’, ‘Spring: bring rubber boots — the beach is sometimes partially flooded in May/June’, ‘Cathedral Beach is excellent for late evening after Tunnel View — 5-minute drive west’]

Common mistake to avoid: [‘Only using the marked picnic area as a vantage point — better compositions are found by walking 50–200m along the riverbank’, ‘Skipping this location for more famous spots — the relative solitude makes for more creative and relaxed shooting’]

11. Valley View

The only valley-floor viewpoint that combines El Capitan, Bridalveil Fall, the Merced River, and multiple granite peaks in a single wide-angle frame. Photograph from the riverbank to include the river as a lead-in line. The ‘Gates of the Valley’ perspective entering the park from the west.

  • GPS: 37.7172, -119.662
  • Elevation: 3,960 ft
  • Best time of day: Sunset (primary) — afternoon sun from the west lights El Capitan and Bridalveil Fall; also excellent in winter for low water and snow elements
  • Sun direction: Faces east up the valley from the western end. At sunset the photographer looks east — the sun is behind and to the right, lighting El Capitan on the left and Bridalveil Fall on the right with warm golden light. A shadow from other rock formations slowly creeps up El Capitan’s face as the sun drops below the valley walls — timing is critical to catch the last golden light on the upper cliff. Sunrise here is backlit and produces a more moody, silhouetted effect. Winter offers the lowest Merced River levels, exposing rocks and logs for foreground interest.
  • Access: Northside Drive near the west end of Yosemite Valley — year-round vehicle access. Small parking lot (room for ~10 cars) that fills quickly. One-way traffic on Northside Drive heading west. Easily missed — the lot entrance is not well-signed. No shuttle access — drive only.
  • Difficulty: None — viewpoint accessible from parking area
  • Recommended settings: Wide-angle 16–24mm to capture the full scene. Long exposure (tripod, ND filter) 2–8 sec to blur the Merced River and add dynamism. Polarizer to deepen sky and manage water reflections. In spring: high water for rushing river; winter: low water reveals foreground rocks and logs.

Shots to chase:

  • El Capitan and Bridalveil Fall framed by the narrowing valley walls at sunset
  • Long exposure Merced River as silky lead-in toward El Capitan
  • Winter snow on valley walls with icy Merced River shallows
  • Telephoto compression of El Capitan’s upper face in final golden glow
  • After-sunset alpenglow on El Capitan when the valley below is already in shade

Pro tip: [“Come here immediately after shooting Tunnel View at sunset (5-minute drive west) to catch El Capitan’s afterglow”, ‘In winter after a snowstorm, downed logs and snow-capped boulders in the foreground create exceptional Ansel Adams-style compositions’, ‘The shadow line creeping up El Capitan at sunset moves fast — motor-drive the final 10 minutes to capture its progression’, “This is also the classic ‘leaving Yosemite’ shot heading west — equally valid as an entry framing shot”]

Common mistake to avoid: [‘Missing the small parking lot entrance (easy to drive past on one-way Northside Drive without a U-turn option)’, ‘Shooting in the middle of the day — harsh light and no foreground definition’, ‘Not including the river — shooting from behind the bank railing loses the essential lead-in element’]

12. Taft Point

Sheer exposure: Taft Point sits directly at the top of a 3,500-ft cliff with no railing at the primary viewpoint. The fissures (parallel cracks extending into the cliff edge) create iconic foreground geometry. Looking down into Yosemite Valley from above El Capitan’s height is vertigo-inducing and awe-inspiring. The Sentinel Dome loop (5 miles total) can combine both in one outing.

  • GPS: 37.713, -119.6046
  • Elevation: 7,503 ft
  • Best time of day: Sunset (primary); also excellent at sunrise and for moonrise over El Capitan
  • Sun direction: Faces roughly north-northwest from the cliff edge. At sunset, warm western light bathes El Capitan (northwest) in golden tones and illuminates the valley below. The viewpoint is on the south rim, looking across to El Capitan and Cathedral Rocks. Yosemite Falls is visible to the northeast. The sheer 3,500-ft drop directly at the fissures creates a dramatic and slightly vertiginous foreground for wide-angle compositions with El Capitan and the setting sun.
  • Access: Glacier Point Road — seasonal access only (closed in winter, typically November through late May/June). Drive to the Sentinel Dome/Taft Point Trailhead (2.2 miles before Glacier Point). 1.1-mile trail (each way) with 200 ft descent to the point. Moderate walk on a clear trail.
  • Difficulty: Moderate — 2.2-mile RT hike with 200 ft elevation change on sometimes rocky trail
  • Recommended settings: Wide-angle 16–20mm for cliff-edge fissure foreground with El Capitan and valley beyond. Tripod essential at golden hour. Be aware of wind gusts at the exposed edge — attach tripod to rocks with sandbag or use a low center of gravity. For the classic fissure shot: f/11, polarizer for sky, graduated ND for valley in shadow.

Shots to chase:

  • Person silhouetted at the edge of the fissures with El Capitan and sunset behind (classic Taft Point shot)
  • Looking straight down 3,500 ft through the fissures to the valley floor — requires courage and a wide lens
  • El Capitan at sunset bathed in golden light, Yosemite Falls visible to the right
  • Moonrise over El Capitan from Taft Point at dusk
  • Star trail over the valley from the exposed cliff edge — use a wide 14–20mm lens

Pro tip: [‘Do not approach the unrailed cliff edge in wet, icy, or windy conditions — the rock is extremely slippery when wet’, ‘The fissure silhouette shot is best with a human subject at the edge for scale — place your subject in the slot between two fissures’, ‘Combine Taft Point with Sentinel Dome in a 5-mile loop (start at Sentinel Trailhead) for two iconic locations in one sunset trip’, ‘Check the Glacier Point Road opening date each spring — it lags behind Tioga Road opening by a few weeks’]

Common mistake to avoid: [‘Getting too close to the unguarded edge — people have died falling from Taft Point; observe from behind the fissure line’, “Visiting in poor visibility (valley smoke, fog) — the point loses its entire raison d’être without the valley view”, ‘Forgetting a headlamp for the 1.1-mile hike back after sunset in darkness’]

When to photograph Yosemite: a year-round breakdown

Yosemite is photogenic every month of the year — but the conditions differ radically by season. Here is what to expect:

Spring (March–May)

Highlights: [‘Waterfalls reach peak flow — Yosemite Falls, Bridalveil, Ribbon Fall, and seasonal falls at full thunderous capacity’, ‘Valley wildflowers emerge (late April) — dogwood blooms in spectacular display early-mid May’, ‘Mirror Lake at maximum depth with perfect Half Dome reflections’, ‘Horsetail Fall firefall in mid-to-late February (technically late winter but frequently called spring season)’, ‘Merced River at peak volume — Cathedral Beach and Valley View are at their best’, ‘Crowds build toward summer levels by late May — still manageable in March–April’]

Challenges: Parking requires early arrival (5–6 am). Timed entry reservations typically required from late May. Mist at waterfall bases saturates lenses rapidly.

Summer (June–August)

Highlights: [‘Tioga Road (Hwy 120) opens — access to Tuolumne Meadows, Olmsted Point, Tenaya Lake’, ‘Glacier Point Road opens — access to Glacier Point, Taft Point, Sentinel Dome’, ‘High Country wildflowers peak in July at 8,000+ ft’, ‘Long days: sunrise as early as 5:30 am, sunset past 8 pm — extended golden hour windows’, ‘Milky Way visible from Glacier Point and Tuolumne Meadows (new-moon nights)’]

Challenges: Valley floor extremely crowded — 4+ million annual visitors concentrated in 8 miles of valley. Parking unavailable without early arrival. Smoke from California wildfires can degrade visibility and air quality.

Fall (September–November)

Highlights: [‘Significantly reduced crowds after Labor Day — valley regains some tranquility’, ‘Golden willow and cottonwood foliage along Merced River (peak typically mid-to-late October)’, ‘Bridalveil Fall rainbow effect in late afternoon sunlight (September–October)’, ‘Valley View and Tunnel View at their best for warm afternoon light without summer haze’, ‘Bears actively foraging before winter hibernation — excellent wildlife photography’, ‘Lower river levels expose rocks and logs for foreground elements’]

Challenges: Waterfalls largely absent (Bridalveil is the notable year-round exception). Tioga Road/Glacier Point Road closures limit High Country access.

Winter (December–February)

Highlights: [‘Horsetail Fall firefall: mid-to-late February (best conditions Feb 16–23 most years)’, ‘Snow transforms the valley into a monochromatic landscape of black granite, white snow, and dark conifers’, ‘Valley nearly empty compared to summer — exceptional solitude’, ‘Frozen Merced River sections and snow-laden pines create Ansel Adams-esque compositions’, ‘Snowstorm clearing light: the most dramatic weather photography in any season’, ‘Badger Pass Ski Area open (limited cross-country skiing access to Glacier Point via groomed track)’]

How to get to Yosemite National Park

Photographer safety at Yosemite: read this

Every national park has its own hazards. Read the briefing before you go.

  • Bear Safety: {‘overview’: “Yosemite’s black bears (Ursus americanus) are habituated to human food and extremely resourceful. Bears can open car doors and break windows. In 2025, 18 bears were struck by speeding vehicles on park roads. Keep bears wild by driving slowly (observe all speed limits), storing all food and scented items in bear boxes or certified bear canisters at all times — in the backcountry this is required by regulation.”, ‘food_storage’: ‘Never leave food, trash, toiletries, or any scented items unattended or in a vehicle. Use bear-proof food storage lockers provided at all campgrounds and many trailheads. In the backcountry, a NPS-approved bear canister is mandatory.’, ‘wildlife_distance’: ‘Stay a minimum of 50 yards (45 m) from bears at all times. Never approach or feed a bear under any circumstances. Feeding bears is a federal offense with fines up to $5,000. If a bear approaches, make yourself large and loud — shout, clap, wave your arms. Do not run.’, ‘photography_note’: ‘Use a telephoto lens (300mm or longer) to photograph bears from a safe, legal distance. Moving closer for a better shot puts both you and the bear at risk — habituated bears may be euthanized if they become aggressive. Report wildlife incidents to rangers at 209-372-0322.’}
  • River Crossings: {‘overview’: ‘The Merced River and Tenaya Creek become extremely dangerous in May and June when snowmelt swells flows to peak levels. Powerful currents, icy water (40–50°F), and slick submerged rocks create lethal conditions.’, ‘guidelines’: [‘Never wade or swim in the Merced River upstream of any waterfall — visitors are swept over Vernal Fall annually’, ‘Unbuckle backpack waist strap before any stream crossing — it can trap you underwater’, ‘Cross at wide, shallow sections only — avoid areas with rapids, falls, or deep channels’, ‘Stream-polished rocks are extremely slippery even when dry — use trekking poles’, ‘If water is above knee height in summer snowmelt, do not cross without a rope team’, ‘Cold water rapidly saps strength — a short distance feels manageable until muscles stop responding’]}
  • Half Dome Cables: {‘overview’: ‘The Half Dome cable route covers 400 vertical feet of near-vertical granite at approximately 45–60° incline. The cables are installed seasonally (approximately late May through mid-October) and removed in winter when they lie flat on the rock face — do not attempt without cables.’, ‘permit_required’: ‘A permit is required to hike the Half Dome cables year-round. Day hike permits are distributed by lottery (pre-season lottery in March, daily lotteries throughout the season) at recreation.gov. Without a permit, rangers will turn hikers back at the Sub-Dome.’, ‘hazards’: [‘Wet granite is lethal — even a slight surface film from morning dew or afternoon thundershower makes the polished granite extremely slippery’, ‘Afternoon summer thunderstorms are common — leave the summit by noon and be off the cables before storm buildup’, ‘The exposed 400-ft cable section has no guardrails — a slip means a fall of hundreds of feet’, ‘Lightning strikes on the exposed summit and cable poles are a known fatality cause — evacuate immediately if thunderheads form’, ‘Crowds on the cables create congestion — multiple parties on the cables simultaneously slow movement and increase fall risk’], ‘gear_required’: [‘Leather or full-finger grip gloves (mandatory for cable grip)’, ‘Lug-sole hiking boots (NOT trail runners, sandals, or smooth-soled shoes)’, ‘Trekking poles (stow in pack for the cable section)’, ‘Water minimum 3L for the 14–17 mile round trip’, ‘Headlamp (start no later than 5 am to summit and descend before afternoon storms)’]}
  • Drones: {‘status’: ‘PROHIBITED’, ‘regulation’: ‘Launching, landing, or operating any unmanned aircraft system (UAS/drone) within Yosemite National Park boundaries is prohibited under 36 CFR § 1.5 (park closure/public use limit authority, Policy Memorandum 14-05). This applies to all drone types and sizes, recreational and commercial, with no exceptions or permits available.’, ‘penalties’: ‘Violation is a federal misdemeanor with penalties of up to 6 months imprisonment and/or a $5,000 fine.’, ‘rationale’: “Drones disturb peregrine falcon nesting on cliff faces, disrupt wildlife behaviors, interfere with emergency helicopter rescue operations, and impair other visitors’ wilderness experience.”}
  • Rockfall: {‘overview’: ‘Rockfalls are the most powerful geologic force shaping Yosemite Valley today. Several occur each year, sometimes without warning, often from cliffs above popular viewpoints. Never camp or linger directly below cliff faces.’, ‘high_risk_areas’: [“Below El Capitan’s north face”, “Beneath Half Dome’s sheer face”, ‘Base of Yosemite Falls cliffs’, ‘Near Glacier Apron on any granite wall base’]}
  • Lightning: {‘overview’: ‘Summer afternoon thunderstorms are common and build rapidly over the High Sierra. Lightning strikes are a serious hazard on all exposed summits, ridges, and open meadows.’, ‘guidelines’: [‘Be off all peaks, domes, and exposed ridges by noon in summer’, ‘If caught in a storm: descend immediately, avoid tall solitary trees, do not lie flat — crouch on balls of feet’, ‘Taft Point, Glacier Point, Half Dome summit, and Olmsted Point are all extreme lightning hazards’, ‘Monitor weather forecasts at weather.gov/hnx (Hanford NWS office covers Yosemite)’]}

The complete safety briefing is inside the Yosemite Photographer’s Guide PDF.

Edit smarter: AI tools for landscape photography

Luminar Neo’s Sky AI, atmosphere AI and SuperSharp are designed for landscape work — replace flat skies, add depth, and recover detail in seconds. Tagged as affiliate per FTC.

Related guides nearby

Three more photography guides within striking distance — perfect for combining into one trip.

Browse all 78 guides → · Open the map

Also on Amazon: gear that helps with this technique

Quick Amazon shortcuts to the gear most useful for this kind of shot. Use them if Prime shipping or Amazon credit makes more sense than B&H. As an Amazon Associate ShutYourAperture earns from qualifying purchases.

Frequently asked questions

What is the single best photography location in Yosemite for a first-time visitor?

Tunnel View at sunset followed immediately by Valley View (5-minute drive west) covers the most iconic Yosemite compositions in a two-hour window. Both are drive-up accessible year-round. For sunrise, Sentinel Bridge (Mirror Lake shuttle stop area) for the Half Dome reflection in the Merced River is equally iconic and crowd-free in early morning.

When is Mirror Lake at its best for the Half Dome reflection?

The lake is at its deepest and most reflective during peak snowmelt, typically mid-May through early June. Conditions are highly variable — check NPS current conditions and recent social media reports before planning specifically for the reflection. By July the lake is usually reduced significantly, and by August it is often a dry meadow.

Do I need a permit to photograph at Yosemite, and are drones allowed?

Still photography for personal, non-commercial use requires no permit. Commercial still photography (for advertising, stock licensing, or retail) requires a commercial filming/photography permit from NPS. Drones are completely prohibited within park boundaries under 36 CFR § 1.5 — no exceptions and no permits available. Violation is a federal misdemeanor with fines up to $5,000 and/or 6 months imprisonment.

How do I see the Horsetail Fall firefall, and do I need a reservation?

The firefall occurs for 3–10 minutes at sunset on clear evenings during mid-to-late February when the sun aligns with Horsetail Fall on El Capitan’s east face. Arrive at El Capitan Picnic Area (Northside Drive) by noon to secure a position. Weekend dates require advance entrance reservations from recreation.gov — announced in January each year. Weekday visits do not require reservations but are still extremely crowded. The effect requires both sufficient water in the fall (from snowmelt or rain) and a completely clear western horizon at sunset.

What camera settings should I use at Glacier Point for the Milky Way?

Start with ISO 3200–6400, aperture f/2.0–f/2.8, and a shutter speed of 15–25 seconds (use the 500 Rule: 500 ÷ focal length in mm = maximum seconds without star trails). White balance around 3,500K for warm, natural star color. Focus manually using 10x live view on a bright star. Shoot RAW for maximum dynamic range in post-processing. Plan your visit for a new-moon window in June–August when the galactic core is highest above Half Dome. Use PhotoPills to determine exact core positioning and timing for your target date.

Take this guide into the park

This post is the complete field reference. The Yosemite Ultimate Photographer’s Guide PDF is the field-deployable version: full-page resolution hero photography, GPS maps with gold pins for every location, multi-season shooting calendars, gear matrices per location, sun-angle diagrams, the full safety briefing, and a print-ready editorial layout in Framehaus black and gold. Save it offline. Print it. Take it into the park.

Yosemite Ultimate Photographer’s Guide
Downloadable PDF · 12 GPS-mapped locations · Multi-season calendar · Safety briefing · Packing checklist

Get the Yosemite guide — $47   Or get the National Parks Bundle — $197

Combo Deal

Get the Yosemite National Park Guide + Preset Pack

Photograph it. Edit it. Done.

$66
$54
Save $12
PDF Guide Every spot, GPS, golden hour
Preset Pack 20 Lightroom presets
Book your tours & experiences in Yosemite National Park

All links go to Viator (a TripAdvisor company), the world’s largest marketplace for guided experiences. Tagged as affiliate per FTC.

Take Yosemite National Park home in your pocket.

Every shot location, every angle, every time of day worth shooting. Printable PDF + GPS-tagged map.

Instant download. Works on phone, tablet, and printed.

Continue reading

← Back to National Parks Photography Guides