
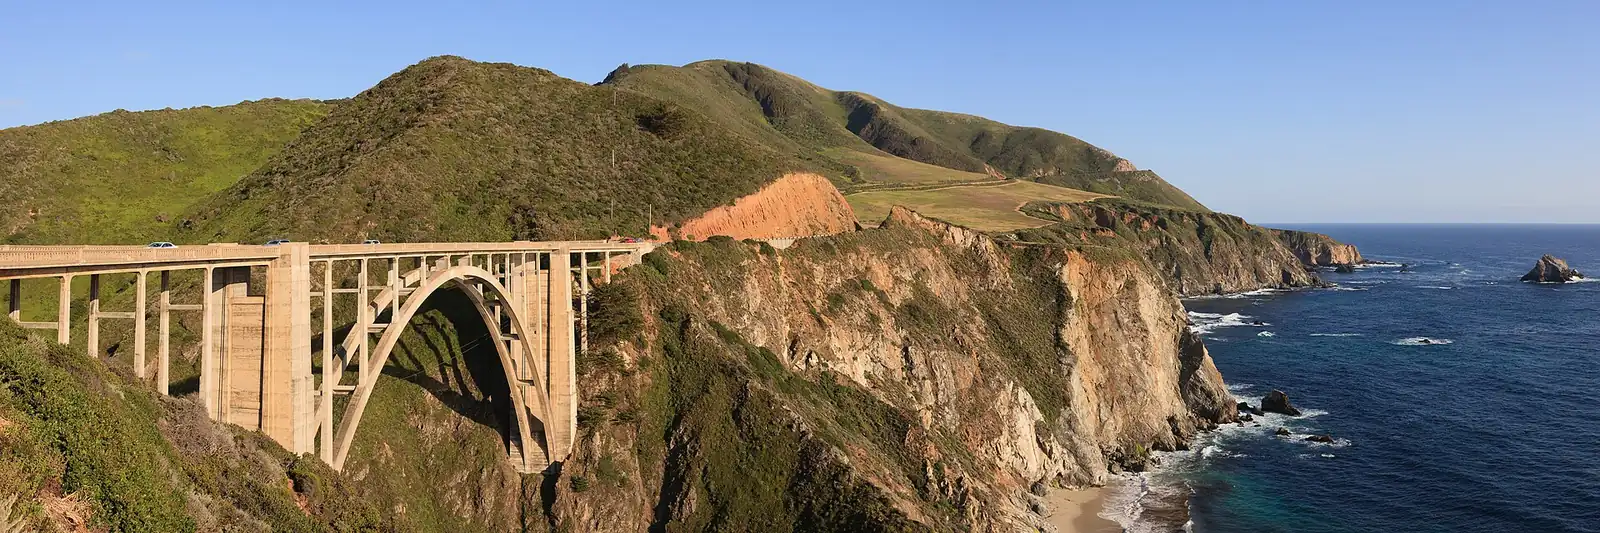
Bixby Bridge spans a 260-foot-deep coastal canyon on Highway 1 in Big Sur and has appeared in more car commercials than you can count. What makes it photographically interesting is the concrete arch combined with the rugged canyon walls and the Pacific Ocean in the background — a composition that works in fog, golden hour, and long-exposure blue hour equally well.
Best Time to Shoot
The north overlook pull-off gives the classic view; the sun sets over the water to the northwest, putting late afternoon to golden hour light directly on the bridge face. Morning marine fog rolls in from the ocean in spring and summer, creating atmospheric layers. Avoid midday in summer — flat light and zero atmosphere. For practitioners, see our breakdown of radial mask for sun glow. For practitioners, see our breakdown of aperture and depth of field control. For practitioners, see our breakdown of dual-base ISO sensor.
How to Get There
Bixby Bridge is on Highway 1 about 13 miles south of Carmel. The north pull-off parking area holds roughly 10 cars. Arrive early on weekends or park on the highway shoulder legally. No permits or fees. Highway 1 closures for landslides are common after heavy rain — check Caltrans before driving down.
Camera Settings
For the classic shot, 24-35mm captures the full bridge plus canyon. Long exposure at blue hour: ISO 100, f/16, 15-30 seconds to blur the ocean and create headlight trails on the bridge deck. Polarizer reduces glare on the ocean surface and saturates the canyon walls green. Graduated ND for bright sky vs dark canyon situations.
Recommended Gear for This Spot
Common Mistakes
- Shooting from inside the car or the bridge itself — you need the pull-off or the canyon trail below for any compelling angle.
- Missing the fog window: marine layer is thickest before 9 a.m. and usually clears by noon.
- Forgetting the canyon floor view: a short scramble down gives a completely different low-angle composition.
- Underexposing the concrete bridge at dusk — it reflects more light than expected and holds texture.
Big Sur photography workshops cover Bixby, McWay Falls, and Pfeiffer Beach in a single day timed for the afternoon light window. Browse Bixby Bridge photography tours to find options that fit your schedule.
For more location guides like this, see the Landscape Photography Guide on Shut Your Aperture. Browse all spots on the USA CA photo spots hub.
What to Pack
A focused landscape kit handles every shot at Bixby Bridge without breaking your back. Here is the working photographer's pack list — every link goes to B&H Photo Video (our primary supplier) or Amazon (for accessories and same-day delivery in the US).
| What & Why | B&H | Amazon |
|---|---|---|
Wide-angle zoom (14-35mm range) The single most important lens for sweeping vistas. Pair with a circular polarizer for skies and water. | Shop B&H → | Shop Amazon → |
Sturdy travel tripod Carbon fiber, packs to 15 inches, holds steady in wind off the coast. Essential for blue-hour and long-exposure work. | Shop B&H → | Shop Amazon → |
Circular polarizer (77mm or 82mm) Cuts haze, deepens sky, reveals texture in water. Non-negotiable for landscape work. | Shop B&H → | Shop Amazon → |
10-stop ND filter For 30-second exposures that turn moving water and clouds into silk. | Shop B&H → | Shop Amazon → |
Extra batteries (3 minimum) Cold weather and long exposures eat batteries. Carry triple what you think you need. | Shop B&H → | Shop Amazon → |
Fast SD/CFexpress cards V90 or CFexpress depending on your body. Two cards minimum so a failure mid-trip is recoverable. | Shop B&H → | Shop Amazon → |
Microfiber lens cloths Salt spray, mist, and dust will ruin every shot if you don't carry a cloth. | Shop B&H → | Shop Amazon → |
B&H and Amazon links are affiliate links. We earn a small commission on purchases at no extra cost to you. We only recommend gear we use or would buy ourselves.