
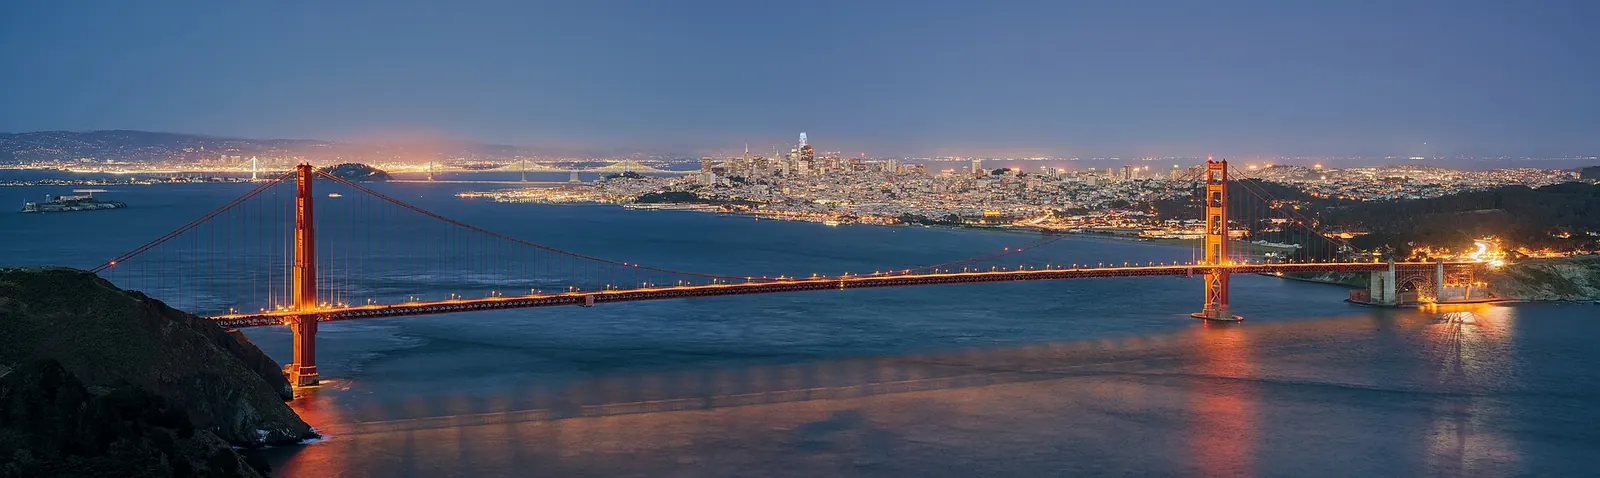
The Golden Gate Bridge is photographed millions of times a year, and standing out in that volume requires knowing which vantage points most visitors skip. Battery Spencer in the Marin Headlands sits directly above the north tower and offers the only angle that puts you level with or above the bridge deck. Vista Point on the Marin side gives the standard panoramic view. Crissy Field provides low-angle water compositions.
Best Time to Shoot
Summer mornings often bring marine layer that fills the bay while the bridge towers rise above — that shot requires elevation (Battery Spencer or Hawk Hill). Fog-free sunrises in fall and winter are best for pure bridge-and-bay shots. Sunset illuminates the bridge’s orange-red paint in direct warm light from the west. For practitioners, see our breakdown of lens corrections. For practitioners, see our breakdown of climbing for vantage. For practitioners, see our breakdown of shutter for product motion.
How to Get There
Battery Spencer: exit US-101 at Alexander Avenue, turn left on Bunker Road, and follow to the Marin Headlands trailhead — 10-minute walk to the battery. Vista Point: exit 101 immediately after the north tower. Crissy Field: accessible by car from the San Francisco side via Lincoln Boulevard. No permits for personal photography.
Camera Settings
Battery Spencer: 16-24mm for the overhead north tower composition, or 70-200mm to isolate the bridge and San Francisco skyline beyond. Crissy Field: 70-200mm to compress the bridge against the Marin hills. For fog shots: meter for the lit bridge top and let the fog go white — or pull the whites back from RAW.
Recommended Gear for This Spot
Common Mistakes
- Shooting only from Vista Point on the Marin side, which is what every visitor does.
- Missing Battery Spencer: it requires a 10-minute walk but is a completely different angle.
- Not checking the Bay Area fog forecast before driving out.
- Shooting into the sun from Crissy Field without a lens hood — the wide shot goes flare-heavy.
A Golden Gate photography tour covers Battery Spencer at sunrise, Vista Point for the fog window, and Crissy Field at golden hour in one guided session. Browse Golden Gate Bridge photography tours to find options that fit your schedule.
For more location guides like this, see the Landscape Photography Guide on Shut Your Aperture. Browse all spots on the USA CA photo spots hub.
What to Pack
A focused landscape kit handles every shot at Golden Gate Bridge without breaking your back. Here is the working photographer's pack list — every link goes to B&H Photo Video (our primary supplier) or Amazon (for accessories and same-day delivery in the US).
| What & Why | B&H | Amazon |
|---|---|---|
Wide-angle zoom (14-35mm range) The single most important lens for sweeping vistas. Pair with a circular polarizer for skies and water. | Shop B&H → | Shop Amazon → |
Sturdy travel tripod Carbon fiber, packs to 15 inches, holds steady in wind off the coast. Essential for blue-hour and long-exposure work. | Shop B&H → | Shop Amazon → |
Circular polarizer (77mm or 82mm) Cuts haze, deepens sky, reveals texture in water. Non-negotiable for landscape work. | Shop B&H → | Shop Amazon → |
10-stop ND filter For 30-second exposures that turn moving water and clouds into silk. | Shop B&H → | Shop Amazon → |
Extra batteries (3 minimum) Cold weather and long exposures eat batteries. Carry triple what you think you need. | Shop B&H → | Shop Amazon → |
Fast SD/CFexpress cards V90 or CFexpress depending on your body. Two cards minimum so a failure mid-trip is recoverable. | Shop B&H → | Shop Amazon → |
Microfiber lens cloths Salt spray, mist, and dust will ruin every shot if you don't carry a cloth. | Shop B&H → | Shop Amazon → |
B&H and Amazon links are affiliate links. We earn a small commission on purchases at no extra cost to you. We only recommend gear we use or would buy ourselves.