Top Night Photography Spots in Miami
Miami after dark is a serious photographer’s city. The skyline reflects off Biscayne Bay in double-exposure layers. Neon washes the Art Deco facades on Ocean Drive. Murals in Wynwood catch off-camera flash like a purpose-built studio. But you need to know where to stand, when to arrive, and what the security situation actually looks like — because generic “go to South Beach at night” advice will leave you in the wrong spot with a fogged lens and a dead battery.
This guide covers 10 real locations with addresses, GPS coordinates, parking notes, and safety context. Each entry includes recommended shutter speed, ISO, and aperture starting points. Five Miami-specific tips at the end address the humidity, salt spray, and tidal factors that will wreck a shoot if ignored.
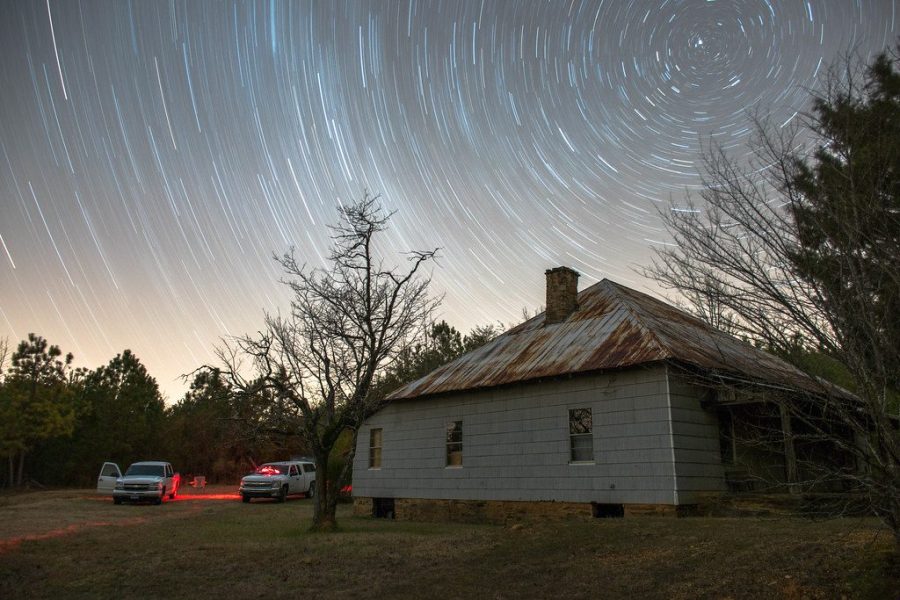
For stationary night work a sturdy tripod is non-negotiable. The Peak Design Carbon Fiber Travel Tripod folds to 15.5 inches and handles a full mirrorless kit without wobble on 30-second exposures.
1. Rickenbacker Causeway — Brickell Skyline Reflection Point
Address / GPS: Virginia Key entrance area, near the toll plaza pulloff — 25.7464° N, 80.1910° W. The best unobstructed shooting position is on the north shoulder of the causeway just past the toll booths, where a paved pullout sits beneath a tree line facing back toward Brickell.
Getting there: Head east on SW 26th Road to the Rickenbacker Causeway ($2 toll). A small paved pullout past the toll booth is the standard photographer’s spot — no official lot, so arrive early on weeknights.
Safety: Cars move at speed on the causeway — stay back from the guardrail and wear something reflective. The spot is popular and generally safe; go with a second person if shooting past midnight.
Best timing: Arrive 20 minutes before civil twilight so you can compose during the blue hour before committing to full night settings. The Brickell skyline lights up progressively from about 8:30 p.m. onward.
Camera settings: f/8, ISO 400, 20–30 seconds. Dial aperture to f/11 if bright point sources are blooming. Use mirror lockup or a 2-second timer to kill vibration.
Best lens: The Rokinon 14mm f/2.8 IF ED UMC resolves the full skyline arc in one frame. Set focus at hyperfocal distance (~8 feet at f/8) and it stays sharp edge-to-edge. A 16–35mm zoom works if you want framing flexibility.
2. South Pointe Pier — The South Beach Jetty
Address / GPS: South Pointe Park, 1 Washington Avenue, Miami Beach, FL 33139. The pier itself extends roughly 450 feet southeast from the park’s southern tip. Coordinates: 25.7636° N, 80.1333° W.
Getting there: Head south on Washington Avenue to its end. Paid parking at the South Pointe Park Pier Garage, 300 S Pointe Drive — arrive before 9 p.m. on weekends. The park’s official hours are sunrise to sunset, but the pier access path has no gate and the area stays busy well into the evening.
Safety: South Pointe is one of the busier night spots on Miami Beach — joggers, couples, and other photographers are almost always present. The pier has turtle-safe amber lighting, which gives a warm color cast at night. Bring a headlamp for setup but keep it off when other photographers are shooting nearby.
Best timing: 9 p.m.–midnight. Cruise ships transit Government Cut (visible from the pier) on a published PortMiami schedule — time your shoot around a lit vessel moving through the frame for an unmistakably Miami image.
Camera settings: f/8, ISO 200–400, 15–25 seconds. If waves are washing the pier base, either freeze them (2–4 seconds) or smooth them to glass (60–90 seconds). At high tide the lower platform floods — check the tide table.
Best lens: 16–24mm for wide city-and-water compositions; 50mm to isolate passing ships against the Fisher Island lights.
3. Wynwood Walls — Light Painting in the Open-Air Gallery
Address / GPS: 2516 NW 2nd Avenue, Miami, FL 33127. The Walls are in the block bounded by NW 25th and 26th Streets, west of NW 2nd Avenue. Coordinates: 25.8011° N, 80.1997° W.
Getting there: Street parking is scarce on Art Walk nights (second Saturdays). The Wynwood Garage at 250 NW 24th Street is the most reliable paid option; rideshare drop-off on NW 2nd Avenue is straightforward.
Access: The Walls compound has ticketed entry with evening access typically until 11 p.m. on Fridays and Saturdays — check thewynwoodwalls.com for current hours. Street murals outside the compound are publicly accessible at any hour.
Safety: Wynwood is well-patrolled. Stick to the main gallery blocks and lit commercial streets — avoid residential side streets with heavy gear after midnight.
Best timing: Friday and Saturday after 9 p.m. for ambient bar and gallery light on the walls. Weeknight visits after 10 p.m. give you the same murals with fewer people in frame.
Camera settings for light painting: Put the camera in Bulb mode, set ISO to 400–800, and open the aperture to f/4–5.6. Use a 15–30 second exposure and move a flashlight or LED panel across the mural surface during the exposure. An intervalometer locked in Bulb mode makes this workflow repeatable — the Vello ShutterBoss II Timer Remote handles Bulb sequences precisely and is compatible with Sony, Canon, and Nikon bodies in different connector variants.
Best lens: 24mm f/1.8 or the 14mm if you want to pull back enough to capture a full 30-foot mural panel in one frame.
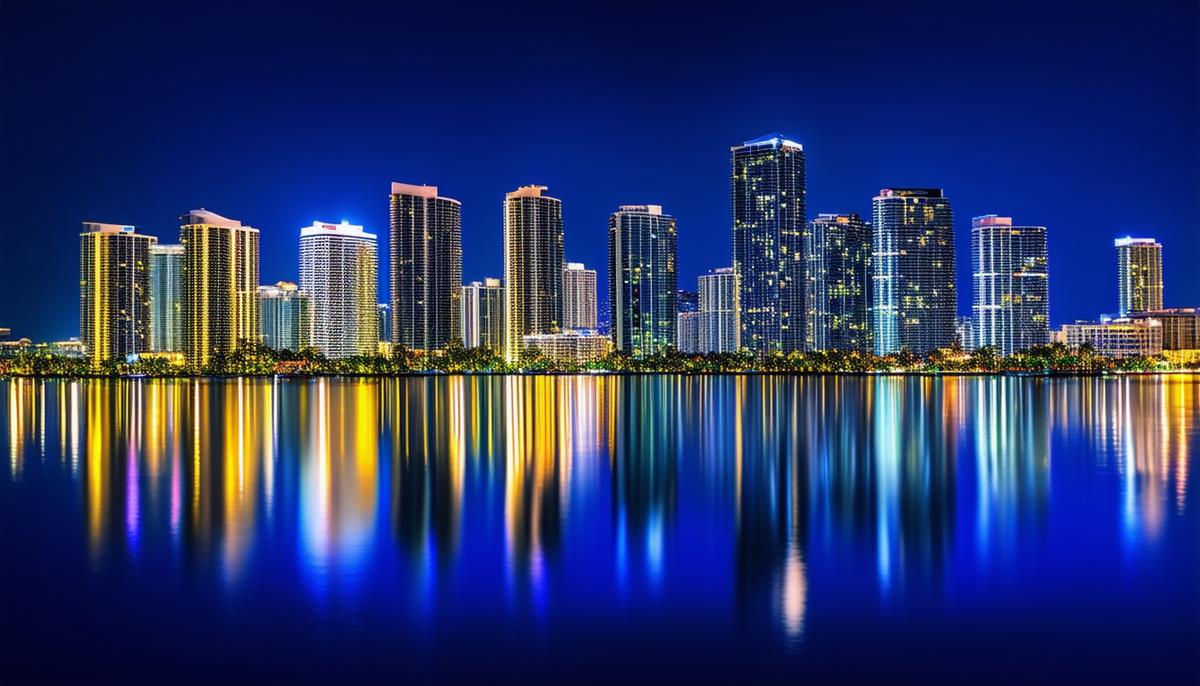
4. Bayside Marketplace and Downtown Skyline
Address / GPS: 401 Biscayne Boulevard, Miami, FL 33132. The best photography positions are along the waterfront boardwalk on the east side of the complex, facing northwest toward the skyline. Coordinates: 25.7750° N, 80.1873° W.
Getting there: Use the Bayside Marketplace garage off Biscayne Boulevard (free first 90 minutes). The Miami Trolley and Baylink ferry also stop nearby.
Safety: Bayside is a busy tourist area with on-premises security until 10–11 p.m. The boardwalk north toward Bayfront Park stays accessible after closing with lower foot traffic. Standard urban precautions apply.
Best timing: 8:30–10:30 p.m. for Biscayne Bay reflections of the lit downtown towers with foot traffic as foreground life. The Skyviews Observation Wheel adds a rotating neon element when framed from the waterfront path.
Camera settings: f/8, ISO 400, 20–30 seconds. The buildings behind Bayside are very bright — use a soft ND grad during blue hour to balance the sky against the water. The NiSi Nano Soft-Edge Graduated IRND (100×150mm, 3-Stop) handles the transition without color shift.
Best lens: 16–35mm or 24mm prime. Leave the ultrawide at home here — the buildings are close enough that a 14mm creates significant keystoning that’s hard to correct in post.
5. Ocean Drive — The Neon Corridor
Address / GPS: Ocean Drive runs north-south in South Beach from 1st Street to 15th Street, parallel to the beach. The Art Deco “neon corridor” is most concentrated between 5th and 14th Streets. Coordinates for a central position: 25.7785° N, 80.1300° W.
Getting there: Street parking on Ocean Drive fills by 7 p.m. on weekends. Collins Avenue (one block west) has better availability. The 17th Street Garage is the most reliable paid option for extended sessions.
Safety: Ocean Drive is heavily patrolled and safe to shoot alone. Tripods on the sidewalk draw attention — set up briefly in the median for symmetrical shots, then step back. Keep bags zipped.
Best timing: 9 p.m.–midnight. The Colony Hotel (736 Ocean Drive), the Clevelander Bar (1020 Ocean Drive), and the pastel hotel row hit full neon brightness after daylight fades. Friday and Saturday traffic creates light trails; Wednesday and Thursday evenings give cleaner, less crowded frames.
Camera settings: 4–8 seconds at f/8 captures car light trails and blurs pedestrian movement. For sharp street scenes, push to ISO 800–1600 at f/2.8, 1/60–1/125 sec. Shoot RAW — the neon is mixed-temperature and needs per-shot white balance correction in post.
Best lens: 35mm or 50mm prime for character-focused shots of individual facades; 16–24mm for full-block perspective shots from the median toward the beach.
6. MacArthur Causeway — Lookback Toward Downtown
Address / GPS: The primary shooting position is on the south shoulder of MacArthur Causeway (I-395) near the Watson Island junction, facing west-southwest toward the downtown Brickell skyline. Coordinates: 25.7784° N, 80.1727° W. There is a paved area near the boat ramps on Watson Island’s south side that provides a low, clear waterline view.
Getting there: Take MacArthur Causeway east and exit onto Watson Island. Park near the boat ramp area off South Bayshore Drive — generally accessible after hours. The roadside shoulder before the causeway bridge is not an official parking zone.
Safety: Stay on the Watson Island boat ramp side. The mainland underpass area attracts late-night foot traffic best avoided — the Watson Island end is substantially safer and better lit.
Best timing: 9–11 p.m. Blue hour remnants in the upper frame complement the warm tower lights well from this west-facing position. The Port of Miami terminals on Dodge Island add lit geometric shapes to the left of the skyline.
Camera settings: f/8, ISO 400, 20–30 seconds. Focus manually on the waterline reflection zone. Skip the polarizer — negligible benefit at night.
7. Vizcaya Museum Exterior — Limited Night Access
Address / GPS: 3251 S Miami Avenue, Miami, FL 33129. The main house faces south toward Biscayne Bay. Coordinates: 25.7446° N, 80.2103° W.
Getting there: Paid parking is available in the main lot off S Miami Avenue. The museum is accessible by Miami-Dade Metrobus on the 48 and 249 routes.
Night access — what you need to know: Vizcaya is not a freely accessible night location. Standard hours are 9:30 a.m.–4:30 p.m. On select Friday evenings in summer (June–September), “Vizcaya Late” events extend garden access to 8 p.m. on standard admission. Commercial permits start at $1,000+ per extra hour. Check vizcaya.org for the current Late schedule — after-hours shooting is trespassing on a fenced, monitored property.
What you can shoot: During Vizcaya Late events, the garden terraces, ornamental fountains, and bay-facing balustrade are accessible. The main house exterior lit against the bay is the primary composition. Bring a 24–70mm for detail work and a wide prime for the full garden panorama.
Camera settings: f/4–5.6, ISO 1600–3200. The gardens are dimly lit during events — shoot at 1/15–1/30 sec handheld or 10–20 seconds on a tripod. Tripods are permitted during Vizcaya Late.
8. Miami Beach Lifeguard Towers — Lit at Night
Address / GPS: The most photographed towers sit at 8th Street Beach (25.7749° N, 80.1297° W) and 10th Street Beach (25.7785° N, 80.1296° W), directly off Ocean Drive on the sand. The 8th Street tower in particular is frequently cited as the most photogenic thanks to its isolated position and the low skyline behind it.
Getting there: Park on Collins Avenue or the 7th Street/Collins lot and walk east. Beach access is free and 24-hour — no restriction on after-dark use.
Safety: The beach stays active at night. Keep bags between your feet when shooting and do not leave gear unattended. Working solo after midnight is generally fine.
Best timing: 9–11 p.m. Ocean Drive neon provides a warm backlight on the towers from behind. Some towers have solar LED strips that activate at dusk — others are unlit, so scout the specific tower before committing.
Camera settings: f/5.6–f/8, ISO 800–1600, 10–25 seconds. Tripod legs sink in sand — use wide-foot spikes or a ground plate. Wet sand near the waterline creates mirror reflections of the tower lights.
Best lens: 24mm or 35mm prime to balance the tower against the sky and the beach foreground. A vertical orientation emphasizes the tower’s height against the stars if you have clear skies.
9. Wynwood After-Dark Mural Shoots — Off-Camera Flash Work
Address / GPS: The extended Wynwood mural district covers NW 2nd and 1st Avenues between NW 20th and 29th Streets. The highest density of accessible outdoor murals is between NW 23rd and 26th Streets on the avenues. Coordinates of a central shooting block: 25.8018° N, 80.1997° W.
Access: Street-facing murals on NW 2nd Avenue and NW 26th Street are on public property, accessible at all hours. Most building owners actively welcome photographers.
Off-camera flash technique: On-axis speedlight produces flat, washed-out results on textured murals. Position a strobe at 45 degrees to the wall surface, 6–10 feet out, and use a grid or snoot to control spill. Textured paint catches raking sidelight with dramatically more depth than front-flash.
Camera settings: Sync speed (1/200–1/250 sec), f/5.6–f/8, ISO 400–800. This underexposes ambient street light and makes the strobe dominant. Start at 1/4 flash power and bracket up from there.
Safety: Wynwood’s commercial blocks are well-trafficked on Friday and Saturday evenings. Avoid the residential streets west of NW 3rd Avenue late at night. Lock any cases in your vehicle before walking the district with gear.
10. Coconut Grove Waterfront — Calm Water, Long Exposures
Address / GPS: Peacock Park, 2820 McFarlane Road, Miami, FL 33133. The waterfront shooting positions are along the bay walk that runs east of Peacock Park toward the Coconut Grove Marina. Coordinates: 25.7259° N, 80.2395° W.
Getting there: Street parking on McFarlane Road is free after 6 p.m. The CocoWalk garage at 3015 Grand Avenue is a short walk for paid parking.
Safety: The Grove waterfront is quiet and residential. The bay walk near Peacock Park is lit and used by evening walkers — one of the most low-stress shoots on this list.
Best timing: 8:30–10:30 p.m. On windless nights, Biscayne Bay here barely moves — mirror-like reflections of the marina lights and the distant downtown glow. A full moon rising from the east adds a dimension unavailable at the causeway locations.
Camera settings: f/8, ISO 200, 30–60 seconds for glassy water. A breeze drops that to 8–15 seconds to keep reflections readable. Check moon phase — a telephoto can isolate the moon over the bay from Peacock Park.
Best lens: 16–35mm for panoramic bay shots; 70–200mm to compress the distance between the marina lights and the faint downtown glow on the horizon.
5 Night Shoot Tips Specific to Miami
1. Manage Lens Fogging from Humidity
Miami’s ambient humidity sits above 80% at night. Pull a cold lens out of an air-conditioned car and moisture condenses on the front element immediately. Let gear acclimate outside for 10 minutes before shooting. The Giottos Rocket Air Blaster clears surface moisture without contact. Keep anti-fog wipes in a side pocket as backup.
2. Watch the Tide Table at South Pointe
The lower platform of South Pointe Pier floods at high tide. Miami’s tidal variation runs 1–2 feet, but a king tide can cover the primary shooting deck. Check NOAA tide predictions for Miami Harbor before driving out. A falling mid-tide gives you dry footing and tidal texture on the sand flats beneath the pier.
3. Salt Spray at Coastal Locations
South Pointe, the lifeguard towers, and Coconut Grove all expose gear to salt spray. Beyond the lens, salt corrodes tripod legs and flash mounts over time. After coastal shoots, wipe down all gear with a damp microfiber cloth. Never blow salt crystals off a lens element dry — dampen the cloth first or you’ll grind them in.
4. Plan Around Miami’s Light Pollution Gradient
Miami is one of the most light-polluted metros in the US. The sky above Brickell runs orange-gray, not black — but for skyline work, that’s the point. A dark sky would kill the color contrast that defines Miami night photography. For Milky Way work you need the Everglades or the Keys. Work with the ambient glow by letting long exposures accumulate it rather than fighting it.
5. Gear Security and Situational Awareness
The spots on this list are all routinely used by photographers and tourists. Basic rules: never leave a bag unattended on a tripod. In Wynwood with multiple flash stands, bring a partner. At causeway pullouts, leave nothing visible in a locked car — smash-and-grab is common in Miami tourist parking areas.
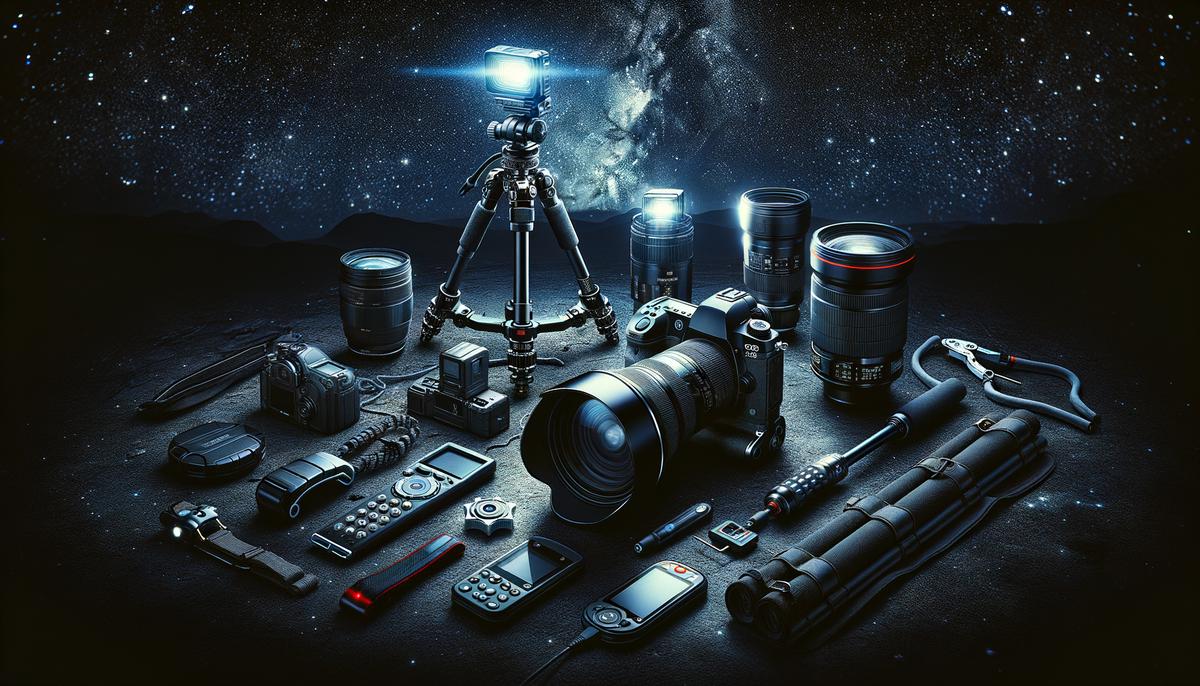
Gear Summary for Miami Night Shoots
- Tripod: Peak Design Carbon Fiber Travel Tripod — compact for street work, rigid for long causeway exposures
- Intervalometer: Vello ShutterBoss II Timer Remote — Bulb mode control for light painting and timelapse sequences
- Fast wide prime: Rokinon 14mm f/2.8 IF ED UMC — sharp, affordable, wide enough for the full Brickell arc
- ND Grad: NiSi Nano Soft-Edge Graduated IRND Filter (100×150mm, 3-Stop) — balances bright skyline against dark bay water at twilight
- Humidity/dust: Giottos Rocket Air Blaster — clears surface moisture and dust without contact
For daytime and golden hour locations across the same neighborhoods, see the best photography spots in Miami guide. Solid night technique starts with understanding how ISO performs in low light — get that dialed before your first after-dark shoot.