Categories: News, PHOTO SERIES, TUTORIALS, TRAVEL
Tags: News, PHOTO SERIES, TUTORIALS, TRAVEL
There is a profound moment in every photographer’s journey when the camera ceases to be a cold, mechanical box and becomes an extension of the soul. For many, that transformation begins the second they click the dial away from the "Auto" setting and venture into the brave, intimidating world of Manual Mode. If you have ever felt that your camera was making decisions for you: decisions that didn't quite capture the ethereal glow of a sunset or the stoic grace of a mountain peak: then you are ready to reclaim your creative sovereignty.
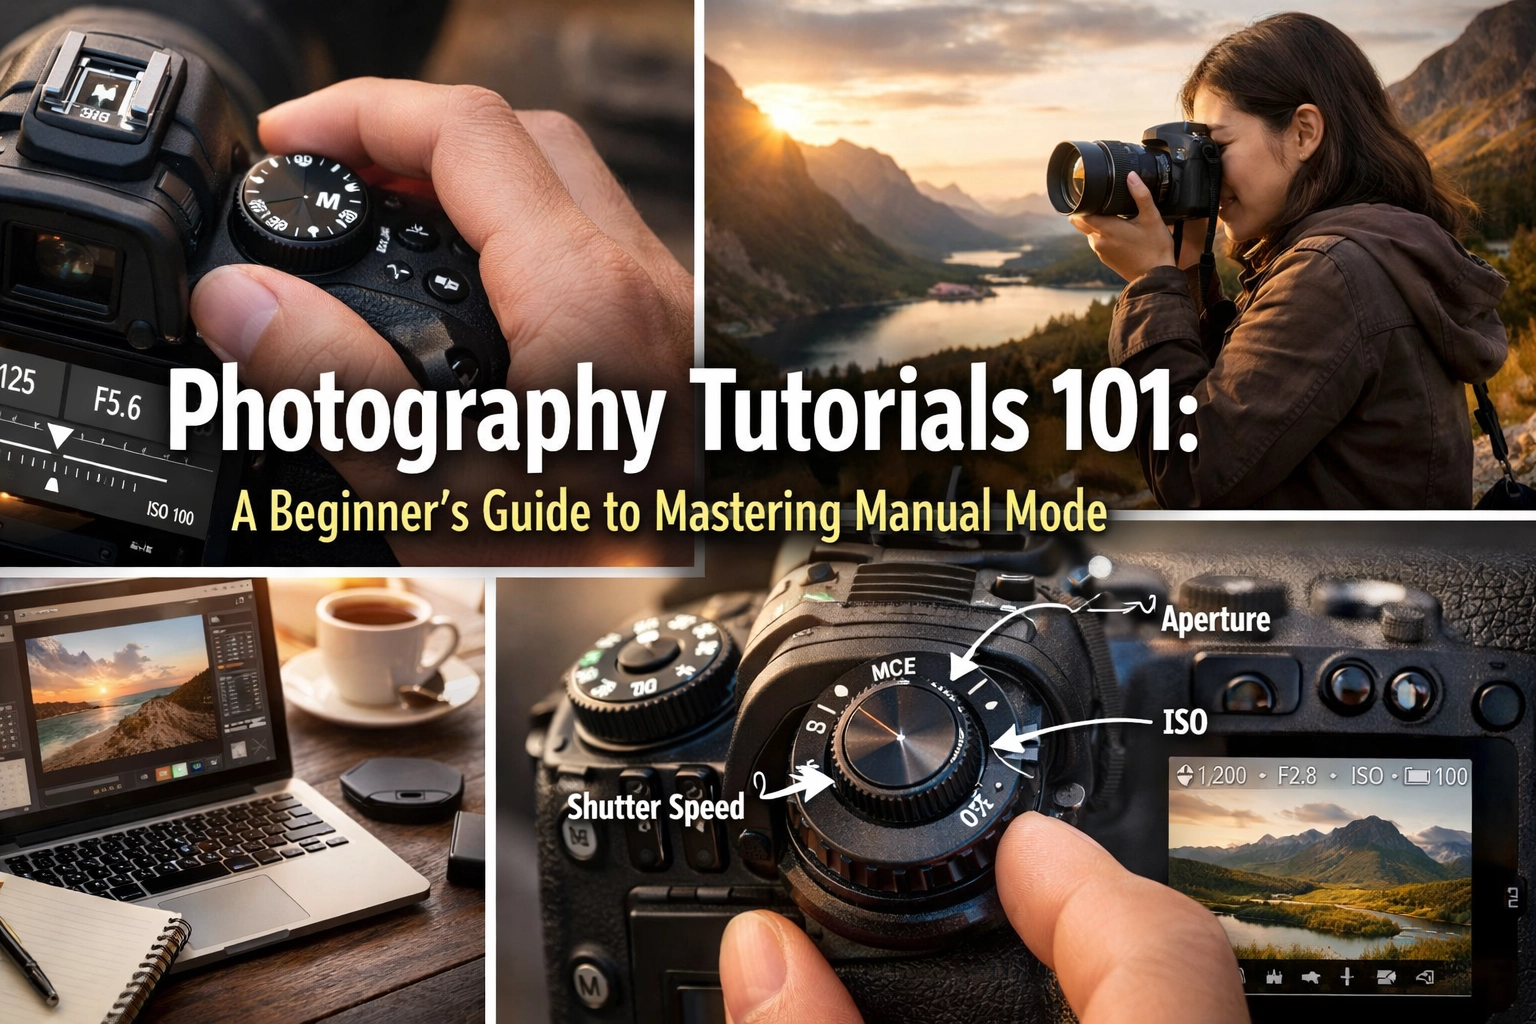
Manual mode is not just a technical choice; it is a declaration of intent. It is the difference between taking a picture and creating an image. In this guide, we will peel back the layers of complexity and look at the intrinsic relationship between light and glass. Dear hobbyists and fellow enthusiasts, let us embark on this journey to master the "Holy Trinity" of exposure: Aperture, Shutter Speed, and ISO.
The Soul of the Sensor: Understanding the Exposure Triangle
To master manual mode, one must first show reverence for the light. Light is our paintbrush, and the sensor is our canvas. The exposure triangle is the fundamental framework that dictates how that light is captured. Every time you adjust one setting, it whispers to the others, requiring a delicate dance of balance to achieve the perfect exposure.
I have tried every "shortcut" in the book, but nothing compares to the absolute control you gain when you understand how these three pillars interact. Whether you are shooting with a Nikon D850 or the latest mirrorless body, the physics of light remain constant.
 Save
Save
Aperture: The Ethereal Eye
Aperture is perhaps the most poetic of the three settings. It refers to the opening in your lens that allows light to pass through to the sensor. Think of it as the pupil of an eye: dilating in the dark to see more, and constricting in the bright sun to protect the vision.
In technical terms, we measure aperture in f-stops. A low f-number (like f/1.8 or f/2.8) signifies a wide opening, while a high f-number (like f/11 or f/16) signifies a narrow one. But the magic of aperture lies in its ability to manipulate the "depth of field."
When you use a wide aperture, you create a shallow depth of field, resulting in that creamy, blurred background we call "bokeh." This is essential for portrait photography techniques, where you want your subject to pop against an ephemeral backdrop. Conversely, a narrow aperture ensures that the entire scene: from the blade of grass at your feet to the distant clouds: remains in sharp focus. This is the cornerstone of landscape photography.
Shutter Speed: The Heartbeat of Time
If aperture is the eye, shutter speed is the heartbeat. It determines how long the sensor is exposed to the world. It is the tool we use to trap a single, fleeting moment in time or to allow time to flow across the frame like a river.
A fast shutter speed (such as 1/1000th of a second) freezes motion. It captures the frantic beat of a hummingbird’s wing or the precise moment a wave crashes against the shore. A slow shutter speed (such as 1/2 a second or longer) allows motion to blur, turning a waterfall into silk or car lights into ribbons of fire.
Venture forth with your tripod and experiment with long exposures. There is something truly spiritual about watching a long exposure develop: a process where the chaotic movement of the world is distilled into a single, serene image. For those moving between gear types, understanding how shutter speed behaves is crucial, especially when deciding between DSLR vs Mirrorless systems.
 Save
Save
ISO: The Quiet Resilience of the Sensor
ISO is the unsung hero of the exposure triangle. It represents the sensor’s sensitivity to light. In the days of film, you were locked into a specific ISO for the duration of the roll. Today, we have the freedom to change it with a simple click.
However, this power comes with a cost. As you increase the ISO to shoot in darker environments, you introduce "noise" or grain into the image. A low ISO (like 100) produces the cleanest, most intrinsic image quality, but it requires ample light. A high ISO (like 6400) allows you to shoot in the dim light of a cathedral or under the stars, but it can compromise the purity of the shadows.
Balancing the Scales: A Step-by-Step Practical Guide
Now that we’ve delved into the philosophy of the triangle, it’s time to get down to the brass tacks of how to actually use Manual Mode in the field. Don't be discouraged if your first few attempts result in images that are too dark or too bright. Your camera’s built-in light meter is a stoic guide that will tell you exactly where you stand.
Step 1: Define Your Creative Intent
Before you even touch a dial, ask yourself: What is the soul of this photo? If you are shooting a friend’s portrait, your priority is likely a wide aperture for a blurred background. If you are shooting a speeding car, your priority is shutter speed. Set your most important variable first.
Step 2: Harmonize with the Light Meter
Look through your viewfinder. You will see a small scale with a "0" in the middle. This is your exposure meter. If the marker is to the left (the minus side), your image is underexposed: too dark. If it is to the right (the plus side), it is overexposed: too bright.
Adjust your remaining two variables until that marker sits at or near the zero. For more advanced techniques, you might check out our HDR tutorial to learn how to handle scenes with extreme light and shadow.
 Save
Save
Step 3: The Test and Refine Cycle
Manual mode is a conversation. Take a shot, look at the screen, and listen to what the image tells you. Is the sky "blown out" and white? Increase your shutter speed or close your aperture. Is the subject a shadowy silhouette? Open your aperture or bump up your ISO. This iterative process is how you learn the "personality" of your gear.
The Modern Advantage: Mirrorless and Beyond
In 2026, the technology at our fingertips is nothing short of miraculous. If you are still choosing the best mirrorless camera, you will find that "Electronic Viewfinders" (EVF) have made learning manual mode much more intuitive. Unlike old DSLRs, an EVF shows you the exposure in real-time. If you change your shutter speed, the screen gets darker or brighter instantly.
This real-time feedback is a game-changer for beginners. It removes the guesswork and allows you to focus on the composition: the "canvas" of your art. Stay updated with today’s camera gear news to see how these sensors are becoming even more capable in low light.
Refinement in the Digital Darkroom
Mastering Manual Mode is the first step, but the journey doesn't end when the shutter clicks. Post-processing is where you polish the raw stone into a diamond. I have used many programs, but when it comes to bringing out the ephemeral details in a landscape, Luminar is an incredible tool that simplifies the workflow without sacrificing power.
Whether you are fixing a slight exposure mistake or enhancing the colors of the dancing sun, software allows you to realize the full potential of your manual capture. You can explore more about this in our software category.
 Save
Save
Why the Struggle is Worth It
You might ask, "Why bother with all this when my phone can take a great photo on Auto?" The answer lies in the connection. When you shoot in manual, you are not a passive observer; you are an active participant in the creation of beauty. You learn to see the world differently. You start to notice how the light "whispers" through the trees or how the blue hour brings a stoic calm to the city streets.
For those looking for inspiration, I highly recommend checking out the work of Joao Freire or exploring our PHOTO SERIES for examples of manual mastery in the real world.
Beyond the Basics: Pushing the Boundaries
Once you are comfortable with the basics of Manual Mode 101, you can start breaking the rules. Intentionally underexpose to create a moody, low-key portrait. Overexpose to create a high-key, dreamlike sequence. The camera gear is just the "unsung hero" that facilitates your vision.
If you are interested in the intersection of photography and moving images, the same principles apply to videography success. Understanding manual settings is the foundation for everything from time-lapses to cinematic shorts.
 Save
Save
A Shared Journey
Photography is a communal craft. We all start at the same place: staring at a confusing array of buttons and menus. But as you practice, the settings become second nature. Within a week or two, you won't even have to look at the dials; your fingers will move with an intrinsic memory of their own.
If you find yourself stuck or if a particular concept isn't clicking, don't hesitate to reach out. Drop me a line below if you have any questions, or consider sharing your progress with us through our submissions page. We are all here to learn from one another.
For more technical deep-dives and artistic inspiration, you can always visit blog.edinchavez.com or www.photoguides.com. If you're looking for professional-grade gear reviews and studio insights, check out www.proshoot.io and www.edinstudios.com.
Ultimately, mastering Manual Mode is a gift you give to yourself. It is the key that unlocks the door to true creative freedom. It allows you to capture the world not just as it looks, but as it feels. The light is dancing: it’s time you joined the lead. Seize these moments! Venture forth and shoot with purpose.
The emotional reward of a perfectly exposed, manually captured image is a feeling of accomplishment that no "Auto" mode can ever provide. It is a testament to your growth, your patience, and your reverence for the art of photography. Now, go out there and shut your aperture!