By Edin Chavez | Updated October 2026
 Save
SaveSome links are affiliate links. If you buy through them, we may earn a commission.
Dark does not mean muddy. That is the whole game.
A common mistake: someone wants the brooding, low-key boudoir look, turns down the exposure, and ends up with a frame where the skin goes gray, the face disappears and the shadows have no shape. The mood was supposed to feel like candlelight and silk. It feels like a phone photo taken in a closet.
Moody is a decision about where the light stops. You choose what gets to be bright, you choose what is allowed to fall off, and you protect the skin tone in the part that stays lit. This guide walks through that decision in a sensible working order: exposure for the person first, the background second, then shadow control, catchlights, color and the edit.
If you are new to the genre, start with the full overview in our boudoir photography pillar guide. This article stays on light, shadow and tone.
What “dark and moody” actually means in a boudoir frame
Low-key photography means most of the frame sits in the darker half of the tonal range, with a smaller area of brighter tones carrying the story. In boudoir that bright area is usually skin, a face, a shoulder, a line of fabric. Everything else can sink.
Three things have to be true for the look to work:
- The lit part of the subject is exposed properly. Skin should look like skin, not like a dim copy of it.
- The dark parts are dark on purpose. Black should be black, or a rich deep brown, not a flat gray haze.
- There is a clear edge or gradient between the two. That transition is where the shape comes from.
If one of those fails, the look falls apart. A properly exposed face on a dark background is low-key. An underexposed face on a dark background is just underexposed.
Step one: expose for the subject, not the room
Here is the habit that fixes most dark photos. Decide what you are protecting, usually skin on the face and body, and set your exposure for that. Let the background fall wherever it falls.
In a dark room your camera meter wants to brighten everything. That is its job. If you let it average the scene, it will pull the shadows up toward middle gray and flatten the mood. Switch to a metering mode that cares about the subject, or use spot metering on the skin and then adjust from there, and check the result rather than trusting the number.
Then look at the screen and the histogram. A low-key image usually shows a big pile of data on the left side, which is normal. The right side needs a careful read. A pile against the right wall can come from bedding, a lamp or a bright background, not from skin, so do not read the global histogram as a verdict on the face. Inspect the skin highlights directly instead. Use your camera’s highlight warning if it has one, and remember it is based on the JPEG preview, so it can look worse or better than what a RAW file holds. Zoom in on the brightest skin and check that the texture is still there. If it has gone flat and featureless, lower the exposure on the next frame, because detail that was never recorded cannot be rebuilt in the edit.
One quick check: zoom in on the brightest patch of skin. Can you still see tiny tonal changes there? Good. If it looks like a flat white-ish patch, back the exposure off a little.
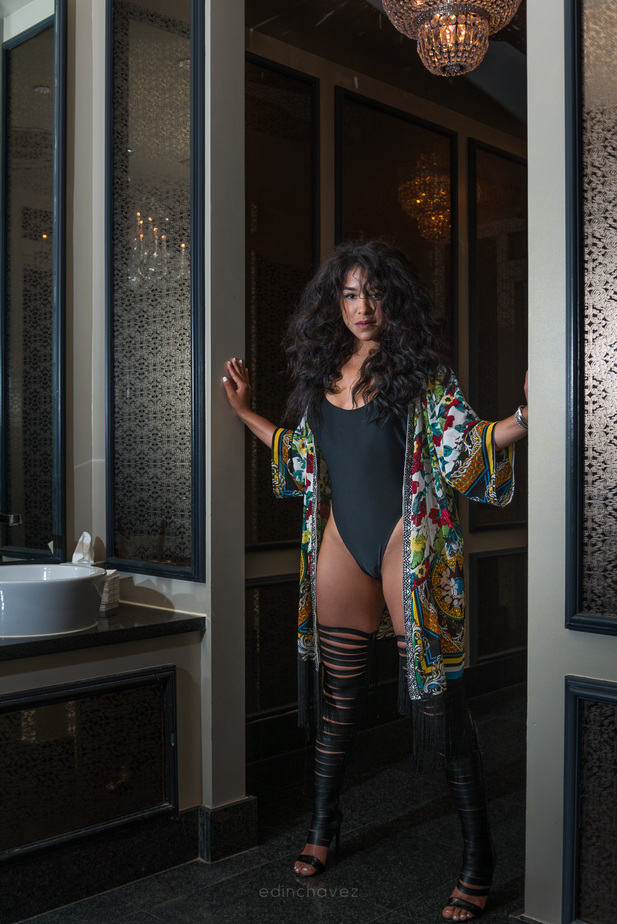
The photo below is a good reference for the look. The face and arms are clearly lit, and the bed and background drop away into deep black. Notice that the dark area is not empty. You can still feel the texture of the fabric and the gradient where the light fades.
 Save
SaveA note on that caption: you cannot reverse-engineer a lighting setup from a finished photo. A dark background can come from distance, from a dark room, from flags, from a low exposure or from several of those at once. Use pictures for mood and tone. Use your own tests for technique.
Step two: separate the subject from the background
Dark backgrounds do not automatically give you separation. If the subject’s hair, shoulders and sheets are all the same dark value as what is behind them, they merge.
You have three easy tools.
Distance. Light falls off fast as it travels. The farther the background sits from your light source, the darker it gets compared with the subject. In a bedroom or hotel room, even a couple of steps of distance between the person and the wall can change a lot. Move the subject forward before you reach for any gear.
A different tone behind the edge. A slightly lighter wall or headboard behind a dark shoulder, or a darker patch behind a bright one, creates a visible edge. You do not need a lot of contrast. A small step is enough for the eye to separate the two.
Edge light. A gentle highlight on the hair or the line of a shoulder can outline the subject. Keep it modest. In a moody frame, a rim that is too bright reads as a glow and breaks the atmosphere.
Step three: negative fill and spill control
This step is easy to skip, and it is where moody photos get their depth.
Fill light is anything that bounces light back into the shadow side. A white wall, white sheets, a pale ceiling, even a light-colored floor all act as fill. In a small bright room there is a lot of it, and it quietly lifts your shadows so the image looks softer and flatter than you wanted.
Negative fill is the opposite. You place something dark next to the subject, on the shadow side, so there is nothing to bounce light back. A black flag, a dark cloth over a chair, a dark curtain or a black card all work. The shadow side gets deeper, the light looks more directional and the face gains shape.
Spill is light landing where you do not want it. A light aimed at the subject can still brighten the wall, the bed or the floor. Move the light, tighten it with a shield or flag, or shift the subject. If the background is going gray instead of black, spill is the first thing to check.
One note on gear. A reflector disc is great for adding light back, but a standard multi-surface reflector is not a black flag. Many discs offer white, silver, gold and diffusion surfaces, and those are the opposite of what negative fill needs. For true negative fill, use something that is actually black. Check the exact product before you buy, because “5-in-1” does not always mean it includes a black side.
Step four: catchlights and the face
In a dark photograph the eyes carry a lot. A small catchlight, the little reflection of the light source in the eye, keeps a face alive when everything else is dim.
If the eyes are going dead, try these small moves:
- Raise or lower the light slightly so its reflection falls in the upper part of the eye instead of disappearing.
- Ask the person to turn their chin or eyeline a few degrees toward the light. That is a small adjustment and they are always free to say no or skip it.
- Reduce a very dark hat, hair or shadow across the eyes if it is killing the connection, unless that is the mood you want.
You will see a lot of broken eye contact in moody work, and that is a valid choice. What matters is that you chose it.
 Save
SaveStep five: keep color in the shadows
Dark and moody does not have to mean black and white, and it does not have to mean cold blue. The biggest quality killer in low-key color work is a muddy cast. Skin turns orange, then gray, then green as you push the shadows around.
A few ways to avoid it:
- Shoot in RAW so you have room to adjust white balance later.
- Pick one main light color and stay with it. Mixed warm lamps and cool window light create color fights on skin that are painful to fix.
- If the room has colored lights, decide whether they are part of the look. A little color in the background can be beautiful, but make sure your subject is lit cleanly.
- Check skin in the edit by zooming in on a neutral-looking area and asking whether it looks like the person, not whether it looks “cinematic.”
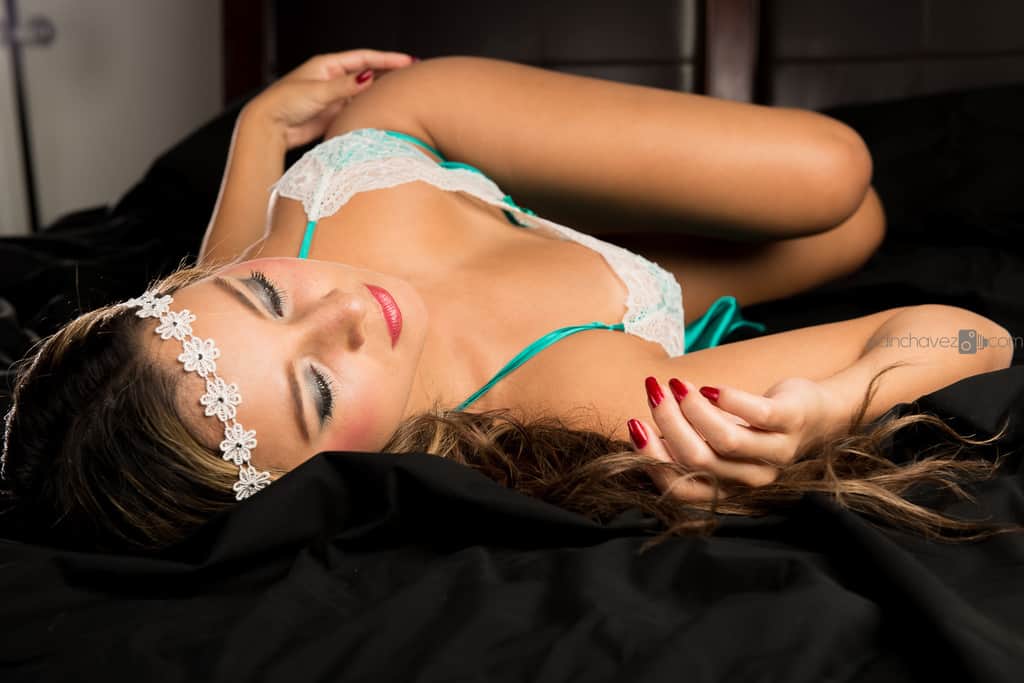
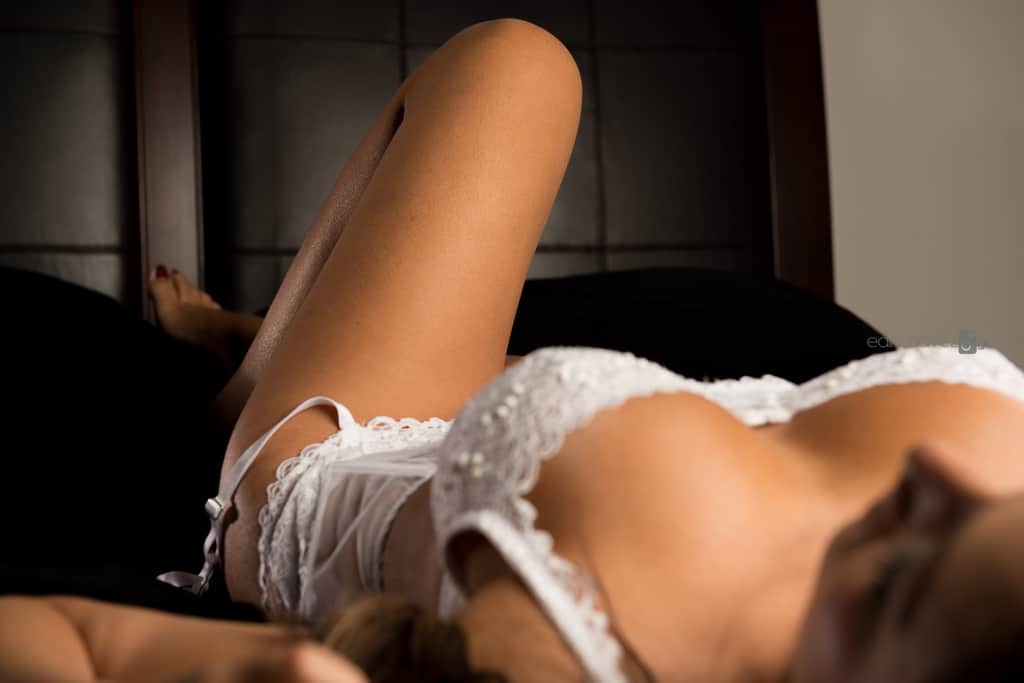
The frame below is a useful reference for tone. Warm skin and bright lace come forward, the dark bed and padded headboard fall away, and the lace still holds its pattern.
 Save
SaveStep six: the edit
Even a well-shot dark photo benefits from a careful edit. The goal is to shape the light, not to rescue the file.
A reliable order in Lightroom:
- Set white balance and overall exposure so the skin looks right.
- Pull the blacks down gently until the deep shadows feel intentional, but check you are not crushing texture in fabric and hair.
- Use masks to shape the light. Adobe’s masking tools let you brighten or darken the subject, the background or specific areas with a subject mask, a brush or a gradient. Their documentation is worth ten minutes: Adobe Lightroom Classic masking.
- Adjust color and tone with the controls described in Adobe’s guide to tone and color.
- Finish with light cleanup. If you retouch skin, agree on the level with the person beforehand and keep it natural. Our general guide to cleaning up a portrait in Lightroom covers the basics.
A small trick that helps a lot: view your edit at a smaller size and on a different screen. Dark images look different on a phone with the brightness up than on a calibrated monitor. Most clients will see them on a phone.
If you want a structured way to learn color, masking, detail and export, the Lightroom editing course in our Academy covers those skills. It is a general editing course, not a boudoir class, but those are the skills this look depends on.
If you are curious about taking the same ideas to monochrome, the black and white techniques guide is a good next read.
Common problems and quick fixes
The skin looks gray. Possible causes include underexposed skin, a raised black point, a color cast or flat fill light. Check the skin highlights directly, compare against a neutral reference and adjust the subject before the whole frame.
The whole image looks flat. It may be too much fill. Look for pale walls and sheets, and add something dark on the shadow side.
The background is not black. Light may be spilling onto it, or the subject may be close to it. Check spill, add distance, flag the light or lower its power.
The face is lost. Reposition the light, check the catchlights, and make sure the face is the brightest important area.
The image has a color cast. It may come from mixed light sources, colored surfaces or white balance. Check each, turn off a source you do not need, or correct it in the edit.
The photo is noisy. Dark scenes push noise when you lift shadows. Expose properly at capture instead of rescuing it later, and use noise reduction sparingly.
Practice exercise: three frames, one subject
Here is a drill you can run on a friend, a mannequin or even a draped chair. It teaches more than any article.
- Place the subject in a dark corner with one light source on one side.
- Take a frame exposed for the subject. Check the histogram.
- Add a dark flag on the shadow side and take the same frame. Compare the shadows.
- Move the subject a few steps farther from the wall and shoot again. Compare the background.
- Raise or lower the light a little and look at the catchlights.
Three small changes, three clear lessons. Keep the originals and compare them side by side.
Working with the person in front of the camera
Moody sessions often happen in dim rooms, and that can feel more intimate or more uncomfortable depending on the person. Be extra clear about the plan. Agree in advance on the look, the coverage, what is and is not photographed and how the photos will be edited and used. Anyone can pause or stop at any time, and when they do, you stop. Our session checklist covers this in detail: Boudoir Session Preparation Checklist.
Boudoir is a trust job first. The light only works if the person feels safe in it.
Gear box: what actually helps for this look
You do not need a lot. A few things make dark work easier and safer.
- Portable flash (optional): If you want to add controlled light in a dim room, a battery flash such as the Godox AD200Pro II TTL pocket flash at B&H gives 200Ws in a compact body. Note that the flash-only listing does not include a camera-specific transmitter, so check that you have one that matches your camera before ordering.
- Fast, safe storage: Dark RAW files add up. A rugged portable drive like the Samsung T7 Shield 1TB at B&H is a handy place for backups. No drive makes your files secure, so keep more than one copy.
- Gallery delivery: Delivering a private gallery is part of a calm workflow. SmugMug offers privacy controls for sharing, described on their privacy page. No guarantee of confidentiality is implied.
Some links are affiliate links. If you buy through them, we may earn a commission.
Q&A: dark and moody boudoir photography
Do I need studio lights for a dark and moody look?
No. Window light in a dim room, a single lamp or a small flash can all work. What matters is that you control where the light lands and expose for the skin. More gear helps you repeat a result, not create one.
Why does my dark boudoir photo look muddy?
Usually underexposed skin, light spilling onto the background, or fill from pale walls and sheets. Check exposure on the subject first, then look at spill and fill.
What should the histogram look like for low-key photos?
Expect lots of data on the left. A pile on the right can be bedding or background, so zoom in and inspect the brightest skin directly to make sure the texture is still there.
What is negative fill?
Something dark placed next to the subject so it does not bounce light into the shadows. It deepens shadows and adds shape.
Can I use a standard 5-in-1 reflector as negative fill?
Check the model. Many include white, silver, gold and diffusion surfaces but not black. Those surfaces add light, which is the opposite of negative fill.
Should dark boudoir photos be black and white?
They can be, but color works well too. Keep one clear main light color and watch skin tone.
How do I keep eyes alive in a dark photo?
Make sure there is a catchlight, adjust the light height slightly and check the face is the brightest key area.
Can I copy the lighting from a photo I like?
You can learn from the mood, but a finished photo cannot tell you the exact setup. Test and compare your own frames.
How should I plan a dark session with a client?
Agree on the look, coverage, boundaries, editing and use ahead of time. Anyone can pause or stop at any time.
Is there one best setting for moody boudoir?
No. Settings depend on your light, camera and room. Expose for the subject and check your histogram.
Final thoughts
Moody photography is built on contrast you chose, not darkness you stumbled into. Protect the skin, shape the shadows, keep the eyes alive, and let the rest fall away. Do that and your dark frames will feel like they glow from the inside.
Now go find a dark corner and run the three-frame drill.
Related reading in this series: window-light boudoir photography, one-light boudoir photography and small-room boudoir photography.
Source note: Histogram guidance is informed by Nikon’s notes that the camera histogram is JPEG-derived (Nikon histogram support) and on highlight recovery (Nikon histogram guide). Lighting and workflow ideas draw on editorial guidance from Amateur Photographer and Icon Photography School. Photo credits: all images by Edin Chavez. Photos are illustrative.