Updated October 2026
You can have beautiful light, a sharp lens and a room that looks like a magazine cover, then make a flat boudoir photograph because the person in front of you feels rushed. Start with trust. The photograph gets better when the person knows what is happening, what they can say no to and where their images will go.
Boudoir photography is intimate portrait photography, often made in a private room with clothing, lingerie or carefully chosen coverage. Nudity is not a requirement. There is no one body type, gender or level of confidence that qualifies someone for a session. Your job is to make good photographs of the person who has chosen to be there, within the boundaries they set.
This guide takes you through a first adult boudoir session from the conversation before the shoot to the files you deliver. You do not need a wall of lights to start. You need a workable room, controlled light, clear communication and a process that does not fall apart when someone needs a break. Get those right before buying more gear.
Begin with the conversation, not the camera
Ask what the person wants from the photographs. An anniversary gift, a personal milestone and a private portrait collection can lead to different choices. Do they want a soft, bright look or something darker? Do they prefer a face-led portrait, a wider environmental frame or a quiet detail? Ask them to describe the feeling rather than copy a stranger’s body or pose.
Agree the level of coverage before the session. Fully clothed portraits, a robe, lingerie and implied coverage are separate choices. Someone can change their mind about any of them. A mood board can help you talk about lighting and styling, but it is not consent to recreate everything in it. Point to specific elements: soft side light, plain bedding, a dark background. Ask which parts appeal to them and which do not.
Talk about touch explicitly. Give verbal directions first and demonstrate with your own hands or body when useful. Do not move hair, clothing or a limb without asking. Make stopping ordinary: “We can pause or change this whenever you want.” That is more useful than a speech about confidence followed by impatient directions once the camera comes up.
Agree who will be present. A support person should be the participant’s choice, with everyone understanding privacy and space limits. Explain whether an assistant or hair and makeup artist is involved. Do not surprise someone with extra people in the room. Plan a private changing area and a place to keep their belongings.
Separate making the photographs from publishing them. Permission to photograph and deliver an image does not automatically mean permission to put it on a website, in an advertisement or on social media. Discuss intended use clearly and use an appropriate written agreement for your business and location. This article is a photography workflow, not a legal contract or legal advice.
Choose a room you can actually control
A simple room beats a beautiful room that keeps interrupting the shoot. Check who can enter, what can be seen through windows and whether you can close a door. Make sure the participant has privacy while changing. In a rented location, confirm the permitted use and who has access before the session, rather than assuming a reservation gives you a private studio.
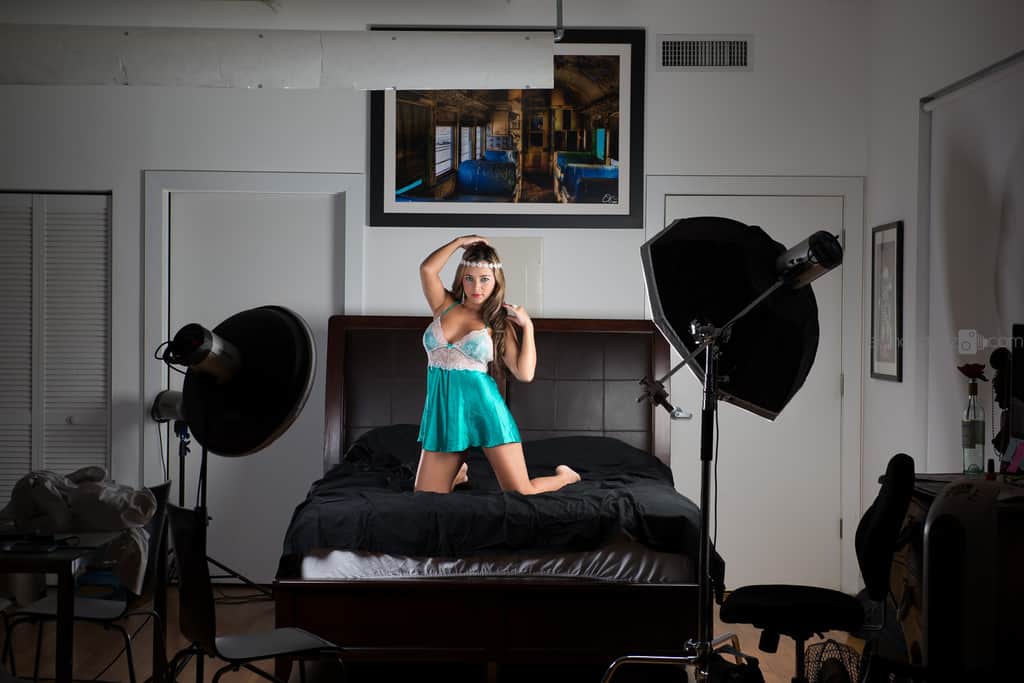
Look for one useful light source and one clean background. A window beside a bed, a plain wall or a chair can be enough. Clear small distractions before asking the person to settle into the frame. Bright packaging, charging cables, tangled bedding and a mirror reflecting your equipment are easy to miss when you are concentrating on an expression.
Walk the room with the camera before the participant changes. Check your working distance, the edge of the frame and where a light stand would sit. A long lens can be awkward when you cannot step back. A wider view can work, but placing the camera too close changes perspective. Move yourself and choose your framing before deciding that a lens will fix the room.
Keep exits and walking paths clear. Secure cables and stands so they are not trip hazards. A weighted stand still needs sensible placement; a sandbag is not permission to balance a large modifier over someone. Do not stand on an unstable chair for a higher view. Lower the camera, move the subject or use a safe, rated platform when one is appropriate.
 Save
SaveFind the direction of the light
Do not begin by asking which camera setting makes skin look good. Look at the light on the face. Where are the highlights? Where do the shadows fall? Is the source large from the person’s position, or small and hard? Does the background pull your attention away from the face?
For a daylight start, place the person near a window and rotate them gradually. Side light can add shape. Turning toward the window can give a more open, brighter look. Turning away can let the shadows deepen. There is no universal angle you must copy. Watch the face, the eyes and the transition between light and shadow.
A sheer curtain can soften direct sunlight, but it also reduces the available light. Check your exposure again after adding it. If the room has warm lamps and cool window light, switch off the lamps when they are not needed or decide deliberately how to handle the mixed color. Trying to fix three different light colors on skin later is often more work than simplifying the room now.
A white reflector can lift shadows without adding another active light. Start with it farther away, then move it closer while watching the effect. Too much fill can remove the shape you just worked to create. Negative fill does the opposite: a dark surface near the subject reduces reflected light and deepens shadow. Do not assume every reflector kit includes a black surface; check the actual product.
With flash, build from one light and a test frame. Choose a compatible trigger and a modifier that fits the light and bracket. Check the camera’s flash-sync behavior before the session. Add fill or another light only when you can explain what it changes. More lights can make a setup harder to control, especially in a small room where spill reaches every wall.
 Save
SaveSet exposure for the person, not the bedding
White sheets and dark walls can push an automatic meter in different directions. The meter is trying to interpret the scene; it does not know which part you care about. Take a test frame, inspect the face and bright skin highlights, then adjust. A bright room does not require blown highlights, and a dark mood does not require underexposed skin.
Choose an aperture for the framing and depth you need. A close portrait with a wide aperture can put one eye outside the sharp area when the face is turned. Stop down when you need both eyes or more of the body in focus. There is no reward for using the smallest f-number if the important part of the image is soft.
Choose a shutter speed that handles camera movement and the person’s small movements. Even someone holding still breathes, shifts weight and changes expression. In window light, raise ISO when you need a faster shutter rather than accepting motion blur to keep the ISO number low. With flash, work within the camera and light’s supported sync settings and test the result.
Focus on the eye that matters in the composition and review actual sharpness, not just the little focus box. Eye detection can help, but it can choose the wrong eye or lose the face in low light. Check magnified playback during the session. A quick focus check is kinder than discovering a whole sequence is soft after everyone has left.
Shoot RAW when your workflow supports it. It gives you room to adjust color and tone, but it cannot restore motion blur, missed focus or every clipped highlight. Keep the camera steady, make a clean exposure and use editing to finish the photograph rather than rescue an avoidable mistake.
Direct clearly without turning the session into a pose test
Begin with something comfortable: sitting on the edge of a bed, standing near a window or settling into a chair. Ask whether the position feels okay. Give one direction at a time. “Turn your shoulders a little toward the window” is easier to follow than five instructions about feet, hands, chin, hips and eyes in one breath.
Watch the hands. They often reveal tension before the face does. Ask the participant to relax and reset rather than force fingers into a shape. Keep language specific and neutral. Talk about where the light falls and what the camera sees, not which body parts need to be hidden or fixed.
Show a frame when doing so helps the person understand the direction. Do not use the screen as pressure to accept a photograph they dislike. Ask what feels right and what they would change. If a position hurts or feels too exposed, change it. You are making a photograph, not proving that someone can tolerate discomfort.
Build a small sequence instead of chasing dozens of unrelated poses. Start with a wider frame, move to a medium portrait and finish with a closer detail. Change your position, framing or light before asking for a completely new setup. This gives the person time to settle and gives the final gallery a more consistent story.
Take breaks before exhaustion changes the expression. Offer a robe or other agreed coverage between setups. Keep checking in as the session develops; an earlier yes is not a permanent yes to every later variation. Your best image might be the quiet, fully clothed portrait made at the end, not the most complicated frame.
 Save
SaveMake a gallery with variety, not random changes
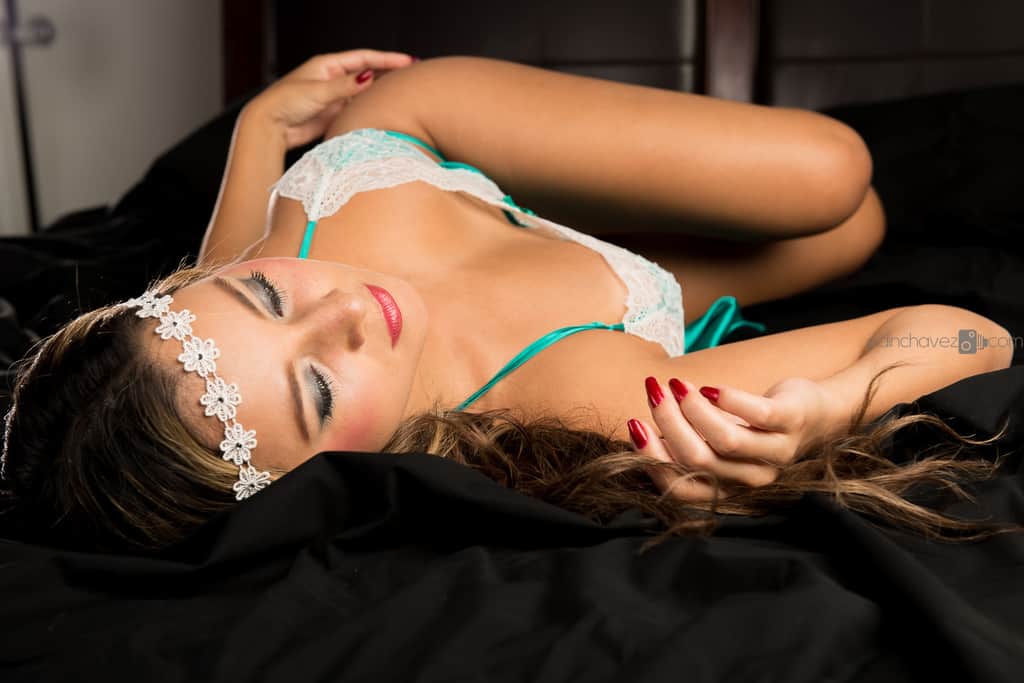
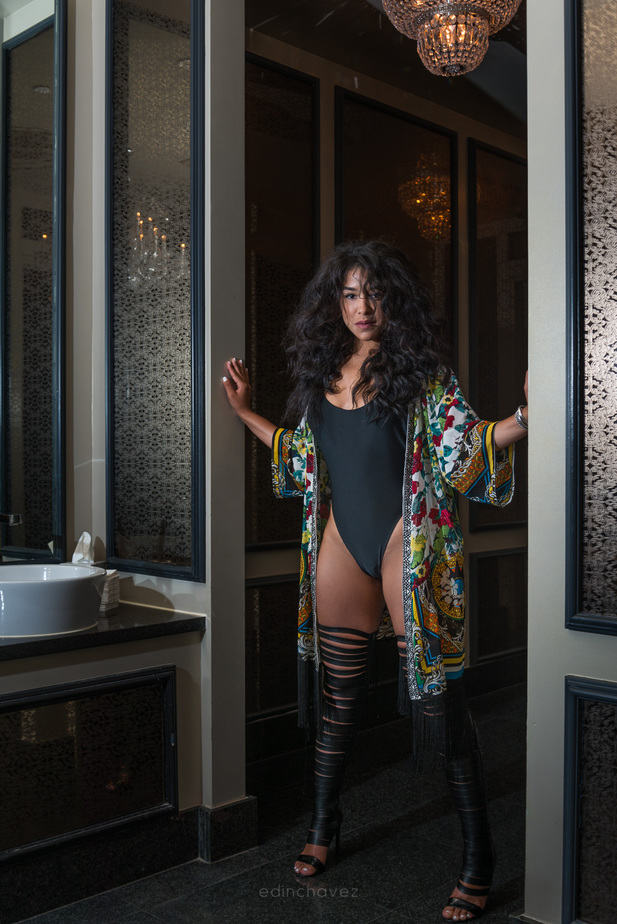
Variety does not mean making every photograph look as if it came from a different shoot. Keep a few elements consistent: the room, a clothing choice, the quality of light or the color palette. Then vary framing and viewpoint. A face-led portrait, a wider room frame and a detail can feel connected without looking repetitive.
Watch your edges. Bedding, elbows, a curtain and the edge of a chair can create awkward lines. Step back and look at the entire frame before concentrating on the eyes again. Move a distraction out of the scene when possible. It is quicker than planning to remove it from every image later.
Include images the participant can use comfortably, which might mean a covered portrait as well as more intimate frames. Do not assume which image they want to share. Keep the delivery conversation separate from any request for portfolio use. A photograph can be successful even if it never becomes public.
When you try a darker or brighter look, make the change deliberately. A low-key image still needs enough information where it matters. A high-key image should keep skin and fabric detail unless a specific highlight is intentionally allowed to clip. Compare a test frame to the previous sequence so you can see what changed.
 Save
SaveEdit with restraint and an agreed purpose
Back up the files before you start deleting or editing. Keep originals separate from working exports and make sure another copy exists on a separate device or service suited to the privacy agreement. One drive is a working copy, not a complete backup plan. Review any cloud workflow before uploading intimate photographs; convenience does not settle permission or access.
Cull for expression, focus, light and the person’s agreed boundaries. Do not deliver a frame merely because it is technically sharp if it reveals more than they intended. Keep rejected images out of client-facing galleries and export folders. Check the selection again before sending the link.
Set a consistent white balance and basic tone for each lighting sequence. Different rooms, flash setups and daylight changes may need separate starting points. Synchronizing every setting across every image can create problems when light or exposure changed. Match the sequence, then inspect individual frames.
Retouch within the preferences you agreed. Removing a temporary distraction and reshaping a body are different decisions. Do not assume someone wants skin texture, scars, stretch marks or other features removed. Use local adjustments carefully and keep checking the image at normal viewing size as well as close up.
For the general tool sequence, read our portrait cleanup workflow in Lightroom. If color is competing with the shape of the light, our black-and-white photography guide explains the tonal foundation. A monochrome conversion should still preserve separation and useful detail; it is not a shortcut for every color problem.
Want to understand the editing decisions rather than collect another preset? The SYA Academy Lightroom editing course covers color, masking, detail and export. It teaches a general editing workflow, not a boudoir-specific qualification or a promise about any client’s results.
Deliver privately and test what the client will see
Choose a delivery method with real access controls. An unlisted link is not the same as a protected gallery. Anyone who has that link may be able to open it. Where appropriate, use password protection or a platform’s selected-person access, and explain to the client how it works.
Check the difference between gallery visibility, access and download permissions. In SmugMug, for example, “Private (Only Me)” is not a client delivery setting because only the owner can see it. “Unlisted” hides the gallery from normal navigation but does not by itself restrict access. The current platform instructions matter more than an old tutorial or a guess from the setting’s name.
Use a test gallery with non-sensitive images to learn the controls. Then verify the actual client gallery from a signed-out session before sending it. Check the cover image, access prompt, included files, download options and any visible metadata. Do not trust what you see while logged in as the owner; you may be bypassing the restrictions.
Send the link through the channel you agreed, to the intended recipient only. Avoid putting access details into a public comment or a group thread. Confirm the delivery and any retention arrangement. No online setting can guarantee that an authorized viewer will never take a screenshot or share a downloaded file, so do not sell right-click blocking as complete protection.
Some links are affiliate links. If you buy through them, we may earn a commission.
If you need a platform to compare, SmugMug offers visibility and access controls. Review the current plan and settings for your needs. The platform is an option, not a guarantee of confidentiality and not a replacement for a careful delivery process.
 Save
SaveA simple first-session plan
Before the shoot, agree coverage, mood, who will be present, image use, retouching preferences and delivery. Scout the room and test the light. Prepare a safe changing space and a clear working area. Check batteries, cards and the backup plan before the participant arrives.
At the session, begin with a comfortable, covered portrait. Check exposure and focus, then build a short sequence. Give one direction at a time, show useful feedback and keep the option to pause visible in your behavior. Move to another look only when the person is comfortable with it.
Afterward, back up, cull against both photographic quality and agreed boundaries, edit consistently and inspect exports. Test the delivery controls signed out. A good first shoot is not measured by how many elaborate poses you tried. It is measured by photographs that work and a person who understands and feels comfortable with what happened.
Recommended gear for a simple boudoir workflow
Use the camera and lens you already understand. Spend first on controlling light and keeping files safe, not replacing a workable body.
- A reflector or diffusion panel: useful for adjusting window light. Check the surfaces, mounting method and room clearance. A white bounce surface and a black negative-fill surface do different jobs; one does not automatically come in every kit.
- Godox AD200Pro II: a researched 200Ws flash option for an artificial-light setup. The flash-only version still needs a suitable camera-compatible trigger and the right bracket/modifier for your setup. Check the AD200Pro II at B&H.
- Samsung T7 Shield 1TB: a researched portable storage option for a working copy. Plan a separate backup and appropriate access controls; a drive purchase does not guarantee privacy. Check the T7 Shield at B&H.
Gear links are researched options, not claims of personal testing.
Boudoir photography Q&A
Does boudoir photography require nudity?
No. A session can be fully clothed, use a robe or lingerie, or use other agreed coverage. The participant chooses the boundaries and can change them.
Can I start with natural light?
Yes. A useful window, a clean background and control over reflected light can be enough. Test changing daylight and mixed room lighting rather than assuming every window gives the same result.
Do I need an expensive camera?
No. A camera and lens you can focus and expose reliably matter more than a new body. Good light, clear direction and a safe room have a bigger role than buying gear you do not yet understand.
How do I avoid soft eyes?
Use enough depth of field for the framing, choose an appropriate shutter speed and check magnified playback. Eye detection can help, but verify the important eye is actually sharp.
Can I publish a photograph because I delivered it to the client?
Do not assume so. Photographing, delivering and public use are separate decisions. Agree intended use clearly and use an appropriate written agreement for your business and location.
Is an unlisted gallery private enough for intimate photographs?
Unlisted generally means hidden from normal navigation, not restricted to a particular person. Use appropriate access controls, understand download settings and verify the gallery signed out before sending it.
Lighting and workflow references: Amateur Photographer’s boudoir studio guide; Icon Photography School’s boudoir guide; Adobe’s current Lightroom Classic tone and masking documentation; SmugMug’s current gallery privacy documentation. Original photographs: Edin Chavez. Sources checked October 2026.
www.shutyouraperture.com
Continue through the boudoir series: Window-light boudoir, One-light boudoir, Small-room boudoir, Dark and moody boudoir, High-key boudoir, Session preparation checklist, Lightroom editing, Black-and-white boudoir, Photo privacy and delivery.