Best Photography Spots in Florence: 11 Locations With GPS

Tours & experiences disclosure: This guide includes affiliate links to Viator, the world’s largest tour and experiences marketplace. If you book through these links, ShutYourAperture may earn a small commission at no extra cost to you.

Florence photography guide hero imageSave

Amazon Associates disclosure: ShutYourAperture is a participant in the Amazon Services LLC Associates Program. As an Amazon Associate we earn from qualifying purchases. Some links below go to Amazon (Store ID edinchavez01-20). Buying through these links costs you nothing extra and helps fund our free guides.
Skip the planning. Get the Florence PDF. All locations, GPS coordinates, golden-hour times, gear tips. Instant download.

Florence, Italy is one of the most photogenic cities in the world. If you have a camera and the patience to show up before dawn, Florence will give you images that last a career — but only if you know where and when to point it.

This is the definitive field guide to the 11 best photography spots in Florence, with GPS coordinates you can drop straight into Google Maps, exact camera settings tuned to Florence’s unique light, precise timing for every location, and the access notes nobody else bothers to document. It mirrors the intel inside our Florence Ultimate Photographer’s Guide ($47 PDF) — a downloadable field guide with full-page hero images, GPS maps, seasonal tables, a city safety briefing, and a complete photographer’s packing list. Get the guide →

Planning multi-city travel? See also: U.S. cities photography hub and the National Parks Photography Guides.

Florence Ultimate Photographer’s Guide — $47
11 GPS-mapped locations · Exact camera settings · Multi-season shooting calendar · Free annual updates

Download the PDF guide →
Skip the planning

Get the Florence Ultimate Photographer’s Guide

Every location below — pre-mapped with GPS, golden-hour timing, gear recommendations, cultural rules, and a 14-day itinerary. Downloaded by 200+ working photographers.

Get the PDF · $47
Instant download · Lifetime updates

Quick jump to the 11 spots

  1. Piazzale Michelangelo
  2. Ponte Vecchio
  3. Duomo + Brunelleschi’s Dome View (from top)
  4. Giotto’s Campanile
  5. Uffizi Gallery Exterior + Loggia dei Lanzi
  6. Palazzo Vecchio + Piazza della Signoria
  7. Boboli Gardens
  8. San Miniato al Monte
  9. Santa Maria Novella
  10. Mercato Centrale (San Lorenzo Market)
  11. Forte di Belvedere

A look inside the Florence Photographer’s Guide

Here are three of the actual shots you’ll find inside the PDF — cinematic full-page references for the exact spots, lenses, and lighting conditions documented in the guide. The full guide includes 11 locations, each with a hero image, GPS map, settings table, and a five-shot list.

Piazzale Michelangelo — from the Florence Photographer's GuideSave
Piazzale Michelangelo — sample reference photo from the Florence Photographer’s Guide PDF

Before you shoot Florence: the essentials

  • Free public access: Piazzale Michelangelo (free, 24h), Ponte Vecchio bridge deck (free, 24h), Ponte Santa Trinita (free), Piazza della Signoria and Loggia dei Lanzi outdoor sculptures (free, 24h), Duomo cathedral interior (free with reservation via operaduomo.firenze.it), Forte di Belvedere €8/adult (free for under-7), Boboli Gardens €10/adult on-day, San Miniato al Monte basilica free (small donation appreciated), Santa Maria Novella exterior and piazza free; Uffizi Gallery €25/adult (same-day) or €29 (advance); Giotto Pass (Campanile + museum + baptistery + crypt) €20/adult; Brunelleschi Pass (Dome climb + all Duomo complex monuments) €30/adult — all Duomo passes valid 3 calendar days
  • Commercial permits: Personal and tourist photography in all public spaces is unrestricted. Commercial shoots requiring crew, lighting rigs, or tripods in public piazzas require authorization from the Comune di Firenze Ufficio Riprese Cinematografiche at least 15 days in advance. Photography inside churches is generally permitted without flash; Uffizi Gallery allows photography for personal use (no flash, no tripods). Drone flights are prohibited over the historic centre UNESCO zone without explicit ENAC authorization.
  • Best photography seasons: March–May (spring blooms, mild light, moderate crowds) and September–October (golden Tuscan light, clear skies, harvest atmosphere, fewer tourists than summer peak)
  • Blue hour notes: Florence sits at 43.77°N — the sun arc is lower and more southerly than tropical cities. Blue hour lasts 20–30 minutes after sunset, giving generous tripod-setup time. In summer, sunset is as late as 9:00 PM; in winter, as early as 4:45 PM. The Arno riverbanks, Piazzale Michelangelo, and Ponte Vecchio are at their most photogenic during this window when warm amber city lighting balances against a deep cobalt sky. The terracotta rooftops and warm stone facades respond beautifully to the blue-hour color palette.
  • Drone policy: Drone laws vary widely by country and city — many capital and tourist zones are no-fly. Verify the local civil aviation authority’s current rules before launching.
  • Local resource: Official visitor information

The full-resolution version of every map below — plus seasonal calendars, gear notes per location, sun-angle diagrams, and a complete photographer’s packing checklist — is inside the Florence Photographer’s Guide PDF ($47).

1. Piazzale Michelangelo

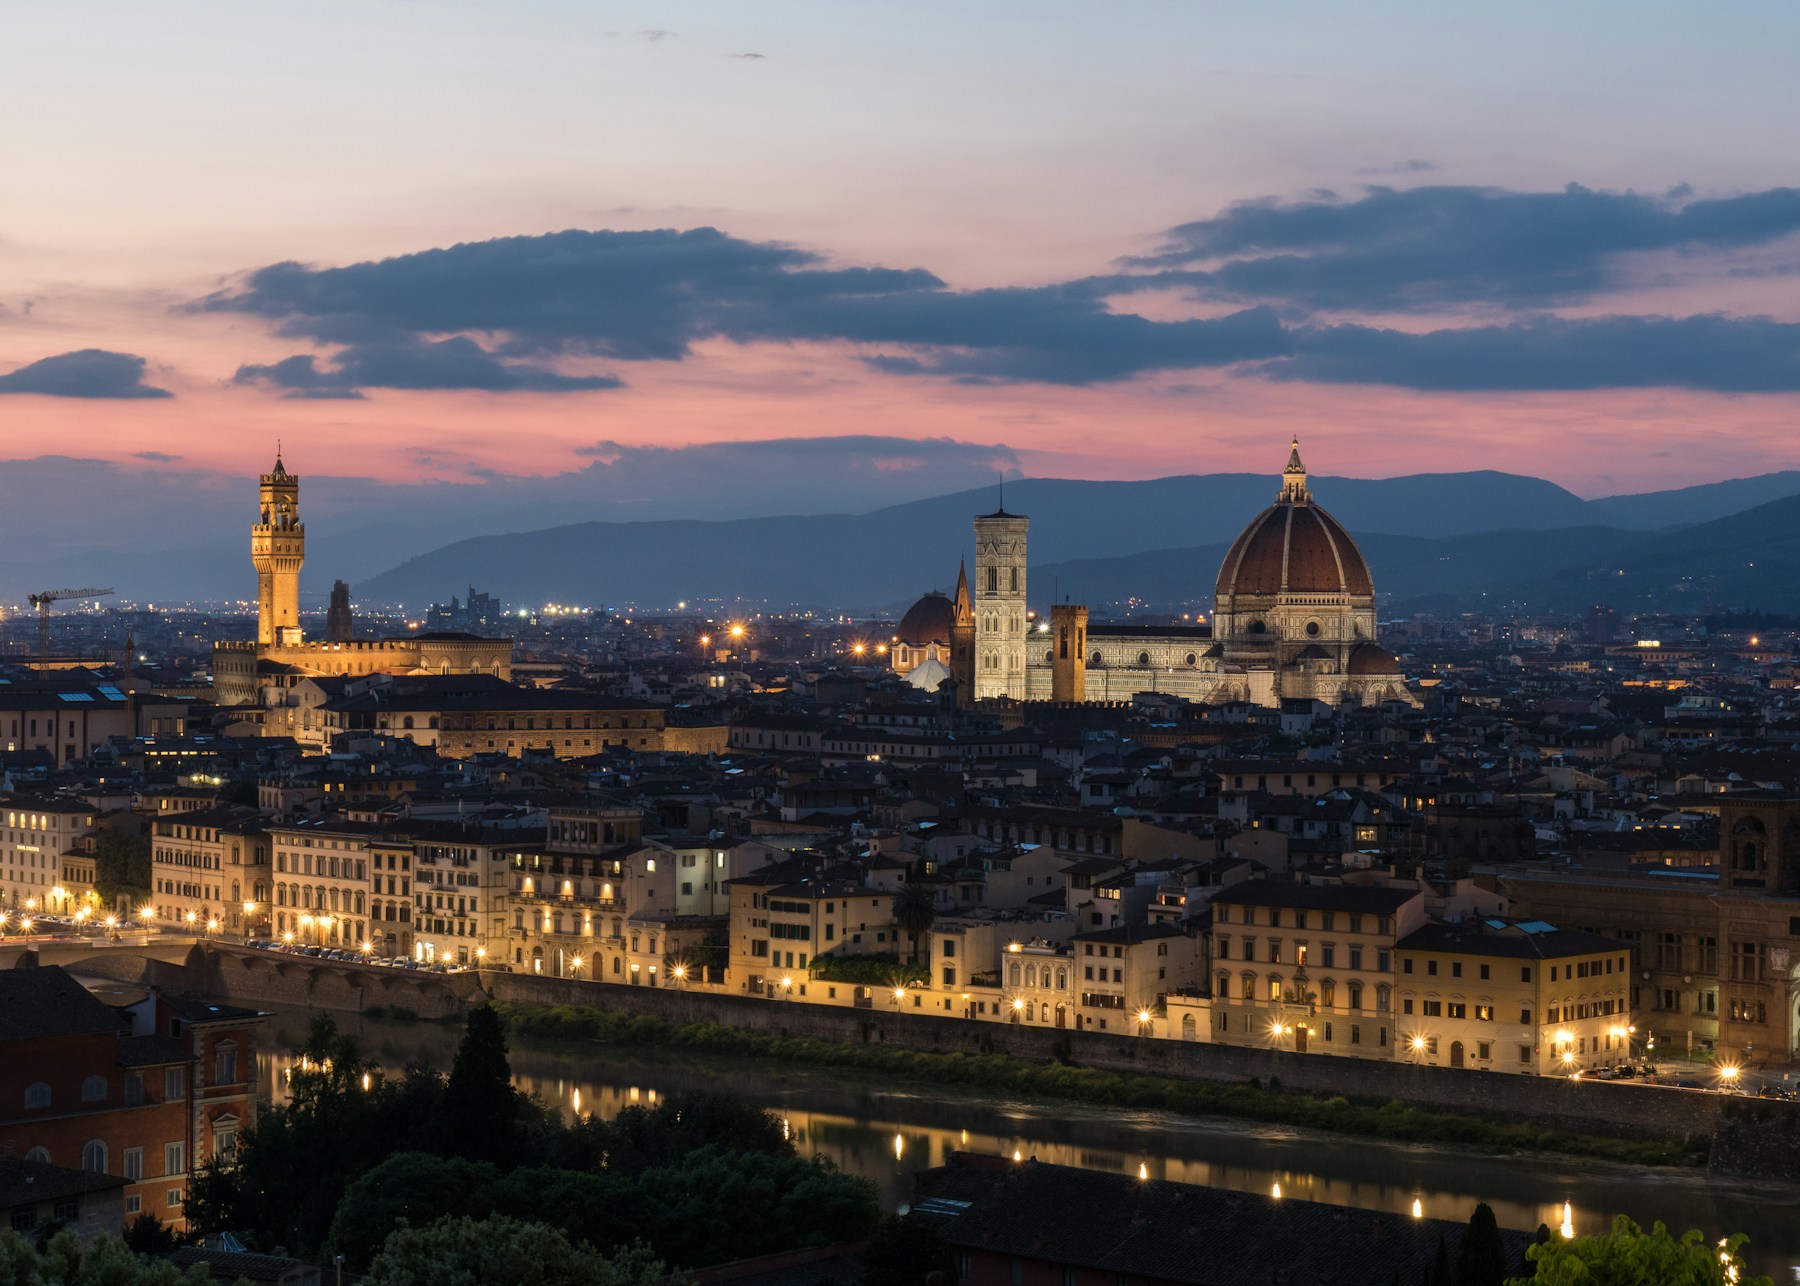
Piazzale Michelangelo is the definitive Florence panorama — a single unobstructed viewpoint that captures the entire UNESCO-listed historic centre in one frame: the orange terracotta dome of Brunelleschi, Giotto’s striped Campanile, the crenellated tower of Palazzo Vecchio, the basilica of Santa Croce, and the Arno looping through the city with Ponte Vecchio stacked between the other bridges. Designed by architect Giuseppe Poggi in 1869, the neoclassical terrace also features a bronze copy of Michelangelo’s David at its centre, providing a monumental foreground element. No other public viewpoint in the city combines this breadth, elevation, and accessibility for free.

  • GPS: 43.762778, 11.265056
  • Elevation: 341 ft
  • Best time of day: sunrise — arrive 30–40 minutes before first light when the terrace is nearly empty and the city transitions from deep blue to amber gold; also excellent at sunset and blue hour, though expect large crowds by late afternoon in summer
  • Sun direction: Florence’s historic centre lies due north of the terrace at azimuth ~340°. The sun rises to the east-northeast in summer (azimuth ~65°) and far southeast in winter (azimuth ~120°). At sunrise the warm raking light enters from the east, side-lighting the Duomo, Campanile, and Palazzo Vecchio tower from the right — ideal for revealing three-dimensional texture on the rooftop terracotta. At sunset the sun descends toward the west-northwest (azimuth ~285° in summer), gradually shifting the city to warm amber tones before the blue-hour window begins. In winter, sunset falls to the southwest (~235°), still illuminating the city facades warmly from the side.
  • Access: Piazzale Michelangelo, 50125 Florence. The terrace is a public square, open 24 hours, free entry. By foot: 15–20 minute uphill walk from Ponte alle Grazie via Viale Michelangiolo or the steep staircase path via Rampe del Poggi. By bus: ATAF line 12 or 13 from Piazza Santa Maria Novella (timetable at gestrambus.it). Taxi: ~€10–15 from the city centre. Minimal parking available on Viale Michelangiolo; arrive very early for a spot in summer. No permit required for photography.
  • Difficulty: easy
  • Recommended settings: Sunrise Long Exposure: f/11, 2–4 sec, ISO 100, 24mm, tripod — smooth the Arno surface and blend the transitional sky  ·  Golden Hour Cityscape: f/8, 1/125 sec, ISO 200, 50–70mm — compress the skyline monuments and separate tonal layers  ·  Blue Hour Ambient: f/11, 15–20 sec, ISO 100, 24mm, tripod — balanced exposure between illuminated monuments and cobalt sky  ·  Telephoto Detail: f/5.6, 1/500 sec, ISO 400, 200mm — isolate Brunelleschi’s dome between cypress branches or compress Ponte Vecchio with far-bank buildings

Shots to chase:

  • Classic wide-angle sunrise panorama from the terrace balustrade with the Arno catching the first warm light below and all major Florence landmarks arrayed on the horizon
  • Telephoto compression shot (150–200mm) isolating the Duomo dome rising above a sea of terracotta rooftops, with San Miniato al Monte hillside visible in the background
  • Long exposure at blue hour with the bronze David silhouetted against the illuminated city skyline
  • Framing the skyline through the overhanging branches of the ancient olive and cypress trees lining the upper terrace perimeter for a natural vignette
  • Pre-dawn Milky Way composite (winter clear nights) with the dark city below and the Campanile tower visible as a landmark anchor — requires a foreground-lit separate exposure for blending

Pro tip: Arrive 40 minutes before sunrise on weekdays — the terrace is nearly deserted and the transitional light from deep blue through crimson to gold is Florence’s most photographed sequence. Position yourself at the left (eastern) edge of the terrace balustrade for a slightly diagonal view that prevents the Arno bridges from aligning dead-straight and adds compositional depth. For the sunset shot, arrive at least 90 minutes before sunset in summer to claim a front-rail spot before tour buses unload. The upper esplanade behind the David bronze offers a second, slightly elevated platform that frames the David in the foreground against the skyline — underused by tourists.

Common mistake to avoid: Shooting only at the designated tourist viewpoints at the front railing — the upper terrace level and the staircase access paths offer cleaner, less crowded angles. Using focal lengths wider than 24mm produces foreground distortion and makes the Duomo appear small and distant; 35–70mm gives the most balanced and photogenic result. Arriving exactly at golden hour without accounting for crowd buildup: summer sunset can attract hundreds of visitors by 30 minutes before sunset.

2. Ponte Vecchio

Ponte Vecchio (built 1345) is Florence’s oldest and most iconic bridge — the only bridge in the city not destroyed by retreating German forces in 1944. Its defining visual character comes from the medieval goldsmith and jewellery shops that line and overhang both sides of the bridge, their mismatched windows, timber brackets, and projecting structures creating an extraordinarily photogenic chaotic skyline above the Arno. The Corridoio Vasariano — the elevated passageway built by Giorgio Vasari in 1565 for the Medici family — runs across the upper east side of the bridge, adding another architectural layer. At night, the shop windows glow amber and their reflections shimmer in the Arno’s dark surface.

  • GPS: 43.768009, 11.253165
  • Elevation: 154 ft
  • Best time of day: blue hour — 15–25 minutes after sunset when the goldsmith shop lights glow amber and reflect in the Arno below; also pre-dawn for an empty bridge; sunset from Ponte Santa Trinita to the west for the classic framing shot
  • Sun direction: The bridge runs roughly east–west along the Arno. From Ponte Santa Trinita (270m to the west, the canonical shooting position), the bridge faces the camera at azimuth ~90°. The sun sets to the west-northwest in summer (azimuth ~285°), directly behind the camera on Ponte Santa Trinita, bathing the bridge’s orange shop fronts and overhanging medieval buildings in warm backlit glow — the most beautiful light of the day. At sunrise the sun rises behind the bridge (from Ponte Santa Trinita’s perspective), creating dramatic silhouette possibilities with the Oltrarno hillside glowing in the background. From Lungarno Generale Diaz on the north bank, morning light from the east side-lights the shopfronts beautifully.
  • Access: Ponte Vecchio, 50125 Florence (midpoint of the bridge). The bridge is a public thoroughfare open 24 hours. No vehicle access — pedestrian only. Nearest parking: Piazzale di Porta Romana or Lungarno della Zecca Vecchia (paid). The bridge is 5 minutes’ walk from Piazza della Signoria and 10 minutes from Santa Maria Novella station. No entry fee; all photography from the bridge and surrounding quays is free.
  • Difficulty: easy
  • Recommended settings: Blue Hour Reflection: f/11, 8–15 sec, ISO 100, 35mm, tripod on Lungarno Acciaiuoli — smooth the Arno surface and capture warm shop-light reflections  ·  Sunset From Ponte Santa Trinita: f/8, 1/250 sec, ISO 100, 50mm — expose for the backlit bridge silhouette and deep sky  ·  Dawn Empty Bridge: f/8, 1/60 sec, ISO 400, 24mm, handheld — catch the bridge in early blue light before shops open at 9 AM  ·  Telephoto Compressed: f/5.6, 1/500 sec, ISO 400, 135–200mm from Ponte alle Grazie — compress the bridge’s overhanging shops against the Oltrarno hillside

Shots to chase:

  • Classic sunset framing from Ponte Santa Trinita looking east, with the bridge’s overhanging shops silhouetted against a warm sky and Piazzale Michelangelo visible in the far background
  • Blue-hour long exposure from Lungarno Generale Diaz (north bank, east of bridge) with golden shop reflections streaking across the smoothed Arno surface
  • Pre-dawn empty bridge shot from the midpoint looking along the pedestrian corridor with lanterns still lit and zero pedestrians — requires arrival before 6 AM in summer
  • Telephoto view (150–200mm) from Ponte alle Grazie to the east, compressing the bridge and stacking it against the terraced hillside buildings of the Oltrarno district
  • Detail shot from inside the bridge of the small windows cut through the Corridoio Vasariano on the bridge’s east parapet, framing the river view below through the historic peepholes

Pro tip: The best shooting position for the Ponte Vecchio is not on the bridge itself but from the riverbanks. For the classic reflection shot, stand on Lungarno degli Acciaiuoli on the north bank just west of the bridge at blue hour — the shop lights reflect cleanly in the water and the bridge’s asymmetrical overhang is fully visible. For the famous postcard framing, use Ponte Santa Trinita: position yourself at the mid-point of the bridge, slightly toward the south railing, and use a 50–85mm lens to frame Ponte Vecchio between the curvature of the Santa Trinita arches. The early morning (5–6 AM in summer) sees zero pedestrian traffic on the bridge and the market stall chains are still up — a rare opportunity for a completely unobstructed shot.

Common mistake to avoid: Photographing only from the bridge itself rather than from the surrounding quays and neighboring bridges where the visual drama is far greater. Shooting at midday when harsh overhead light flattens the overhanging shopfronts and the Arno surface turns featureless. Using a very wide lens (14–20mm) that distorts the bridge’s elegant form and makes the iconic asymmetrical shops appear misshapen.

3. Duomo + Brunelleschi’s Dome View (from top)

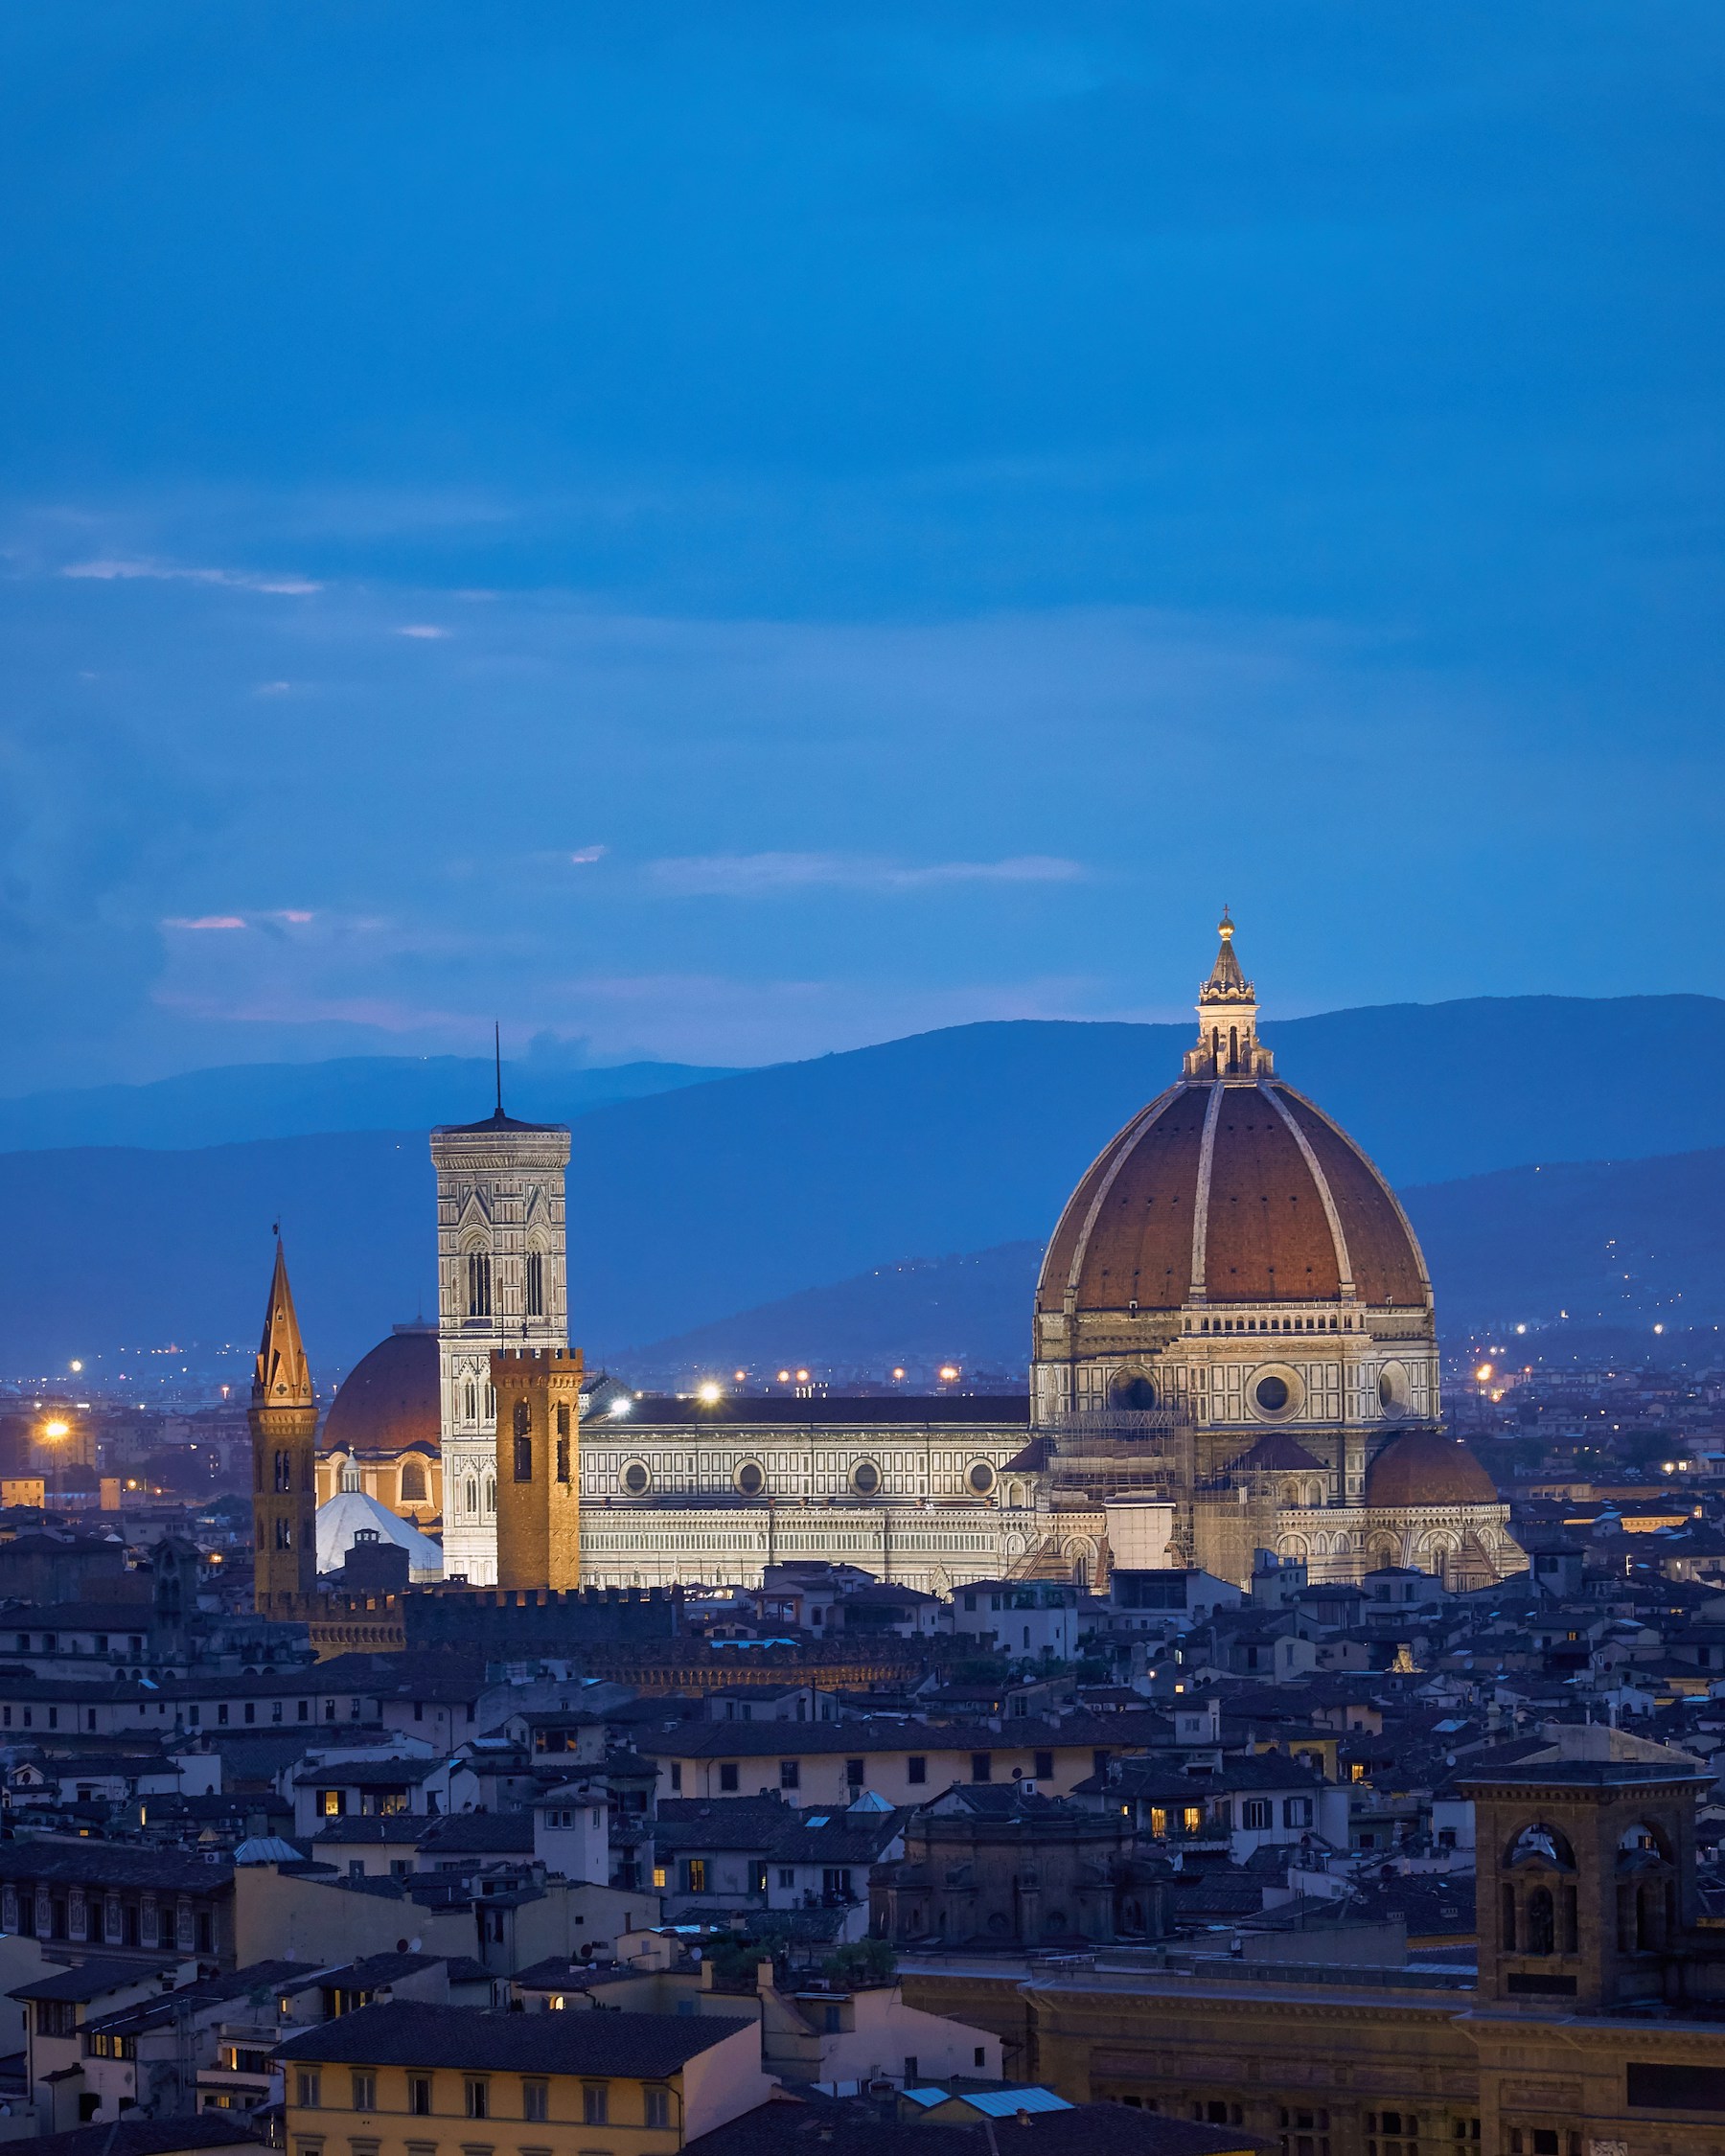
Brunelleschi’s dome (completed 1436, diameter 44.5m) is the largest brick dome ever constructed and the architectural heart of Florence — visible from virtually every vantage point in the city and from the surrounding hills up to 30 km away. From the lantern at the summit, visitors stand above the city on the very structure that defined the Italian Renaissance. The leading lines of the dome’s octagonal terracotta ribs below the viewing platform create one of the most iconic architectural photographs in Italy. The exterior is clad in white and green marble with the characteristic geometric patterns of early Italian Renaissance Gothic, making it equally compelling from ground level.

  • GPS: 43.7731, 11.255379
  • Elevation: 374 ft
  • Best time of day: early morning — exterior at 7:00–9:00 AM for side-lit marble facade before crowds; dome climb best at opening (timed slots begin at 8:15 AM) for clear air and manageable queues; exterior at blue hour for dramatic uplight effect
  • Sun direction: The cathedral faces west with its ornate neo-Gothic facade at azimuth ~270°. Morning sun from the east back-lights the facade and casts long shadows on the surrounding piazza; the ideal side-lit exterior shot is achieved between 8–10 AM when east light rakes across the green-white-pink marble geometry from the right. From atop the dome (lantern at 376 ft / 114m), the panorama faces all directions; the Campanile to the south-southeast is particularly dramatic in early morning when side-lit. The dome’s terracotta brick exterior is photographed from the Campanile level (direct east at azimuth ~85°) in the morning for maximum texture.
  • Access: Piazza del Duomo, 50122 Florence. Cathedral interior: free, open 10 AM–5 PM weekdays (check operaduomo.firenze.it for current hours; online reservation required). Brunelleschi Pass: €30/adult (valid 3 days), includes dome climb with reserved time slot, Campanile, Baptistery, Opera del Duomo Museum, and Santa Reparata Crypt — book at operaduomo.firenze.it. Giotto Pass (Campanile only, no dome): €20/adult, 3-day validity. Dome climb is 463 steps (no elevator). By bus/tram: Piazza del Duomo is 7 minutes’ walk from Santa Maria Novella station or reachable via tram line T1. No vehicle access in the ZTL zone; paid parking at Piazza della Libertà (1.5 km).
  • Difficulty: moderate (463 steps to dome summit; narrow spiral staircase; some claustrophobic passages)
  • Recommended settings: Dome Summit Cityscape: f/8, 1/250 sec, ISO 200, 16–24mm — capture the full 360° panorama including the leading-line ribs of the dome beneath the lantern  ·  Exterior Facade Detail: f/11, 1/250 sec, ISO 100, 70–200mm — isolate the intricate green-white-pink marble geometric patterns from street level  ·  Interior Fresco Dome: f/4, 1/60 sec, ISO 3200, 14–16mm, handheld — capture Vasari’s Last Judgment fresco from the narrow internal gallery inside the dome shell (no tripod permitted)  ·  Blue Hour Exterior: f/11, 10–20 sec, ISO 100, 24mm, tripod from Via dei Servi — the dome glows in warm uplight against a cobalt sky with the lantern visible above the roofline

Shots to chase:

  • Leading-line composition from the dome terrace looking down over the two converging terracotta rib sections, with the city of Florence spreading out far below between them — the most iconic single photograph from atop the dome
  • Wide-angle exterior from Piazza San Giovanni (north side) at 7:30 AM showing the Baptistery’s octagonal form in the foreground and the full facade rising behind with side-morning light
  • Detailed close-up of the marble inlay geometric patterns on the facade (hexagons, diamonds, and blind arcading) using a telephoto from across the piazza
  • From the internal gallery inside the dome shell: looking up at Vasari and Zuccari’s Last Judgment frescoes, wide-angle against the curving inner surface (limited to dome-climb ticket holders)
  • At blue hour from Via dei Servi (north, looking south): the dome and Campanile frame a narrow perspective of the piazza, with monument uplighting visible against the dark sky

Pro tip: Book the Brunelleschi Pass dome time-slot online at operaduomo.firenze.it — the earliest slots (8:15–9:00 AM) sell out weeks in advance in peak season (April–October). The internal narrow staircase between the two dome shells allows you to peer through small windows directly at Vasari’s fresco from unusual oblique angles not visible from the floor below. For exterior photography, the side streets off the Duomo are more interesting than the main piazza: Via dello Studio (southwest) and Via della Canonica (south) both frame the dome rising dramatically between narrow buildings. Overcast days produce the most evenly lit exterior shots — the white, green and pink marble has almost no shadow under diffuse light and every geometric detail is revealed.

Common mistake to avoid: Arriving without a pre-booked time slot for the dome in summer — walk-up tickets are frequently unavailable for days. Shooting the facade at midday when the white marble blows out and shadows from overhanging details create unflattering contrast. Forgetting to look inward from the dome gallery: the interior fresco view looking up is as dramatic as the exterior view looking down, but most visitors head straight for the exterior balcony.

Want this in your pocket on the street?
The full-resolution version of every spot above — with full-page hero photography, GPS maps with gold location pins, sun direction diagrams, multi-season tables, and a complete safety + packing checklist — is inside the Florence Ultimate Photographer’s Guide PDF ($47). Print it, save it offline, take it on the walk. Get the guide →

4. Giotto’s Campanile

Giotto’s Campanile is the only vantage point in Florence from which you can photograph Brunelleschi’s dome at the same height and from such close proximity — the dome’s terracotta brick surfaces, white marble ribs, and lantern crown are fully revealed from the terrace level rather than glimpsed from far below or above. Designed by Giotto (begun 1334), the tower is also an architectural masterpiece in its own right, clad in alternating horizontal bands of green and white marble with pink accents, and decorated with Pisano and Luca della Robbia relief panels on its lower sections. The 360° open-air terrace provides a central-city perspective that Piazzale Michelangelo cannot match.

  • GPS: 43.7729, 11.2559
  • Elevation: 277 ft
  • Best time of day: morning — ascend at opening (8:15 AM) for the best direct close-up view of Brunelleschi’s dome lit from the east; late afternoon for warm side light on the dome and Baptistery below; exterior most photogenic at golden hour when the pink-green-white marble glows
  • Sun direction: The Campanile stands immediately south of the cathedral, facing west at azimuth ~270°. From the open-air top terrace at 277 ft (84m), the dome of the cathedral lies to the northwest at very close range — in summer morning light (sun east-northeast), the dome’s terracotta brick is warmly side-lit and its octagonal geometry is dramatically revealed. In the afternoon, the sun moves to the west and backlights the dome creating a strong silhouette. The Baptistery to the north is best photographed from the Campanile at midday when the sun is nearly overhead and illuminates its white marble octagonal roof.
  • Access: Piazza del Duomo, 50122 Florence. The Campanile shares access with the Duomo complex. Giotto Pass: €20/adult (includes Campanile, Baptistery, Museum, and Crypt); Brunelleschi Pass: €30/adult (includes Campanile + dome climb + all other monuments). Book at operaduomo.firenze.it. Hours: 8:15 AM–7:30 PM (last entry 7:00 PM). 414 steps, no elevator. Children under 6: free. Children 7–14: €7 (standalone Campanile). All passes valid 3 calendar days. The Campanile requires a timed entry with the Giotto Pass.
  • Difficulty: moderate (414 steps; open-air top level with low iron railings; not suitable for severe vertigo)
  • Recommended settings: Dome Close Up: f/8, 1/500 sec, ISO 200, 35–70mm — from the terrace, the dome fills a large portion of the frame at moderate focal lengths  ·  Marble Facade Detail: f/11, 1/250 sec, ISO 100, 70–135mm — telephoto isolation of the hexagonal and diamond relief panels on the Campanile’s lower tiers, shot from piazza level  ·  Piazza Duomo Overview: f/11, 1/125 sec, ISO 200, 24–35mm — looking straight down from the top terrace onto the Baptistery’s octagonal roof and the cathedral’s north side  ·  Cityscape Compressed: f/8, 1/500 sec, ISO 200, 70–100mm — telephoto compression of the Florence roofscape with the Arno visible and rolling Tuscan hills beyond

Shots to chase:

  • Close-up of Brunelleschi’s dome from the Campanile terrace: fill the frame with the massive terracotta brick surface, white marble ribs, and the golden lantern — no other public viewpoint in Florence gets this close
  • Looking straight down through the terrace railings at the geometric octagonal white marble roof of the Baptistery of San Giovanni, with tourists appearing as dots below
  • Classic wide-angle panorama of central Florence from the top terrace at golden hour, with the warm amber city light on all sides and the Arno and its bridges in the distance
  • From street level, a side-on telephoto view of the Campanile’s lower marble panels showing the Pisano hexagonal reliefs (Planets, Virtues, Liberal Arts) against the multicolored marble geometry
  • At sunset from piazza level: shooting the tower from the south side where the pink-green-white marble bands glow in warm raking light, with the Duomo apse visible as a backdrop

Pro tip: The Campanile terrace (277 ft / 84m) is slightly lower than Brunelleschi’s dome lantern (376 ft / 114m) but provides a cleaner view of the dome’s full octagonal structure without looking down at it from above. The 3rd-floor level stairwell windows (about halfway up, before the open terrace) have unobstructed rectangular window openings — unlike the metal grille at the very top — providing a clean frame for dome shots without cage bars. Arrive at opening to beat the crowds that arrive once tour groups enter the piazza from 9 AM onwards. In clear winter weather, the Apennine mountains with snow cover are visible to the north on the panorama.

Common mistake to avoid: Assuming the Campanile and dome offer identical views — the Campanile is the better choice for close-range architectural photography of the dome itself; the dome is better for the leading-line terracotta-rib view downward. Shooting the dome from the Campanile terrace top with a wide lens — at 24mm the dome appears smaller than expected; use at least 50mm for an appropriately dramatic rendering. Neglecting the lower stairwell windows where unobstructed views are available without metal safety cage bars.

5. Uffizi Gallery Exterior + Loggia dei Lanzi

Uffizi Gallery Exterior + Loggia dei Lanzi Florence photography sampleSave
Uffizi Gallery Exterior + Loggia dei Lanzi — cinematic reference from the Florence Photographer’s Guide PDF

The Loggia dei Lanzi (1382) is the world’s most accessible outdoor Renaissance sculpture gallery — a three-bay open arcade housing Cellini’s bronze Perseus with the Head of Medusa (1554), Giambologna’s marble Rape of the Sabines (1583), Donatello’s Judith and Holofernes, and ancient Roman marble groups. All are unenclosed and photographable from within arm’s reach. The Uffizi’s long Vasari-designed corridor creates a dramatic vanishing-point perspective toward the Arno and the Boboli Gardens beyond. Together they form a single photographic scene that combines architecture, outdoor sculpture, and one of the world’s great art institutions.

  • GPS: 43.767788, 11.255256
  • Elevation: 148 ft
  • Best time of day: late afternoon (4:00–6:00 PM) for warm directional light on the sculpture and the Palazzo Vecchio tower; blue hour for illuminated piazza shots; early morning (7:00–8:00 AM) for empty piazza compositions
  • Sun direction: Piazza della Signoria faces north from the Uffizi colonnade. The sun to the south means the piazza’s southern end (Loggia dei Lanzi open front) receives direct warm afternoon light as the sun swings southwest after 3 PM. Cellini’s Perseus and Giambologna’s Rape of the Sabines are side-lit from the west in late afternoon, revealing sculptural musculature in dramatic relief. The north face of Palazzo Vecchio (facing the piazza) is in shade most of the morning and lit from the west in late afternoon. Uffizi’s long east and west wings create a tunnel-like corridor facing south — on clear days the late afternoon light shafts dramatically through this axis toward the Arno.
  • Access: Piazzale degli Uffizi, 50122 Florence. The Uffizi colonnade, Piazza della Signoria, and Loggia dei Lanzi are all free public spaces open 24 hours. Uffizi Gallery interior: €25/adult (same-day ticket), €29 (advance booking — strongly recommended to avoid multi-hour queues); free for EU citizens under 18. Book at uffizi.it. Hours: 8:15 AM–6:50 PM, closed Mondays. The 5-Day Pass covering Uffizi + Pitti Palace + Boboli Gardens is €40/adult. Photography inside the gallery is permitted for personal use (no flash, no tripods). The Loggia dei Lanzi sculptures are free and accessible 24 hours.
  • Difficulty: easy
  • Recommended settings: Loggia Sculpture Afternoon: f/5.6, 1/250 sec, ISO 200, 85mm — isolate Perseus’s bronze details against the loggia arch shadows  ·  Uffizi Corridor Perspective: f/11, 1/125 sec, ISO 200, 24–35mm — stand at the north end of the Uffizi colonnade and shoot the full vanishing-point perspective toward the Arno  ·  Piazza Blue Hour: f/11, 15–20 sec, ISO 100, 24mm, tripod — capture the illuminated Palazzo Vecchio tower above the empty piazza cobblestones  ·  Loggia Arch Framing: f/8, 1/250 sec, ISO 200, 35mm — use the round arch of the Loggia as a natural frame around Perseus or the Rape of the Sabines

Shots to chase:

  • Classic vanishing-point shot along the Uffizi corridor (colonnade walkway) with the Arno and boboli hills framed at the far end — most powerful at blue hour with warm colonnade lamps lit
  • Close-up bronze detail of Cellini’s Perseus: the mirror-polished surface reflects distorted sky and loggia arch; use a polarizer to control highlight reflections
  • Low-angle composition shooting up at Giambologna’s Rape of the Sabines from floor level inside the Loggia, emphasizing the spiraling upward movement of the three intertwined figures
  • From inside the Uffizi Gallery’s second-floor back corridor windows (requires museum entry): unique view down onto the Ponte Vecchio and Vasari Corridor elevated walkway connecting the two buildings
  • At dawn, the entire Piazza della Signoria is empty — compose a wide-angle shot showing the Palazzo Vecchio tower, the Neptune Fountain, and the Loggia dei Lanzi all in one frame with the cobblestones catching the early light

Pro tip: The interior of the Loggia dei Lanzi provides cleaner sculpture compositions than street level because the arches eliminate the background clutter of the piazza. For Perseus, shoot from the right side (east face) in late afternoon when the west light creates a single dominant shadow that defines the figure against the bright arch above. The Uffizi corridor exterior at blue hour is one of Florence’s under-photographed scenes: position yourself at the north entrance to the colonnade (Piazza della Signoria end) with a wide lens and a 20-second exposure to smoothen any pedestrian movement and capture the gas-lamp glow against a navy sky.

Common mistake to avoid: Photographing the Loggia sculptures at midday when overhead sun creates harsh shadows and the marble backgrounds blow out. Buying Uffizi tickets at the door without advance reservation — queues routinely exceed 2–3 hours in summer; online booking at uffizi.it adds a €4 booking fee but saves hours. Overlooking the internal museum windows on the second floor that give a unique bird’s-eye view down onto Ponte Vecchio.

6. Palazzo Vecchio + Piazza della Signoria

Piazza della Signoria has been Florence’s civic heart for 700 years and remains the most powerful gathering of outdoor sculpture and medieval/Renaissance architecture in the world. Palazzo Vecchio’s 94-meter fortress-palace tower (built 1299) dominates the skyline from the piazza level with an overwhelming verticality. The piazza itself functions as an open-air museum: Michelangelo’s David (replica; original in Accademia), Donatello’s Judith, Ammannati’s Neptune Fountain, the Marzocco lion, and the full Loggia dei Lanzi sculpture complex are all photographable for free. The cobblestone textures, the outdoor café terraces, and the constant human activity provide rich street photography material at any hour.

  • GPS: 43.7694, 11.2561
  • Elevation: 148 ft
  • Best time of day: early morning (6:30–8:30 AM) for an empty piazza; late afternoon (4:00–6:00 PM) for warm raking light on the 94-meter tower; blue hour for the best illuminated-monument shots with balanced exposure
  • Sun direction: Palazzo Vecchio’s main facade faces north, overlooking the L-shaped piazza. Morning sun from the east reaches the piazza by approximately 9:30 AM, side-lighting the tower from the right with a low warm beam. The tower’s crenellated upper section and the belfry catch the last long afternoon light beautifully as the sun drops toward the southwest (after 4 PM). The Neptune Fountain (east side of piazza) is lit from the west in late afternoon, giving the bronze figure dramatic shadow. The piazza cobblestones catch puddle reflections after rain — a sought-after composition opportunity.
  • Access: Piazza della Signoria, 50122 Florence. The piazza is a public space open 24 hours, free. Loggia dei Lanzi sculptures: free, 24h. Palazzo Vecchio museum interior: €12.50 (basic route), €17 (with secret passages); open Mon–Wed and Fri–Sat 9 AM–11 PM, Thu–Sun 9 AM–2 PM (check comune.fi.it for current hours). Tower climb: included in museum ticket. Photography permitted in most palace rooms.
  • Difficulty: easy
  • Recommended settings: Tower Long Exposure: f/11, 20–30 sec, ISO 100, 24–35mm, tripod — blue hour, smooth any pedestrian movement and capture warm tower illumination against the sky  ·  David Replica Detail: f/5.6, 1/500 sec, ISO 200, 85–135mm — isolate the marble figure against the tower facade with afternoon side light  ·  Neptune Fountain Action: f/8, 1/500–1/1000 sec, ISO 400, 85mm — freeze the water arcs around Neptune’s bronze form  ·  Dawn Empty Piazza: f/11, 4–8 sec, ISO 100, 16mm, tripod — the piazza is rarely empty except at dawn; wide-angle including tower, loggia, and cobblestones

Shots to chase:

  • Dawn wide-angle composition across the full piazza breadth: Palazzo Vecchio tower left, Loggia dei Lanzi right, Neptune fountain centre-foreground, and the empty cobblestone expanse with long last-night lamp shadows
  • Puddle reflection shot after rain — the piazza’s slightly uneven cobblestones collect water in shallow pools; a low-angle composition doubles the tower and loggia arches vertically
  • Telephoto detail (135–200mm) of the Palazzo Vecchio’s clock face, belfry, and crenellated ramparts at golden hour, isolating the medieval stonework against a warm sky
  • Blue-hour long exposure with the Palazzo Vecchio tower illuminated and the loggia arches glowing — a 20-second exposure from a tripod placed at the west edge of the piazza captures both structures in context
  • Street photography during aperitivo hour (6–8 PM): the piazza fills with locals and tourists, the tower lights come on, and the café terraces of Rivoire become animated — a 35mm street scene with the architecture as backdrop

Pro tip: The single best camera position for the tower is at the southwest corner of the piazza, near the Via della Ninna entrance — from here the full tower height is visible without foreground obstruction and the Loggia dei Lanzi arches can be included in the left portion of the frame. After heavy rain, shallow puddles collect at the junction of Via dei Calzaiuoli and the piazza entrance — worth a detour for reflection compositions. The Palazzo Vecchio Tower can be climbed as part of the museum visit (booking on comune.fi.it); the top view looks directly down onto the full piazza and across to the Duomo.

Common mistake to avoid: Photographing the tower from the centre of the piazza directly in front — the adjacent building line crops the base and makes the tower appear shorter; the angled southwest position gives maximum apparent height. Visiting at midday in summer when the piazza is densely crowded and overhead light produces flat, shadowless images. Neglecting the interior courtyard of Palazzo Vecchio (Cortile di Michelozzo) which is accessible with museum entry — its frescoed arches and central fountain make an intimate architectural composition.

7. Boboli Gardens

The Boboli Gardens (Giardini di Boboli) are Florence’s grandest Renaissance garden, created from 1549 behind Palazzo Pitti and expanded over two centuries by the Medici grand dukes. They contain over 500 sculptures, fountains, grottoes, and terraced walkways spanning 45,000 square meters. The central Viottolone (grand cypress alley) creates one of the longest vanishing-point perspectives in Italian garden design. The Isolotto — an oval pond with a small island featuring Giambologna’s Ocean Fountain — is the garden’s most spectacular single composition. From the upper terraces, the gardens offer panoramic views across Florence that rival Piazzale Michelangelo but with garden foreground interest.

  • GPS: 43.762514, 11.248975
  • Elevation: 194 ft
  • Best time of day: late afternoon (3:00–6:00 PM) for warm golden light on the terraced garden geometry and the panoramic views from the upper paths; spring (March–May) for garden blooms; early morning for mist effects and empty paths
  • Sun direction: The gardens rise steeply southward from Palazzo Pitti, with the main axis running south–north. The upper terrace of the gardens faces northwest toward the city; in late afternoon the sun drops to the southwest and west, casting warm raking light across the formal garden geometry and illuminating the city panorama below. The Neptune’s Fountain pool (upper gardens) catches specular light reflections from the west in late afternoon. The Kaffehaus (coffee house) terrace in the north section of the gardens faces directly toward the Duomo — morning light from the northeast is best for this Duomo-framed city view.
  • Access: Enter via Palazzo Pitti, Piazza de’ Pitti 1, 50125 Florence. Boboli Gardens: €10/adult (same-day); €13 (advance online); combined Pitti Palace + Boboli: €22/adult (same-day), €25 (advance). Buy at uffizi.it. Open daily (except first Monday of month); hours vary by season: winter 8:15 AM–4:30 PM, summer 8:15 AM–7:30 PM. Free first Sunday of each month (confirm at uffizi.it — may change). Photography permitted; no flash, no drones, no large tripods inside garden buildings. By foot: 15 minutes from Ponte Vecchio across the river.
  • Difficulty: easy to moderate (extensive grounds with uphill paths; comfortable shoes essential)
  • Recommended settings: Viottolone Long Exposure: f/11, 1/30 sec, ISO 100, 24–35mm — the cypress alley; a long exposure in low light smooths the surface and maximizes depth of field  ·  Isolotto Reflection: f/11, 1/125 sec, ISO 200, 35–50mm — the oval pool surrounds the island fountain; still mornings give mirror-like reflections  ·  City View From Upper Terrace: f/8, 1/250 sec, ISO 200, 70–100mm — telephoto compression of Florence skyline from the Kaffehaus terrace with cypress tree foreground  ·  Grotta Del Buontalenti: f/4, 1/30 sec, ISO 1600, 16mm — the Mannerist grotto interior with Michelangelo’s Prisoners casts inside; very low light, handheld

Shots to chase:

  • Classic Viottolone (grand cypress alley) shot: stand at the south entrance and frame the diminishing line of ancient cypresses converging on the circular Isolotto pond — most powerful in early morning light with mist between the trees
  • Isolotto island composition from the oval pond perimeter: Giambologna’s fountain figure surrounded by citrus trees on the island, with the oval basin framing the scene and optional garden reflections
  • View of Florence from the upper Kaffehaus terrace: frame the Duomo dome rising above the city’s terracotta rooftops with the formal garden beds and a cypress as foreground layers
  • Grotta del Buontalenti: the Mannerist stone grotesque interior with embedded shells, tufa, and fake cave stalactites creates a unique wide-angle composition — shoot toward the inner chamber
  • Spring bloom walk: along the Rose Garden section near the north entrance, frame formal Italian rose beds in full bloom with the historic garden walls and Palazzo Pitti’s ochre facade in the background

Pro tip: The Kaffehaus terrace in the northern section (near the exit toward the Annalena Gate) provides one of the least-known elevated views of Florence — looking northeast over the rooftops with the Duomo dome appearing above the garden edge. This view is less visited than Piazzale Michelangelo but can be combined with a garden visit. The Viottolone is best photographed in winter or early spring morning when the low mist settles between the centuries-old cypress trees and the garden light is soft. Arrive at opening time (8:15 AM) to find the grand alley unoccupied; by 10 AM tourist groups fill the main paths.

Common mistake to avoid: Visiting only the central axis (Viottolone and amphitheater) and missing the northern section, which has the best city views and the lesser-known Isolotto pond. Planning a visit at midday in summer when the garden paths are fully exposed to intense heat; the terraces offer little shade. Underestimating the garden’s size — allow a minimum of 2–3 hours for worthwhile photography coverage.

Want this in your pocket on the street?
The full-resolution version of every spot above — with full-page hero photography, GPS maps with gold location pins, sun direction diagrams, multi-season tables, and a complete safety + packing checklist — is inside the Florence Ultimate Photographer’s Guide PDF ($47). Print it, save it offline, take it on the walk. Get the guide →

8. San Miniato al Monte

San Miniato al Monte (11th–13th centuries) is Florence’s finest example of Florentine Romanesque architecture and one of the most beautiful church facades in Tuscany — a geometric composition of green-and-white Carrara marble bands and inlaid geometric panels that prefigures the decorative vocabulary of Brunelleschi and the Renaissance. It sits on the highest accessible hill directly above the city, providing a panorama broader than Piazzale Michelangelo — but oriented slightly differently so that the Duomo dome appears as a prominent singular landmark against a hillside backdrop rather than embedded in a mass of rooftops. The cemetery terrace (Porte Sante Cemetery) provides exceptional foreground interest, and the evening Vespers chanted by Olivetan monks at 5:30 PM creates an acoustic photography atmosphere impossible to replicate.

  • GPS: 43.75945, 11.26511
  • Elevation: 394 ft
  • Best time of day: sunset and blue hour — the church sits higher than Piazzale Michelangelo and faces west-northwest directly toward the Florence skyline; also early morning (7:30 AM opening) for peaceful Romanesque facade shots; much less crowded than Piazzale Michelangelo at any time
  • Sun direction: The basilica facade faces west at azimuth ~270°. At sunset the sun drops directly toward the northwest (azimuth ~285° in summer), backlighting the Romanesque facade from behind the viewer and casting the facade in warm frontal golden light — unusual for a church facade and extremely photogenic. The city panorama to the northwest is side-lit from the south in the afternoon. For the facade shot (looking east from the terrace below), morning light from the east provides direct warm frontal illumination — the green-and-white marble geometric patterns are most visible in this directional light. From the terrace looking west toward Florence, late afternoon to sunset provides the best dynamic range.
  • Access: Via delle Porte Sante, 34, 50125 Florence. Access by foot: 15-minute uphill walk from Piazzale Michelangelo via Viale Galileo Galilei, or from the city via the staircase at Via del Monte alle Croci. Bus: line 12 from Piazza Santa Maria Novella serves nearby. No vehicle access for visitors (private road). Basilica free entry; open 9:30 AM–1:00 PM and 3:00 PM–7:00 PM (winter closes 6 PM); Saturdays 9:30 AM–7:00 PM, Sundays 8:15 AM–7:00 PM. The forecourt terrace with the Florence panorama is accessible whenever the church is open. No photography fee; donations welcome.
  • Difficulty: moderate (steep uphill approach, 15–20 minutes on foot from Piazzale Michelangelo)
  • Recommended settings: Facade Morning: f/11, 1/250 sec, ISO 100, 35–50mm — direct morning light on the green-white marble; expose for the highlights to preserve the geometric inlay detail  ·  City Panorama Sunset: f/8, 1/125 sec, ISO 200, 50–70mm — from the lower terrace looking northwest; the sun descends toward the city and lights the Duomo dome warmly  ·  Blue Hour City View: f/11, 15–20 sec, ISO 100, 24mm, tripod — the Florence skyline illuminated against a cobalt sky with the cemetery tombstones in the foreground  ·  Cemetery Foreground: f/8, 1/60 sec, ISO 400, 35mm — framing the city panorama through the Renaissance carved tombstones and cypress trees of the Porte Sante Cemetery

Shots to chase:

  • Classic sunset panorama from the lower forecourt terrace with the Romanesque church facade catching golden light behind and the full Florence skyline visible to the northwest in the same frame
  • Framing the Duomo dome through the Renaissance carved stone gate pillars of the Porte Sante Cemetery — a unique composition combining funerary art and the most famous architectural landmark
  • Close-up of the Romanesque facade’s geometric marble inlay patterns: the central gable mosaic (Christ between Mary and St. Minias, 13th century) in morning direct light reveals extraordinary Byzantine gold tile detail
  • Long exposure at blue hour from the cemetery terrace: the city spreads out below with its amber lights, the Campanile and Duomo illuminated, and the dark cypress silhouettes of the cemetery framing the foreground
  • Interior of the basilica (no flash): the 11th-century Romanesque nave with alternating green and white marble columns, the 13th-century polychrome marble floor, and the Michelozzo tabernacle — a tripod-free low-ISO long exposure

Pro tip: San Miniato is consistently less crowded than Piazzale Michelangelo at all times — especially at sunset, where Piazzale Michelangelo fills with hundreds of tourists while San Miniato may have only a handful of visitors. The slight angular difference in viewpoint means the Duomo dome appears more isolated as a single landmark against the Fiesole hillside, rather than embedded in the skyline — some photographers prefer this more focused composition. Arrive 20 minutes before sunset and position yourself at the northeast corner of the lower terrace for a composition that includes both the church facade (right) and the city panorama (left) in a single wide-angle frame.

Common mistake to avoid: Arriving after the basilica closes (missing the interior and the best terrace access in winter). Shooting only toward the city and ignoring the photogenic church facade itself — the facade is one of the finest Romanesque compositions in Italy and deserves as much attention as the panorama. Using the same telephoto focal lengths as at Piazzale Michelangelo — from San Miniato’s slightly different angle and higher elevation, wide-angle lenses (24–35mm) are needed to include foreground cemetery elements with the city panorama.

9. Santa Maria Novella

Santa Maria Novella Florence photography sampleSave
Santa Maria Novella — cinematic reference from the Florence Photographer’s Guide PDF

Santa Maria Novella’s facade (completed 1470 by Leon Battista Alberti) is one of the most celebrated pieces of architectural composition in Italian Renaissance history. Alberti’s green-white marble geometric design — alternating bands, pilasters, rosette roundels, and the distinctive scrolled volutes (the first use of this motif in Renaissance architecture) — introduced a mathematical proportional system that influenced architects for five centuries. The piazza in front retains two ancient Egyptian-style obelisks (Cosimo I’s 1608 race posts for the chariot race) and is flanked by the Loggia di San Paolo with terracotta della Robbia lunettes — forming a complete photographic scene of interlocking Renaissance and Gothic elements.

  • GPS: 43.774806, 11.249228
  • Elevation: 157 ft
  • Best time of day: afternoon (2:00–5:00 PM) when the sun moves to the west-southwest and lights the marble facade from the right at a low angle, revealing the full geometric inlay detail; blue hour for the facade’s architectural illumination against the evening sky
  • Sun direction: The church facade faces east at azimuth ~90°, directly toward the Piazza Santa Maria Novella. At sunrise the facade receives direct frontal light from the east — the most geometrically clear and shadow-free illumination. By midmorning the sun has moved north of east and begins to side-light the facade from the right. In afternoon the east-facing facade falls into shade; however, from 3 PM the upper flanking walls and the piazza’s surrounding buildings are lit from the west, providing interesting cross-light. The piazza itself catches the longest direct light in late morning. For the classic head-on facade shot, early morning east light (7:00–9:00 AM) is optimal.
  • Access: Piazza Santa Maria Novella, 50123 Florence. The piazza is a public space, free, 24h. Basilica interior and museum: €7.50/adult, open Mon–Thu 9 AM–5:30 PM, Fri 11 AM–5:30 PM, Sat 9 AM–5:30 PM, Sun 1 PM–5:30 PM (check smn.it for current hours). The church exterior and piazza are freely photographable at all times. Santa Maria Novella train station is directly adjacent — the piazza is effectively the train station forecourt.
  • Difficulty: easy
  • Recommended settings: Facade Morning Frontal: f/11, 1/250 sec, ISO 100, 35–50mm — direct morning light; expose for the white marble to prevent blowout while retaining green inlay shadow detail  ·  Piazza Wide Scene: f/11, 1/125 sec, ISO 200, 24mm — include both obelisks, the loggia, and the church facade for the full piazza composition  ·  Facade Detail Telephoto: f/8, 1/500 sec, ISO 200, 135–200mm — telephoto isolation of the scrolled volutes and upper pediment rosette windows  ·  Blue Hour Illuminated: f/11, 10–20 sec, ISO 100, 24–35mm, tripod — the facade illumination comes on at dusk and gives warm amber uplighting against a blue sky

Shots to chase:

  • Frontal wide-angle shot from across the piazza at 7:30 AM: the facade receives direct east light, the piazza is nearly empty, and the two obelisks frame the composition symmetrically
  • Detail of the upper pediment: the central circular oculus window, the scrolled volutes, and the Alberti family crest in the tympanum — Alberti’s architectural signature at 135mm from piazza level
  • The Loggia di San Paolo (across the piazza) with its della Robbia terracotta lunettes in blue and white — a contrasting late Gothic element that makes a rich pairing with the Renaissance church in a wide-angle framing
  • Blue-hour facade uplighting shot from the south end of the piazza, where the long perspective includes both the obelisks in the foreground and the full illuminated facade with the sky above
  • The narrow Via degli Avelli: a covered loggia running along the church’s south side with a row of Gothic arched niches (the tomb wall) — shade, repetitive arches, and stone textures make a compelling architectural abstract

Pro tip: The most underused angle of Santa Maria Novella is from the southeast corner of the piazza, where the loggia arcade (Via degli Avelli) on the south flank of the church meets the piazza — a diagonal view shows both the facade and the Gothic arcade wall simultaneously. The interior has two photographic highlights beyond the famous Masaccio Trinity fresco: Ghirlandaio’s choir frescoes (Life of the Virgin and John the Baptist, 1486–90) and Brunelleschi’s crucifix — both require low-light settings and no flash.

Common mistake to avoid: Photographing the facade in afternoon when it faces east and is entirely in shade. Shooting only straight-on from the centre of the piazza and missing the two-obelisk framing composition, which gives context and depth. Neglecting the Loggia di San Paolo opposite (the undervisited companion Gothic arcade) — its terracotta lunettes and arches directly face and complement the Renaissance facade.

10. Mercato Centrale (San Lorenzo Market)

The Mercato Centrale (1874, architect Giuseppe Mengoni — who also designed Milan’s Galleria Vittorio Emanuele II) is Florence’s finest example of 19th-century iron-and-glass market architecture. The three-nave structure has a soaring barrel-vaulted cast-iron roof with a continuous glass clerestory, flooding the interior with natural light from above while the bustling ground-floor stalls create a vibrant scene below. The ground floor retains traditional Florentine food culture — lampredotto (tripe) carts, local cheese makers, butchers, and produce vendors in a scene largely unchanged for 150 years. The upper food hall (renovated 2014) has exposed iron trusses and warm industrial lighting for very different atmospheric photography.

  • GPS: 43.7767, 11.25333
  • Elevation: 164 ft
  • Best time of day: morning market hours (8:00–11:00 AM) for the ground-floor food market in full swing with light entering through the cast-iron and glass ceiling; early opening also best for interior architecture before crowds; evening (7:00 PM–midnight) for the upper food hall’s warm amber atmosphere
  • Sun direction: The Mercato Centrale is an enclosed iron-and-glass structure — natural light enters through the barrel-vaulted glass ceiling during daylight hours. In morning, direct sun enters from the east through the upper glass panels, creating dramatic shafts of light that cut across the market stalls and catch the dust and steam of the food preparation. As the sun moves to the south by noon, light becomes diffuse and even through the roof glass. The exterior (cast-iron and pietra serena sandstone) faces south on Via dell’Ariento — morning light from the east side-lights the decorative cast-iron facade details; afternoon is better for the western entrance.
  • Access: Piazza del Mercato Centrale, Via dell’Ariento, 50123 Florence. Ground floor market: Mon–Sat 7:00 AM–2:00 PM (food stalls). Upper food hall: daily 10:00 AM–midnight (restaurants and gourmet stalls). Free entry (no ticket required). The market is 5 minutes’ walk from Santa Maria Novella station and adjacent to the San Lorenzo Leather Market (outdoor stalls). No tripods on the crowded ground floor; small compact/mirrorless cameras and phones are fine. Photography is generally welcomed by vendors.
  • Difficulty: easy
  • Recommended settings: Interior Architecture: f/8, 1/125 sec, ISO 800, 14–24mm — capture the full barrel-vaulted roof height with stalls in the foreground; the contrast between the bright glass ceiling and dark stall interiors requires exposing for the midtones  ·  Vendor Portrait: f/2.8–4, 1/250 sec, ISO 800, 50–85mm — shallow depth of field isolates a vendor against the colorful stall background; use window light from the roof for natural fill  ·  Produce Color Detail: f/5.6, 1/250 sec, ISO 400, 50–85mm — arranged produce displays are best photographed from a slight overhead angle at 45° to reveal the full color range  ·  Morning Light Shafts: f/8, 1/500 sec, ISO 400, 24–35mm — shafts of east morning light entering through the glass roof create dramatic diagonal beams; underexpose by 1 stop to make the shafts visible

Shots to chase:

  • Standing at the centre of the ground floor and shooting upward at the full barrel-vaulted cast-iron and glass ceiling — a symmetrical architectural abstract of repeating arched trusses with the glass panels above
  • Morning light-shaft composition: arrive at 8:00–9:00 AM in summer when raking east light enters through the east-facing glass panels and creates visible beams through the market dust and steam
  • Vendor candid — the ground-floor tripe cart (lampredotto) vendor is a classic Florentine subject; the handwritten menu boards, copper pots, and physical activity of preparation make a rich documentary frame
  • Color contrast composition of the produce stalls: arrange a frame that combines the red of tomatoes, the purple of radicchio, and the bright orange of citrus against the grey pietra serena stone flooring
  • The upper food hall at 8:00 PM: warm amber industrial lighting on the exposed iron trusses, the evening crowd at high tables, and the open kitchen counters glowing — a very different atmosphere from the daylight market below

Pro tip: The best architectural light in the Mercato is in the 8–9 AM window in summer when direct east sun enters through the glass clerestory panels and creates visible shafts across the market floor. Position yourself at the center of the ground floor, facing east, and use a wide-angle lens pointed upward toward the glass ceiling. For vendor photography, the tripe carts on the north side of the ground floor are the most photogenic and the vendors are accustomed to tourists — make eye contact and a nod typically gets an approving response. The leather market stalls outside on Via dell’Ariento add chaotic color as foreground context for the market building exterior.

Common mistake to avoid: Arriving after 11 AM when the ground floor is packed and the best vendors have sold out; the fresh produce stalls begin packing up at 1 PM. Shooting the exterior from too close — the building fills an entire block and requires crossing to the opposite side of Via dell’Ariento for the best architectural shots. Using a flash on the ground floor, which disturbs vendors and flattens the natural-light atmosphere.

11. Forte di Belvedere

Built in 1590 by Bernardo Buontalenti for Grand Duke Ferdinando I, Forte di Belvedere is described by Florentines as ‘the most beautiful terrace in Florence.’ At 400 feet above sea level — 60 feet higher than Piazzale Michelangelo — it provides a broad westward sweep that includes the Oltrarno district in the foreground, Ponte Vecchio and all the Arno bridges, the full city skyline, and the Fiesole hills beyond. Unlike Piazzale Michelangelo, it has very few visitors and often hosts contemporary art installations within the fortress walls that provide additional photographic subjects. The star-fort ramparts themselves — five-pointed bastions with panoramic views in all directions — are architecturally distinctive.

  • GPS: 43.763447, 11.253519
  • Elevation: 400 ft
  • Best time of day: late afternoon and sunset — the panoramic terrace faces north directly over the city; the sun to the southwest in late afternoon casts warm golden light across the entire roofscape below; access is seasonal (typically open June–October, closed in winter except for special events)
  • Sun direction: Forte di Belvedere sits on the highest point of the Oltrarno hills at approximately 122m / 400 ft, with its main panoramic terrace facing north toward Florence. At sunrise the city below is lit from the east and the terrace is in shade — best for photographing the fort’s own architecture against a lit sky. In the afternoon the sun moves to the southwest (azimuth ~235–280°), side-lighting the city rooftops and giving the terracotta-topped buildings a warm amber glow. Sunset itself occurs behind and slightly left of the camera when facing north, casting the longest warm light across the city about 30–45 minutes before sunset. This is a slightly different city angle than Piazzale Michelangelo — the Arno’s bend is more prominent and the Ponte Vecchio appears at a different angle.
  • Access: Via San Leonardo, 1, 50125 Florence. Access via Costa San Giorgio (a steep cobbled road from Ponte Vecchio area) or from Boboli Gardens upper section. The fort is seasonal: typically open April–October, Tue–Sun 10 AM–8 PM; closed Mondays (except August 15). Admission: €8/adult; €6/reduced (seniors over 65, children 7–17, groups over 10); €18 family ticket; free for under 7. Opening schedule and exhibition programming via musefirenze.it. NOTE: The fort often hosts temporary exhibitions — always check current opening status before visiting, as it may be closed between exhibitions.
  • Difficulty: moderate (steep uphill approach via Costa San Giorgio or through Boboli Gardens)
  • Recommended settings: Panorama Golden Hour: f/11, 1/125 sec, ISO 200, 35–70mm — wide to mid telephoto to capture the full city sweep; bracket exposures for HDR if dynamic range is extreme  ·  Rampart Architecture: f/11, 1/250 sec, ISO 100, 24mm — the star-fort walls and bastions as foreground geometry against the city below  ·  Blue Hour City: f/11, 15–25 sec, ISO 100, 50mm, tripod — the illuminated city spread out below; focus to the near edge of the rampart and use hyperfocal for maximum depth of field  ·  Telephoto Compression: f/5.6, 1/500 sec, ISO 400, 200mm — compress the full Arno curve with all bridges stacked and the Duomo visible above the rooftops

Shots to chase:

  • Wide panorama from the north rampart including the star-fort’s pale stone bastion walls as foreground geometry and the full Florence skyline — a composition unique to this fort that combines military architecture with the Renaissance city
  • Telephoto compression (150–200mm) of the Arno River bend showing Ponte Vecchio, Ponte Santa Trinita, and Ponte alla Carraia stacked in perspective with the Duomo above the rooftops
  • The interior courtyard of the Palazzina (small 16th-century palace within the fort) — a refined Renaissance courtyard with loggia arches and a terraced garden overlooking the city
  • Any temporary exhibition installations within the ramparts — contemporary sculptures set against the city panorama create bold visual contrasts between contemporary art and 16th-century military architecture
  • At blue hour from the south rampart: the fort walls glow in warm exterior lighting, the path of Costa San Giorgio curves down below, and the Arno bridges are lit amber against the darkening city

Pro tip: Forte di Belvedere is one of the least-crowded major viewpoints in Florence with a paid entry that keeps casual tourists away. Arrive 45 minutes before closing to catch the golden hour and blue hour transition — the staff is accustomed to photographers staying through sunset and will often indicate when closing time approaches rather than abruptly clearing the terrace. The approach via Costa San Giorgio (from Ponte Vecchio, heading south uphill on Via de’ Bardi then Costa San Giorgio) passes the most authentic residential Oltrarno street scenes and offers incidental photography opportunities along the cobbled historic street. Always verify opening status at musefirenze.it before visiting — the fort closes between exhibition programmes.

Common mistake to avoid: Arriving without checking whether the fort is open — it operates seasonally and closes between exhibitions, sometimes for months at a time. Using only a wide-angle lens when the most powerful views require at least 70–100mm to compress the Arno bridges and emphasize the depth of the city. Visiting on Monday when the fort is closed (except August 15).

When to photograph Florence: a year-round breakdown

Florence is photogenic every month of the year — but the conditions differ radically by season. Here is what to expect:

March–May (spring blooms, mild light, moderate crowds) and September–October (golden Tuscan light, clear skies, harvest atmosphere, fewer tourists than summer peak)

Photographer safety in Florence: read this

City photography has its own risks: gear visibility, neighborhood timing, traffic, weather. Read the briefing before you go.

  • Gear visibility: Use a discreet bag with no obvious camera branding. Keep a body strapped under a jacket on transit.
  • Neighborhood timing: Pre-dawn and post-sunset shoots reward early scouting. Cross-reference each location with current local guidance and choose well-lit transit routes.
  • Situational awareness: Headphones out. One eye in the viewfinder, one on the street.
  • Traffic: Bridges, medians, and bike lanes are not setup zones. Shoot from sidewalks and pedestrian areas only.
  • Weather: Summer storms move quickly; winter cold drains batteries. Layer up, keep gear dry, watch for ice on cobblestones at blue hour.

The complete safety briefing is inside the Florence Photographer’s Guide PDF.

Take this guide into the city

This post is the complete field reference. The Florence Ultimate Photographer’s Guide PDF is the field-deployable version: full-page resolution hero photography, GPS maps with gold pins for every location, multi-season shooting calendars, gear notes per location, sun-angle diagrams, the full city safety briefing, and a print-ready editorial layout in Framehaus black and gold. Save it offline. Print it. Take it on the walk.

Florence Ultimate Photographer’s Guide
Downloadable PDF · 11 GPS-mapped locations · Multi-season calendar · City safety briefing · Packing checklist

Get the Florence guide — $47

Combo Deal

Get the Florence Guide + Preset Pack

Photograph it. Edit it. Done.

$66
$54
Save $12
PDF Guide Every spot, GPS, golden hour
Preset Pack 20 Lightroom presets
Book your tours & experiences in Florence

All links go to Viator (a TripAdvisor company), the world’s largest marketplace for guided experiences. Tagged as affiliate per FTC.

Also on Amazon: gear that helps with this technique

Quick Amazon shortcuts to the gear most useful for this kind of shot. Use them if Prime shipping or Amazon credit makes more sense than B&H. As an Amazon Associate ShutYourAperture earns from qualifying purchases.

Take Florence home in your pocket.

Every shot location, every angle, every time of day worth shooting. Printable PDF + GPS-tagged map.

Instant download. Works on phone, tablet, and printed.

Continue reading

← Back to International Cities Photography Guides

Related guides nearby

Three more photography guides within striking distance — perfect for combining into one trip.

  • Venice 205 km away · city · Italy
  • Rome 231 km away · city · Italy
  • Colosseum Rome 232 km away · landmark · Unknown

Browse all 78 guides → · Open the map

Save your trip-planning hours

The complete Florence guide is $47

All vantage points above + 5 bonus secret spots, printable map, gear pack list, and editing recipes. One-time payment, instant download, lifetime updates.

Buy Florence PDF →

Common questions about the Florence guide

Is the Florence photography guide worth $47?

For most photographers, yes. The guide saves 8-12 hours of trip-planning research and prevents the most common mistake of Florence photography: shooting at the wrong time of day. If a single better frame is worth $47 to you, the guide pays for itself on day one. Buyers get every GPS coordinate, every golden-hour window, every cultural rule, and a printable shot list.

Does the Florence guide include GPS coordinates?

Yes — every vantage point in the guide has Google Maps-ready GPS coordinates so you can pin them before you fly. The guide also includes a printable map showing all locations clustered by walking distance, so you can build efficient half-day routes.

What's in the Florence PDF that isn't in this article?

The article shows the highlights. The PDF includes: 5 additional secret spots not published online, a 14-day itinerary with daily routes, the full camera-settings cheat sheet for every scenario in Florence, a printable gear packing list, post-processing recipes with screenshot examples, and a list of local guides we trust for portrait commissions.

Do I get the Lightroom presets too?

The $47 guide is the PDF only. The matching Florence preset pack is a separate $19 download — most buyers grab both as a bundle and save the editing time. Both are instant download, both work on Lightroom Classic and Lightroom Mobile.

Will the guide work for a Florence trip in 2026?

Yes. The guide is updated annually as fees, restrictions, and new vantage points change. All buyers get free lifetime updates. The 2026 edition includes the latest drone rules, museum photography policies, and seasonal light data for the year.

Get the Florence guide · $47