Best Photography Spots in Boston: 12 Locations With GPS

Tours & experiences disclosure: This guide includes affiliate links to Viator, the world’s largest tour and experiences marketplace. If you book through these links, ShutYourAperture may earn a small commission at no extra cost to you.

Boston photography guide hero imageSave

Amazon Associates disclosure: ShutYourAperture is a participant in the Amazon Services LLC Associates Program. As an Amazon Associate we earn from qualifying purchases. Some links below go to Amazon (Store ID edinchavez01-20). Buying through these links costs you nothing extra and helps fund our free guides.
Skip the planning. Get the Boston PDF. All locations, GPS coordinates, golden-hour times, gear tips. Instant download.

Boston, Massachusetts is one of the most photogenic cities in the United States. If you have a camera and the patience to show up before dawn, Boston will give you images that last a career — but only if you know where and when to point it.

This is the definitive field guide to the 12 best photography spots in Boston, with GPS coordinates you can drop straight into Google Maps, exact camera settings tuned to Boston’s unique light, precise timing for every location, and the access notes nobody else bothers to document. It mirrors the intel inside our Boston Ultimate Photographer’s Guide ($47 PDF) — a downloadable field guide with full-page hero images, GPS maps, seasonal tables, a city safety briefing, and a complete photographer’s packing list. Get the guide →

Planning multi-city travel? See also: U.S. cities photography hub and the National Parks Photography Guides.

Boston Ultimate Photographer’s Guide — $47
12 GPS-mapped locations · Exact camera settings · Multi-season shooting calendar · Free annual updates

Download the PDF guide →
Skip the planning

Get the Boston Ultimate Photographer’s Guide

Every location below — pre-mapped with GPS, golden-hour timing, gear recommendations, cultural rules, and a 14-day itinerary. Downloaded by 200+ working photographers.

Get the PDF · $47
Instant download · Lifetime updates

Quick jump to the 12 spots

  1. Acorn Street, Beacon Hill
  2. Boston Public Garden – Swan Boat Lagoon
  3. Boston Common
  4. Fenway Park – Jersey Street Exterior
  5. Faneuil Hall & Quincy Market
  6. Copley Square – Trinity Church & John Hancock Tower
  7. Old North Church
  8. Boston Public Library – McKim Building
  9. Charles River Esplanade – Hatch Shell Skyline View
  10. Harvard Yard, Cambridge
  11. View Boston Observatory – Prudential Tower
  12. Castle Island & Pleasure Bay

A look inside the Boston Photographer’s Guide

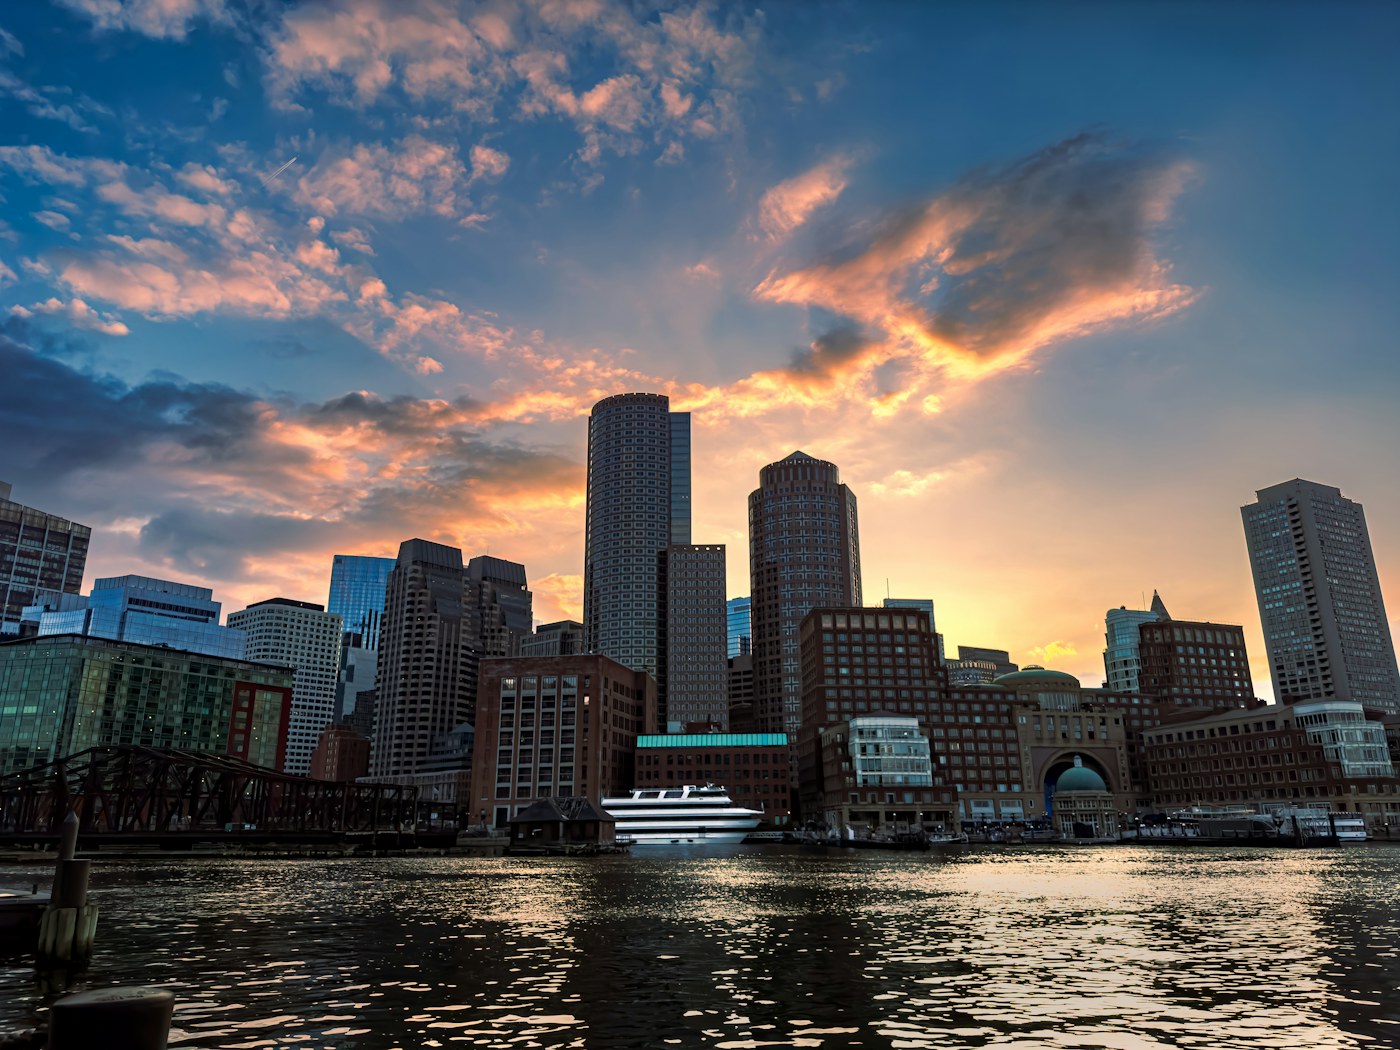
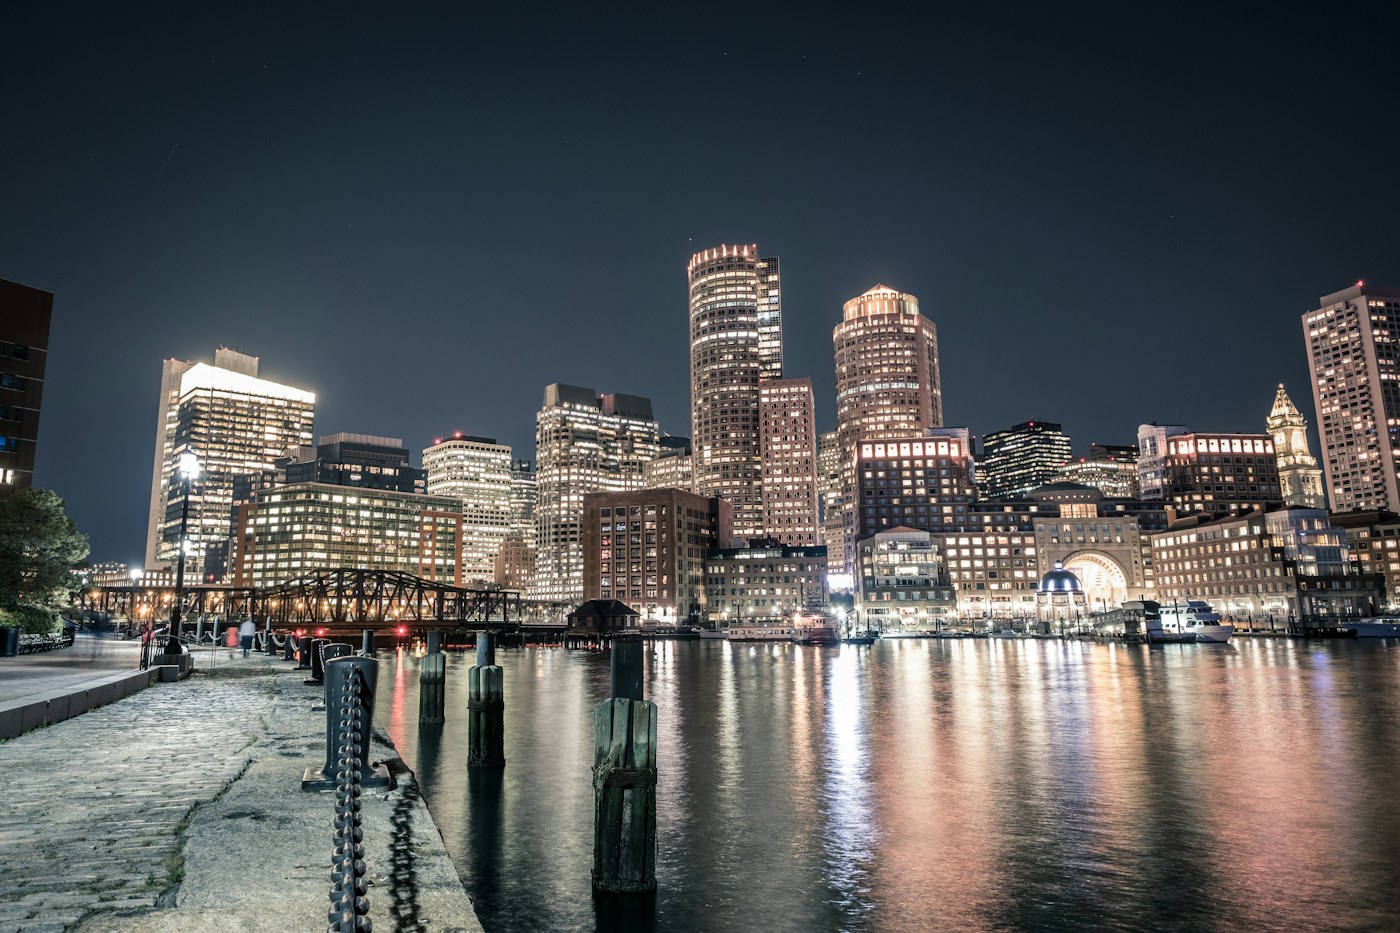
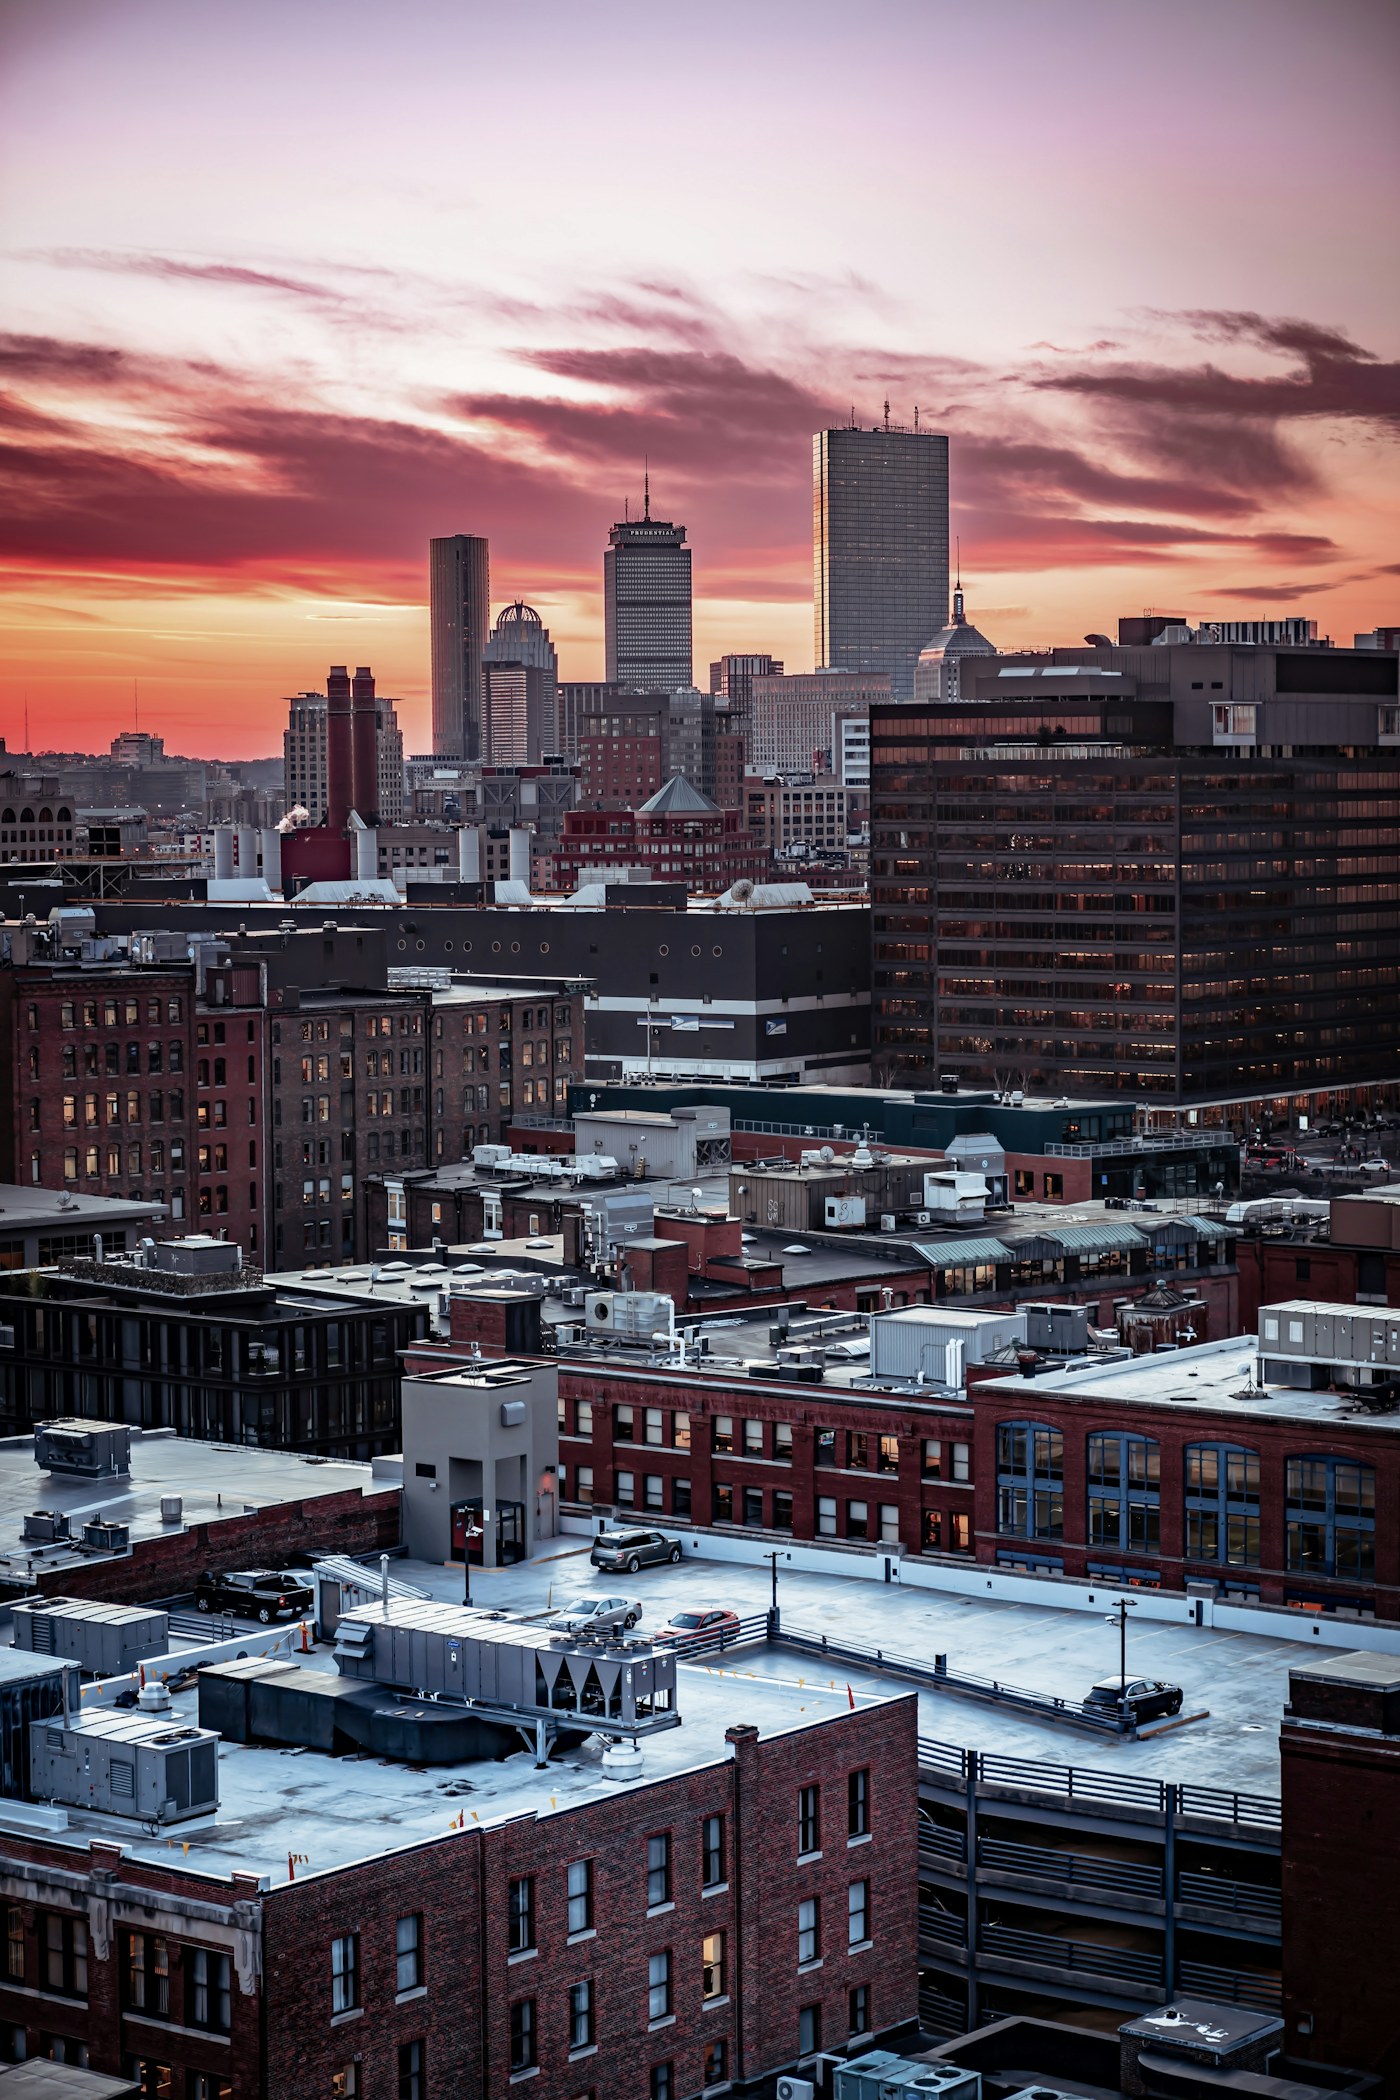
Here are three of the actual shots you’ll find inside the PDF — cinematic full-page references for the exact spots, lenses, and lighting conditions documented in the guide. The full guide includes 12 locations, each with a hero image, GPS map, settings table, and a five-shot list.

Acorn Street, Beacon Hill — from the Boston Photographer's GuideSave
Acorn Street, Beacon Hill — sample reference photo from the Boston Photographer’s Guide PDF

Before you shoot Boston: the essentials

  • Free public access: Boston Common, Public Garden grounds, Faneuil Hall exterior, Acorn Street, Charles River Esplanade, Castle Island, and Harvard Yard are all free to enter. Old North Church charges a small admission for interior access. View Boston observation deck requires a paid ticket ($30+).
  • Commercial permits: No photography permit required for personal or editorial use at public spaces. Commercial shoots in Boston parks may require a Special Events permit from Boston Parks & Recreation. Fenway Park restricts tripods inside the stadium; exterior Jersey Street shots are unrestricted.
  • Best photography seasons: Spring (April–May, cherry blossoms and tulips in Public Garden), Autumn (October, peak foliage in Beacon Hill and Cambridge)
  • Blue hour notes: Blue hour (20–30 min after sunset) is exceptional from the Charles River Esplanade and Castle Island, with city lights reflecting off the water. View Boston offers dramatic blue-hour cityscapes elevated 750 ft above ground.
  • Drone policy: Most major U.S. cities restrict drone flight in airspace and via local ordinances. Check FAA + city rules before launching.
  • Local resource: Official visitor information

The full-resolution version of every map below — plus seasonal calendars, gear notes per location, sun-angle diagrams, and a complete photographer’s packing checklist — is inside the Boston Photographer’s Guide PDF ($47).

1. Acorn Street, Beacon Hill

Acorn Street is the most photographed street in the United States—a single-block 19th-century cobblestone lane flanked by Federal-style brick rowhouses with original iron railings, carriage steps, and gas-lamp-style lanterns. The entire scene has changed almost nothing since the 1820s, creating an instant time-travel quality unique in an American city.

  • GPS: 42.3574, -71.0686
  • Elevation: 62 ft
  • Best time of day: Sunrise (6–7 AM); golden hour light filters from the east down the cobblestones; arrive before 7:30 AM on weekends to beat crowds
  • Sun direction: Street runs roughly east–west. Morning sun travels from the east end of the street, casting warm raking light across the cobblestones and brick facades; afternoon sun backlights from the west creating rim light on the iron railings. Winter snow scenes are exceptional at any time of day.
  • Access: Nearest T: Charles/MGH (Red Line) or Park St (Green/Red), then a short walk. Street parking is very limited and expensive; Boston Common Garage on Charles St is the practical option. Acorn Street is a public right-of-way, open 24/7, free to walk.
  • Difficulty: easy
  • Recommended settings: Sunrise Golden Hour: f/8, 1/125 sec, ISO 400, 24mm  ·  Overcast Soft Light: f/5.6, 1/60 sec, ISO 800, 35mm  ·  Blue Hour Night: f/8, 6 sec, ISO 200, 24mm (tripod)  ·  Winter Snow: f/7.1, 1/200 sec, ISO 400, 35mm

Shots to chase:

  • Low wide-angle view from the western end looking east toward the State House dome peeking above the roofline
  • Tight 85mm telephoto compression shot of the receding cobblestone rows with a pedestrian silhouette
  • Detail shot of the hand-forged iron boot scraper and granite doorstep on a brick rowhouse
  • Long-exposure blue-hour image with gas-lamp glow on wet cobblestones after rain
  • Autumn framing: one window box of orange and red flowers with ivy climbing the brick facade

Pro tip: Arrive no later than 6:30 AM on weekdays or 6:00 AM on weekends during peak tourist season (May–October). A 24–35mm lens is ideal for the full street width. A low angle (knee-height) dramatically emphasizes the cobblestone texture.

Common mistake to avoid: Shooting mid-morning or midday means fighting a constant flow of tourists in every frame. Many photographers stand right at the street center and use a boring straight-on composition—instead, step to one curb and shoot with the brick wall as a leading line for depth.

2. Boston Public Garden – Swan Boat Lagoon

America’s first public botanical garden (1837) offers a unique combination of Victorian iron footbridge, weeping willows, lagoon reflections, swan boats, and the beloved bronze ‘Make Way for Ducklings’ statues—a concentration of iconic photographic elements in a compact 24-acre setting in the heart of the city.

  • GPS: 42.3542, -71.0698
  • Elevation: 36 ft
  • Best time of day: Sunrise to early morning (golden hour) for reflections on the lagoon; late May–early June for peak tulips and cherry blossoms
  • Sun direction: The lagoon faces roughly southwest. Morning sun illuminates the footbridge and willow trees from the east, creating warm reflections in calm water before wind picks up. Sunset produces golden backlight through the weeping willows on the west side of the lagoon.
  • Access: Nearest T: Arlington (Green Line), one-block walk. Boston Common Garage (entrance on Charles St) is the closest paid parking. Garden grounds are free and open sunrise to midnight. Swan boat rides operate mid-April to mid-September; adults $4.50, children $3.00.
  • Difficulty: easy
  • Recommended settings: Sunrise Reflection: f/8, 1/60 sec, ISO 200, 16mm  ·  Swan Boats Action: f/5.6, 1/500 sec, ISO 400, 70mm  ·  Golden Hour Foliage: f/7.1, 1/125 sec, ISO 200, 35mm  ·  Blue Hour Bridge: f/11, 15 sec, ISO 100, 24mm (tripod)

Shots to chase:

  • Symmetrical lagoon reflection of the cast-iron footbridge at sunrise before ducks disturb the water
  • Swan boat gliding past weeping willows in soft morning light with passengers in the background
  • Wide angle shot from the bridge looking south toward the ‘Make Way for Ducklings’ statues
  • Macro detail of a mallard duck at the water’s edge with the city skyline softly blurred behind
  • Spring scene: diagonal rows of pink tulips leading to the George Washington equestrian statue

Pro tip: The lagoon is glassiest in the first hour after sunrise before wind starts and foot traffic disturbs the ducks. A polarizing filter dramatically increases color saturation and cuts surface glare in mid-morning light. Position yourself on the suspension footbridge for a symmetric reflection shot looking north.

Common mistake to avoid: Most visitors shoot from the south bank looking north, missing the richer western-light shots from the bridge in the morning. Avoid shooting swan boats at midday—harsh shadows and harsh glare on the water flatten the image.

3. Boston Common

America’s oldest public park (established 1634) and the anchor of Boston’s Emerald Necklace, the Common serves as an urban stage where the glinting State House dome, seasonal Frog Pond, elm-lined paths, and open meadows create endlessly varied compositions across all four seasons.

  • GPS: 42.3551, -71.0657
  • Elevation: 26 ft
  • Best time of day: Golden hour in autumn (mid-October for peak foliage); blue hour in winter when the Frog Pond skating rink is lit; early morning spring for empty grand lawns
  • Sun direction: The Common’s central Parade Ground faces southwest. Morning light from the east illuminates the State House golden dome above the northern edge beautifully. The main Mall (between Arlington and Berkeley) faces southeast, making morning the best for the George Washington statue at the Public Garden entrance.
  • Access: Nearest T: Park St (Green/Red Lines) at the northeast corner; Boylston (Green Line) at the southeast corner. Multiple MBTA bus stops on Tremont St. Boston Common Garage (underground, 1,200 spaces) on Charles St South. Park open 24/7, free.
  • Difficulty: easy
  • Recommended settings: Autumn Foliage Morning: f/8, 1/250 sec, ISO 200, 24mm  ·  Frog Pond Winter Night: f/5.6, 4 sec, ISO 400, 24mm (tripod)  ·  State House Golden Dome: f/7.1, 1/500 sec, ISO 200, 70mm  ·  Misty Morning Park: f/5.6, 1/60 sec, ISO 800, 35mm

Shots to chase:

  • Frog Pond skating rink at night with colorful lights reflected in the ice and State House dome glowing in the background
  • Looking north along the elm-lined central mall in peak October foliage toward the gold dome of the State House
  • Wide-angle drone-alternative shot from Flagstaff Hill (highest point in the Common) looking across to the skyline
  • Early morning mist rising off the Frog Pond in late autumn with lone joggers as human elements
  • Summer scene: children in the Frog Pond splash area with tall office buildings looming behind the tree canopy

Pro tip: Flagstaff Hill (near the Soldiers and Sailors Monument) is the Common’s highest elevation and offers a clear sightline to the State House dome—arrive at golden hour for the dome lit in warm light against a blue sky. Winter nights at the Frog Pond rink (open November–March) are among Boston’s most photogenic scenes.

Common mistake to avoid: Treating the Common as purely a pass-through destination—it rewards slow exploration of sub-spaces. The open central field is bland; the wooded paths along Tremont Street and the Pond area are far more interesting.

4. Fenway Park – Jersey Street Exterior

Opened in 1912, Fenway Park is Major League Baseball’s oldest stadium and most iconic exterior—the dark-red brick facade on Jersey Street (formerly Yawkey Way), vintage neon signage, and the looming Green Monster visible above the left-field wall produce an atmosphere found nowhere else in American sports.

  • GPS: 42.3467, -71.0972
  • Elevation: 16 ft
  • Best time of day: Golden hour on game nights (lights on, fans streaming in); early morning for clean exterior architecture shots; autumn afternoon for warm brick tones
  • Sun direction: Jersey Street runs roughly east–west along the third-base side. In the morning, the brick facade on the south (Jersey St) side is in shade; afternoon sun from the west illuminates the main gate and scoreboard. On evening game nights, the ballpark’s interior lights spill warm green-white glow over the exterior walls.
  • Access: Nearest T: Kenmore (Green Line B/C/D), 5-minute walk. Limited street parking; paid lots nearby on Landsdowne St and Brookline Ave. Jersey Street exterior is a public sidewalk, free to access anytime. Stadium tours available year-round (purchase at FenwayPark.com); game tickets required to enter the park.
  • Difficulty: easy
  • Recommended settings: Game Night Exterior: f/4, 1/125 sec, ISO 1600, 24mm  ·  Morning Architecture: f/8, 1/250 sec, ISO 200, 35mm  ·  Golden Hour Brick: f/7.1, 1/400 sec, ISO 200, 50mm  ·  Fan Crowd Blue Hour: f/4, 1/60 sec, ISO 3200, 24mm

Shots to chase:

  • Classic wide-angle of the brick facade and Fenway Park sign on Jersey Street with fans streaming past on a game night
  • Telephoto compression of the top of the Green Monster visible above the stadium roof line from Lansdowne Street
  • Detail shot of the vintage red-letter ‘Fenway Park’ marquee sign against deep blue sky
  • Long exposure of game-night street crowds on Jersey Street with neon light trails
  • Architectural study of the original 1912 brick arches and windows on the Van Ness Street side

Pro tip: Game nights two hours before first pitch are the highest-energy exterior scenes—fans, vendors, live music, and all the stadium lights create an electric atmosphere. For clean architecture shots without crowds, visit on a Tuesday or Wednesday morning in the off-season.

Common mistake to avoid: Shooting only from directly in front of the main gate misses the richer textures on the Lansdowne Street side where the Green Monster wall rises above the stadium. Avoid midday in summer—the Jersey Street side is fully shaded and flat in quality.

Want this in your pocket on the street?
The full-resolution version of every spot above — with full-page hero photography, GPS maps with gold location pins, sun direction diagrams, multi-season tables, and a complete safety + packing checklist — is inside the Boston Ultimate Photographer’s Guide PDF ($47). Print it, save it offline, take it on the walk. Get the guide →

5. Faneuil Hall & Quincy Market

Faneuil Hall & Quincy Market Boston photography sampleSave
Faneuil Hall & Quincy Market — cinematic reference from the Boston Photographer’s Guide PDF

The ensemble of Faneuil Hall (1742, expanded 1805) and the Greek Revival Quincy Market (1826) anchors Boston’s waterfront history—the combination of the brick hall with its iconic grasshopper weathervane, the granite market colonnades, and the always-animated marketplace creates a scene that layers Revolutionary-era architecture against contemporary street life.

  • GPS: 42.3602, -71.0549
  • Elevation: 20 ft
  • Best time of day: Blue hour (just after sunset) when granite facades reflect warm light from the market lanterns; early morning (before 8 AM) for crowd-free architectural shots
  • Sun direction: Quincy Market’s long axis runs east–west; the central rotunda faces south. Morning sun from the east illuminates the east portico and the Faneuil Hall weathervane nicely. Late-afternoon golden hour from the southwest lights up the granite colonnades on the south side. The cupola of Faneuil Hall catches first light at sunrise.
  • Access: Nearest T: Government Center (Green/Blue Lines) or Aquarium (Blue Line), both 3-minute walks. Parking at the Government Center Garage. Faneuil Hall exterior and the Quincy Market plaza are open 24/7, free. Faneuil Hall interior (NPS Visitor Center) is open 9 AM–5 PM daily, free.
  • Difficulty: easy
  • Recommended settings: Blue Hour Market: f/8, 8 sec, ISO 400, 16mm (tripod)  ·  Morning Architecture: f/9, 1/250 sec, ISO 200, 24mm  ·  Crowd Street Scene: f/5.6, 1/500 sec, ISO 400, 35mm  ·  Grasshopper Weathervane: f/7.1, 1/1000 sec, ISO 200, 200mm

Shots to chase:

  • Blue-hour wide angle from the south plaza looking north with the granite colonnades framing the Faneuil Hall brick tower
  • Telephoto detail of the copper grasshopper weathervane atop Faneuil Hall against a blue sky
  • Street-level perspective along the market colonnade with repeating Doric columns receding to a vanishing point
  • Lively daytime scene with street performers and crowds in the outdoor marketplace with both buildings in the background
  • Night reflection of market lantern light in the wet granite plaza after rain

Pro tip: The best single angle for including both Faneuil Hall and Quincy Market in one frame is from the south plaza, slightly offset to the west, using a 16–24mm lens. Blue hour gives the granite a warm, cinematic glow without harsh shadows. On rainy evenings the wet cobblestones double the lantern reflections.

Common mistake to avoid: Most photographers stand in the dead center of the plaza and shoot straight on—this creates a flat, symmetrical image with no depth. Use the colonnade as a leading line or foreground frame to add layers.

6. Copley Square – Trinity Church & John Hancock Tower

The juxtaposition of Henry Hobson Richardson’s 1877 Romanesque Trinity Church—all warm sandstone arches and squat towers—reflected in I.M. Pei’s 1976 blue-glass John Hancock Tower creates the defining architectural contrast image of Boston: 100 years of American architecture, old and new, occupying the same frame.

  • GPS: 42.35, -71.077
  • Elevation: 20 ft
  • Best time of day: Late afternoon golden hour (3–5 PM in autumn/winter); early morning for an empty plaza; overcast days for even light on the Romanesque stonework
  • Sun direction: Trinity Church’s main facade faces west-southwest. Late afternoon sun from the southwest illuminates the main entrance and towers in golden light. The Hancock Tower’s blue-glass skin mirrors the church; the best reflection angle is from the southeast corner of the plaza. Morning light hits the north side only.
  • Access: Nearest T: Copley (Green Line B/C/D), immediately adjacent. Copley Place parking garage on Huntington Ave. Plaza is a public open space, open 24/7, free. Trinity Church interior tours available Mon–Sat 10 AM–5 PM; $10 suggested donation.
  • Difficulty: easy
  • Recommended settings: Hancock Reflection Afternoon: f/8, 1/400 sec, ISO 200, 24mm  ·  Church Facade Golden Hour: f/7.1, 1/500 sec, ISO 200, 35mm  ·  Interior Stained Glass: f/4, 1/60 sec, ISO 1600, 24mm  ·  Plaza Blue Hour: f/9, 10 sec, ISO 200, 16mm (tripod)

Shots to chase:

  • Classic: Trinity Church fully reflected in the mirrored blue-glass skin of the Hancock Tower from the southeast corner of the plaza
  • Low-angle wide shot of the church’s Boylston Street facade with the tower looming behind at golden hour
  • Interior shot of the chancel with John LaFarge’s saturated stained-glass windows in afternoon light
  • Long-exposure blue-hour image with the plaza fountain in the foreground and both buildings lit
  • Geometric detail of the Hancock Tower’s grid of blue glass panels with the church’s stone tracery reflected in them

Pro tip: The reflection of Trinity Church in the Hancock Tower is sharpest from the southeast corner of the plaza (facing northwest), roughly 30 yards east of the church’s main door. For exterior stonework, 3–4 PM in October–November offers ideal warm light without harsh shadows. Tripod use is unrestricted on the public plaza.

Common mistake to avoid: Shooting in the summer midday results in flat glare on the Hancock glass and deep shadows on the church’s recessed arches. The reflection shot only works from a specific narrow range—moving too far south or north loses the alignment.

7. Old North Church

Built in 1723, Old North Church (Christ Church in the City of Boston) is Boston’s oldest surviving church and the site where two lanterns were hung in the steeple on April 18, 1775, to warn Paul Revere of British troop movements. The 191-foot white steeple punctuates the North End roofline and is instantly recognizable from blocks away.

  • GPS: 42.3664, -71.0544
  • Elevation: 36 ft
  • Best time of day: Morning (8–10 AM) when the white steeple is front-lit from the east; blue hour for steeple silhouette; autumn afternoon for warm brick tones on the North End streets
  • Sun direction: The church faces roughly south-southwest on Salem Street. Morning sun from the southeast lights the steeple and southern facade well. Afternoon sun from the west backlights the steeple dramatically; use this for silhouette shots. The narrow North End streets keep the facade in shade from midday onward due to surrounding buildings.
  • Access: Nearest T: Haymarket (Green/Orange Lines), then a 10-minute walk through the North End. Street parking is extremely limited in the North End; best to walk from downtown or use the Haymarket garage. Church exterior is always visible from Salem Street, free. Interior museum admission: $8 adults; open daily 10 AM–5 PM (closed January).
  • Difficulty: easy
  • Recommended settings: Morning Steeple Frontlit: f/8, 1/500 sec, ISO 200, 35mm  ·  Steeple Silhouette Blue Hour: f/11, 30 sec, ISO 200, 50mm (tripod)  ·  Narrow Street Context: f/5.6, 1/250 sec, ISO 400, 24mm  ·  Interior Box Pews: f/4, 1/60 sec, ISO 3200, 24mm

Shots to chase:

  • Classic view down Salem Street with the white steeple rising above the red-brick North End rowhouses
  • Bug’s-eye upward-looking shot from directly below the steeple emphasizing its 191-foot height
  • Blue-hour silhouette of the steeple against deep-blue sky with the last traces of orange at the horizon
  • Interior: the white box pews and columns in natural window light with no artificial fill
  • Detail shot of the original 1744 change-ringing bells in the belfry (visible on tours)

Pro tip: Arrive at 8–9 AM to catch the steeple fully illuminated before the surrounding buildings shade it. A 50mm or 85mm focal length from one block south on Salem Street gives ideal compression to show the steeple rising above the North End streetscape. Lying flat on the sidewalk directly below the steeple produces a dramatic upward perspective with strong geometric distortion.

Common mistake to avoid: Standing directly across the street from the entrance gives a flat, tourist-snapshot result. The steeple is the subject—use the surrounding narrow street and brick buildings as framing elements rather than standing in the open churchyard.

8. Boston Public Library – McKim Building

Charles Follen McKim’s 1895 Italian Renaissance palazzo is one of the finest examples of 19th-century American public architecture—the Bates Hall reading room (218 feet long, barrel-vaulted ceiling) rivals the great European reading rooms, while the arcaded inner courtyard with its central fountain, inspired by the Palazzo della Cancelleria in Rome, provides a serene Mediterranean space in the middle of Boston.

  • GPS: 42.3494, -71.0784
  • Elevation: 20 ft
  • Best time of day: Interior: midday for maximum natural light through Bates Hall’s barrel vault windows; exterior: early morning or golden hour for clean Boylston Street facade shots
  • Sun direction: The McKim Building’s Boylston Street entrance faces north. The facade is never in direct sun (north-facing), making it excellent for flat, even exterior light all day. The interior courtyard is open to the sky and receives excellent mid-afternoon light from the south; the Bates Hall reading room’s large arched windows face north, bathing it in even, cool light ideal for interior photography.
  • Access: Nearest T: Copley (Green Line), one-block walk. Copley Place parking garage on Huntington. Library open Mon–Thu 9 AM–8 PM, Fri–Sat 9 AM–5 PM, Sun 1–5 PM. Free admission. Interior photography allowed without tripod or flash in public spaces.
  • Difficulty: easy
  • Recommended settings: Bates Hall Reading Room: f/4, 1/60 sec, ISO 1600, 16mm  ·  Courtyard Midday: f/8, 1/250 sec, ISO 400, 24mm  ·  Boylston Facade Morning: f/8, 1/500 sec, ISO 200, 24mm  ·  Staircase Abbey Murals: f/4, 1/30 sec, ISO 3200, 24mm

Shots to chase:

  • Wide-angle view down the length of Bates Hall with long oak reading tables receding to a vanishing point under the vaulted ceiling
  • The interior courtyard fountain from the second-floor arcade, with columns framing the open sky above
  • John Singer Sargent’s ‘Triumph of Religion’ murals in the third-floor Sargent Hall under available light
  • Boylston Street facade at dawn with the inscription ‘FREE TO ALL’ above the arched entrance
  • Grand staircase with Puvis de Chavannes mural panels and lion sculptures at the base

Pro tip: Bates Hall is one of Boston’s great interior photography spaces—handhold at ISO 1600–3200 or use a monopod (tripods are not allowed). Visit on a weekday morning when the reading room is sparsely occupied for unobstructed aisle shots. The courtyard is only open during library hours and is best in mid-afternoon (2–4 PM) when sun drops into the open central sky.

Common mistake to avoid: Many photographers shoot Bates Hall from the entrance looking straight down the center—this works but the off-axis view from either side aisle, emphasizing the barrel vault curves and lit reading lamp rows, is more dynamic.

Want this in your pocket on the street?
The full-resolution version of every spot above — with full-page hero photography, GPS maps with gold location pins, sun direction diagrams, multi-season tables, and a complete safety + packing checklist — is inside the Boston Ultimate Photographer’s Guide PDF ($47). Print it, save it offline, take it on the walk. Get the guide →

9. Charles River Esplanade – Hatch Shell Skyline View

Charles River Esplanade – Hatch Shell Skyline View Boston photography sampleSave
Charles River Esplanade – Hatch Shell Skyline View — cinematic reference from the Boston Photographer’s Guide PDF

The Esplanade offers the most iconic Boston skyline photograph—the soaring John Hancock Tower and Prudential Center rise above the Charles River Basin with sailboats and the Longfellow Bridge in the foreground. It is the shot that defines Boston’s visual identity and is impossible to replicate from any other angle.

  • GPS: 42.3599, -71.0857
  • Elevation: 10 ft
  • Best time of day: Sunrise and blue hour; the Back Bay skyline faces southeast so sunrise light illuminates the Hancock and Prudential towers beautifully; blue hour after sunset is world-class from the dock area near the Hatch Shell
  • Sun direction: Shooting from the Esplanade south bank, the view looks southeast across the Charles River toward Back Bay. This orientation means sunrise (from the east-southeast) is the prime time—the towers glow in golden-pink light before noon shadows build. Blue hour after sunset is equally spectacular when the towers are lit. Midday light comes from behind the camera and flattens the skyline.
  • Access: Nearest T: Charles/MGH (Red Line), then a short walk across the footbridge to the Esplanade. Free parking along Storrow Drive is extremely limited; most visitors arrive by T or bicycle. Esplanade is a public park open sunrise to midnight, free.
  • Difficulty: easy
  • Recommended settings: Sunrise Skyline: f/8, 1/250 sec, ISO 200, 24mm  ·  Blue Hour Reflections: f/8, 20 sec, ISO 200, 24mm (tripod)  ·  Sailboats Telephoto: f/7.1, 1/500 sec, ISO 200, 150mm  ·  Longfellow Bridge Night: f/8, 25 sec, ISO 400, 35mm (tripod)

Shots to chase:

  • Classic blue-hour skyline from the dock near the Hatch Shell with glass-calm Charles River reflecting the Hancock and Prudential towers
  • Sunrise shot with the first warm light catching the top of the Hancock Tower against deep blue pre-dawn sky
  • Sailboats on the Charles with the Back Bay skyline behind them on a clear summer afternoon
  • Long exposure from the Longfellow Bridge footpath (5-minute walk) with light trails from passing traffic and the lit skyline
  • Autumn foliage framing: shoot from the wooded Esplanade path with maples in peak color framing the skyline view

Pro tip: The optimal spot for the classic reflection shot is from the small dock area just west of the Hatch Shell—the calm water here is most protected from the river current. Bring a tripod for blue-hour work; Storrow Drive traffic vibrations are minimal at this location. Summer sunrises (5:15 AM) reward early risers with an almost empty park.

Common mistake to avoid: Shooting in harsh midday light washes out the skyline’s tonal contrast. Waiting too long after blue hour results in a completely black sky with no gradient; the ideal 15–25 minute window after sunset is brief and must be anticipated.

10. Harvard Yard, Cambridge

Harvard Yard is the oldest university yard in America (1636) and its dense concentration of 17th–19th century brick buildings, ancient elm trees, and the John Harvard Statue create an archetypal image of American academic life. In October, the Yard’s canopy of elms and maples turns flame-red and orange, making it one of New England’s most photographed spaces.

  • GPS: 42.3747, -71.1172
  • Elevation: 40 ft
  • Best time of day: Autumn (mid-October) at golden hour for peak foliage; early morning for empty lawns and low-raking light on the brick facades; spring for cherry blossoms near the Yard perimeter
  • Sun direction: Harvard Yard is oriented with Widener Library’s facade facing south. The John Harvard Statue faces north-northwest, so morning light from the east illuminates his face. Golden hour in late afternoon bathes the red-brick buildings on the west side of the Yard in warm light. University Hall’s white granite catches sunset glow beautifully.
  • Access: Nearest T: Harvard (Red Line), 5-minute walk through Harvard Square. Limited metered street parking; University lot parking on weekends. Harvard Yard is open to the public daily; the perimeter gates close at night. Free access. Some building interiors (Widener Library) require Harvard ID.
  • Difficulty: easy
  • Recommended settings: Autumn Foliage Yard: f/8, 1/250 sec, ISO 200, 35mm  ·  John Harvard Statue: f/5.6, 1/500 sec, ISO 200, 85mm  ·  Widener Library Facade: f/9, 1/400 sec, ISO 200, 24mm  ·  Morning Mist Lawn: f/5.6, 1/125 sec, ISO 400, 50mm

Shots to chase:

  • John Harvard Statue with autumn foliage framing and University Hall’s white facade in the background
  • Long shot of Widener Library’s broad Corinthian colonnade with a scattering of students on the steps
  • Golden-hour side light raking across the red-brick facade and white trim of Holden Chapel (1744)
  • Upward-looking view of elm canopy arching over the central path in peak autumn color
  • Early morning fog scene with the Yard’s gas-lamp-style lanterns still glowing and empty paths

Pro tip: Mid-October (typically around the 15th–20th) is the peak for Harvard Yard foliage; the elm and maple canopy turns simultaneously. Early mornings on weekdays are the least crowded times—tourist groups typically arrive after 10 AM. A 35mm lens balances the foreground greenery with the building facades.

Common mistake to avoid: The John Harvard Statue is always crowded with tourists touching his foot for luck—shoot from a low angle (knee height) with a wide lens to include the statue and minimize people in the background. Shooting Widener Library at midday with the sun directly overhead creates flat, low-contrast results on its white columns.

11. View Boston Observatory – Prudential Tower

View Boston (opened June 2023 as the successor to the Skywalk Observatory) occupies three floors of the Prudential Tower at approximately 750 feet above ground, offering Boston’s only publicly accessible 360° aerial perspective. The combination of harbor islands to the east, Back Bay and Cambridge to the west, and the full city grid below is unmatched by any other vantage point in New England.

  • GPS: 42.3472, -71.0825
  • Elevation: 750 ft
  • Best time of day: Blue hour and night (30 minutes after sunset through 10 PM) when city lights are vivid and the sky retains color; sunset arrival (30 minutes before) to capture the color transition
  • Sun direction: View Boston offers 360° coverage from the 50th–52nd floors, so any sun direction is addressable by rotating around the deck. The southeast-facing windows offer sunrise shots of the harbor and Logan Airport. The northwest-facing windows capture Back Bay and the Charles River at sunset. Midday brings glare on the windows—bring a dark cloth to press against the glass.
  • Access: Entrance inside Prudential Center Mall near center court at 800 Boylston Street. Nearest T: Prudential (Green Line E). Validated parking at Prudential Center garage. Hours: Daily 10 AM–10 PM (last entry 9:15 PM). Tickets: adults from $30 (purchase online in advance to avoid sold-out waits). Tripods are NOT permitted; monopods may be allowed with staff permission.
  • Difficulty: easy
  • Recommended settings: Blue Hour Cityscape: f/5.6, 1/30 sec, ISO 3200, 24mm (brace against glass)  ·  Night City Lights: f/4, 1/15 sec, ISO 6400, 24mm  ·  Sunset Color Transition: f/8, 1/250 sec, ISO 400, 24mm  ·  Telephoto Landmark Detail: f/5.6, 1/500 sec, ISO 800, 100mm

Shots to chase:

  • Blue-hour aerial panorama looking southeast toward Boston Harbor and the Boston Harbor Islands
  • City-lights night shot looking west over Back Bay with the Charles River and Cambridge beyond
  • Telephoto compression of the MIT dome and Cambridge riverfront from the northwest-facing windows
  • Abstract overhead shot looking straight down at the geometric grid of streets and buildings
  • Sunset sequence from the west-facing windows: color transition through orange, pink, and purple over the river

Pro tip: Wear a dark shirt and press your lens against the glass to eliminate window reflections—a must at night. Arrive 30–45 minutes before sunset to secure a west-facing window position. A wide-angle 16–24mm lens captures the largest sweep; telephoto for picking out landmarks like Fenway Park or the State House dome from above.

Common mistake to avoid: Shooting midday results in heavy glare and washed-out colors on the glass panels. Many visitors over-expose trying to capture both interior light and exterior; use spot metering on the exterior sky. Without pressing the lens to glass, ghost reflections of interior lighting ruin every night shot.

12. Castle Island & Pleasure Bay

Castle Island is a 22-acre harbor peninsula anchored by the star-shaped granite Fort Independence (1851) with sweeping views of Boston Harbor, the city skyline to the northwest, Logan Airport flight paths, and open ocean to the south. The circular Pleasure Bay causeway gives photographers a 360° coastal vantage point rarely found so close to a major city center.

  • GPS: 42.3376, -71.0106
  • Elevation: 15 ft
  • Best time of day: Sunrise (facing west-northwest toward the city skyline from the harbor); golden hour at sunset for the harbor and Fort Independence; blue hour for long-exposure water shots
  • Sun direction: Castle Island sits in Boston Harbor with views north-northwest to the city skyline and south-southeast to the open Atlantic. Sunrise from the east-southeast lights up the harbor and Fort Independence’s granite walls. The city skyline to the northwest is best in pre-dawn blue light and sunset when the towers catch warm western glow. The circular Pleasure Bay causeway walk faces all directions for versatile shooting.
  • Access: Address: 2010 Day Blvd, South Boston, MA 02127. By MBTA: Bus #9 from Copley to City Point (about 20 min), then a short walk. Free parking in the large lot near Fort Independence (Dawn to Dusk). Park hours: sunrise to sunset. No admission fee.
  • Difficulty: easy
  • Recommended settings: Sunrise Harbor Fort: f/8, 1/250 sec, ISO 200, 24mm  ·  Blue Hour Cityscape: f/9, 30 sec, ISO 200, 24mm (tripod)  ·  Aircraft Landings Telephoto: f/7.1, 1/2000 sec, ISO 400, 300mm  ·  Long Exposure Harbor: f/11, 120 sec, ISO 100, 24mm (tripod, ND filter)

Shots to chase:

  • Pre-dawn blue-hour long exposure of the Pleasure Bay causeway walkway with the city skyline glowing on the horizon to the northwest
  • Sunrise shot of Fort Independence granite battlements lit in orange-pink light against the harbor
  • Telephoto compression of aircraft on approach to Logan Airport with the city skyline as backdrop
  • Circular Pleasure Bay from the causeway with a 5-stop ND filter for a silky-smooth water long exposure
  • Panoramic harbor view from the northeast tip of the island showing Boston Harbor Islands in the mid-distance

Pro tip: The single best long-exposure spot is from the circular causeway walkway on the south side of Pleasure Bay, where the calm enclosed water produces glass-like reflections. Arrive 20 minutes before sunrise to set up—parking is easy and free at this hour. An ND filter (6–10 stop) in the middle of the day turns the harbor water milky-smooth and eliminates passing boat traffic.

Common mistake to avoid: Many photographers stand only at the fort itself and miss the broader harbor composition available from the northern tip of the causeway. Midday shots without an ND filter result in harsh, choppy water with no tonal interest.

When to photograph Boston: a year-round breakdown

Boston is photogenic every month of the year — but the conditions differ radically by season. Here is what to expect:

Spring (April–May, cherry blossoms and tulips in Public Garden), Autumn (October, peak foliage in Beacon Hill and Cambridge)

Photographer safety in Boston: read this

City photography has its own risks: gear visibility, neighborhood timing, traffic, weather. Read the briefing before you go.

  • Gear visibility: Use a discreet bag with no obvious camera branding. Keep a body strapped under a jacket on transit.
  • Neighborhood timing: Pre-dawn and post-sunset shoots reward early scouting. Cross-reference each location with current local guidance and choose well-lit transit routes.
  • Situational awareness: Headphones out. One eye in the viewfinder, one on the street.
  • Traffic: Bridges, medians, and bike lanes are not setup zones. Shoot from sidewalks and pedestrian areas only.
  • Weather: Summer storms move quickly; winter cold drains batteries. Layer up, keep gear dry, watch for ice on cobblestones at blue hour.

The complete safety briefing is inside the Boston Photographer’s Guide PDF.

Take this guide into the city

This post is the complete field reference. The Boston Ultimate Photographer’s Guide PDF is the field-deployable version: full-page resolution hero photography, GPS maps with gold pins for every location, multi-season shooting calendars, gear notes per location, sun-angle diagrams, the full city safety briefing, and a print-ready editorial layout in Framehaus black and gold. Save it offline. Print it. Take it on the walk.

Boston Ultimate Photographer’s Guide
Downloadable PDF · 12 GPS-mapped locations · Multi-season calendar · City safety briefing · Packing checklist

Get the Boston guide — $47

Combo Deal

Get the Boston Guide + Preset Pack

Photograph it. Edit it. Done.

$66
$54
Save $12
PDF Guide Every spot, GPS, golden hour
Preset Pack 20 Lightroom presets
Book your tours & experiences in Boston

All links go to Viator (a TripAdvisor company), the world’s largest marketplace for guided experiences. Tagged as affiliate per FTC.

Also on Amazon: gear that helps with this technique

Quick Amazon shortcuts to the gear most useful for this kind of shot. Use them if Prime shipping or Amazon credit makes more sense than B&H. As an Amazon Associate ShutYourAperture earns from qualifying purchases.

Take Boston home in your pocket.

Every shot location, every angle, every time of day worth shooting. Printable PDF + GPS-tagged map.

Instant download. Works on phone, tablet, and printed.

Continue reading

← Back to U.S. Cities Photography Guides

Related guides nearby

Three more photography guides within striking distance — perfect for combining into one trip.

Browse all 78 guides → · Open the map

Save your trip-planning hours

The complete Boston guide is $47

All vantage points above + 5 bonus secret spots, printable map, gear pack list, and editing recipes. One-time payment, instant download, lifetime updates.

Buy Boston PDF →

Common questions about the Boston guide

Is the Boston photography guide worth $47?

For most photographers, yes. The guide saves 8-12 hours of trip-planning research and prevents the most common mistake of Boston photography: shooting at the wrong time of day. If a single better frame is worth $47 to you, the guide pays for itself on day one. Buyers get every GPS coordinate, every golden-hour window, every cultural rule, and a printable shot list.

Does the Boston guide include GPS coordinates?

Yes — every vantage point in the guide has Google Maps-ready GPS coordinates so you can pin them before you fly. The guide also includes a printable map showing all locations clustered by walking distance, so you can build efficient half-day routes.

What's in the Boston PDF that isn't in this article?

The article shows the highlights. The PDF includes: 5 additional secret spots not published online, a 14-day itinerary with daily routes, the full camera-settings cheat sheet for every scenario in Boston, a printable gear packing list, post-processing recipes with screenshot examples, and a list of local guides we trust for portrait commissions.

Do I get the Lightroom presets too?

The $47 guide is the PDF only. The matching Boston preset pack is a separate $19 download — most buyers grab both as a bundle and save the editing time. Both are instant download, both work on Lightroom Classic and Lightroom Mobile.

Will the guide work for a Boston trip in 2026?

Yes. The guide is updated annually as fees, restrictions, and new vantage points change. All buyers get free lifetime updates. The 2026 edition includes the latest drone rules, museum photography policies, and seasonal light data for the year.

Get the Boston guide · $47