Best Photography Spots in Houston: 12 Locations With GPS
edinchavez01-20). Buying through these links costs you nothing extra and helps fund our free guides.
Houston, Texas is one of the most photogenic cities in the United States. If you have a camera and the patience to show up before dawn, Houston will give you images that last a career — but only if you know where and when to point it.
This is the definitive field guide to the 12 best photography spots in Houston, with GPS coordinates you can drop straight into Google Maps, exact camera settings tuned to Houston’s unique light, precise timing for every location, and the access notes nobody else bothers to document. It mirrors the intel inside our Houston Ultimate Photographer’s Guide ($47 PDF) — a downloadable field guide with full-page hero images, GPS maps, seasonal tables, a city safety briefing, and a complete photographer’s packing list. Get the guide →
Planning multi-city travel? See also: U.S. cities photography hub and the National Parks Photography Guides.
12 GPS-mapped locations · Exact camera settings · Multi-season shooting calendar · Free annual updates
Download the PDF guide →
Get the Houston Ultimate Photographer’s Guide
Every location below — pre-mapped with GPS, golden-hour timing, gear recommendations, cultural rules, and a 14-day itinerary. Downloaded by 200+ working photographers.
Quick jump to the 12 spots
- Eleanor Tinsley Park — Skyline Lawn
- Sabine Street Bridge — Sabine Promenade
- Gerald D. Hines Waterwall Park
- Rothko Chapel — Exterior and Broken Obelisk
- Buffalo Bayou Park Cistern
- Discovery Green — Lake and Skyline
- McGovern Centennial Gardens — Hermann Park
- James Turrell Twilight Epiphany Skyspace — Rice University
- Beer Can House — Visionary Folk Art
- Houston Heights — 19th Street Historic District
- Space Center Houston — Rocket Park (Saturn V Building)
- Glenwood Cemetery — Bayou Skyline Vista
A look inside the Houston Photographer’s Guide
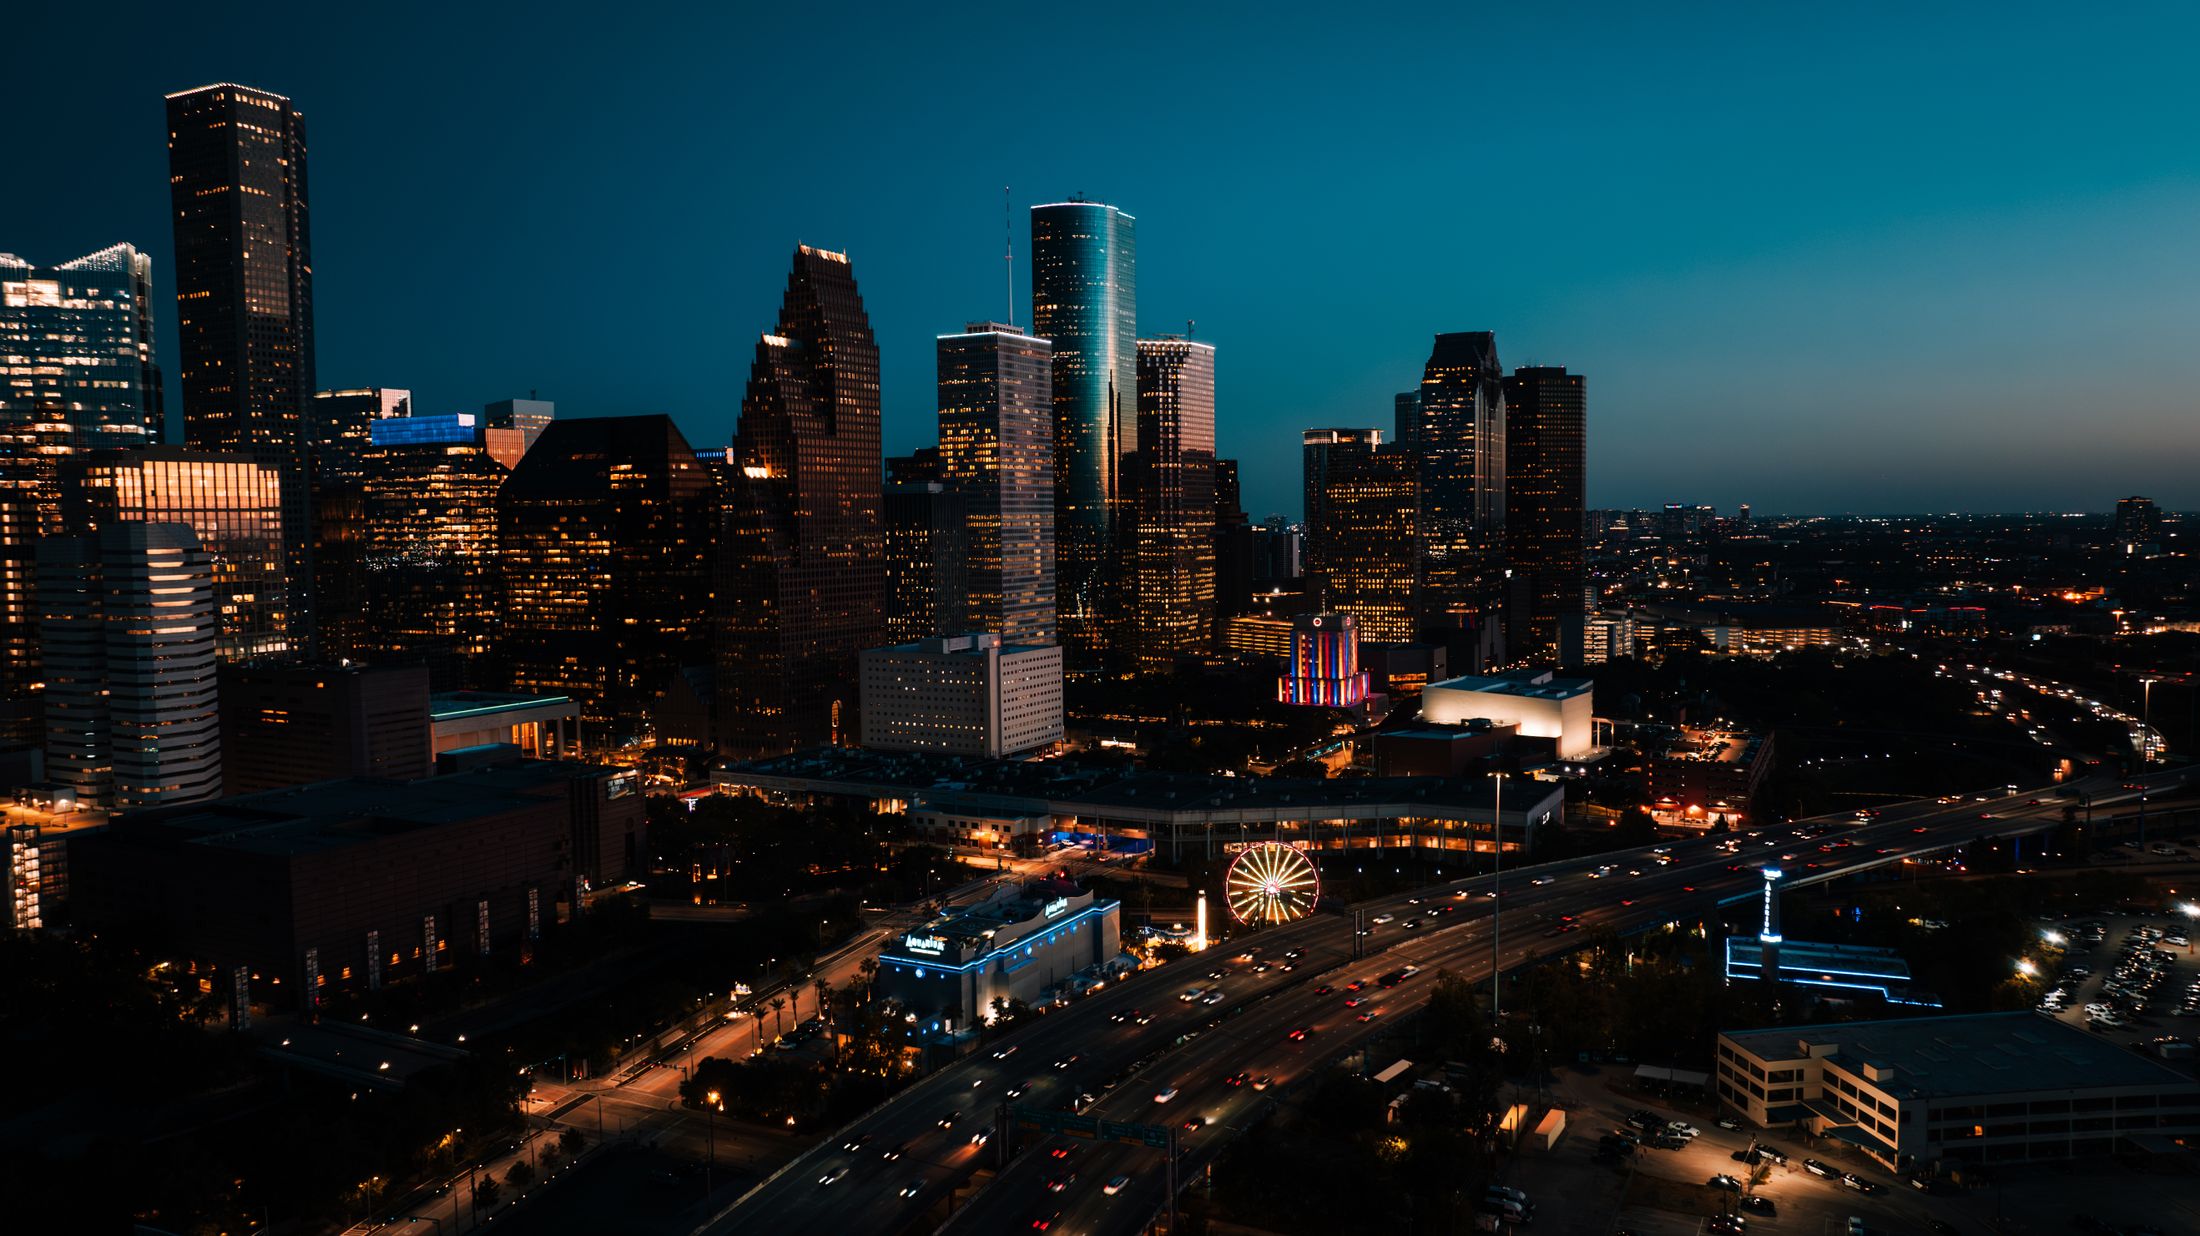
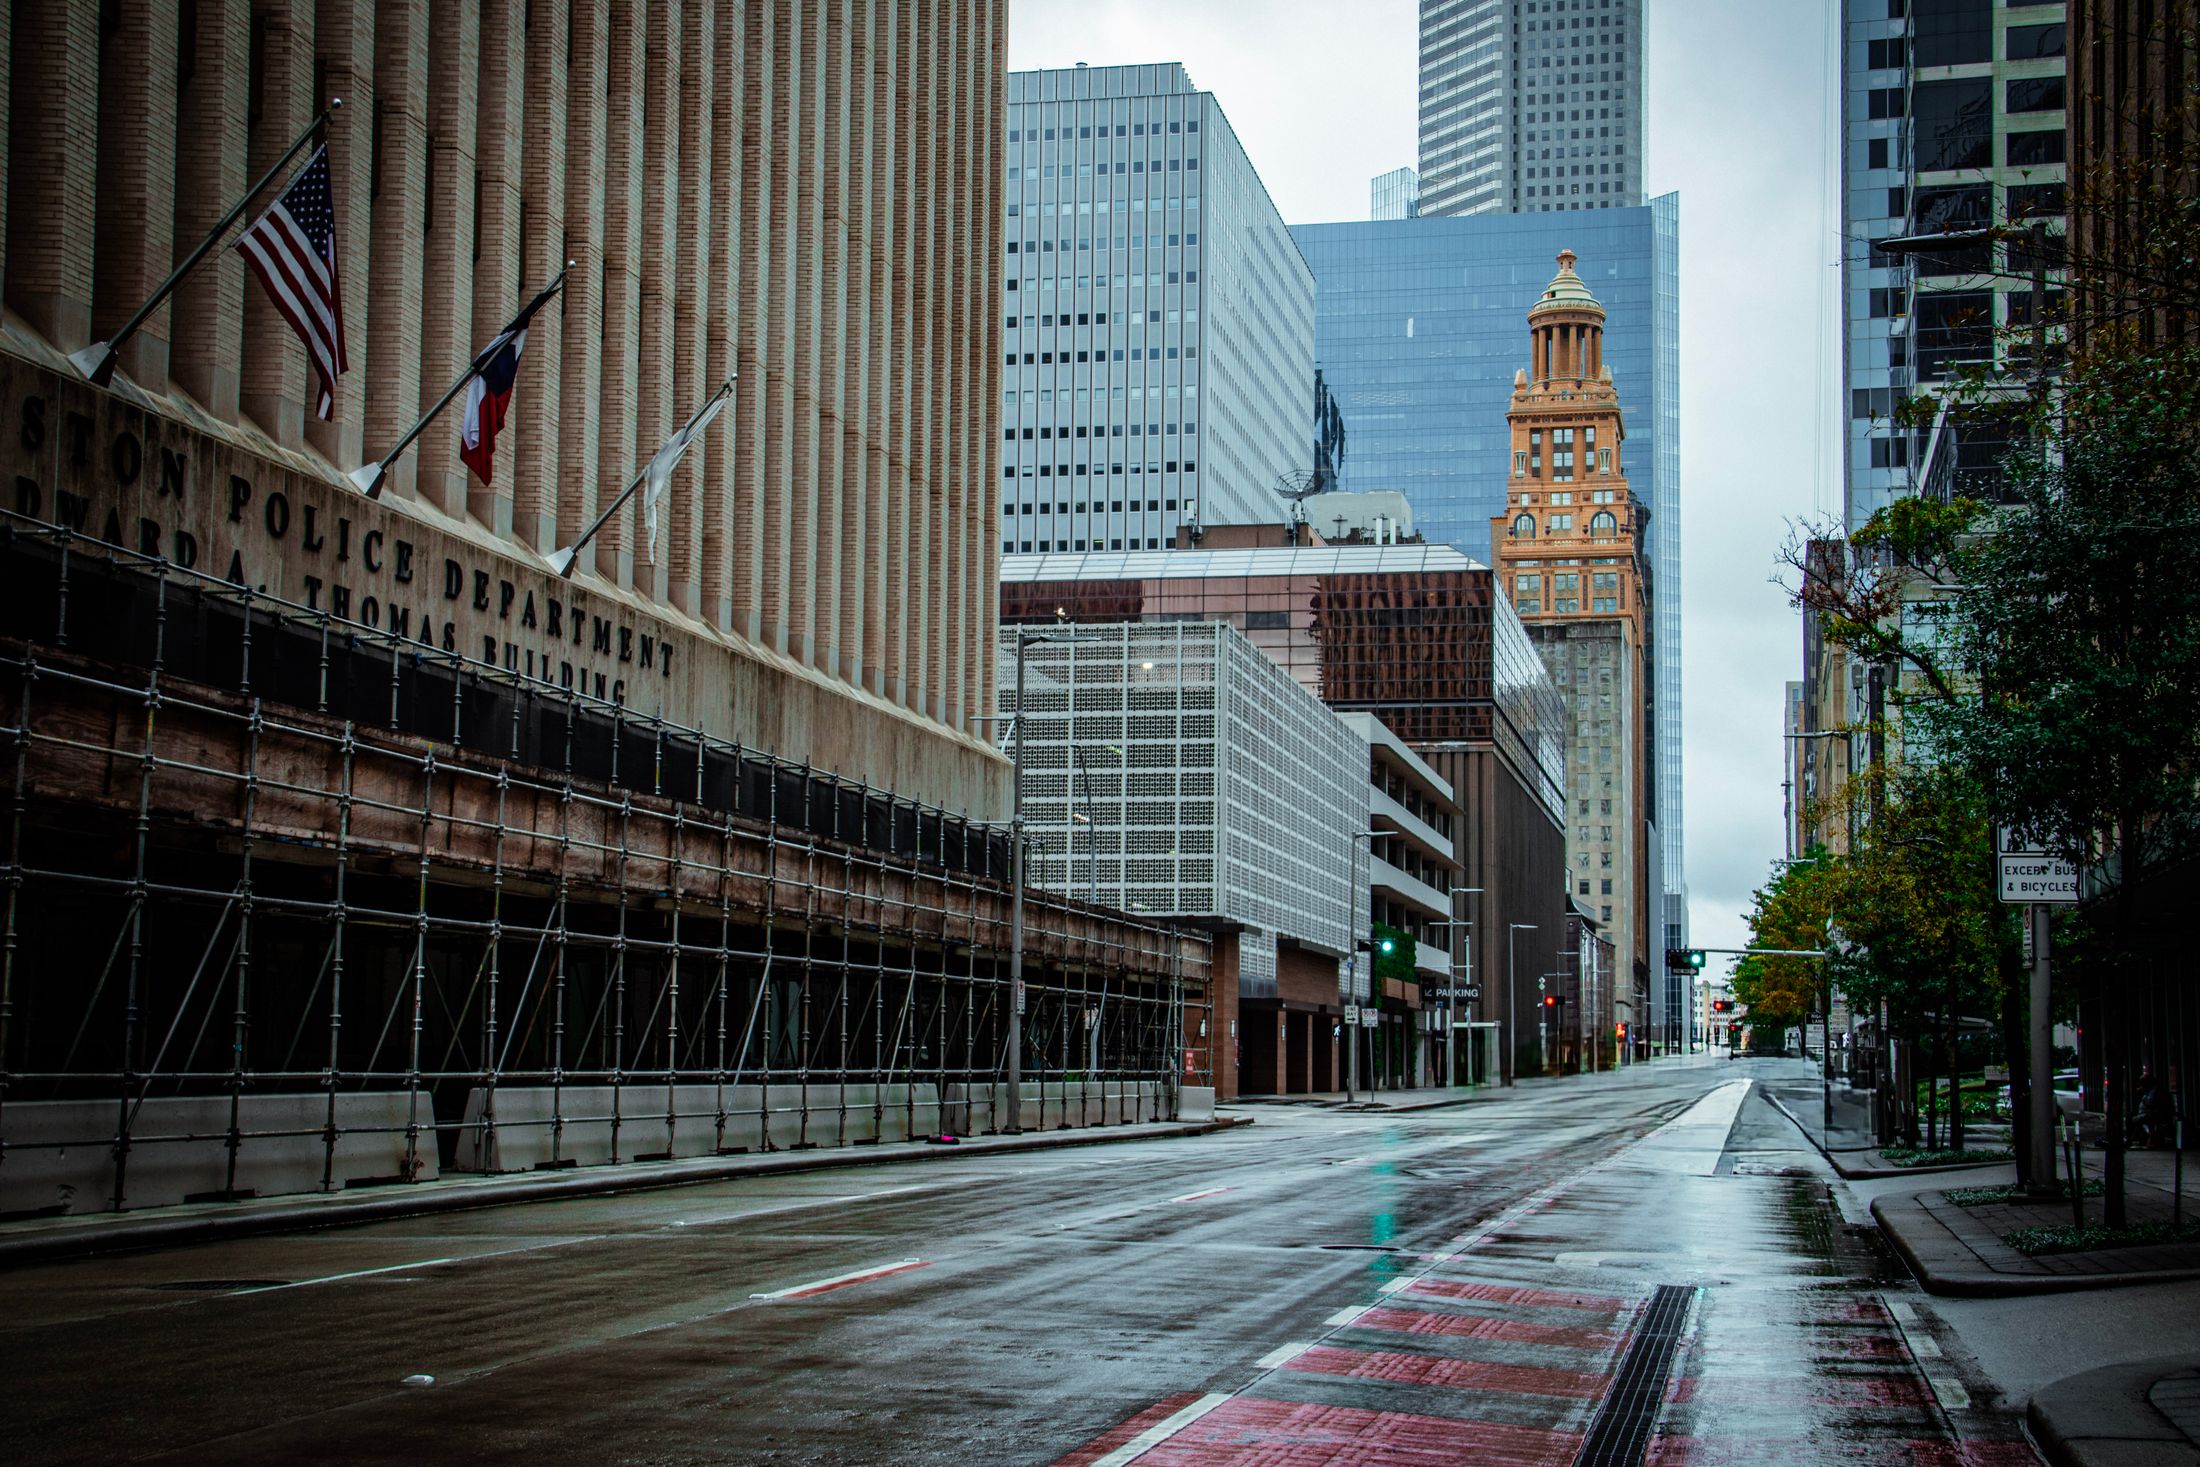
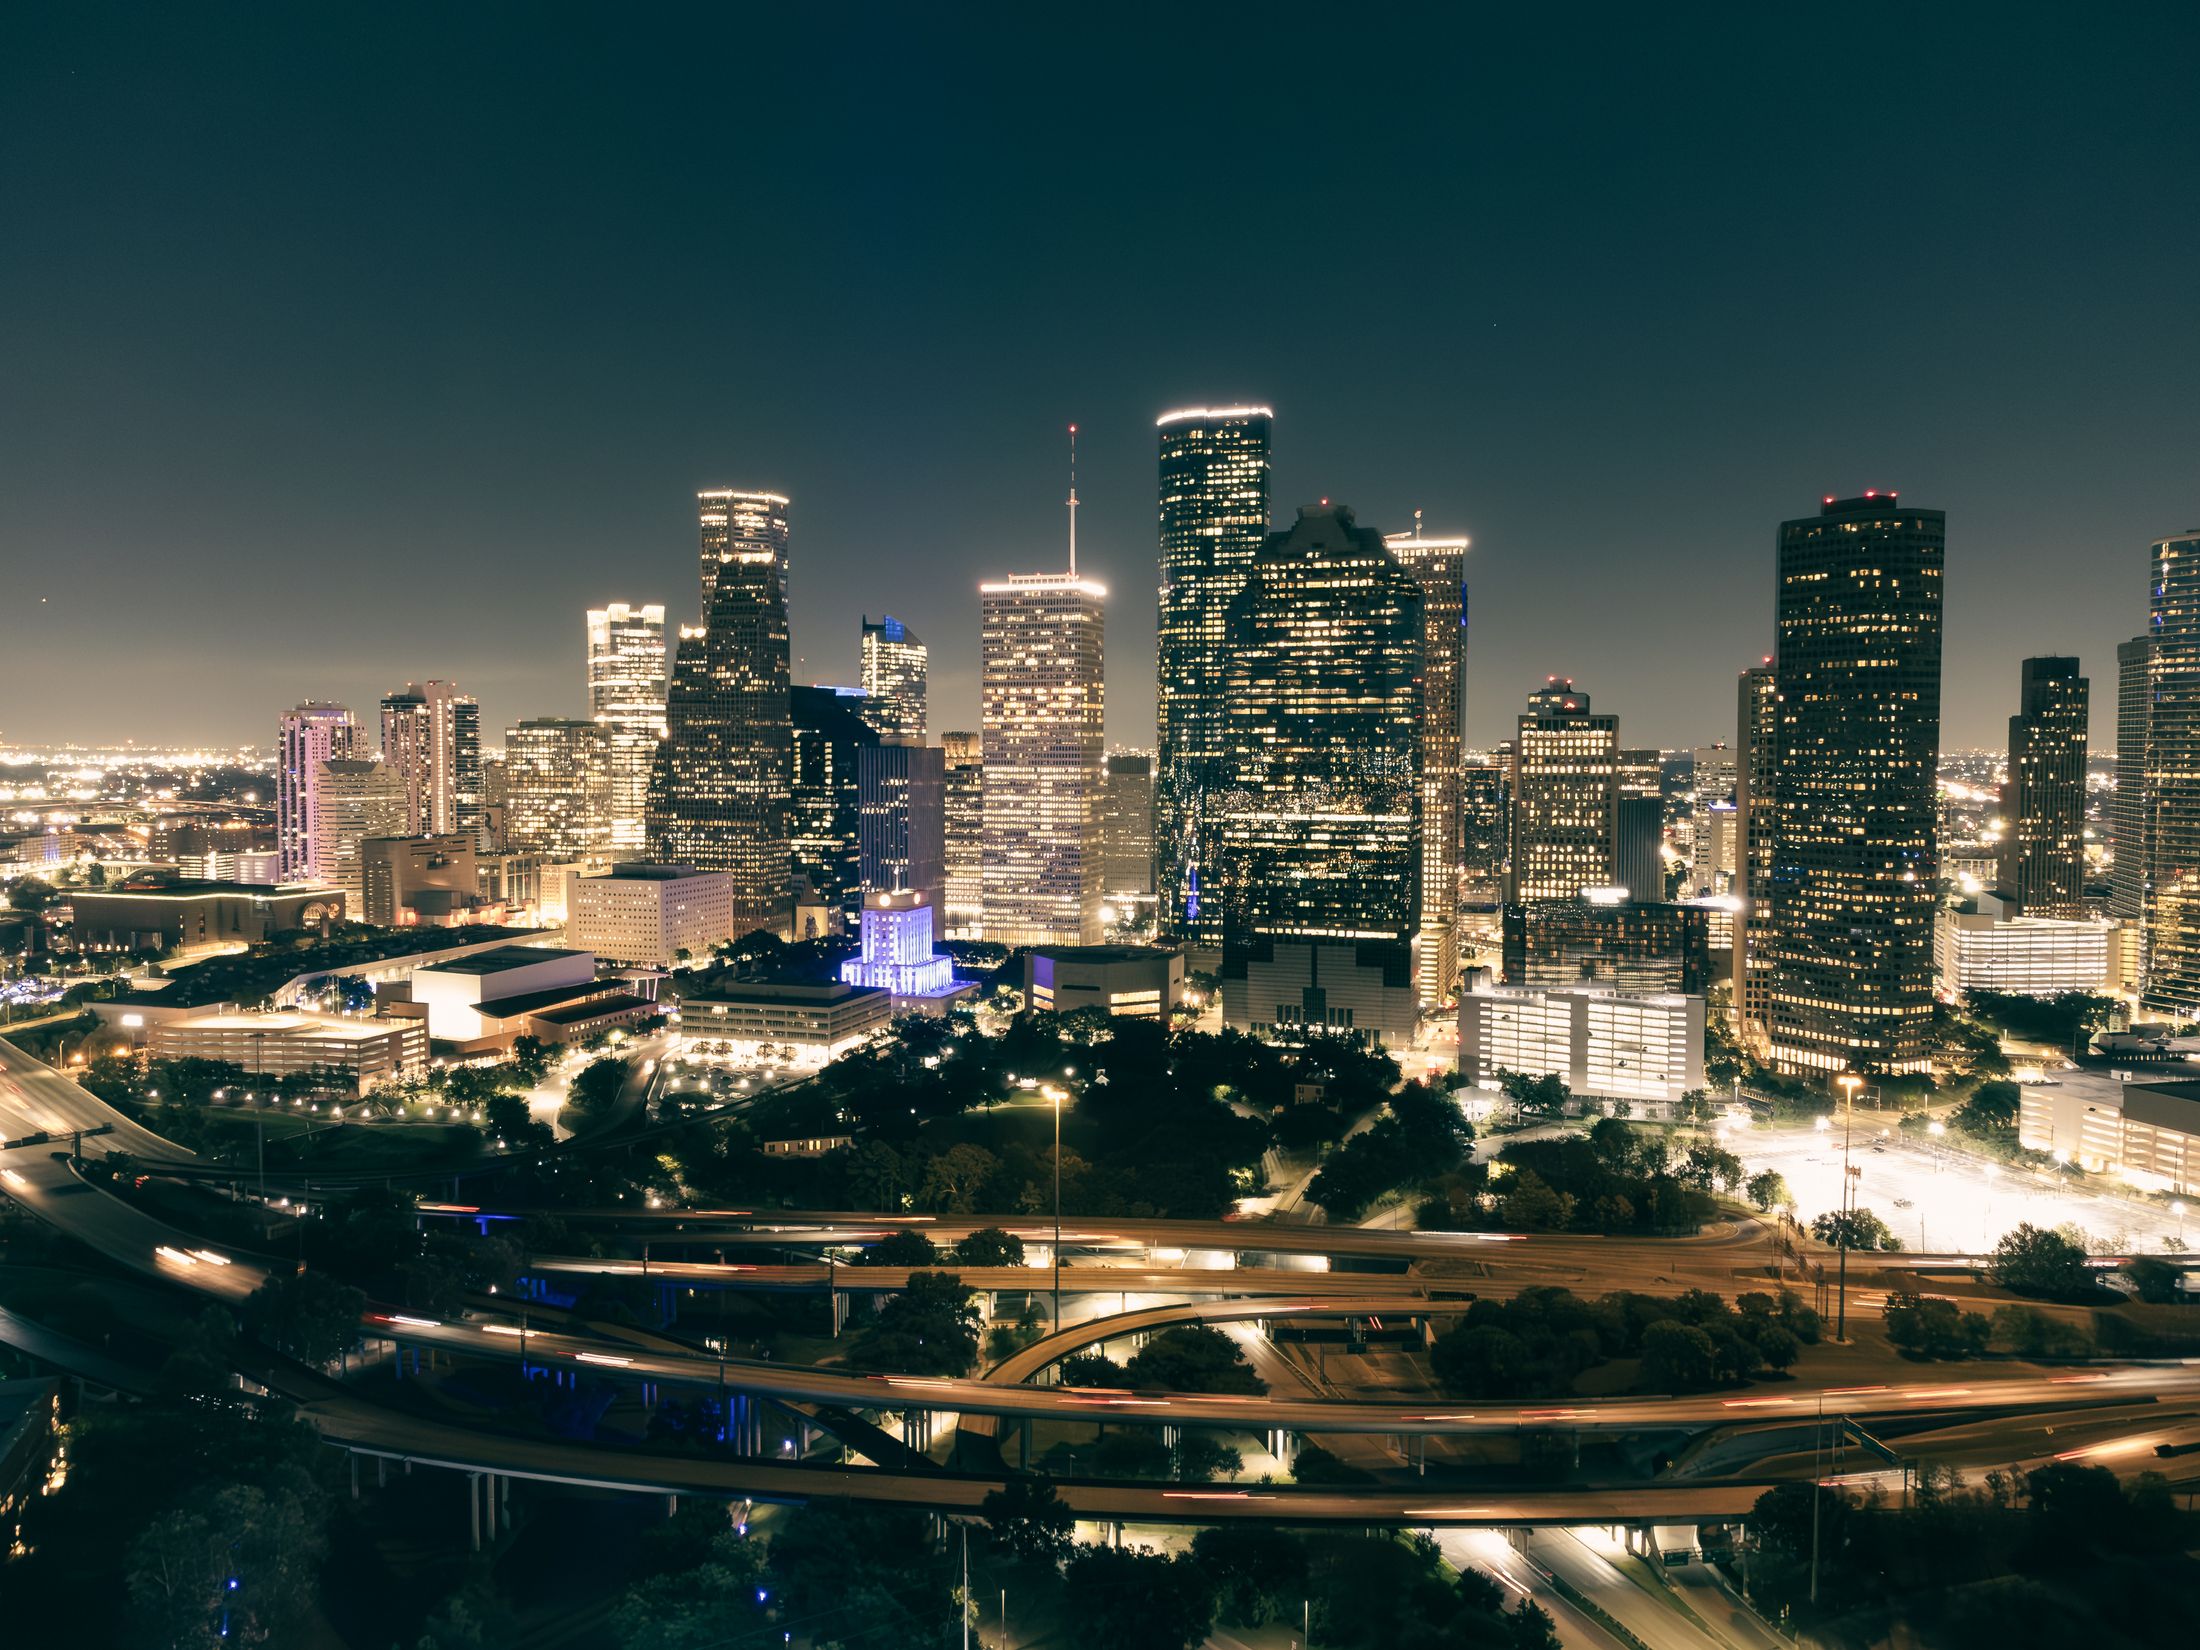
Here are three of the actual shots you’ll find inside the PDF — cinematic full-page references for the exact spots, lenses, and lighting conditions documented in the guide. The full guide includes 12 locations, each with a hero image, GPS map, settings table, and a five-shot list.
Save
Before you shoot Houston: the essentials
- Free public access: Eleanor Tinsley Park, Buffalo Bayou Park trails, Sabine Street Bridge and Sabine Promenade, Discovery Green (grounds), Mecom Fountain traffic circle, Rothko Chapel exterior and grounds, Beer Can House exterior (street view), Houston Heights 19th Street (public sidewalks), and all exterior views of Gerald D. Hines Waterwall Park are free to photograph publicly. Discovery Green charges $10/hour for individual commercial photographers. Hermann Park grounds are free; permits required for commercial use. Space Center Houston requires paid general admission ($29.95–$34.95 adults) to access the Rocket Park building.
- Commercial permits: Commercial photography on City of Houston Parks & Recreation property (including Hermann Park, Memorial Park, Eleanor Tinsley Park, and other COH parks) requires a photography permit; contact the Reservations Office at 832-394-8805 or submit the Photography/Filming Request Form to cantrell.daniel@houstontx.gov (form available at houstontx.gov/parks). City park permit fee is approximately $128.59. Buffalo Bayou Park (managed separately by the Buffalo Bayou Partnership): commercial and professional shoots require a Film and Photography Permit Application submitted to permits@buffalobayou.org; $50 application fee plus $250 for a 4-hour session plus a refundable deposit; proof of $1 million liability insurance required. Discovery Green: $10/hour for individual photographers or $140 for a team for up to 2 hours; submit an initial application to Discovery Green Conservancy. The Houston Film Commission (houstonfilmcommission.com, 713-853-8959, located at 701 Avenida de las Americas Ste. 200) assists with multi-location commercial productions and can coordinate park permits. Personal (non-commercial) photography at all these sites generally does not require a permit unless using professional setups that restrict public access or involve props/generators.
- Best photography seasons: Fall (mid-October–November) for bearable humidity, golden-hour warmth on bayou trails, and a rare palette of autumn color along Buffalo Bayou; Spring (late February–April) for blooming wildflowers, azaleas in Hermann Park, and soft-diffused morning light before summer haze builds; Winter (December–February) for clear low-humidity air that sharpens skyline definition and brings the best blue-hour contrast; Summer (June–August) for long golden hours and dramatic afternoon cumulonimbus storm cells building over downtown — iconic for dramatic sky compositions
- Blue hour notes: Blue hour in Houston is exceptional due to the sheer density and luminosity of the downtown skyline — a compact cluster of glass towers that glow intensely for 20–35 minutes after sunset. From Sabine Promenade and Eleanor Tinsley Park, the entire skyline reflects in the still waters of Buffalo Bayou, turning the bayou into a liquid mirror of blue and gold. Discovery Green’s lake turns cobalt and reflects the surrounding high-rises from the south bank, typically 15–25 minutes after sunset. The Hines Waterwall at dusk is transformed by its own garden lighting, with the 186-foot-wide crescent of cascading water backlighting the Williams Tower against the darkening sky. Houston’s blue hour window runs approximately 20–35 minutes after sunset and before sunrise year-round; in winter the window is tighter but the air clarity is dramatically sharper.
- Drone policy: Most major U.S. cities restrict drone flight in airspace and via local ordinances. Check FAA + city rules before launching.
- Local resource: Official visitor information
The full-resolution version of every map below — plus seasonal calendars, gear notes per location, sun-angle diagrams, and a complete photographer’s packing checklist — is inside the Houston Photographer’s Guide PDF ($47).
1. Eleanor Tinsley Park — Skyline Lawn
Eleanor Tinsley Park is universally regarded as Houston’s definitive skyline photography location — the ‘grandmomma of all downtown skyline shots,’ as Houstonia Magazine called it. The west-facing open lawn creates a clean unobstructed foreground of green grass and bayou water that contrasts dramatically with the dense vertical cluster of downtown’s glass towers. No other Houston viewpoint provides this combination of distance, elevation angle, and clean foreground. On still mornings and evenings, Buffalo Bayou becomes a perfect mirror, doubling the skyline in a reflection that turns the composition into a symmetrical abstract of light. The park is also the premier viewing location for Houston’s Fourth of July and New Year’s Eve fireworks, when pyrotechnics burst directly in front of the downtown towers — a unique multi-subject composition impossible to replicate anywhere else in the city.
- GPS: 29.7617, -95.3781
- Elevation: 45 ft
- Best time of day: Blue hour (primary) — 20–35 minutes after sunset; sunrise golden hour (secondary); winter mornings for maximum air clarity
- Sun direction: Eleanor Tinsley Park’s primary skyline-facing lawn looks roughly east-northeast toward downtown Houston. At sunrise, the sun rises to the east-southeast (azimuth ~80–100° in spring/fall), directly behind the skyline from the park’s perspective — creating a backlit silhouette of the towers with rim-lighting on their glass faces that ignites in gold and amber. This makes sunrise the ideal time for dramatic silhouette-and-glow compositions using the bayou water as a reflective foreground. At sunset, the sun sets to the west-northwest (behind the photographer standing in the park), delivering warm front-lighting directly onto the skyscraper facades — the glass curtain walls of buildings like JPMorgan Chase Tower and 600 Travis turn from silver to amber to deep orange. Blue hour (20–35 minutes after sunset) is when the park reaches its photographic peak: building lights activate, the cobalt sky deepens, and the still bayou becomes a mirror of the illuminated skyline.
- Access: 500 Allen Parkway, Houston, TX 77002. The park is part of Buffalo Bayou Park and is freely accessible daily; lighted areas open 6 PM–11 PM, other areas dawn to dusk. Parking: limited street parking along Allen Pkwy; larger lot at The Water Works (105-B Sabine St., approximately 0.8 miles east). METRO buses serve Allen Pkwy. Tripods permitted for personal photography at no charge. Commercial/professional shoots require a Buffalo Bayou Partnership permit — email permits@buffalobayou.org; $50 application + $250 for 4 hours + deposit, with $1M liability insurance proof required. No drone photography without FAA waiver.
- Difficulty: Easy — flat open lawn; wide paved paths along the bayou bank; ADA accessible
- Recommended settings: Blue Hour Reflection: aperture: f/8, shutter: 8s, iso: 400, lens: 24-70mm at 35–50mm, notes: Position on the bayou’s south bank 20–30 minutes after sunset. Shoot from a tripod at near-water-level for maximum reflection. Use a remote shutter release or 2-second timer to eliminate vibration. Check wind speed beforehand — anything above 5 mph will ripple the water and break the mirror reflection. Bracket ±1 EV to handle the bright building lights against the deep cobalt sky. · Sunrise Silhouette: aperture: f/11, shutter: 1/60s, iso: 200, lens: 70-200mm at 100–135mm, notes: From the park’s east end near Allen Pkwy, face northeast 30 minutes before sunrise. The sky turns deep magenta-orange behind the downtown towers, creating powerful silhouettes. Use spot metering on the brightest part of the sky to keep buildings dark. A graduated ND (0.9) helps balance the bright sky against the still-dark foreground. · Golden Hour Wide: aperture: f/11, shutter: 1/125s, iso: 100, lens: 16-35mm, notes: 30 minutes before sunset, the sun behind you illuminates the west-facing tower facades in warm orange light. Use a wide angle to include the full park lawn as foreground, sweeping into the bayou and then the illuminated skyline. A polarizer reduces sky glare and deepens the glass reflections on the towers’ faces. · Fireworks Composite: aperture: f/8, shutter: 4s, iso: 100, lens: 24-70mm at 28–35mm, notes: July 4th and New Year’s Eve: position on the lawn facing northeast, use a tripod and cable release, open shutter for 3–5 seconds during each burst. Bursts typically appear directly above downtown towers, creating a uniquely Houston composition. ISO 100 keeps noise minimal; multiple exposures can be blended in post.
Shots to chase:
- Mirror reflection panorama: from the south bank at blue hour, use a 35mm to frame the full downtown cluster doubled symmetrically in the still bayou — the quintessential Houston postcard image
- Sunrise silhouette row: telephoto at 135mm compresses the JPMorgan Chase Tower, 600 Travis, and Williams Tower into a tight cluster of dark silhouettes against a magenta-orange sky
- Bayou foreground texture: get low (tripod at ground level) with a 16mm and include bayou reeds or rocks in the near foreground while the distant skyline glows at blue hour — creates dramatic depth-of-field transition
- Fireworks + skyline: on July 4th, 4-second exposure captures firework trails bursting directly above the tower cluster with the park’s trees framing the composition from below
- Storm cell drama: summer afternoons, massive cumulonimbus cells build south of downtown — from the park’s open lawn, use a 24mm to frame the towering cloud formations dwarfing the skyscrapers below
Pro tip: The optimal position on the park lawn is approximately 150–200 feet west of the Rosemont Bridge, where you have a clear southeast-facing sightline to the full skyline with the bayou flowing left-to-right in the foreground. Arrive at least 30 minutes before sunset to scout reflections and choose position before blue hour crowds gather. Weekday evenings (Tuesday–Thursday) have significantly fewer other photographers than weekends. In winter (December–February), the low humidity and cool air produces the sharpest skyline definition — buildings appear to float against a crisp blue sky. The park’s lighted areas close at 11 PM, giving photographers a generous window through the deep blue-to-black transition of nightfall.
Common mistake to avoid: Setting up too far west in the park, which increases distance and loses the intimate foreground relationship with the bayou. Shooting only at blue hour and missing the equally dramatic sunrise silhouette window. Using a tripod that’s too high — the closer the lens is to the water surface, the more reflection fills the frame. Ignoring the wind forecast: a calm day produces mirror reflections; anything above 5–8 mph creates ripples that diffuse the reflection into an abstract wash of color.
2. Sabine Street Bridge — Sabine Promenade
The Sabine Street Bridge is Houston’s most photographed and most technically challenging urban viewpoint — it delivers a compressed telephoto panorama of the downtown skyline across the bayou that no other ground-level location replicates. Built in 1924 as a City Beautiful-era concrete bridge (the last surviving of its type in Houston), the bridge’s white-painted concrete rails, period lampposts, and six-span girder structure provide rich architectural foreground elements that frame the contemporary skyline in a juxtaposition of 20th-century civic infrastructure and 21st-century glass architecture. The spot is referenced as ‘the quintessential Houston skyline photo’ by both Reddit’s /r/houston photography community and Houstonia Magazine. At blue hour, the bridge lamp globes glow amber against cobalt sky while JPMorgan Chase Tower’s crown and 600 Travis’s glass pyramid ignite behind them — a quintessentially Houston composition.
- GPS: 29.7625, -95.3753
- Elevation: 42 ft
- Best time of day: Blue hour (primary) — the definitive compressed-skyline shot; sunrise golden hour; overcast midday for even diffuse light on the bridge structure
- Sun direction: The Sabine Street Bridge runs roughly north–south, crossing Buffalo Bayou. Standing on the bridge or just west of it and looking east-northeast toward downtown (azimuth approximately 60–70°), the sun rises almost directly behind the skyline cluster in spring and summer — ideal for silhouette compositions with the bridge’s concrete rails, ornamental lampposts, and the JPMorgan Chase Tower and 600 Travis as skylit subjects. In fall (October–November), the sunrise azimuth shifts closer to due east, providing warm side-lighting on the tower facades visible from the bridge. At sunset, the bridge’s west face catches warm golden light, and from the bridge deck looking east, the towers transition from gold to orange as the sun drops behind the photographer. Blue hour from the bridge’s pedestrian walkway is the most photogenic window: building lights activate, the cobalt sky deepens, and from a low position on the walkway, the skyline is framed between the bridge’s rail posts and the bayou below.
- Access: Sabine Street at Buffalo Bayou, Houston, TX 77007 (Buffalo Bayou Park). The bridge and surrounding promenade are freely accessible 24/7. On-street parking along Gillette St and near The Water Works (105-B Sabine St) approximately 0.2 miles east. METRO Bus routes serve nearby Allen Parkway. Tripods permitted freely for personal photography; commercial shoots require Buffalo Bayou Partnership permit (permits@buffalobayou.org). The 1924 historic bridge is on the National Register of Historic Places (NRHP #07001023); no physical alterations permitted to structure.
- Difficulty: Easy — flat paved pedestrian bridge with railings; ADA-accessible via the adjacent Sabine Promenade walkway
- Recommended settings: Blue Hour Compressed: aperture: f/8, shutter: 10s, iso: 400, lens: 70-200mm at 135–180mm, notes: From the bridge’s east pedestrian walkway, use telephoto to compress the downtown skyline towers into a tight cluster behind the bridge rail and lamppost foreground. Shoot 20–30 minutes after sunset. A tripod is essential at these focal lengths and shutter speeds. Use Live View for manual focus on the distant towers to ensure critical sharpness. · Bridge Perspective Wide: aperture: f/11, shutter: 15s, iso: 200, lens: 16-35mm at 16–20mm, notes: Stand on the center of the bridge looking east at blue hour and use an ultra-wide to include both bridge rail lines as strong leading-line perspective converging toward the skyline. The wide angle makes the bridge appear to ‘launch’ toward the towers. Shoot from a tripod positioned just above the rail for maximum leading-line effect. · Sunrise Silhouette: aperture: f/11, shutter: 1/125s, iso: 200, lens: 24-70mm at 35mm, notes: At sunrise, face east from the bridge. The sun rises nearly behind the skyline in spring/summer, creating dramatic tower silhouettes with rim lighting. Expose for the brightest sky tone to keep towers as dark, graphic shapes. A 0.6 GND helps balance sky against the still-dark bayou below. · Bayou Reflection: aperture: f/8, shutter: 6s, iso: 400, lens: 24-70mm at 28mm, notes: Descend from the bridge to the Sabine Promenade path below (bayou level), shoot back toward the bridge with the illuminated skyline behind it at blue hour. The bayou water reflects both the bridge lampposts and the distant tower lights simultaneously — a layered composition. Low angle on tripod maximizes the reflection surface in frame.
Shots to chase:
- Bridge rail perspective: from bridge center at blue hour, use 16mm wide-angle with rail lines as twin leading diagonals converging on the illuminated JPMorgan Chase Tower — the definitive Houston engineering-meets-skyline shot
- Lamppost-framed skyline: at dusk, position the ornamental period lamppost in the left or right third of the frame as a warm amber foreground anchor, with the cool cobalt skyline receding behind it in the middle distance
- Bayou-level reflection: from the Sabine Promenade path directly below the bridge, capture the bridge arch and ornamental rails reflected in the bayou with the skyline towers glowing in the far background — a three-layer depth composition
- Graffiti underbelly: descend to bayou level and face upward to capture the colorful murals and graffiti art painted on the bridge’s underbelly — a uniquely gritty urban counterpoint to the polished skyline shots above
- Golden hour compression: use 200mm to compress the skyline into a dense row of towers with warm orange facade reflections during the last 15 minutes of direct sunlight
Pro tip: The bridge has two pedestrian walkways — the west walkway (closest to Eleanor Tinsley Park) is slightly lower and gives a more dramatic bayou-level perspective; the east walkway is 6 inches higher and better aligned for the lamppost-framing shots. Standing precisely at midspan gives the maximum converging-rail leading-line effect. The blue-hour window on clear evenings is exceptionally precise here — arrive 30 minutes before sunset to set up, and shoot aggressively in the 15-minute window when sky and building light are balanced. Reddit photographers consistently note that 9:30 AM with the sun over the buildings creates harsh lens flare — early mornings before 8 AM or post-sunset sessions are ideal.
Common mistake to avoid: Shooting from the sidewalk at street level rather than descending to the Sabine Promenade path at bayou level, which offers dramatically more interesting angles. Arriving right at sunset rather than 20 minutes after — the best light is blue hour, not the sunset itself. Using a too-narrow focal length from midspan (e.g., 50mm) that doesn’t capture either the full skyline width or the bridge rail leading lines — use either ultra-wide (16–24mm) for the perspective shot or telephoto (135–200mm) for the compression shot.
3. Gerald D. Hines Waterwall Park
The Gerald D. Hines Waterwall (formerly Transco Waterwall) is one of the most striking private sculptural fountains in the United States — a 186-foot-wide, 186-foot-radius crescent of granite from which 11,000 gallons per minute of water cascade down tiered surfaces into a reflecting basin. Designed in 1985 by John Burgee Architects (with Philip Johnson) as a companion to the Williams Tower (then Transco Tower) next door, the Waterwall creates a micro-climate of mist and sound that is theatrically unlike any other Houston location. The sheer scale — the crescent is taller than a 6-story building — makes it ideal for dramatic wide-angle compositions with the water filling the entire frame, as well as telephoto close-ups where individual water curtains create abstract texture patterns. The Williams Tower’s 64 stories of blue-green reflective glass rising directly behind the fountain provides an architectural backdrop found nowhere else in Texas.
- GPS: 29.7358, -95.4611
- Elevation: 80 ft
- Best time of day: Late afternoon golden hour (3–5 PM); blue hour (dusk); early morning (before 9 AM) for crowds-free solitude
- Sun direction: The Waterwall is a 186-foot-wide, 186-foot-radius semicircular fountain that opens to the south, with the Williams Tower (now the Hess Tower, 64-story glass monolith) rising directly behind it to the north. At golden hour in the afternoon, the sun moves to the west-southwest and side-lights the cascading water curtains from approximately 45°, creating sparkling prismatic highlights and deep shadow contrast in the water sheets. From inside the crescent (south-facing interior viewpoint), looking north, the sun is behind and above the photographer in late afternoon — ideal for front-lighting the water with the Williams Tower backlit as a dramatic silhouette. At sunrise (east, behind the fountain from inside the crescent), the tower is front-lit in warm amber. Blue hour is highly photogenic: small garden floodlights activate around the fountain base, illuminating the water green-gold from below against a cobalt sky, with the Williams Tower’s illuminated crown providing vertical anchor.
- Access: 2800 Post Oak Blvd, Houston, TX 77056 (Uptown/Galleria district). Free admission; open Monday–Sunday 8 AM–9 PM (summer hours may extend; confirm at uptown-houston.com). Free surface parking available in the adjacent lot. METRO BRT Uptown Line stops at Post Oak and West Alabama, approximately 3 minutes walk. Tripods are permitted for personal photography. Commercial photography requires contact with the building/park management; the Uptown Houston District oversees the park. Water Wall operates year-round except for occasional maintenance shutdowns — verify current operating status at uptown-houston.com before visiting.
- Difficulty: Easy — flat paved paths around the crescent; the interior semicircle has step-stones across the basin at the second level; minor spray dampness on windy days
- Recommended settings: Golden Hour Motion Blur: aperture: f/16, shutter: 1/2s, iso: 50, lens: 16-35mm at 20–24mm, notes: From inside the crescent (south interior position), use a slow 1/2–2 second exposure to silken the cascading water sheets into smooth veils. An ND filter (6-stop) allows this in bright afternoon light. Position to include the Williams Tower crown as a vertical anchor at the upper frame edge. Use a tripod on the stone basin platform. · Blue Hour Illuminated: aperture: f/8, shutter: 5s, iso: 400, lens: 24-70mm at 28–35mm, notes: At dusk, the underwater and garden lights illuminate the water from below in warm green-gold tones. A 5-second exposure blurs the water into glowing silk against the cobalt sky and tower silhouette. Shoot from slightly outside the crescent’s east end for an angled perspective that includes both the water curtains and the tower in the same frame. · Frozen Splash: aperture: f/5.6, shutter: 1/1000s, iso: 800, lens: 70-200mm at 135mm, notes: Use a telephoto from across the basin to freeze individual water droplet sprays and curtain details. Early morning with front-lighting isolates individual water strands against the dark granite backing. ISO 800 in shade; drop to 400 in direct morning sun. This setting reveals the sculptural detail of the water architecture. · Environmental Portrait: aperture: f/2.8, shutter: 1/500s, iso: 400, lens: 85mm or 135mm, notes: Wide aperture portrait with the cascading water as a blurred, textured background. Position subject at the basin edge for foreground placement; f/2.8 will render water as smooth silver-white brush strokes behind. Ideal in late afternoon when subjects are front-lit and background is soft.
Shots to chase:
- Silk-water interior panorama: from the center of the crescent’s interior arc at blue hour, ultra-wide 16mm captures the full 186-foot curve of illuminated cascading water with the Williams Tower rising behind — a composition unlike any other in Houston
- Water-to-tower vertical: use 35mm from inside the crescent at dusk, compose vertically to include the full height from the reflecting basin at bottom through water curtains to the Williams Tower crown against cobalt sky
- Abstract water texture: telephone at 200mm captures extreme close-ups of individual water sheet patterns cascading over granite — abstract blue-white textures that read as pure graphic elements with zero contextual reference
- Splash spray foreground: position at the basin edge with the 16mm and deliberately include your own shadow or a visitor’s silhouette in the foreground against the luminous water backdrop — adds scale and human narrative
- Misty bokeh at twilight: use 135mm f/2 from outside the crescent to isolate a small section of water droplets in the mist with the tower’s lit windows as bokeh circles in the deep background
Pro tip: The Waterwall is at its most spectacular on calm, low-wind days when the mist stays within the crescent and doesn’t soak equipment; always check wind forecasts. The best-kept secret is arriving Monday–Thursday at 8 AM when the fountain opens — on weekends it’s reliably crowded by 10 AM. For the long-exposure silk-water shot, a remote shutter release and a 6-stop or 10-stop ND filter is essential in daylight. The park closes at 9 PM; arriving for the last 30 minutes of operation gives you a nearly empty fountain as other visitors leave. Bring a rain cover or plastic bag for your camera on humid summer days — the ambient mist in calm conditions can dampen front elements in under 10 minutes.
Common mistake to avoid: Standing only inside the crescent and never exploring the exterior (south-facing) perspectives, which provide the best tower-plus-fountain compositions. Using shutter speeds in the 1/60–1/250s range that neither freeze the water crisply nor blur it smoothly — commit to either 1/1000s or 1/2s or longer. Visiting only during midday when overhead sun creates flat, harsh lighting on the granite surfaces with no directional shadow detail.
4. Rothko Chapel — Exterior and Broken Obelisk
The Rothko Chapel is one of America’s most extraordinary intersections of visual art, sacred architecture, and public contemplation — a non-denominational chapel designed in 1971 by Philip Johnson (completed by Howard Barnstone and Eugene Aubry) to house 14 monumental black paintings by Mark Rothko, created in the last two years of the artist’s life. Photographically, the exterior presents a severe, almost elemental composition: a dark redbrick octagon, low and horizontal against the Houston sky, with Barnett Newman’s towering 26-foot Cor-Ten steel ‘Broken Obelisk’ — its inverted pyramid balanced on a point above a reflecting pool — as a vertical counterpoint. The juxtaposition of 1960s minimalist sculpture against the quiet brick chapel, surrounded by live oaks and a simple reflecting pool, creates one of the most contemplative and graphically pure urban compositions in Houston. The chapel is dedicated to human rights and has hosted major international exhibitions and symposia.
- GPS: 29.7376, -95.3962
- Elevation: 55 ft
- Best time of day: Overcast mornings (primary) for diffuse shadow-free light on the octagonal brick chapel; late afternoon golden hour for warm side-lighting; dawn for solitude
- Sun direction: The Rothko Chapel is a windowless, octagonal, redbrick structure oriented with its main entrance to the north. Barnett Newman’s 26-foot ‘Broken Obelisk’ sculpture stands in a shallow reflecting pool to the north of the chapel, dedicated to Dr. Martin Luther King Jr. The chapel’s south facade catches direct sunlight from the south for much of the day in summer. In the morning (sun to the east), the chapel’s east side and the obelisk’s east face are bathed in warm directional light, while the reflecting pool to the north is in partial shade — ideal for calm reflection shots of the obelisk. Late afternoon (sun to the west) provides dramatic side-lighting on the obelisk’s rusting Cor-Ten steel surface, emphasizing its geometric angularity and patina texture. Overcast or lightly overcast days are ideal for the chapel exterior itself, where diffuse light eliminates harsh brick shadows and renders the structure with maximum tonal depth.
- Access: 3900 Yupon Street (at Sul Ross Ave), Houston, TX 77006 (Montrose neighborhood). Chapel exterior, grounds, and the Broken Obelisk reflecting pool are free and open to the public daily from dawn until dusk. The Chapel interior is open daily 10 AM–6 PM, free admission. Free street parking available on Yupon, Branard, and Sul Ross streets around the Chapel. METRO Bus Route 25 (Montrose) serves nearby Montrose Blvd. Tripods permitted on exterior grounds for personal photography. The chapel interior prohibits photography during meditation hours; confirm current interior photography policy at rothkochapel.org. Commercial photography requires advance coordination with Rothko Chapel staff (713-524-9839).
- Difficulty: Easy — flat brick plaza and grounds; fully accessible
- Recommended settings: Overcast Chapel Facade: aperture: f/8, shutter: 1/125s, iso: 200, lens: 24-70mm at 35mm, notes: Overcast light is ideal for the chapel’s dark brick exterior. From the south side of the Broken Obelisk reflecting pool, frame the obelisk in the left third of the composition with the chapel’s north facade and entry door in the background. Expose to hold detail in both the Cor-Ten steel and the dark brick. A polarizer deepens sky and eliminates any surface reflections on the pool. · Obelisk Reflection: aperture: f/11, shutter: 1/60s, iso: 100, lens: 16-35mm at 20mm, notes: On calm mornings or overcast days, the shallow reflecting pool mirrors the obelisk perfectly. Get low (tripod at ground level, lens at 6 inches above water surface) and frame the inverted obelisk reflection in the lower half of the frame with the real sculpture above. Include a sliver of the chapel’s brick wall at the frame edge for context. · Golden Hour Texture: aperture: f/8, shutter: 1/250s, iso: 100, lens: 70-200mm at 135mm, notes: Late afternoon side-light (3–5 PM in winter, 4–6 PM in summer) rakes across the obelisk’s rust-orange Cor-Ten steel surface and the chapel’s dark brick, emphasizing the textural contrast between the rough, weathered steel and the tight mortar lines of the handmade brick. A 135mm focal length from the chapel’s south side isolates the obelisk tip against a clean sky. · Minimalist Abstract: aperture: f/11, shutter: 1/250s, iso: 100, lens: 70-200mm at 200mm, notes: Telephoto isolation of the Broken Obelisk tip against a blank sky — pure geometric abstraction. In overcast light, the rust-orange Cor-Ten steel reads as warm against a neutral grey sky. Underexpose slightly (-0.7 EV) to deepen the steel’s orange-red tones.
Shots to chase:
- Obelisk-and-chapel axis: from the north side of the reflecting pool, use a 35mm to frame the Broken Obelisk centered with the chapel’s entrance door directly behind it — a perfectly aligned composition that links sculpture and architecture
- Mirror reflection at dawn: arrive at first light when the pool is completely calm and light low; use a 20mm ultra-wide at ground level to capture the obelisk mirrored in the pool with the surrounding live oaks framing the scene
- Cor-Ten close-up texture: telephoto at 200mm isolates sections of the obelisk’s Cor-Ten surface, where rust patterns, weld lines, and weathering create abstract photographic textures reminiscent of landscape photography
- Octagonal chapel silhouette: at sunset, position west of the chapel and expose for the sky — the low dark brick octagon becomes a pure geometric silhouette against the warm sky, with the obelisk tip visible above the roofline
- Human contemplation narrative: a single figure seated on the chapel steps reading or meditating, captured with a 135mm from a respectful distance — the classic humanizing counterpoint to the architectural abstraction
Pro tip: The Rothko Chapel is one of Houston’s quietest early-morning photography locations — arrive at dawn (30 minutes before chapel opening) to have the grounds completely to yourself, with the best low-angle light on the obelisk and pool. The reflecting pool has been temporarily removed for conservation of the Broken Obelisk on multiple occasions in the past decade — always verify current status at rothkochapel.org before making a special trip for the reflection shot. The surrounding Montrose neighborhood provides rich context: the chapel sits 0.5 miles from the Menil Collection museum and within walking distance of the Cy Twombly Gallery and Menil Drawing Institute — plan a half-day photography circuit of all three.
Common mistake to avoid: Shooting on harsh sunny days when the dark brick chapel falls into deep shadow with blown-out bright sky above — overcast is always better. Photographing only the obelisk and missing the chapel’s own strong geometric presence. Arriving inside the 10 AM–6 PM open hours expecting quiet — the chapel receives regular visitors during open hours; dawn on weekdays is the only reliably solitary time.
Want this in your pocket on the street?
The full-resolution version of every spot above — with full-page hero photography, GPS maps with gold location pins, sun direction diagrams, multi-season tables, and a complete safety + packing checklist — is inside the Houston Ultimate Photographer’s Guide PDF ($47). Print it, save it offline, take it on the walk. Get the guide →
5. Buffalo Bayou Park Cistern
Save
The Buffalo Bayou Park Cistern is widely considered the most extraordinary interior photography location in Houston and one of the most unusual in the United States. Built in 1926 as one of Houston’s first underground drinking water reservoirs and decommissioned in 2007, the 87,500-square-foot cistern was restored by the Buffalo Bayou Partnership and reopened in 2016. Its 221 concrete columns create a forest of vertical geometry, and the one-inch depth of standing water on the floor produces a near-perfect reflection that doubles every column infinitely — creating an optical illusion of limitless depth from any angle. When artists’ light installations occupy the space (which happens throughout the year), the columns can appear in any color from amber to deep violet, transforming the space completely. It is unlike any other interior in Texas.
- GPS: 29.7625, -95.3739
- Elevation: 40 ft
- Best time of day: Any time of day during open hours (interior; no natural light variation); early-session tours (opening time) for fewer people in frame
- Sun direction: The Cistern is entirely underground — a 87,500-square-foot subterranean former drinking water reservoir built in 1926. There is no natural light source; the space is entirely illuminated by artificial installation lighting. This makes the Cistern exceptional for photography precisely because conditions are completely controlled: the lighting is the same at 10 AM and 4 PM on any day. The signature aesthetic is the infinite-mirror reflection — 221 concrete columns in a 25-foot-high chamber, each column base reflected in an inch of standing water that covers the floor, creating an illusion of infinite depth. The only variable is the installation artwork in residence, which changes periodically and transforms the entire character of the space.
- Access: 105-B Sabine Street, Houston, TX 77007 (The Water Works, Buffalo Bayou Park). Open Wednesday–Sunday 10 AM–5 PM; closed Monday and Tuesday. Admission charged for regular tours (~$10–12 adults; verify at buffalobayou.org). Reservations strongly recommended. Tripods and stands are NOT permitted during regular public tours; tripod use is permitted only during designated Cistern Photography Tours (check buffalobayou.org for schedule). Professional photography inside requires a Cistern Film and Photography Permit Application (email permits@buffalobayou.org). Parking at The Water Works lot (limited; first-come) or City Lot H at 1643 Memorial Dr.
- Difficulty: Moderate — requires walking 0.25 miles in 25 minutes on the tour; the floor has one inch of standing water that is not accessible without closed-toe shoes; very low light requires careful footing; inform Cistern Attendant if accessibility accommodation needed
- Recommended settings: Infinite Column Reflection: aperture: f/5.6, shutter: 4s, iso: 800, lens: 16-35mm at 16mm, notes: Get as low as safely possible (lying prone or near-prone on the edge of the walkway, with lens just above the water surface). The ultra-wide at 16mm dramatically multiplies the column-reflection depth. Use a tripod (photography tours only) or brace against a column with IBIS engaged. 4 seconds blurs any residual water ripple into a perfect mirror. Live View for precise focus on column rows. · Symmetry Composition: aperture: f/8, shutter: 6s, iso: 1600, lens: 24-70mm at 24mm, notes: Find a position where column rows recede in perfect symmetrical perspective (the cistern’s grid is regular). Place one column directly centered on the vertical axis and frame reflections to fill the lower half. ISO 1600 at f/8 gives sufficient depth of field; use noise reduction in post. Remote shutter release essential. · Handheld Available Light: aperture: f/1.8, shutter: 1/60s, iso: 6400, lens: 35mm or 50mm f/1.8, notes: During regular tours (no tripods), use a prime lens at maximum aperture. ISO 6400 with modern full-frame or APS-C sensors produces acceptable noise. Shoot in RAW, adjust white balance in post for the color temperature of the installation lighting. 1/60s at 35mm is the minimum handheld shutter for sharp columns — brace against a column for stability. · Installation Art Color: aperture: f/8, shutter: 3s, iso: 800, lens: 24-70mm at 35mm, notes: When color installation art is in residence, the entire space transforms. Shoot at f/8 for maximum column sharpness; 3-second exposure for the slight water-reflection smoothing. Check the installation’s color temperature before shooting; set a custom white balance or deliberately shoot with ‘incorrect’ WB for surreal color shifts. Multiple bracketed exposures to handle varying light levels throughout the cistern.
Shots to chase:
- Infinite column forest: from near-water-surface level with a 16mm lens, the columns recede into both real and reflected infinity — a surreal, architecturally impossible image that reads as pure abstraction
- Single-point perspective: find the exact geometric center of a column row and shoot directly down the axis with a 35mm — the columns converge to a single vanishing point, both above and below in the reflection
- Color installation abstraction: during light-art residencies, long-exposure shots capture color gradients transitioning across the column forest, turning the cistern into a cathedral of light
- Scale human: during photography tours, include a single person standing between distant columns with their reflection below — their scale against the vast space emphasizes the cistern’s monumental proportions
- Edge-of-water reflection: from the walkway edge, tilt the camera slightly down to include only the reflected columns in the lower half of the frame and the real columns in the upper half — a perfectly disorienting, vertical symmetrical composition
Pro tip: Book the dedicated Photography Tour (listed on buffalobayou.org event calendar) rather than the regular guided tour — the photography tour allows tripods, gives more time in the space, and the group is intentionally kept smaller. The photography tour fills months in advance; book immediately when dates are released. During regular tours, the guide moves the group through at a walking pace — position yourself at the back of the group so you have the most time at each vantage point before moving. The inch of water on the floor is deceptively slippery on smooth-soled shoes; bring rubber-soled footwear. The cistern’s climate is consistently 67°F year-round — bring a light layer regardless of season.
Common mistake to avoid: Visiting on a regular tour expecting tripod access — only the photography tours allow tripods. Shooting with the kit 18-55mm zoom at the widest end (18mm) when the full-frame equivalent 16mm makes a dramatic difference in column multiplication. Standing upright and shooting at eye level, which minimizes the reflections; the near-water-surface position is the single most impactful change you can make.
6. Discovery Green — Lake and Skyline
Discovery Green is Houston’s premier downtown gathering park — an 11.78-acre green space that opened in 2008 and transformed what was a parking lot into the city’s most vibrant urban commons. For photographers, it offers a rare combination: a reflective urban lake, the dramatically lit George R. Brown Convention Center’s stainless-steel-and-glass barrel vault as an architectural backdrop, and the downtown Houston skyline rising in the north-northwest background. At blue hour, the park functions like an urban stage set — the Convention Center’s grid of interior lights creates a luminous pattern across the water, while surrounding high-rises and the Hilton Americas Hotel add vertical depth. The park’s Gateway Fountain (operational 9 AM–7 PM, 9 PM in summer) adds kinetic foreground interest to daylight shots.
- GPS: 29.7525, -95.3586
- Elevation: 40 ft
- Best time of day: Blue hour and night (primary) for the lake reflection of illuminated Convention Center and surrounding towers; golden hour (secondary) for warm facades and park life
- Sun direction: Discovery Green’s 12-acre park is bounded on the east by Avenida de las Americas and the George R. Brown Convention Center, on the north by McKinney Street, on the west by La Branch, and on the south by Lamar Street. The park’s central lake (John P. McGovern Lake) opens to the east where the GRB Convention Center’s dramatic glass-and-aluminum barrel vault facade dominates. The sun rises to the east-southeast — at sunrise, the Convention Center’s east facade is front-lit in warm amber, and the lake creates an unobstructed mirror of this illumination. At sunset (sun to the west), the west-facing facades of the surrounding high-rises catch warm golden light, while the Convention Center transitions to its characteristic blue-hour glass illumination. The best photographic time is 15–30 minutes after sunset: the GRB Convention Center and surrounding towers activate their interior and exterior lighting, the lake turns cobalt, and the park’s own landscape lighting activates — creating a luminous downtown oasis effect.
- Access: 1500 McKinney Street, Houston, TX 77010. Free admission; open daily 6 AM–11 PM (extended summer hours to midnight). The park is fully publicly accessible. Closest parking garage: Avenida Central at 1002 Avenida de las Americas (713-853-8970). METRO Rail (Green and Purple Lines) stop at Convention District station, 2 minutes walk. Tripods permitted for personal photography freely. Commercial photography: $10/hour for individual photographers, or $140 for a team for up to 2 hours; submit initial application to Discovery Green Conservancy. Drone photography prohibited within park boundaries.
- Difficulty: Easy — flat paved paths, grassy lawns, fully ADA-accessible; well-lit at night
- Recommended settings: Blue Hour Lake Reflection: aperture: f/8, shutter: 6s, iso: 400, lens: 24-70mm at 28–35mm, notes: From the south bank of McGovern Lake, face north to capture the Convention Center and high-rises reflected in the calm water. A 6-second exposure renders the lake as a smooth mirror. Shoot 15–25 minutes after sunset when the sky still holds cobalt color but building lights are at full brightness. A low tripod position maximizes the water reflection area. · Convention Center Architecture: aperture: f/11, shutter: 1/125s, iso: 200, lens: 16-35mm at 20mm, notes: Stand on the east side of the lake facing east toward the GRB Convention Center’s barrel vault facade. Use ultra-wide to capture the full vertical sweep of the glass-and-metal facade from ground level, with the lake reflecting it in the foreground. Overcast days deliver the best even lighting on the stainless-steel panels. · Golden Hour Park Life: aperture: f/4, shutter: 1/500s, iso: 400, lens: 70-200mm at 85mm, notes: 30 minutes before sunset, the park comes alive with joggers, families, and events. Use a medium telephoto at moderate aperture to document authentic park scenes with the skyline as backdrop — people, dogs, children at the fountain — keeping enough depth of field to maintain context while softening the background towers. · Fountain Long Exposure: aperture: f/16, shutter: 1s, iso: 50, lens: 24-70mm at 35mm, notes: Gateway Fountain in daylight: use a 1–2 second exposure (ND filter in bright conditions) to silken the water into smooth arcs against the geometric backdrop of the Convention Center. Low tripod position. A 10-stop ND enables 30+ second exposures in midday light for extreme motion blur.
Shots to chase:
- Blue-hour lake mirror: from the south bank at 20 minutes post-sunset, frame the entire 360° of park lighting and tower glow reflected in McGovern Lake — a rare circular reflective composition impossible at linear waterways
- Convention Center barrel vault: ultra-wide 16mm close to the glass facade, looking up along the curved stainless-steel roof grid — a pure architectural abstract dominated by the rhythmic structural geometry
- Park-to-skyline perspective: from the northwest corner of the park (La Branch and McKinney), use 35mm to capture the park’s green canopy in the foreground receding to the full cluster of downtown towers behind — nature meeting city
- Night fountain arc: 1-second exposure of the Gateway Fountain at dusk, capturing the water arcs as smooth white ribbons against the dark park and illuminated Convention Center background
- Event energy: during concerts or outdoor movies (common summer programming), use ISO 3200 at f/2.8 to document the crowd-city-light atmosphere that defines Discovery Green’s cultural character
Pro tip: The most important and consistently overlooked Discovery Green shot is from the northwest corner of the lake (near the jogging trail’s northwest kink), where you can frame the entire Convention Center facade reflected in the water with a 24mm without any obstructing trees. The Gateway Fountain shuts off at 7 PM (9 PM in summer) — if you want fountain + blue-hour light, plan for a summer evening when the fountain runs late enough to overlap with blue hour. The park receives heavy foot traffic on weekday lunch hours and weekend afternoons; weekday evenings (6–9 PM) balance good blue-hour light with manageable crowd levels.
Common mistake to avoid: Shooting from the park’s west side (facing east) in afternoon sun when the Convention Center facade is backlit and poorly exposed. Using only the lake’s north bank (closest to buildings) rather than the south bank, which provides the superior full reflection including sky. Arriving after dark rather than at blue hour, when the sky has gone black and the composition loses its rich cobalt-tone contrast against the building lights.
7. McGovern Centennial Gardens — Hermann Park
McGovern Centennial Gardens, opened in 2012 to celebrate Hermann Park’s centennial, is one of the most architecturally ambitious public gardens in Texas — a 5-acre sculptural landscape by landscape architect POD that transforms flat Houston terrain into a dramatic vertical garden experience. The 12-foot waterfall cascades over terraced limestone walls covered with planted alcoves, while the 90-foot-elevated canopy walkway provides an unusual treetop perspective over the park and toward the nearby Texas Medical Center towers. The gardens are particularly extraordinary in spring (February–April) when the garden’s 50,000+ plants include spectacular azalea, wildflower, and perennial displays. The adjacent Sam Houston statue (on horseback, the largest equestrian statue in Texas) adds a historical compositional element. The gardens represent Houston’s unique ability to create dramatic vertical landscape in a nearly flat coastal plain city.
- GPS: 29.7175, -95.3896
- Elevation: 55 ft
- Best time of day: Golden hour (late afternoon) for the waterfall’s warm-lit cascades and garden terraces; spring (February–April) for azalea bloom; overcast mornings for even lighting
- Sun direction: McGovern Centennial Gardens occupies the northeast quadrant of Hermann Park, centered around a dramatic 45-foot mound terraced with gardens, a 12-foot waterfall, interactive water elements, and a 90-foot canopy walkway. The mound faces generally south and west, meaning the best direct sunlight hits the terrace faces and waterfall in late afternoon (3–5 PM) from the west-southwest — this ‘golden hour from the west’ is when the cascading water catches the warmest directional light and the terrace planting beds glow with maximum color saturation. Early morning (east light) provides more diffuse, cooler illumination and is better for overall garden-and-mound compositions. The canopy walkway faces south, making midday overhead sun the worst time and late afternoon the best for walkway photography. In spring, azalea and wildflower blooms peak in February–April; combine with golden-hour light for maximum color.
- Access: 1500 Hermann Drive, Houston, TX 77004 (Hermann Park). The gardens are free and open daily during park hours. Parking: Hermann Park Conservancy lots along Hermann Drive; additional parking at the Museum of Natural Science garage. METRO Rail (Red Line) stops at Hermann Park/Rice University station, 5 minutes walk. Tripods permitted for personal photography; commercial photography requires City of Houston park permit — contact 832-394-8805. Professional photography is strictly prohibited in the Hermann Park Japanese Garden (separate area). Drone photography prohibited throughout Hermann Park (FAA regulations).
- Difficulty: Moderate — the 45-foot mound involves a significant uphill climb on terraced paths; the canopy walkway has steps; all areas have paved paths with railings
- Recommended settings: Golden Hour Waterfall: aperture: f/16, shutter: 1/2s, iso: 100, lens: 24-70mm at 35mm, notes: Position at the base of the waterfall facing northeast at 4–5 PM in summer, 3–4 PM in winter. The low-angle western sun illuminates the waterfall cascade from the side, creating warm amber highlights on water drops against the dark terraced wall. A 1/2-second exposure silkens the falls; use a tripod on the stone terrace platform. A polarizer at 45° reduces surface glare while retaining some sparkle. · Canopy Walkway Treetop: aperture: f/8, shutter: 1/250s, iso: 200, lens: 16-35mm at 20mm, notes: From the elevated canopy walkway (90 feet above ground), use a wide angle to capture the tree canopy spreading below with Houston’s Medical Center or Museum District buildings peeking above the treetops. Late afternoon golden light is ideal; overcast provides cleaner even tones. A polarizer deepens the sky and enriches green canopy saturation. · Spring Bloom Color: aperture: f/8, shutter: 1/250s, iso: 100, lens: 70-200mm at 100mm, notes: Mid-February through March: use a telephoto to compress clusters of azalea and wildflower blooms against the layered terrace walls. Overcast ‘cloudy bright’ conditions maximize color saturation without harsh shadows. A polarizer at 90° to the light source removes any shine from wet flower surfaces after rain. · Mound Overview: aperture: f/11, shutter: 1/125s, iso: 100, lens: 16-35mm at 24mm, notes: From the canopy walkway or elevated mound apex, face south-southwest to frame the terrace layers, waterfall, and garden plantings as a foreground composition with Hermann Park’s tree canopy extending into the mid-distance. Use a polarizer to saturate the terrace greens against the Houston sky.
Shots to chase:
- Waterfall cascade layers: from the mound base at golden hour, frame the 12-foot waterfall with the terraced limestone walls and planted alcoves as receding vertical layers — a Houston version of Hanging Gardens
- Canopy walkway treetop perspective: from the highest point of the 90-foot canopy walk, use a 20mm to capture the spreading Houston tree canopy below with Medical Center towers rising above the green horizon
- Spring azalea explosion: mid-February to March, the terrace gardens explode in pink, red, and white azalea blooms — use 100mm to compress the flower masses against the architectural terrace walls for a color-dominated composition
- Sam Houston equestrian statue: the bronze horseback statue at the park entrance, 70mm from the south, frames Houston himself against the Hermann Park tree canopy with the Medical Center towers visible behind — a portrait of the city’s namesake in context
- Water misting detail: on humid Houston mornings, fine mist from the waterfall drifts across the terrace plantings — telephoto at 200mm captures individual water droplets on flower petals as natural bokeh foreground jewels
Pro tip: Spring (mid-February through April) is the single most important seasonal consideration at Centennial Gardens — the azalea and wildflower display is spectacular and far exceeds the visual interest of the summer or winter garden. Check the Hermann Park Conservancy website (hermannpark.org) for bloom status updates. Weekday mornings before 10 AM are ideal for crowd-free photography; weekends the gardens can become crowded with family events and professional photo sessions by 10 AM. The waterfall can be turned off during maintenance periods — verify it is operational before making a dedicated visit.
Common mistake to avoid: Visiting in summer (June–August) when the garden’s perennial and annual plantings are past peak bloom and the midday heat creates flat, harsh shadows on the terrace limestone. Missing the canopy walkway’s treetop perspective by going only to the waterfall. Failing to coordinate with the Hermann Park permit office for commercial shoots — the park actively enforces permit requirements for professional setups.
8. James Turrell Twilight Epiphany Skyspace — Rice University
James Turrell’s Twilight Epiphany (2012) is the 73rd Skyspace in Turrell’s celebrated series and is widely considered the most important single artwork in Houston’s public art collection — Houston’s answer to the Rothko Chapel in terms of transformative aesthetic power. It is the first Skyspace to be acoustically integrated (with a soundscape component) and one of the largest Turrell spaces in existence. Photographically, it offers one of the most unusual challenges in the genre: photographing colored light programming that transforms the human perception of sky color in real time. The aperture’s precisely cut ellipse, the LED halo, and the changing sky create compositions that are simultaneously architectural, painterly, and phenomenological. Gifted to Rice University by alumna Suzanne Deal Booth, who worked for Turrell while at NYU, the work connects Houston to the global conversation around perceptual and light-based art.
- GPS: 29.7163, -95.4017
- Elevation: 55 ft
- Best time of day: Sunrise and sunset LED light sequences (Wednesday–Monday; closed Tuesday). NOTE: As of 2025, the Skyspace is CLOSED and scheduled to reopen Summer 2026 — verify current status at moody.rice.edu before visiting.
- Sun direction: The Twilight Epiphany Skyspace is a 70-foot-by-40-foot grass-covered pyramidal structure on Rice University’s campus, designed by light artist James Turrell. Its rooftop aperture is a precisely engineered elliptical opening to the sky. The Skyspace’s signature experience is not natural light photography per se, but the precisely programmed LED lighting that lines the aperture edge and the interior ceiling, designed by Turrell to enhance and transform the perceived color of the sky during twilight. At the moment of sunset, the LEDs begin a 40-minute sequence that shifts through saturated hues (deep purple, amber, green, magenta) that make the sky visible through the aperture appear to change color in counterintuitive ways — the sky appearing warmer when the LEDs go cool, and vice versa. The sunrise sequence works identically in reverse. The aperture frames a precise rectangle of sky that functions as a ‘framed painting’ that changes by the second.
- Access: Suzanne Deal Booth Centennial Pavilion, Rice University campus, 6100 Main Street (campus address), Houston, TX 77005. Access via the Rice University campus, parking at Rice’s visitor lots. The Skyspace is open to the public every day EXCEPT Tuesday. Admission is free. Sunrise sequence begins at a specified time listed on the Moody Center calendar (moody.rice.edu) — note the calendar shows the sequence start time, NOT the actual sunrise time; the sequence starts 8–10 minutes before sunset. Each sequence lasts approximately 40 minutes. CRITICAL NOTE: The Skyspace is currently closed to the public and is scheduled to reopen in Summer 2026; always verify current status at moody.rice.edu. Photography of the experience is freely permitted; commercial photography requires coordination with the Moody Center for the Arts.
- Difficulty: Easy — the Skyspace is a ground-level earthwork structure accessible via the campus path system; the interior seating is on stepped grass berms; no barriers to entry when open
- Recommended settings: Led Sequence Aperture: aperture: f/5.6, shutter: 1/30s, iso: 800, lens: 24-70mm at 35mm, notes: Expose for the sky visible through the aperture (not the LED-lit edges). The LED sequence changes color every 2–5 minutes — shoot continuously throughout the 40-minute sequence to capture multiple color states. ISO 800 at f/5.6 should balance the bright sky and the dimly lit interior walls. Auto-ISO with exposure compensation of -0.7 EV prevents the sky aperture from blowing out. · Interior Ceiling Abstract: aperture: f/4, shutter: 1/15s, iso: 1600, lens: 16-35mm at 16mm, notes: Lying flat on the interior seating (or berm) and shooting straight up at the aperture from below, use 16mm ultra-wide to include both the LED-lit ceiling edges and the sky aperture opening. The ceiling’s LED color and the sky’s actual color in the aperture create a color-theory juxtaposition that changes every few minutes during the sequence. Use IBIS or a small travel tripod. · Architectural Exterior: aperture: f/11, shutter: 1/250s, iso: 100, lens: 24-70mm at 28mm, notes: The exterior of the Skyspace is a grass-covered pyramidal earthwork — subtle and elegant. Shoot from a 45° angle on the lawn during morning golden hour when low-angle light rakes across the pyramid’s surfaces, revealing the grass texture and the architectural cut of the entry ramp. Include the aperture opening in the frame to hint at the interior’s purpose. · Sequence Color Shift: aperture: f/5.6, shutter: 1/15s, iso: 1600, lens: 35mm, notes: During the 40-minute sequence, shoot every 2–3 minutes to document the full arc of color transformations. Compile as a contact sheet or time-lapse in post. The sequence moves through deep amber, cool violet, saturated green, and back through purple to blue as the actual sky darkens — this time-series is the definitive documentation of the Turrell experience.
Shots to chase:
- Aperture as painting: from directly below the opening on the interior seating, use 20mm to frame the precise elliptical sky aperture as a ‘painting’ with the LED-lit ceiling as the frame — the sky color changes every minute during the sequence
- Color-sequence time lapse: set up a tripod inside the structure and shoot one frame every 30 seconds for the full 40-minute sequence — the resulting time-lapse shows the sky and LED colors shifting in choreographed counterpoint
- Architectural earthwork exterior: from the northwest corner of the pyramid during golden hour, the grass-covered slope reads as pure abstract landform with the Rice campus buildings visible beyond — minimalist architecture photography
- Person-in-the-Skyspace: a single visitor lying on the berm gazing up through the aperture at sunset, captured from a low angle — the most humanizing and universally readable documentation of the Turrell experience
- LED color temperature study: shoot RAW without custom white balance and compare files across the sequence — the LED colors, the sky’s true color, and the camera’s auto-WB interpretation create three different versions of the same moment
Pro tip: The Skyspace’s calendar on moody.rice.edu lists the SEQUENCE START TIME, not the actual sunrise or sunset time. Arrive 10–15 minutes before the listed time to get seated before the sequence begins. The interior can accommodate approximately 40 visitors at the sequence; weekend sunset sessions in fall attract the largest crowds — arrive early or target weekday sunrise sessions. The soundscape component is a critical part of the Turrell experience; bring quality earbuds if the integrated speakers are not operating. VERIFY REOPENING STATUS at moody.rice.edu before visiting — the space is undergoing restoration (closed as of 2025, expected Summer 2026 reopening).
Common mistake to avoid: Visiting outside the programmed sequence times (daytime hours) when the LED lighting is off and the experience is purely architectural — valuable for exterior photography but misses the Skyspace’s core artistic intent. Exposing for the LED-lit interior ceiling rather than the sky aperture, which blows out the sky and loses the color juxtaposition. Leaving after the first 10 minutes of the sequence — the full 40-minute arc through multiple color states is essential to experiencing and photographing the work.
Want this in your pocket on the street?
The full-resolution version of every spot above — with full-page hero photography, GPS maps with gold location pins, sun direction diagrams, multi-season tables, and a complete safety + packing checklist — is inside the Houston Ultimate Photographer’s Guide PDF ($47). Print it, save it offline, take it on the walk. Get the guide →
9. Beer Can House — Visionary Folk Art
Save
The Beer Can House is one of the most celebrated examples of American folk art architecture — a modest 1930s bungalow in Houston’s Rice Military neighborhood that retired railroader John Milkovisch transformed over 18 years (1968–1988) by covering every surface in beer can rings, garlands of pull-tabs, and eventually entire flattened beer cans as siding, along with marbles and other found objects set in concrete paths. When he died in 1988, the house was covered in approximately 50,000 beer cans. The Orange Show Center for Visionary Art acquired and restored it in 2001. Photographically, the house is a one-of-a-kind subject: the dense, overlapping texture of aluminum can labels, pull-tab garlands, and ring-chain curtains creates an extraordinary visual surface that no other building in the world replicates. The house sits in an ordinary residential neighborhood, making the contrast between the visionary folk-art structure and the conventional Houston bungalows around it a uniquely powerful compositional element.
- GPS: 29.7625, -95.4083
- Elevation: 60 ft
- Best time of day: Early morning golden hour for warm directional light on the beer can siding without harsh shadows; overcast bright days for even color rendering; interior tours Saturday–Sunday 12–5 PM
- Sun direction: The Beer Can House at 222 Malone Street faces generally east-northeast toward Malone Street. At sunrise and early morning (sun to the east), the front facade — covered in beer-can siding and garlands of pull-tabs — receives warm frontal light that brings out the silver, gold, and aluminum textures. The circular ring of beer cans hanging as wind chimes around the porch edge catches light from multiple directions simultaneously, making morning the optimal window. Mid-morning (9–11 AM) in spring and fall provides clean frontal light with minimal harsh shadows before the sun climbs overhead. Afternoon (sun from the west) illuminates the house’s west-facing side and the backyard garden area. Overcast days are excellent because the diffuse light renders all the aluminum surfaces with maximum detail and color without any specular hotspots.
- Access: 222 Malone Street, Houston, TX 77007 (Rice Military / The Heights neighborhood). Exterior viewing free and available at any time from public sidewalk. Admission $5 per adult for interior guided tours; tours available Saturday and Sunday 12–5 PM only (weather permitting, call to confirm: 713-926-6368). Street parking only on Malone Street and adjacent streets — no dedicated lot. No METRO stop nearby; most visitors arrive by car or bicycle via Buffalo Bayou trail. The property is owned and managed by the Orange Show Center for Visionary Art. Personal photography freely permitted from the public sidewalk at all times. Commercial photography requires advance coordination with the Orange Show Center (theorangeshow.org).
- Difficulty: Easy — flat sidewalk approach; exterior accessible 24/7; interior tour involves navigating a densely decorated residential house interior
- Recommended settings: Morning Golden Facade: aperture: f/8, shutter: 1/250s, iso: 100, lens: 24-70mm at 35mm, notes: From the public sidewalk facing the front facade, early morning golden light renders the beer can siding in warm amber tones with strong directional shadow detail in the embossed can surfaces. Include the hanging ring garlands in the foreground at f/8 for full depth-of-field from garlands to facade. A polarizer reduces specular reflections on the aluminum surfaces. · Texture Close Up: aperture: f/8, shutter: 1/250s, iso: 100, lens: 70-200mm at 135mm, notes: Telephoto from the sidewalk isolates sections of the facade to create abstract pattern compositions — rows of beer can bottoms, rings of pull-tabs, or the mixed color labels of different beer brands. Overcast light is ideal for these texture close-ups; direct sun creates distracting specular highlights. Focus precisely on the plane of one row of cans. · Environmental Wide: aperture: f/11, shutter: 1/125s, iso: 200, lens: 24-70mm at 24mm, notes: Use a wider angle from across the street to frame the Beer Can House in the context of the conventional Houston bungalows on either side — the contrast between the folk-art house and its residential neighbors is the essential documentary composition. Include the oak-canopied street and the neighboring houses as context. · Interior Detail: aperture: f/4, shutter: 1/30s, iso: 3200, lens: 35mm or 50mm f/1.8, notes: Interior tours (Sat–Sun): the interior is dense with collection items and found-object installations. No flash permitted. ISO 3200 at f/4 for available light. Focus on detail compositions — beer-can wind chimes in the window, Milkovisch’s workbench, the backyard gardens — rather than trying to capture the full interior in wide-angle.
Shots to chase:
- Pull-tab garland wind chime: use a 50mm at f/2.8 to isolate the hanging rings of beer can pull-tabs against the house facade — soft bokeh from the facade behind creates a chain-link abstraction
- Beer can texture wall: from 10 feet away with 135mm, fill the entire frame with a single section of the beer can siding — the interlocking rows of can bottoms create a tessellated pattern unlike any other architectural surface in photography
- Neighborhood context wide: from across Malone Street with 24mm, frame the Beer Can House flanked by ordinary Houston bungalows — the folk art house appears to have landed from another dimension in this quiet residential block
- Milkovisch legacy portrait: during Saturday–Sunday tours, a guide can stand on the front porch amidst the can decorations for an environmental portrait that contextualizes the human story behind the art
- Golden hour reflection: on clear mornings, the smooth dome of beer cans on the roof catches the sun and reflects a distorted golden orb — telephoto from the sidewalk captures this ephemeral architectural light effect
Pro tip: The exterior is the primary photographic subject and is accessible 24/7 — the Saturday–Sunday tours are worthwhile for context and interior access but not essential for the key facade photographs. Early Tuesday–Thursday morning (7–9 AM) gives you the facade in morning light with zero pedestrian traffic and minimal car movement on Malone Street. The wind chime ring garlands are at their most photogenic in a light breeze — dead still is too static, strong wind blurs them. The $5 admission for the interior tour is among the best-value cultural admissions in Houston and directly supports preservation; consider it required for any serious documentation of the property.
Common mistake to avoid: Visiting only during the weekend tour hours and missing the superior early-morning exterior light. Shooting only wide-angle establishing shots without exploring the extraordinary close-up texture details that make the Beer Can House photographically unique. Expecting a large or prominent location — the house is deliberately humble in scale, sitting on a standard Houston lot; bring a 135mm for the details, not just the 24mm for the overview.
10. Houston Heights — 19th Street Historic District
Houston Heights, established in 1892 as one of Texas’s first planned suburbs, is the largest and best-preserved historic neighborhood in Houston — a National Register Historic District encompassing approximately 1,750 acres of Victorian, Craftsman, and Foursquare residential architecture, punctuated by the commercial strip of 19th Street’s independent boutiques, coffee shops, galleries, and murals. The Heights offers a photographic vocabulary completely absent from Houston’s other signature locations: instead of glass towers and bayou vistas, it provides painted Victorian gingerbread trim, wraparound porches, towering live oaks, colorful murals on brick facades, and the intimate human scale of a neighborhood that has resisted homogenization. The Heights Boulevard tree-canopied median is one of Houston’s most beloved promenades. For photographers who want to document the authentic residential fabric of one of America’s most diverse cities, the Heights provides a rich and accessible subject.
- GPS: 29.7981, -95.3981
- Elevation: 65 ft
- Best time of day: Golden hour (early morning preferred for east-facing Victorian porches; late afternoon for west-facing storefronts); overcast mornings for mural photography; weekends for street activity
- Sun direction: 19th Street in Houston Heights runs roughly east–west, with the majority of the historic commercial storefronts and Victorian bungalows flanking the street on both sides. Storefront facades face north and south. At sunrise, the south-facing storefronts on the north side of 19th Street catch warm, low-angle morning light directly on their signage and awnings. At sunset, the north-facing storefronts (south side of the street) catch warm afternoon light. The Victorian residential bungalows on the side streets (Yale, Heights Blvd) face east or west and receive optimal morning or afternoon light respectively. The Heights Boulevard median — a tree-lined parkway — provides dappled morning light through the live oak canopy that creates beautiful, naturally diffused lighting for bungalow photography. The area’s historic 1802 Harvard Street Victorian mansion (city landmark) faces east and is best photographed in morning golden light.
- Access: 19th Street, Houston Heights, Houston, TX 77008 (4 miles northwest of downtown). Fully public sidewalks; no access fees. Free street parking throughout the neighborhood; Heights Mercantile (714 Yale St) has a public parking lot. METRO Bus Route 40 serves the Heights corridor. All photography from public sidewalks requires no permit. Commercial photography on public rights-of-way requires no city permit; if shooting on private business property, obtain owner permission. The Heights neighborhood is residential; be respectful of early-morning street noise and avoid photographing through residential windows.
- Difficulty: Easy — flat streets with wide sidewalks; entire area walkable; the commercial strip on 19th Street is 6 blocks long
- Recommended settings: Golden Hour Bungalow: aperture: f/8, shutter: 1/250s, iso: 100, lens: 24-70mm at 35mm, notes: From the public sidewalk, frame a well-preserved Craftsman bungalow with its full porch, ornamental columns, and surrounding live oak. Morning golden light from the east illuminates east-facing porches with warm, directional light that emphasizes the architectural detail. A polarizer deepens the porch shadow contrast and the sky above the oak canopy. · Mural Storefront: aperture: f/8, shutter: 1/250s, iso: 200, lens: 16-35mm at 20mm, notes: For large murals on commercial brick walls, overcast days provide the most even color rendering without harsh shadows breaking up the design. Use a wide angle to include the full mural height and the surrounding architectural context. A polarizer reduces surface glare on painted brick. · Boulevard Canopy: aperture: f/8, shutter: 1/125s, iso: 200, lens: 24-70mm at 24mm, notes: On Heights Boulevard, the tree-lined median canopy creates a natural tunnel of green framing the boulevard. Early morning, low-angle light streams through gaps in the oak canopy creating dramatic dappled light patterns. Use the median’s paired rows of trees as leading lines receding into the distance. · Storefront Lifestyle: aperture: f/4, shutter: 1/500s, iso: 400, lens: 85mm, notes: Weekend mornings, coffee shops, boutiques, and farmers market stalls on 19th Street create authentic neighborhood lifestyle scenes. Use an 85mm at f/4 for environmental portraits of shopkeepers, market vendors, and community members with architectural context. This is the most culturally rich photography the Heights offers.
Shots to chase:
- Victorian gingerbread detail: 135mm telephoto isolates the ornamental porch trim and turned spindle railings of an 1890s Heights Victorian against the morning sky — architectural detail work rare in a modern American city
- Heights Boulevard tree tunnel: from the median at golden hour, 24mm captures the live oak canopy arching over both lanes of the boulevard as a receding green cathedral — one of Houston’s best urban landscape compositions
- 19th Street storefront strip: wide-angle from the middle of the street (early morning, safe from traffic) captures the eclectic commercial facade mix of 19th Street from the historic district’s century-old brick buildings
- Heights murals wall: overcast morning with a 20mm captures the large-scale murals that have been commissioned throughout the neighborhood since 2010, many reflecting Houston’s multicultural character
- Morning coffee ritual: a single subject at an outdoor table at one of the Heights’ boutique coffee shops, 85mm at f/2.8, with the Victorian storefront behind — intimate urban documentary photography
Pro tip: The best single block for concentrated historic architecture photography is the 1200 block of Tulane Street (between Heights Blvd and Yale), where a series of well-preserved 1920s Craftsman bungalows line both sides of the street. The 1802 Harvard Street Victorian mansion (a City of Houston landmark and NRHP property, built 1892 by Heights developer Omri L. Cochran) is the single most architecturally significant residential subject in the neighborhood. The Heights Mercantile (714 Yale St, corner of Yale and 7th) hosts a farmers market every second and fourth Sunday — a vibrant, photogenic community event. Weekend mornings from 9–11 AM on 19th Street have the highest foot traffic and most authentic street-life character.
Common mistake to avoid: Photographing only the commercial facades on 19th Street and missing the superior residential Victorian architecture on parallel residential streets (Harvard, Herkimer, Tulane). Visiting on weekday mornings when the commercial strip is quiet and street life is minimal — weekends are dramatically more photogenic. Underestimating the neighborhood’s scale — the Heights historic district covers 1,750 acres; allocate at least 3 hours for a thorough photographic walk.
11. Space Center Houston — Rocket Park (Saturn V Building)
Space Center Houston’s Rocket Park is home to the most impressive single artifact of the Apollo era on public display anywhere in the world: a full-scale, authentic Saturn V rocket — 363 feet long, 33 feet in diameter, 6.2 million pounds when fueled — one of only three remaining in existence. Displayed horizontally in Building 203, the rocket’s five F-1 engines (each generating 1.5 million pounds of thrust) fill the frame with overwhelming scale. The facility also displays the Independence — an original NASA 905 shuttle carrier aircraft with the high-fidelity Space Shuttle Independence replica mounted on top — the only place in the world where visitors can walk through both a shuttle carrier aircraft and a shuttle replica simultaneously. For photographers, the challenge and reward is capturing the sheer scale of these artifacts in relation to human visitors, and the texture of decades-old aerospace engineering in extraordinary close-up detail.
- GPS: 29.5518, -95.0983
- Elevation: 15 ft
- Best time of day: Midday to early afternoon for even interior lighting in the Saturn V building; exterior Independence Plaza (shuttle) best in morning golden hour facing west; any time for the indoor Saturn V
- Sun direction: Space Center Houston is located approximately 26 miles southeast of downtown Houston in the Clear Lake area. The main visitor center faces generally north, with the outdoor Independence Plaza (featuring the original NASA 905 shuttle carrier aircraft with replica shuttle Independence mounted on top) oriented to face visitors approaching from the north. The outdoor areas, including the SpaceX Falcon 9 rocket display, face east and receive morning light from the east, making morning golden hour the ideal time for the outdoor rocket photography. The Saturn V rocket building (Building 203) is fully enclosed — no natural light; interior is lit by the facility’s own artificial lighting, making time of day irrelevant for the Saturn V itself. The outdoor rocket specimens along the main path are best lit in morning (east-facing) or late afternoon (west-facing), depending on their orientation.
- Access: 1601 E NASA Parkway, Houston, TX 77058 (approximately 26 miles southeast of downtown via I-45 South). Admission required: $29.95–$34.95 adults, $24.95 children (verify current prices at spacecenter.org). Open daily; hours vary seasonally (typically 10 AM–5 PM; extended summer hours). Large dedicated parking lot; parking fee may apply. No METRO access; driving is the primary access method. CRITICAL PHOTOGRAPHY RESTRICTIONS at Space Center Houston: tripods of any kind (including monopods, gimbals, and selfie sticks), action cameras (GoPros), external lighting, aerial drones, and lenses longer than 6 inches are BANNED throughout the facility. Compact cameras and mirrorless cameras with standard zoom lenses (under 6 inches) are permitted. Cameras are welcome for photography of all exhibits except theaters. Tram tour crew will indicate any additional photo restrictions on NASA campus.
- Difficulty: Easy — flat paved paths throughout; fully ADA-accessible; the Saturn V building involves a 10–15 minute tram ride from the main building (included in admission)
- Recommended settings: Saturn V Interior Scale: aperture: f/4, shutter: 1/60s, iso: 3200, lens: 16-35mm at 16mm, notes: Stand beneath the Saturn V’s five F-1 engines and use ultra-wide 16mm to capture the full bell cluster filling the frame from below. Include a human figure (visitor) at the frame edge for scale reference. ISO 3200 at f/4 in the facility’s moderate artificial lighting; shoot RAW and adjust white balance in post. Camera must be hand-held (no tripods permitted). · F1 Engine Detail: aperture: f/5.6, shutter: 1/125s, iso: 3200, lens: 35mm or 50mm (under 6-inch physical length), notes: Close-focus on the individual F-1 engine components: the turbine exhaust manifolds, fuel lines, and heat-shield textures. At 35mm, fill the frame with one engine bell. The facility lighting is warm tungsten/LED; RAW capture for WB flexibility. Look for paint erosion, heat discoloration, and engineering details that tell the story of actual use. · Independence Exterior: aperture: f/8, shutter: 1/250s, iso: 400, lens: 24-70mm or compact equivalent, notes: The Independence Plaza (outdoor) is best photographed in morning (east-facing): the white NASA 905 aircraft with the orange-striped shuttle replica on top catches warm directional light that reveals the aircraft’s overall form. Use a 28–35mm to include the full wingspan (195 feet) and shuttle. Overcast provides clean even lighting without harsh shadow. · Falcon 9 Vertical: aperture: f/8, shutter: 1/250s, iso: 200, lens: 16-35mm at 20mm, notes: The SpaceX Falcon 9 rocket is displayed vertically on its landing legs outdoors. Position directly beneath it looking up with a 20mm ultra-wide — the rocket’s tapered body, grid fins, and landing legs create a powerful upward-perspective architectural composition against the Texas sky.
Shots to chase:
- F-1 engine forest: lying on the floor beneath the Saturn V’s 5 F-1 engine bells, 16mm ultra-wide looks up into a geometric array of thrust chambers that dwarfs the human scale completely — the most viscerally powerful Apollo-era photograph available to visitors
- Saturn V length compression: from the side of the building, use the facility’s interior light to capture the full 363-foot length of the horizontal rocket with the F-1 engines at one end and the third stage at the other — a scale that challenges the eye
- Shuttle-on-carrier perspective: from the Independence Plaza ground level, use 20mm to capture the shuttle replica above its carrier aircraft against the Texas sky — the only location on Earth where this composition is possible
- Falcon 9 landing legs upward: directly beneath the vertical Falcon 9, 20mm looking up captures the landing legs deployed outward against the sky — the image that defines commercial spaceflight’s new aesthetic
- Engineering detail abstracts: 35mm close focus on rocket surface textures — weld seams, thermal protection tiles, fuel line fittings, and engine bell heat discoloration — pure industrial texture photography with extraordinary historical weight
Pro tip: Book tram tickets via the Space Center Houston app’s virtual queue system immediately upon arrival — Rocket Park tram tours have limited capacity and can fill hours in advance on busy days. The Saturn V building (Building 203) is only accessible by tram (included in admission). The 6-inch lens length restriction is the most common photography frustration here — a 70-200mm f/2.8 will almost certainly exceed 6 inches and be prohibited. Bring a mirrorless camera with a compact standard zoom (24-70mm f/4 IS is borderline; 28-70mm f/2.8 will definitely be too large). The SpaceX Falcon 9 and Independence Plaza outdoor displays are accessible without the tram and provide excellent exterior photography with standard compact-to-mirrorless equipment.
Common mistake to avoid: Bringing large telephoto lenses or tripods/monopods that will be turned away at the entrance — review the current prohibited items list on spacecenter.org before packing your bag. Arriving at the facility late in the afternoon and missing the tram reservation window for Rocket Park — the tram typically stops 1–1.5 hours before closing. Photographing only the famous Saturn V and missing the excellent SpaceX Falcon 9 vertical display and the shuttle-on-carrier composition in Independence Plaza.
12. Glenwood Cemetery — Bayou Skyline Vista
Glenwood Cemetery is Houston’s oldest major cemetery (established 1871) and one of the most historically significant landscapes in the city — the burial site of Texas Governor Ross Sterling, Howard Hughes, and other prominent figures. But for photographers, its value is as the premier elevated west-of-downtown viewpoint: standing on the cemetery’s eastern bluff above the Buffalo Bayou flood plain, the full downtown skyline rises above a natural foreground of bayou, lake, and cemetery landscape that no other Houston viewpoint provides. Unlike Eleanor Tinsley Park’s open-lawn skyline view, Glenwood’s view is framed by historic grave markers, live oaks, and natural bluff topography — creating a layered, melancholic, and historically resonant compositional environment. The juxtaposition of Victorian cemetery landscape with 21st-century glass towers makes Glenwood one of Houston’s most visually complex and emotionally charged photography locations.
- GPS: 29.7672, -95.3911
- Elevation: 60 ft
- Best time of day: Golden hour sunrise (primary) — the skyline rises directly to the east above the bayou and cemetery’s natural lake; blue hour; spring for azalea blooms throughout the grounds
- Sun direction: Glenwood Cemetery sits on bluffs above Buffalo Bayou west of downtown Houston. From the cemetery’s eastern edges, the terrain drops off sharply toward the bayou and a man-made lake, with the entire downtown Houston skyline rising directly to the east-northeast. At sunrise (sun rising approximately 80–100° depending on season), the downtown towers are backlit with the sun rising just to the south of the skyline cluster — the towers appear as golden-rimmed silhouettes above the dark bluff landscape. This is one of the few Houston locations where the skyline is photographed from a westerly position looking east, which means: sunrise = dramatic silhouette/rim-light compositions; sunset = warm golden/amber front-lit facades. The cemetery’s mature live oaks, magnolias, and historic Victorian grave markers provide rich foreground framing elements unavailable at open-space viewpoints like Eleanor Tinsley. In spring, azalea blooms throughout the grounds create vibrant foreground color against the distant towers.
- Access: 2525 Washington Ave, Houston, TX 77007. Open to the public during daylight hours (dawn to dusk). Free admission. Park at or near the cemetery office (housed in an 1880s-era cottage); follow internal cemetery roads to the eastern bluff area. Personal photography on the public cemetery grounds is generally permitted; be respectful of ongoing interments and grieving families — avoid photography during services. Commercial photography requires advance permission from cemetery management (713-864-7886). Glenwood is a historic, active cemetery with significant Houston history — it is the burial site of Howard Hughes and other prominent Houstonians.
- Difficulty: Easy to moderate — the eastern bluff overlook involves navigating cemetery roads to the elevated eastern section; uneven grassed terrain near the bluff edge; no fences or barriers
- Recommended settings: Sunrise Silhouette Skyline: aperture: f/11, shutter: 1/60s, iso: 200, lens: 24-70mm at 35mm, notes: From the eastern bluff facing northeast, position 20 minutes before sunrise. The sky transitions from deep magenta to amber behind the downtown towers, creating a full-silhouette skyline over the bayou and lake foreground. Use a graduated ND (0.9) to balance the bright sky against the darker foreground landscape. Include a headstone or obelisk grave marker as near foreground to establish the cemetery context. · Golden Hour Towers Backlit: aperture: f/8, shutter: 1/250s, iso: 100, lens: 70-200mm at 135mm, notes: At sunrise, telephoto compression from 135mm stacks the downtown towers into a dense cluster above the dark bluff tree-line. The rim-lighting on the glass tower facades creates brilliant gold edges against the magenta sky. Expose for the sky, not the towers — the backlit silhouette effect is the primary visual. · Cemetery And Skyline Context: aperture: f/8, shutter: 1/125s, iso: 200, lens: 24-70mm at 28mm, notes: Include 1–3 Victorian grave markers or obelisks in the near-middle ground (10–30 feet from camera) with the lake and skyline behind them. Focus at the grave markers’ plane (hyperfocal distance at f/8 with 28mm covers from 8 feet to infinity). Morning overcast provides the most even lighting for the contrast-heavy scene of dark stone markers and bright towers. · Spring Azalea Foreground: aperture: f/8, shutter: 1/250s, iso: 100, lens: 24-70mm at 24mm, notes: Late February–March, azalea blooms throughout the cemetery grounds. Position a mass of pink or red azaleas as the near-foreground (3–5 feet from lens) with the distant skyline behind — the bloom masses at near focus and the towers at infinity provide a natural two-plane depth composition.
Shots to chase:
- Victorian obelisk and towers: a tall 19th-century cemetery obelisk in the near middle ground with the downtown skyline rising behind it — the ultimate Houston juxtaposition of 19th-century history and 21st-century ambition
- Sunrise rim-light skyline: from the bluff edge at first light, the full downtown cluster silhouetted against the amber horizon with a narrow bar of Buffalo Bayou visible in the foreground — the most emotionally complex Houston skyline composition available
- Lake reflection with trees: a small natural lake in the cemetery’s eastern section catches the dawn sky and distant towers in a partial reflection, framed by mature live oaks and bald cypress trees along the bank
- Azalea spring foreground: in late February, pink azalea masses in the cemetery grounds serve as vivid foreground color against the grays and greens of the bluff landscape and the distant skyline
- Howard Hughes connection: the gravesite of Howard Hughes (a Houston native) with a simple grave marker — a documentary photograph connecting the city’s oil-industry roots to global American mythology
Pro tip: Glenwood is an active cemetery and the most important etiquette rule is: avoid photographing any active interment services and be completely quiet and unobtrusive if a family is visiting a gravesite nearby. Park at the main cemetery office near the entrance and walk the internal roads to the eastern bluff section — the optimal bluff viewpoint is a 5–8 minute walk from the office. The bluff edge facing northeast gives the clearest skyline views; experiment with foreground elements at different distances from the lens. Spring (late February–March) combines azalea blooms throughout the grounds with the period when sunrise azimuth aligns best with the downtown skyline — the ideal seasonal combination.
Common mistake to avoid: Visiting only in summer when the dense oak canopy closes off many views and the azalea blooms are long gone. Arriving exactly at official sunrise rather than 20 minutes before — the pre-dawn golden sky behind the towers is often more dramatic than direct sunrise. Parking near the entrance and assuming the best views are immediately visible — the prime bluff viewpoints require a short walk into the cemetery’s interior.
When to photograph Houston: a year-round breakdown
Houston is photogenic every month of the year — but the conditions differ radically by season. Here is what to expect:
Fall (mid-October–November) for bearable humidity, golden-hour warmth on bayou trails, and a rare palette of autumn color along Buffalo Bayou; Spring (late February–April) for blooming wildflowers, azaleas in Hermann Park, and soft-diffused morning light before summer haze builds; Winter (December–February) for clear low-humidity air that sharpens skyline definition and brings the best blue-hour contrast; Summer (June–August) for long golden hours and dramatic afternoon cumulonimbus storm cells building over downtown — iconic for dramatic sky compositions
Photographer safety in Houston: read this
City photography has its own risks: gear visibility, neighborhood timing, traffic, weather. Read the briefing before you go.
- Gear visibility: Use a discreet bag with no obvious camera branding. Keep a body strapped under a jacket on transit.
- Neighborhood timing: Pre-dawn and post-sunset shoots reward early scouting. Cross-reference each location with current local guidance and choose well-lit transit routes.
- Situational awareness: Headphones out. One eye in the viewfinder, one on the street.
- Traffic: Bridges, medians, and bike lanes are not setup zones. Shoot from sidewalks and pedestrian areas only.
- Weather: Summer storms move quickly; winter cold drains batteries. Layer up, keep gear dry, watch for ice on cobblestones at blue hour.
The complete safety briefing is inside the Houston Photographer’s Guide PDF.
Take this guide into the city
This post is the complete field reference. The Houston Ultimate Photographer’s Guide PDF is the field-deployable version: full-page resolution hero photography, GPS maps with gold pins for every location, multi-season shooting calendars, gear notes per location, sun-angle diagrams, the full city safety briefing, and a print-ready editorial layout in Framehaus black and gold. Save it offline. Print it. Take it on the walk.
Houston Ultimate Photographer’s Guide
Downloadable PDF · 12 GPS-mapped locations · Multi-season calendar · City safety briefing · Packing checklist
Get the Houston guide — $47
Get the Houston Guide + Preset Pack
Photograph it. Edit it. Done.
All links go to Viator (a TripAdvisor company), the world’s largest marketplace for guided experiences. Tagged as affiliate per FTC.
Quick Amazon shortcuts to the gear most useful for this kind of shot. Use them if Prime shipping or Amazon credit makes more sense than B&H. As an Amazon Associate ShutYourAperture earns from qualifying purchases.
Take Houston home in your pocket.
Every shot location, every angle, every time of day worth shooting. Printable PDF + GPS-tagged map.
Instant download. Works on phone, tablet, and printed.
Continue reading
- U.S. Cities Photography Guides — every city, mapped
- National Parks Photography Guides
- Travel photography destinations
- Travel photography pillar
- How to shoot golden hour like a pro
- Blue hour photography settings and locations
← Back to U.S. Cities Photography Guides
Related guides nearby
Three more photography guides within striking distance — perfect for combining into one trip.
- San Antonio 303 km away · city · USA
- Dallas 365 km away · city · USA
- New Orleans 512 km away · city · USA
The complete Houston guide is $47
All vantage points above + 5 bonus secret spots, printable map, gear pack list, and editing recipes. One-time payment, instant download, lifetime updates.
Common questions about the Houston guide
Is the Houston photography guide worth $47?
For most photographers, yes. The guide saves 8-12 hours of trip-planning research and prevents the most common mistake of Houston photography: shooting at the wrong time of day. If a single better frame is worth $47 to you, the guide pays for itself on day one. Buyers get every GPS coordinate, every golden-hour window, every cultural rule, and a printable shot list.
Does the Houston guide include GPS coordinates?
Yes — every vantage point in the guide has Google Maps-ready GPS coordinates so you can pin them before you fly. The guide also includes a printable map showing all locations clustered by walking distance, so you can build efficient half-day routes.
What's in the Houston PDF that isn't in this article?
The article shows the highlights. The PDF includes: 5 additional secret spots not published online, a 14-day itinerary with daily routes, the full camera-settings cheat sheet for every scenario in Houston, a printable gear packing list, post-processing recipes with screenshot examples, and a list of local guides we trust for portrait commissions.
Do I get the Lightroom presets too?
The $47 guide is the PDF only. The matching Houston preset pack is a separate $19 download — most buyers grab both as a bundle and save the editing time. Both are instant download, both work on Lightroom Classic and Lightroom Mobile.
Will the guide work for a Houston trip in 2026?
Yes. The guide is updated annually as fees, restrictions, and new vantage points change. All buyers get free lifetime updates. The 2026 edition includes the latest drone rules, museum photography policies, and seasonal light data for the year.
Visiting more than Houston?
Bundle multiple destination guides and save planning time across the trip:
- New York City Photographer’s Guide ($47)
- Los Angeles Photographer’s Guide ($47)
- Chicago Photographer’s Guide ($47)
- San Francisco Photographer’s Guide ($47)
- Miami Photographer’s Guide ($47)
Or get all 60+ destinations in one bundle: Photo Atlas — every guide, every map, $97.