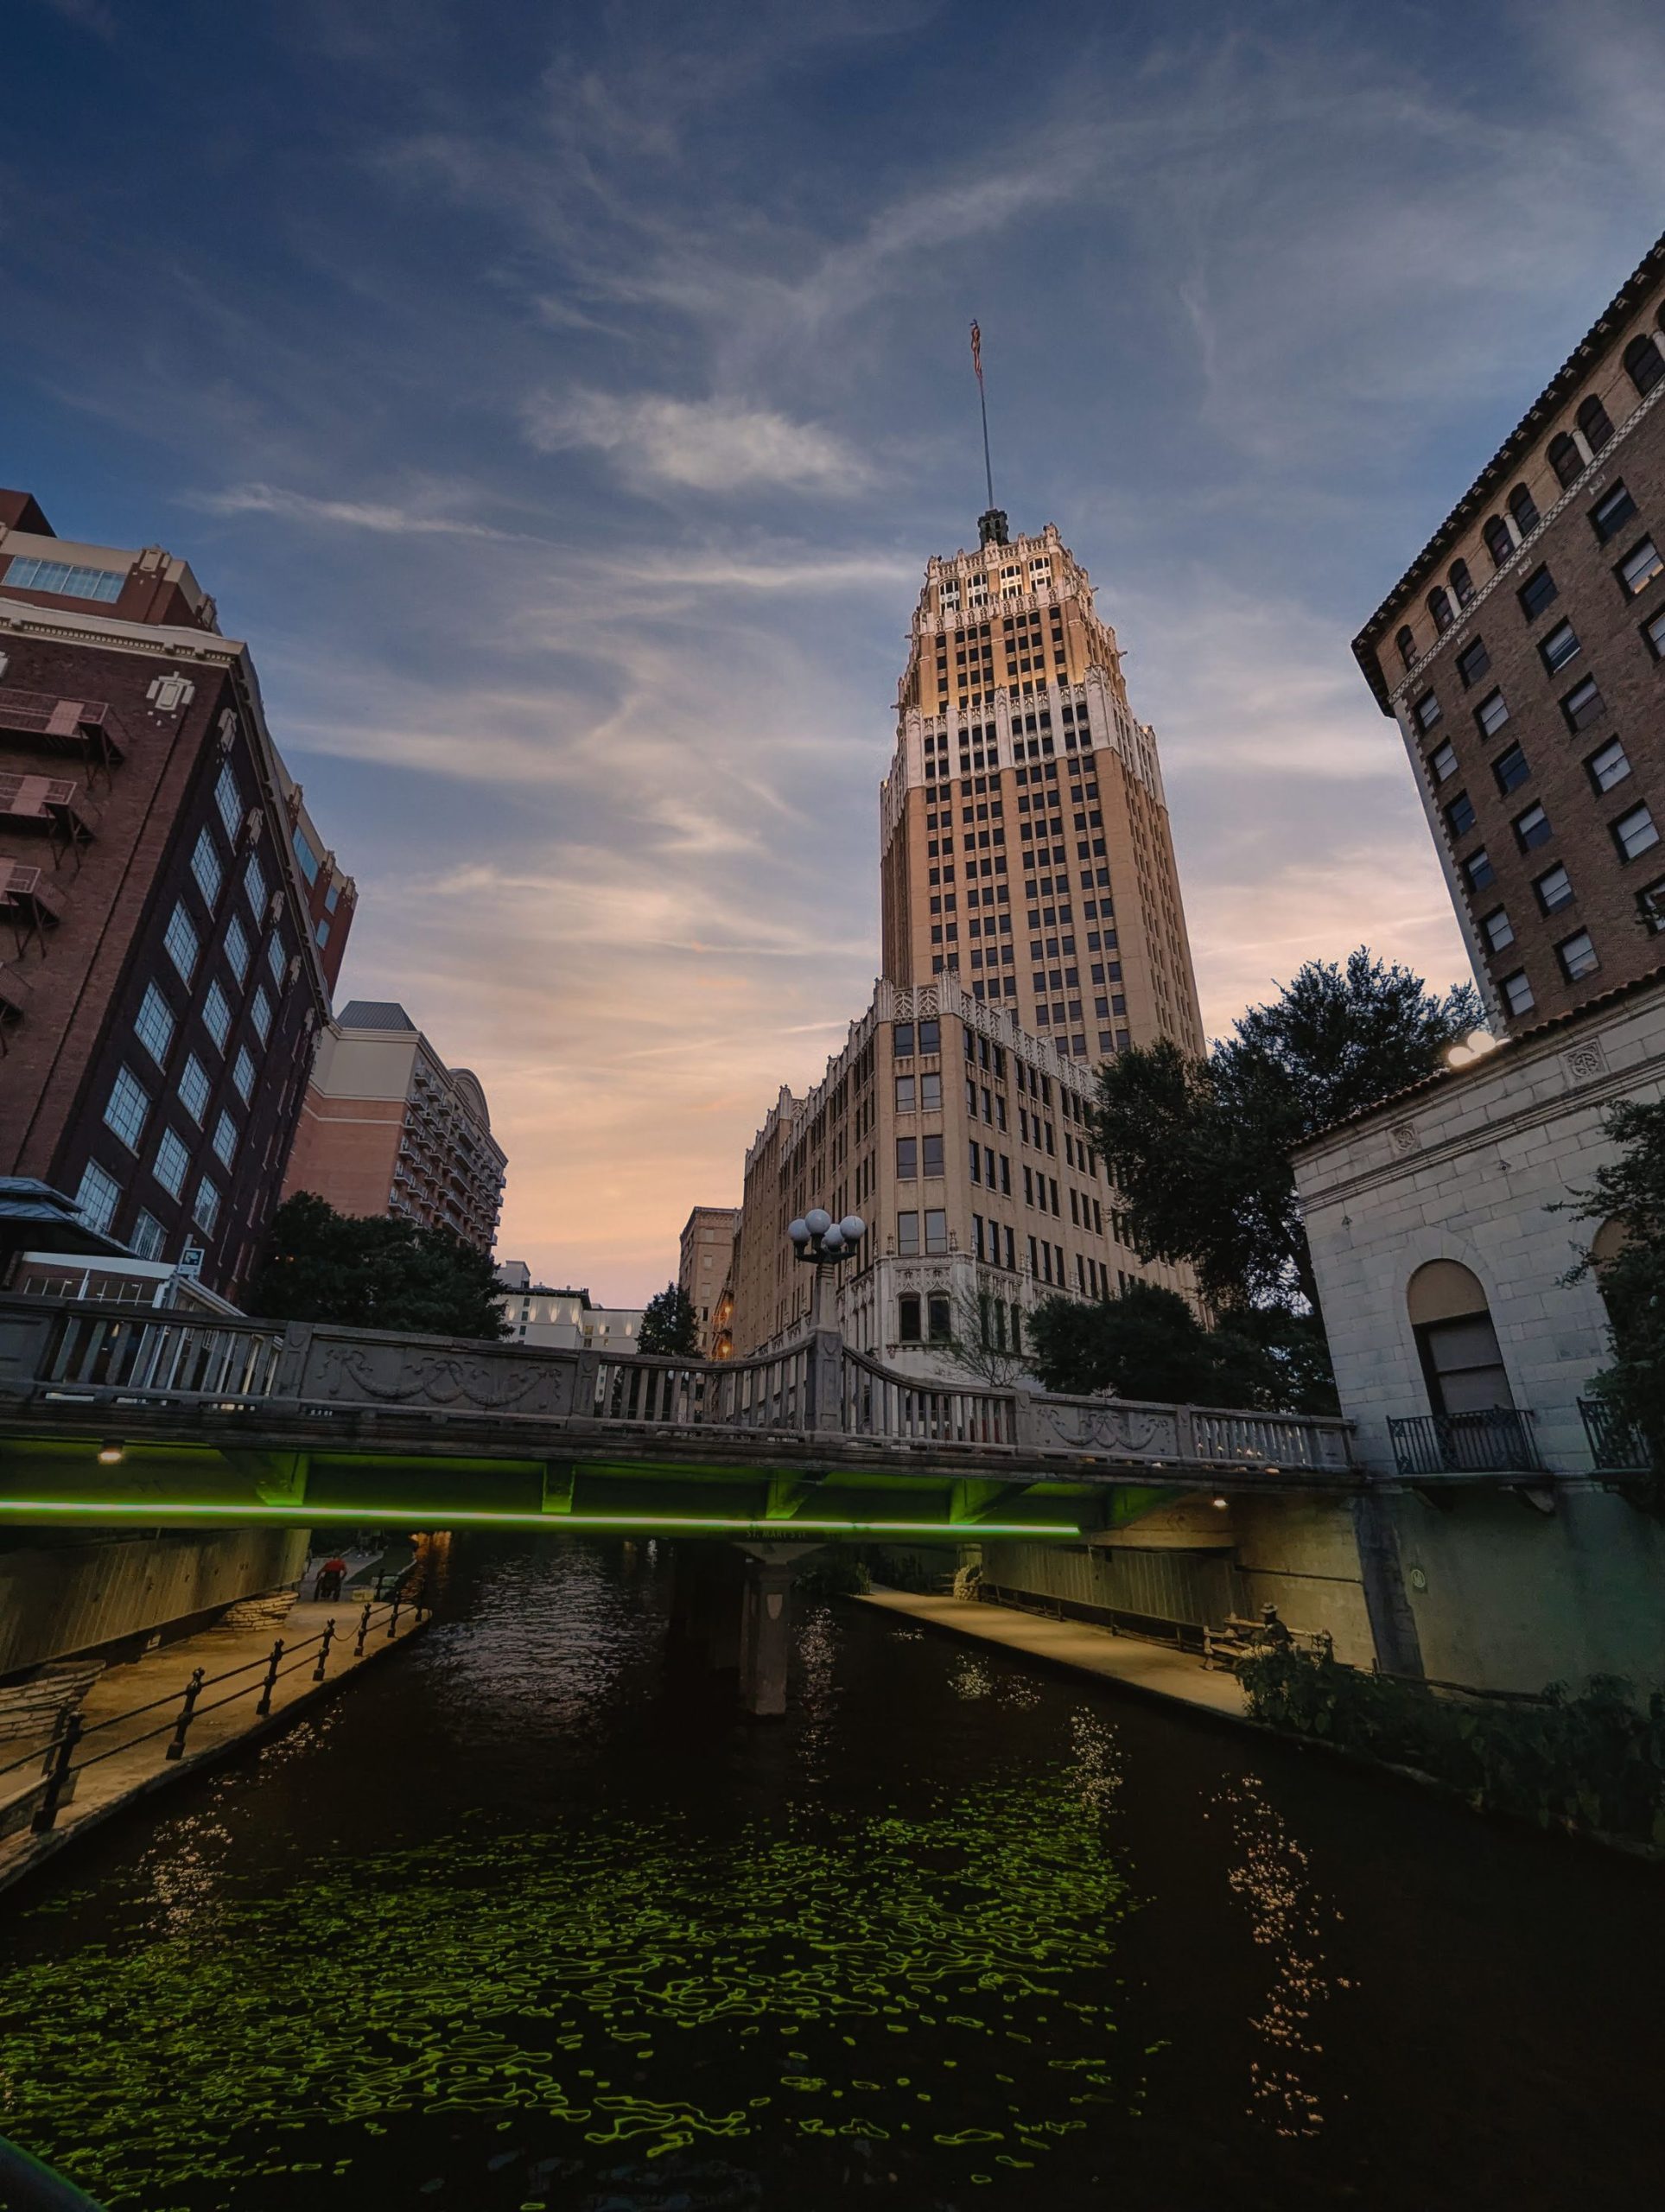
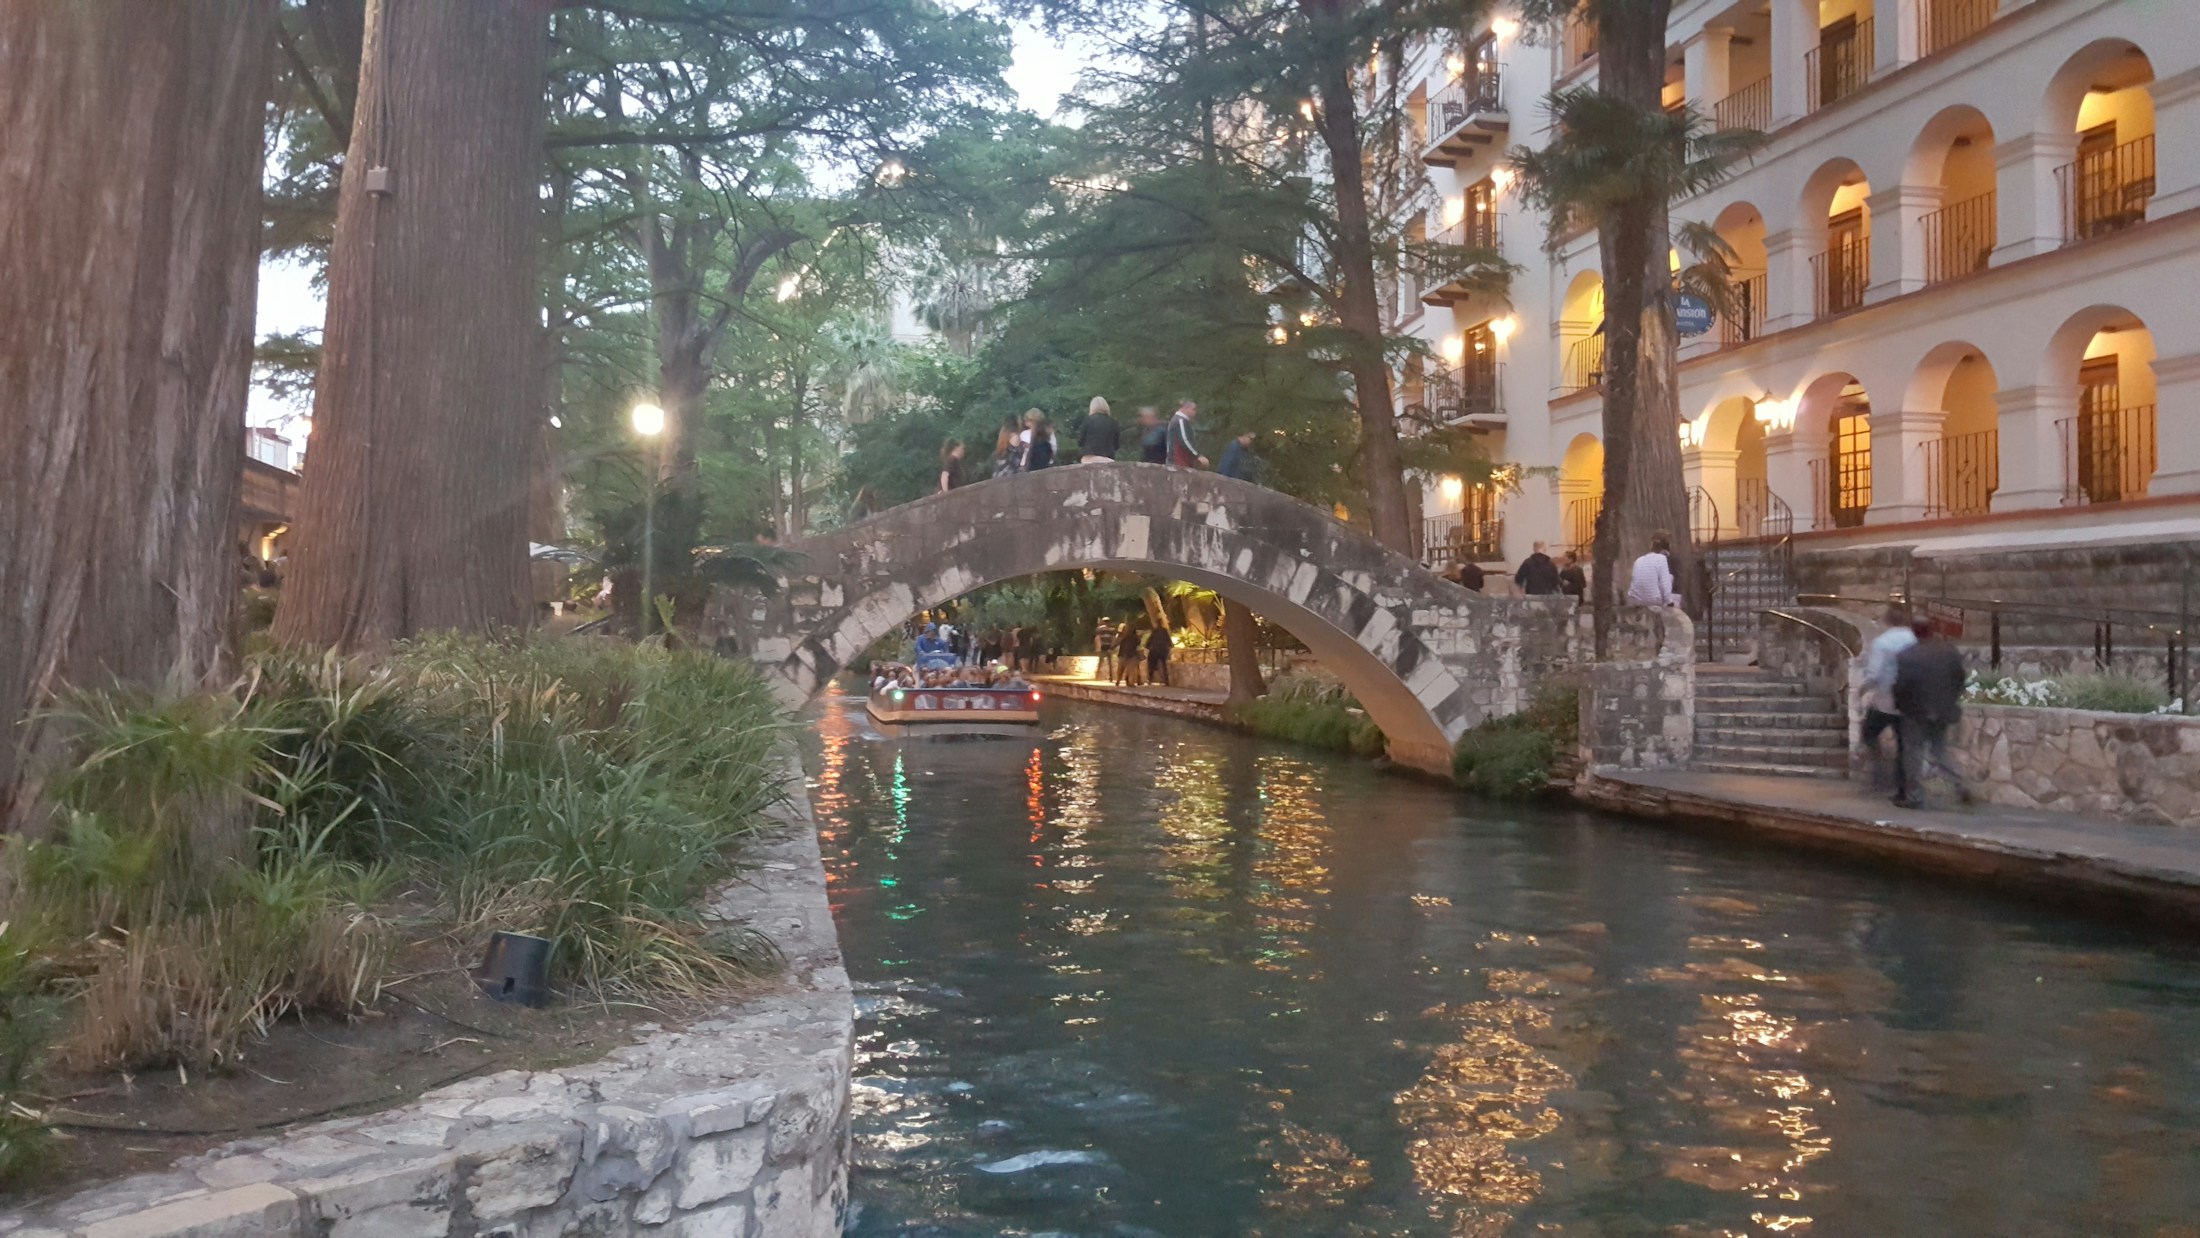
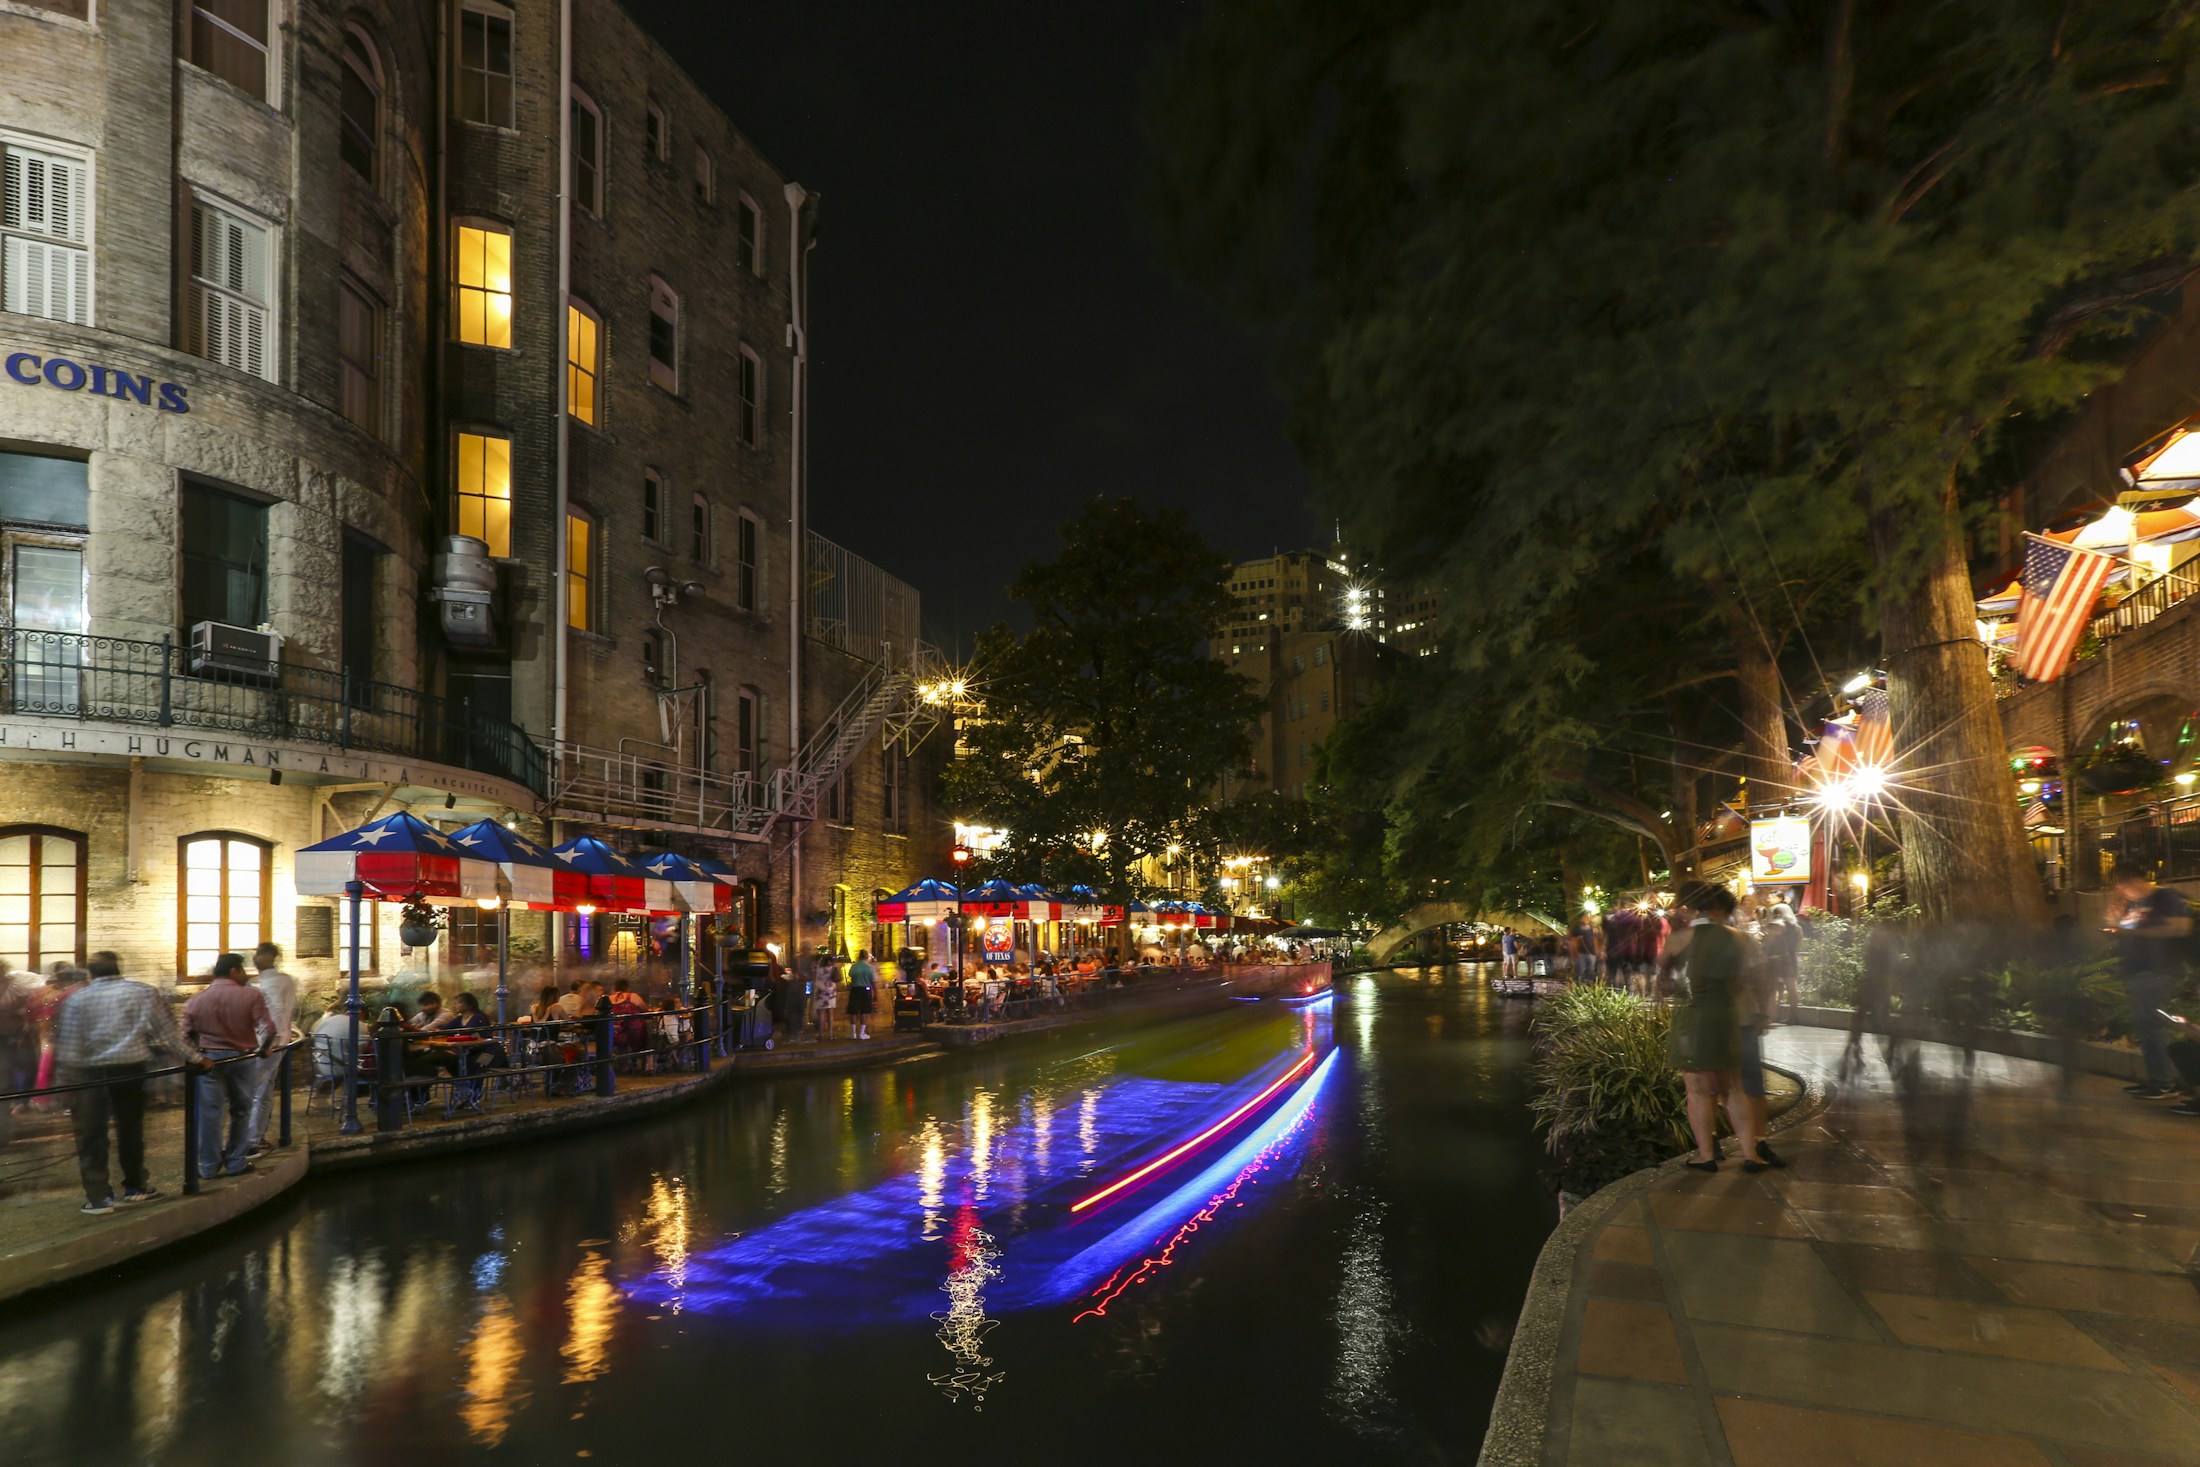
Best Photography Spots in San Antonio: 12 Locations With GPS

Tours & experiences disclosure: This guide includes affiliate links to Viator, the world’s largest tour and experiences marketplace. If you book through these links, ShutYourAperture may earn a small commission at no extra cost to you.

San Antonio photography guide hero imageSave

Amazon Associates disclosure: ShutYourAperture is a participant in the Amazon Services LLC Associates Program. As an Amazon Associate we earn from qualifying purchases. Some links below go to Amazon (Store ID edinchavez01-20). Buying through these links costs you nothing extra and helps fund our free guides.
Skip the planning. Get the San Antonio PDF. All locations, GPS coordinates, golden-hour times, gear tips. Instant download.

San Antonio, Texas is one of the most photogenic cities in the United States. If you have a camera and the patience to show up before dawn, San Antonio will give you images that last a career — but only if you know where and when to point it.

This is the definitive field guide to the 12 best photography spots in San Antonio, with GPS coordinates you can drop straight into Google Maps, exact camera settings tuned to San Antonio’s unique light, precise timing for every location, and the access notes nobody else bothers to document. It mirrors the intel inside our San Antonio Ultimate Photographer’s Guide ($47 PDF) — a downloadable field guide with full-page hero images, GPS maps, seasonal tables, a city safety briefing, and a complete photographer’s packing list. Get the guide →

Planning multi-city travel? See also: U.S. cities photography hub and the National Parks Photography Guides.

San Antonio Ultimate Photographer’s Guide — $47
12 GPS-mapped locations · Exact camera settings · Multi-season shooting calendar · Free annual updates

Download the PDF guide →
Skip the planning

Get the San Antonio Ultimate Photographer’s Guide

Every location below — pre-mapped with GPS, golden-hour timing, gear recommendations, cultural rules, and a 14-day itinerary. Downloaded by 200+ working photographers.

Get the PDF · $47
Instant download · Lifetime updates

Quick jump to the 12 spots

  1. The Alamo — Alamo Plaza at Sunrise
  2. San Antonio River Walk — La Villita / Arneson River Theatre
  3. Tower of the Americas — Observation Deck
  4. Mission San José — UNESCO World Heritage Site
  5. Mission Concepción — UNESCO World Heritage Site
  6. San Fernando Cathedral — The Saga Light Show
  7. Japanese Tea Garden — Brackenridge Park
  8. Pearl District — Hotel Emma Exterior and Brewery Complex
  9. King William Historic District — Steves Homestead & Painted Victorians
  10. Hays Street Bridge
  11. Market Square — El Mercado
  12. Mission San Juan — UNESCO World Heritage Site (Mission Reach Trail)

A look inside the San Antonio Photographer’s Guide

Here are three of the actual shots you’ll find inside the PDF — cinematic full-page references for the exact spots, lenses, and lighting conditions documented in the guide. The full guide includes 12 locations, each with a hero image, GPS map, settings table, and a five-shot list.

The Alamo — Alamo Plaza at Sunrise — from the San Antonio Photographer's GuideSave
The Alamo — Alamo Plaza at Sunrise — sample reference photo from the San Antonio Photographer’s Guide PDF

Before you shoot San Antonio: the essentials

  • Free public access: All four UNESCO mission exteriors (San José, Concepción, San Juan, Espada) are free to visit; Mission Valero (The Alamo) is free on Alamo Plaza exterior 24/7 and free to enter during operating hours (9 AM–5:30 PM, until 7 PM in summer); San Fernando Cathedral exterior and Main Plaza are publicly accessible 24/7; The Saga light show at the cathedral is free; Japanese Tea Garden in Brackenridge Park is free and open daily 7 AM–5 PM; Hays Street Bridge is a free public pedestrian bridge; King William Historic District streets are freely accessible 24/7; River Walk pathways are free to walk; Tower of the Americas observation deck requires paid admission (~$19.50 adults); Pearl District and Hotel Emma exterior are publicly accessible
  • Commercial permits: Commercial photography and videography on City of San Antonio public property (streets, parks, sidewalks) requires a film permit through the San Antonio Film Commission, which does not charge a permit fee — though police/fire staffing and parking-restriction permits carry additional costs. Applications must be submitted at least 10 business days before the first shoot date; a Certificate of Insurance is required. Apply online at the Film Commission portal. For the Alamo: tripods and professional equipment require a signed Right of Entry agreement and an Alamo Film Permit Request plus license agreement; drones are prohibited without an approved permit. For the four NPS-managed UNESCO missions: casual still photography and tourist-scale personal photography do not require a permit; sessions using tripods, lighting equipment, or staging for professional/commercial purposes require an NPS Special Use Permit ($50 non-refundable processing fee), submitted in writing at least 10 days in advance; photography hours are strictly 9:30 AM–4:30 PM year-round. Japanese Tea Garden: professional photography sessions must be scheduled in advance through the San Antonio Parks Foundation (210-559-3148). Contact: San Antonio Film Commission via sa.gov.
  • Best photography seasons: Spring (March–April) for blooming bluebonnets along the Mission Reach trail, fresh green canopy on the River Walk, mild temperatures and clear light with low humidity; Fall (October–November) for golden afternoon light on limestone mission facades, lower crowd density than summer, and the best conditions for Mission Concepción’s equinox-adjacent light phenomenon; Winter (December–February) for the Holiday River Walk lights (600,000+ LED lights on 2 miles of cypress trees), the San Fernando Cathedral Saga light show at its richest with long nights and thin winter air providing minimal atmospheric haze; Summer (June–August) for early-morning fog on the River Walk and dynamic thunderhead skies over the missions — though midday heat (95°F+) limits outdoor shooting windows to before 9 AM and after 6 PM
  • Blue hour notes: San Antonio’s blue hour rewards patient photographers willing to work two distinct windows. At dusk — roughly 20–35 minutes after sunset — the River Walk’s cypress-lined corridors glow with string lights and restaurant lanterns reflecting in calm water, while the downtown skyline’s warm orange office lights ignite against a deep cobalt sky best viewed from the Tower of the Americas observation deck. The Saga light show at San Fernando Cathedral (nightly at 9:00 and 9:30 PM, free) transforms the cathedral’s limestone facade into a 7,000-square-foot projection canvas most vivid in the post-blue-hour darkness. At pre-dawn blue hour, the quietest and most atmospheric window, the Alamo’s iconic facade is lit by floodlights against a deep blue sky — typically 25–40 minutes before sunrise — with zero crowds and calm air producing the sharpest long exposures. The blue hour window in San Antonio runs approximately 20–30 minutes both before sunrise and after sunset, compressed by Texas’s low latitude and fast-moving sky transitions.
  • Drone policy: Most major U.S. cities restrict drone flight in airspace and via local ordinances. Check FAA + city rules before launching.
  • Local resource: Official visitor information

The full-resolution version of every map below — plus seasonal calendars, gear notes per location, sun-angle diagrams, and a complete photographer’s packing checklist — is inside the San Antonio Photographer’s Guide PDF ($47).

1. The Alamo — Alamo Plaza at Sunrise

The Alamo is the most visited historic site in Texas and the most recognizable building in the American Southwest — a Franciscan mission church whose 1836 siege and Battle of the Alamo became a defining myth of Texas identity. The church facade is an architectural masterpiece of Spanish colonial baroque: Flemish limestone carved with carved niches, spiral columns, a scalloped parapet, and — in a visual paradox — no bell towers (they collapsed decades before the battle). At pre-dawn, with the plaza empty of its 4 million annual visitors and the facade glowing under floodlights against a cobalt sky, the Alamo presents the most cinematic version of itself: simultaneously intimate and monumental, ancient and otherworldly. No other American landmark offers this combination of mythological weight, architectural elegance, and photographic accessibility in a single free-admission public plaza.

  • GPS: 29.426, -98.4861
  • Elevation: 666 ft
  • Best time of day: Pre-dawn blue hour (30–45 minutes before sunrise) and golden hour (0–30 minutes after sunrise); avoid 9 AM onward on weekdays and any time on weekends when crowds become constant
  • Sun direction: The Alamo church facade faces approximately north-northeast (azimuth ~15–20°), which means the sun never strikes the front facade directly — it receives diffuse sky light all day long. This is actually favorable: the creamy Flemish-limestone facade reads beautifully in soft overcast or pre-dawn blue light without harsh shadows in the recessed niches and carved baroque details. At sunrise (azimuth ~75–100° in spring/fall, ~65° in summer), early golden light rakes across the south-east side of the church and the south wall of the Long Barrack from the right (east) as you face the facade — illuminating the projecting pilasters and creating a warm sidelight texture on the limestone that mid-morning frontal light destroys. At sunset, the west-facing side of the perimeter wall catches warm orange light. The famous floodlit facade looks best at pre-dawn blue hour when the sky is still a deep cobalt and the flood lights render the stone a luminous warm ivory against the blue — a 10–15 minute window approximately 30 minutes before sunrise.
  • Access: 300 Alamo Plaza, San Antonio, TX 78205. The Alamo Plaza (exterior, surrounding sidewalks) is publicly accessible 24/7. The Alamo grounds and church interior are open daily 9 AM–5:30 PM (extended to 7 PM in summer); free admission. The church interior requires reverent behavior; the exterior perimeter and Alamo Plaza are free to photograph at all hours. TRIPOD POLICY: Tripods and professional equipment are strictly prohibited on Alamo property without an approved Alamo Film Permit Request plus Right of Entry agreement and license agreement from the Alamo Trust — apply well in advance. Flash photography prohibited inside historic structures. Drones prohibited without permit. Commercial photography or licensing requires separate license agreement. Parking: multiple paid garages within 2 blocks (Rivercenter Mall garage, Crockett St garages, $8–$15/day). VIA Metropolitan Transit bus routes 3, 7, 10, 14, 20, 46 stop at or near Alamo Plaza.
  • Difficulty: Easy — flat plaza; most photography from exterior plaza requires no special access
  • Recommended settings: Pre Dawn Blue Hour Facade: aperture: f/8, shutter: 4s, iso: 400, lens: 16-35mm or 24-70mm at 24mm, notes: Set up a monopod (tripods prohibited) or brace against a bench on the plaza’s north side, facing south toward the facade. Shoot 30–40 minutes before sunrise when the sky is still deep cobalt and the floodlights render the limestone warm ivory. Use spot metering on the facade to prevent the floodlit stone from overexposing against the dark sky. Bracket ±1 EV. A 3-second self-timer eliminates shake.  ·  Golden Hour Raking Light: aperture: f/11, shutter: 1/60s, iso: 200, lens: 70-200mm at 100–135mm, notes: Approximately 10–20 minutes after sunrise, move to the south-east corner of the plaza for a 3/4 angle view where early golden light rakes across the carved baroque niches and pilasters on the south-facing edge of the facade. A telephoto compresses the depth and makes the stone carving textures pop. Use a polarizer to deepen the blue sky against the warm limestone.  ·  Long Exposure Night Plaza: aperture: f/8, shutter: 15s, iso: 200, lens: 16-35mm, notes: After 11 PM on weeknights, the plaza becomes very quiet. From the north end of the plaza, a 15-second exposure catches the light trails of the few remaining pedestrians as blurred ghosts against the sharply rendered facade and sky. Ensure the camera is steadily braced (no tripod permitted) — use maximum image stabilization or a sturdy monopod.  ·  Close Detail Baroque Facade: aperture: f/5.6, shutter: 1/250s, iso: 200, lens: 70-200mm at 200mm, notes: Telephoto isolates the carved baroque niches, spiral columns, and scalloped parapet from across the plaza, eliminating tourists in the foreground. Best in soft overcast light when the stone’s warm ivory reads evenly without harsh shadow contrast. Afternoon overcast days produce clean, even tones across the entire carved facade.

Shots to chase:

  • Pre-dawn fortress silhouette: from the south end of Alamo Plaza, a 4-second exposure at 16mm frames the full facade against a deep cobalt sky with the floodlit stone glowing ivory and a handful of lamppost stars — the definitive empty-plaza Alamo frame, achievable only 25–40 minutes before sunrise
  • Baroque detail extraction: from across the plaza with a 200mm telephoto, isolate the three carved niches (Saint Francis, Saint Dominic, center figure) in morning sidelight to reveal the three-dimensional relief that tourists standing close never appreciate
  • Puddle reflection: after San Antonio’s frequent afternoon thunderstorms, return to the plaza at blue hour — shallow rain puddles across the limestone pavers create imperfect, painterly reflections of the floodlit facade that last only 20–30 minutes before draining
  • Long Barrack gateway: from inside the Alamo grounds (during operating hours), use the narrow gateway arch framing the Long Barrack wall with a slice of the blue sky above and a cypress tree to the right — a compositional frame-within-a-frame that most visitors walk past
  • Sunrise flag alignment: position directly below the Texas flag flying over the south wall so that the flag is backlit against the sunrise sky, with the carved facade visible beneath — a patriotic and architecturally layered composition unique to this site

Pro tip: The single best window is the 15 minutes centered on 35 minutes before sunrise — the plaza is empty, the facade glows, and the sky holds enough blue to read as sky rather than black in your exposure. Bring a monopod (tripods are prohibited) and set your camera on a stone bench for stability. The Alamo Trust sometimes mounts temporary exhibits or barriers in the plaza; do a quick scouting visit the day before your shoot. The back of the church (Alamo Street side, east) is far less photographed and shows the raw limestone walls and garden in early sidelight. After 9 AM even on weekdays the plaza becomes crowded with school groups — plan your shoot to finish before 8:30 AM.

Common mistake to avoid: Shooting from the north side of the plaza (putting you behind the facade looking south) rather than from the south end of the plaza looking north at the facade. Arriving at sunrise rather than before sunrise — the true magic window is pre-dawn blue hour, not golden hour, for this west-facing plaza. Using on-camera flash or an iPhone LED fill inside the historic structures, which is prohibited and disrespectful. Overlooking the carved detail and baroque niches in favor of only shooting the full facade — the close-up details are among the finest Spanish colonial stonework in North America.

2. San Antonio River Walk — La Villita / Arneson River Theatre

La Villita (“The Little Village”) is the oldest neighborhood in San Antonio — a collection of 18th-century adobe and stone structures along the river that now houses artisan studios, galleries, and restaurants. The adjacent Arneson River Theatre (built 1939) is one of America’s most distinctive outdoor performance venues: the audience sits on grass-terraced steps on the north bank while performers use the south-bank stage across the water, with the river itself as the ‘pit.’ This architecture creates compositional possibilities found nowhere else in American cities — a stone arch stage opening framing the river, performers silhouetted against cypress trees, and La Villita’s cobblestone alleys spilling down to the water above. The River Walk here retains more architectural character than the commercial stretch near the convention center, making it the single richest photography stretch for the corridor.

  • GPS: 29.422, -98.4945
  • Elevation: 620 ft
  • Best time of day: Golden hour before sunset (4–7 PM, March–October) for warm light filtering through cypress canopy; blue hour (dusk) for Restaurant string lights reflecting in the river; dawn (6–7 AM) for fog and zero foot traffic
  • Sun direction: The River Walk sits approximately 20 feet below street level in a canyon defined by limestone and concrete embankments lined with cypress trees. Sunlight penetrates this canyon in a narrow window — in summer, direct sun reaches the water surface from approximately 10 AM–2 PM when the sun is directly overhead; in spring and fall, golden afternoon light angles down between the trees at approximately 3:30–5 PM from the west-southwest (azimuth ~230–250°), creating brilliant dappled light on the water and the colorful umbrella tables of Casa Rio. The Arneson River Theatre, immediately adjacent to La Villita, faces the river from the south bank; the Spanish-style stage arch and stone steps catch warm western light in the late afternoon. At blue hour (20–35 minutes after sunset), the restaurant string lights and decorative lanterns activate, and in calm conditions the entire illuminated corridor reflects in the dark water — the River Walk’s most photogenic moment.
  • Access: La Villita Historic Arts Village: 418 Villita St, San Antonio, TX 78205. Arneson River Theatre: access from La Villita or via River Walk stairs at S. Alamo St bridge. River Walk pathways are free and open 24/7. La Villita artisan shops open daily 10 AM–6 PM. River Walk boat tour cruises (Go Rio) depart near La Villita — $15 adult. VIA bus routes 7, 20 stop at Alamo/Commerce. Parking: Rivercenter garage or Hemisfair garage (~$10/day). Tripod policy: tripods permitted on public River Walk paths 24/7; no permit required for personal photography.
  • Difficulty: Easy — flat River Walk pathways; stairs connect to street level at multiple points
  • Recommended settings: Blue Hour Reflection: aperture: f/8, shutter: 8s, iso: 400, lens: 16-35mm or 24-70mm, notes: From the north bank path facing south toward La Villita’s staircase, capture the string lights and restaurant lanterns as they activate 10–15 minutes after sunset. Get as close to the water surface as possible on the bank for maximum reflection coverage. A 6–10 second exposure smooths the river surface and blurs any passing pedestrians. Use a monopod or brace against the stone embankment wall.  ·  Golden Hour Canopy Dapple: aperture: f/5.6, shutter: 1/125s, iso: 400, lens: 24-70mm at 35mm, notes: Between 4–6 PM on clear days in spring/fall, low western light angles through the cypress canopy and creates brilliant, high-contrast dappled light on the river and embankment plants. Use spot metering on a sunlit patch of water to prevent overexposure and let the shadowed areas go dark for a high-contrast, jewel-toned look.  ·  Dawn Fog Corridor: aperture: f/8, shutter: 1/30s, iso: 800, lens: 24-70mm at 24mm, notes: On humid mornings (especially June–September), morning fog collects in the River Walk’s sunken corridor around 6–7 AM, before street-level air movements disperse it. Wide-angle from a straight section of the path with the fog creating atmospheric depth and the river a dark mirror below. Increase exposure compensation +1 EV to open the foggy shadows.  ·  Arneson Theatre Architecture: aperture: f/11, shutter: 1/125s, iso: 200, lens: 16-35mm, notes: From the north bank of the river directly opposite the Arneson Theatre stage arch, use a wide angle to capture the full arch, the stone steps as terraced audience seating, and the green hillside of La Villita above. Include a cypress reflection in the foreground water for a layered depth composition. Late-afternoon overcast light is ideal for even tonal rendering of the stone.

Shots to chase:

  • Blue hour canal corridor: from the La Villita footbridge, shoot looking east down the straight corridor section with restaurant string lights reflected in the river below, a Go Rio boat gliding mid-frame, and cobalt sky above the limestone walls — the definitive River Walk image best captured 20 minutes after sunset
  • Arneson arch stage frame: from the north bank opposite the theatre, frame the wide stone arch opening of the Arneson stage with cypress trees as left and right pillars and the river as a foreground mirror — a composition that channels Spanish colonial architecture with theatrical geometry
  • La Villita cobblestone alley descent: from the top of the stone staircase connecting La Villita to the River Walk, shoot down the staircase using a 24mm with the stairs as leading lines descending to the river below and a Go Rio boat as a terminus point — especially effective when draped in greenery March–October
  • Casa Rio umbrella reflections: from the stone path below the Casa Rio restaurant (~50m east of the Arneson), compose the row of vivid colored umbrellas (yellow, red, green) over the river tables with their full reflection in the water below — best on overcast days when the colors saturate without specular glare
  • Pre-dawn fog symmetry: on a humid morning, position in the center of a straight River Walk section with the path and water creating two parallel lines leading to a vanishing point — shoot at 16mm to capture the full enclosed-canyon effect of the limestone walls rising above and fog filtering the distance

Pro tip: The River Walk between the Arneson Theatre and the Casa Rio restaurant (approximately the 200m ‘Great Bend’ section south of Commerce St bridge) is the single most photographically rich stretch — it combines the oldest architecture, the closest cypress canopy, and the most reflective river section. Arrive at dawn (5:30–6:30 AM) on weekdays: this is the only time when the walkway has fewer than 20 people visible. Go Rio boats run from 9 AM to 9 PM and add excellent kinetic interest to long-exposure river shots — their white hull trails read beautifully in 4–8 second exposures. Holiday lights (Thanksgiving through New Year’s) multiply the photographic value dramatically: 600,000+ LED lights strung through the cypress canopy transform every evening into a blue-hour scene with ambient light.

Common mistake to avoid: Shooting only the most commercial ‘tourist mile’ near the convention center and missing the more atmospheric La Villita section. Arriving at golden hour at street level rather than getting down to the River Walk path level, where the light transitions and reflections are. Not checking wind conditions — even light wind at surface level creates ripples that destroy reflections. Shooting only from one side of the river and missing that the opposite bank often delivers the stronger composition with reflections visible.

3. Tower of the Americas — Observation Deck

Built for the 1968 HemisFair World’s Fair (theme: ‘The Confluence of Civilizations in the Americas’), the Tower of the Americas is the only structure in San Antonio that offers an unobstructed 360° elevated panorama of the entire Alamo City and its surrounding Texas plain. At 750 feet it surpasses every building in the downtown skyline, placing the photographer above all obstructions. The view is uniquely layered for a Texan city: the dense green River Walk corridor cutting through the grid, the Alamo’s plaza visible as a pale rectangle amid the downtown blocks, Hemisfair Park below with its fountains and gardens, and the ring of missions visible on the southern horizon up to 8 miles away. No telephoto needed — the Texas sky is simply enormous, and the open plains on three sides give every sunset a billboard-scale canvas of color.

  • GPS: 29.419, -98.4835
  • Elevation: 750 ft
  • Best time of day: Sunset through blue hour (primary); 30–45 minutes before sunset for best warm-light cityscape; dawn for clear-air panorama with no heat haze
  • Sun direction: From the observation deck at 750 feet above ground level (approximately 1,390 feet above sea level), there are no obstructions in any direction — the full 360° panorama is available at all times of day. The downtown skyline cluster (Frost Bank Tower, Grand Hyatt, Tower Life Building) lies directly to the northwest. At sunset (azimuth ~270° in equinox, ~295° in summer), the sun sets beyond the downtown skyline, creating a dramatic silhouette of the towers against an orange-to-magenta sky. This is the classic ‘San Antonio sunset cityscape’ shot. Looking east at dawn, the Texas Hill Country and the broad Bexar County plains stretch to the horizon with the nearest ranches and the Salado Creek greenway visible as dark threads. In the south and southwest, on clear days, the four distant UNESCO missions are visible as pale limestone outlines in the landscape — a remarkable 4-in-1 heritage view unique to this deck.
  • Access: 739 E. César E. Chávez Blvd, San Antonio, TX 78205. Open Sunday–Thursday 10 AM–10 PM, Friday–Saturday 11 AM–11 PM. Observation deck admission: ~$19.50 adults, ~$15 seniors, ~$11 children. Photography is freely permitted on the observation deck; tripods are generally accommodated on the open-air deck though staff may ask you to be mindful of space during busy periods. No drones. Parking: Hemisfair Park garage adjacent, $8–$12/day. VIA buses 20, 5 stop nearby. The Chart House revolving restaurant on the deck allows diners to photograph from a seated position — consider a reservation for quieter shooting access.
  • Difficulty: Easy — elevator access to observation deck; physical limitation is primarily the glass railing which can cause unwanted reflections
  • Recommended settings: Sunset Skyline Panorama: aperture: f/11, shutter: 1/60s, iso: 200, lens: 16-35mm or 24-70mm, notes: Face northwest and compose the downtown skyline cluster — Frost Bank Tower, Grand Hyatt, and Tower Life Building’s Gothic crown — against the sunset sky. Include the River Walk’s green serpentine in the mid-foreground. Arrive 45 minutes before sunset to choose your composition; the best 5-minute window is when the sky turns deep orange directly behind the towers. Shoot a bracketed sequence (±2 EV) for HDR blending of the bright sky and dark city.  ·  Blue Hour 360 Panorama: aperture: f/8, shutter: 10s, iso: 400, lens: 16-35mm, notes: 20–35 minutes after sunset, walk the full deck perimeter shooting panoramic segments. Office building lights are now on, the River Walk string lights sparkle in the canyon below, and the sky holds cobalt color. Stitch 5–7 overlapping frames at 24mm for a full 360° panorama. A remote shutter release prevents camera shake on the long exposure through the deck’s glass railing — position the lens against the glass to eliminate reflections.  ·  Telephoto Mission Reach: aperture: f/8, shutter: 1/250s, iso: 400, lens: 70-200mm at 200mm, notes: On a clear morning (before convective haze builds after 10 AM), face south-southeast with a 200mm and attempt to resolve Mission San José’s tower and church, approximately 3.5 miles distant. In winter with excellent clarity, all four missions are resolvable as pale rectangles. Set focus to infinity and shoot at 1/250s to minimize atmospheric shimmer.  ·  Night Light Abstraction: aperture: f/16, shutter: 25s, iso: 100, lens: 24-70mm at 35mm, notes: After full dark, use f/16 to turn every point light source (streetlights, car headlights, building windows) into a 16-pointed starburst. The River Walk canyon below becomes a ribbon of golden stars. 25 seconds at ISO 100 provides a clean base exposure without blown highlights in the brightest building facades.

Shots to chase:

  • Sunset tower silhouette from below: before going up, shoot the full 750-foot tower from Hemisfair Park below at golden hour — a 16mm upward angle with the park’s fountains as foreground and the spire against a sunset sky creates a dramatic radial-line composition
  • 360° blue hour stitch: walk the full deck perimeter over 20 minutes shooting 8 overlapping segments for a seamless 360° panoramic image of San Antonio at blue hour — a social-media-scale image deliverable unavailable from any other location in the city
  • Alamo from above identification: with a 70-200mm from the northwest sector of the deck, find and frame the Alamo Plaza — identifiable by its pale limestone plaza rectangle amid the downtown grid — with the river’s green corridor threading past it; a perspective that recontextualizes the otherwise ground-level icon
  • Mission horizon line: face due south on a clear winter morning and use a 200mm to stitch a southern horizon panorama that includes Mission San José’s silhouette (3.5 miles), Mission San Juan (5 miles), and Mission Espada (7 miles) as increasingly faint outlines against the Texas plain — a layered heritage landscape unique to this viewpoint
  • Car light trail river: at full dark, face the River Walk corridor below (look slightly west of north) and use a 60-second exposure to capture the headlight and taillight streaks of traffic on Commerce Street and Market Street bridging over the River Walk canyon, creating converging red and white arcs framing the illuminated water below

Pro tip: The deck’s glass railing creates problematic reflections when shooting from more than a few inches away — press your lens hood directly against the glass to eliminate them, or shoot through the open-air gaps at the railing base. Sunset timing on the deck is crucial: arrive at least 45 minutes before the scheduled sunset to claim a northwest-facing position before other visitors crowd it. The Chart House revolving restaurant completes a full revolution every 50 minutes — if dining, this means you automatically get every compass direction during a meal, which is a luxurious way to plan compositions. The open-air deck can have substantial wind gusts — use your body to shield the camera during long exposures and check that your camera bag is secured.

Common mistake to avoid: Shooting only toward the downtown skyline and missing the equally compelling 180° view southward across the flat Texas plain and mission landscape. Arriving at sunset and leaving when the sky turns dark — the blue hour period 20–35 minutes after sunset, when city lights illuminate and the sky holds cobalt, produces the richest cityscape images. Shooting hand-held in low light against the glass railing instead of pressing the lens hood against the glass for a steadied, reflection-free shot.

4. Mission San José — UNESCO World Heritage Site

Mission San José (founded 1720) is the largest and most architecturally complete of the five San Antonio missions, designated the ‘Queen of the Missions’ for its scale and ornamental richness. The church complex includes a functioning parish church (still holds Sunday mass at noon), a granary, a Native American quarters wall enclosing a 2-acre compound, a mill on the adjacent San Antonio River, and the celebrated Rose Window — considered the finest example of Spanish colonial ornamental stonework in North America. The Rose Window is a single carved stone screen approximately 4 feet in diameter set into the south sacristy wall, so elaborately carved with spiral volutes, pomegranates, shells, and human figures that it defies categorization: Spanish, Moorish, and indigenous motifs fuse in a stone symphony. For photographers, the combination of the grand west facade, the intimate Rose Window, the long colonnade of the convento, and the framing of cypress trees and sky makes this the single most photographically diverse mission in the park.

  • GPS: 29.3617, -98.4811
  • Elevation: 627 ft
  • Best time of day: Late afternoon to sunset (4–6 PM, spring/fall) for the west-facing church facade to receive direct warm frontal light; early morning for the Rose Window in east-facing sacristy wall; avoid midday sun which creates harsh shadow contrast on the carved details
  • Sun direction: Mission San José’s church facade faces due west (azimuth ~270°), which is the defining architectural sun-direction fact for photographers. Direct frontal light strikes the elaborately carved baroque facade — including the famous Rose Window (Ventana Rosa) on the south sacristy wall — in the late afternoon, roughly 2–4 hours before sunset. In spring and fall, this window of direct frontal light on the west facade runs from approximately 3 PM to 6 PM with increasingly warm color as sunset approaches. The Rose Window on the south wall of the sacristy (facing south) receives direct overhead sun from mid-morning through early afternoon but looks best photographically with diffuse sky light or in the angled late-afternoon light from the west-southwest that catches its Churrigueresque carved detail. At sunset, the church glows warm amber against a deepening sky — position yourself across the mission courtyard for the full width shot. The bell tower at the northeast corner is backlit at sunset and best as a silhouette.
  • Access: 6519 San Jose Dr, San Antonio, TX 78214. Open daily 9 AM–5 PM. Free admission. The four NPS-managed missions all have free entry. Photography permitted 9:30 AM–4:30 PM year-round per NPS policy; professional/commercial sessions with tripods, lighting, or staging require an NPS Special Use Permit (apply in writing at least 10 days ahead; $50 non-refundable processing fee). Casual photography without tripods does not require a permit. Parking: free lot on site. VIA bus route 42 (‘Mission Trail’ route) serves all four missions — free shuttle on weekends. The Mission Reach Hike-and-Bike Trail passes the site and connects to the River Walk.
  • Difficulty: Easy — flat grounds; interiors require navigating uneven stone floors
  • Recommended settings: Late Afternoon Facade: aperture: f/11, shutter: 1/125s, iso: 200, lens: 24-70mm or 16-35mm, notes: From the west courtyard, face east toward the church facade approximately 3 hours before sunset. The direct frontal light illuminates the full carved baroque portal and bell tower in warm even light. Include the stone path and mission courtyard as a leading-line foreground. A polarizer at 90° to the sun deepens the blue Texas sky against the warm limestone facade for maximum color contrast.  ·  Rose Window Detail: aperture: f/8, shutter: 1/250s, iso: 400, lens: 70-200mm at 150mm, notes: The Rose Window on the south sacristy wall is best photographed in diffuse morning light (overcast preferred) or in the soft angled light of late afternoon coming from the west-southwest, which wraps around the carved relief and brings out the three-dimensional depth. Use a telephoto from 20–30 feet away to fill the frame. Avoid direct overhead midday sun which flattens the relief.  ·  Granary Arch Interior: aperture: f/8, shutter: 1/30s, iso: 800, lens: 16-35mm, notes: The ruined granary (west of the church) has a series of stone arches open to the sky that create dramatic light shafts on clear days. Shoot from inside the granary looking up and out through the open roof at 16mm — the arches frame clouds and blue sky with textured limestone in the foreground. Use HDR or shadow-recovery in post to balance the bright sky with the dark interior stone.  ·  Sunday Mass Exterior: aperture: f/8, shutter: 1/500s, iso: 400, lens: 70-200mm, notes: Sunday noon mass at Mission San José draws worshippers in traditional dress to an active 300-year-old church. From the courtyard, respectful telephoto documentation of the congregants and clergy in the church entrance creates a living-heritage documentary image. Do not photograph inside the church during mass. Approach with respect and ask permission when photographing individuals closely.

Shots to chase:

  • Rose Window carved stone detail: from 20 feet away on the south exterior wall, use a 150mm to fill the frame with the Rose Window — shot in early afternoon diffuse light, the carved spiral volutes, pomegranates, and human figures read as a three-dimensional stone tapestry, the finest colonial ornamental stonework in North America
  • West facade golden hour: from the far west end of the mission courtyard at 4:30 PM in spring/fall, frame the full church facade with the stone wall and cypress trees as lateral flanking elements — the facade glows amber-orange in the direct setting sun while the bell tower catches the last warm light before falling into shadow
  • Granary sky arch: inside the roofless granary, shoot straight up through the open barrel vault at 16mm to frame the blue Texas sky (with clouds) against the ancient stone arches — a purely abstract architectural composition with no contemporary visual references
  • Mission compound overview: from the top of the accessible granary wall (where permitted), a moderate telephoto frames the entire 2-acre walled compound from above — the church, convento colonnade, well, and the pattern of paths through the courtyard create a rare bird’s-eye view of the living mission landscape
  • Convento colonnade shadow study: mid-morning when the sun is at 30–45° from the east, the series of round arches in the convento colonnade cast a pattern of elliptical shadows on the stone walkway — position at one end of the colonnade looking down its length to capture a repeating shadow-rhythm composition

Pro tip: The NPS photography window (9:30 AM–4:30 PM) excludes the golden hours, but the late afternoon window before 4:30 PM exit from the park still captures good warm light on the west-facing facade in fall/winter when sunset is before 6 PM. Sunday noon mass at the church is the only remaining mass in Texas regularly celebrated with Mariachi music — a unique living-heritage scene. The mill building on the adjacent San Antonio River (a short walk south) is far less visited and offers a picturesque stone mill with river reflections. VIA’s Mission Trail bus connects all four missions on weekends at no charge — useful for efficient multi-mission shooting days.

Common mistake to avoid: Arriving at 9 AM and shooting the west-facing facade in backlit morning conditions, when the facade is in complete shadow. Not visiting the Rose Window (south side of the church) because it requires walking around the building — it is the single most photographically significant element at the site. Shooting the missions only as ‘building portraits’ without exploring the interior courtyards, granary ruins, and surrounding grounds that give full context to the living mission compound.

Want this in your pocket on the street?
The full-resolution version of every spot above — with full-page hero photography, GPS maps with gold location pins, sun direction diagrams, multi-season tables, and a complete safety + packing checklist — is inside the San Antonio Ultimate Photographer’s Guide PDF ($47). Print it, save it offline, take it on the walk. Get the guide →

5. Mission Concepción — UNESCO World Heritage Site

Mission Concepción — UNESCO World Heritage Site San Antonio photography sampleSave
Mission Concepción — UNESCO World Heritage Site — cinematic reference from the San Antonio Photographer’s Guide PDF

Mission Nuestra Señora de la Purísima Concepción de Acuña (founded 1731) is the oldest unrestored stone church in the United States — still standing with its original walls, twin bell towers, and vaulted ceiling intact after nearly 300 years, with no major structural reconstruction. The church’s geometric frescoes (painted directly on the stone walls) are among the oldest surviving frescoes in North America; fragments remain visible in the vaulted sacristy. The twin-towered facade, unusual for Texas missions, gives it a cathedral-like presence that reads powerfully in wide-angle compositions. The annual August 15 solar light phenomenon — in which sunlight travels through the interior to illuminate specific sacred spots — is a 275-year-old astronomically engineered event that places this 18th-century building in the same category as Stonehenge and Chichén Itzá as solar-alignment architecture.

  • GPS: 29.3904, -98.4938
  • Elevation: 625 ft
  • Best time of day: Sunrise and early morning (primary) for the east-facing towers to receive direct frontal light; August 15 at 6:30 PM for the annual solar phenomenon (equinox-adjacent light shaft); blue hour for floodlit facade against deep sky
  • Sun direction: Mission Concepción is the only San Antonio mission with twin bell towers, and its church facade faces east (azimuth ~90°), the exact opposite of Mission San José. This east-facing orientation makes it uniquely suited to sunrise photography: at sunrise (azimuth ~80–100° in spring/fall), the rising sun strikes the twin-towered facade directly with warm frontal light as the day’s first color fills the sky. At sunset, the facade is backlit — creating dramatic silhouette opportunities from the west. The most famous optical phenomenon at the missions occurs here: on or near August 15 (the Feast of the Assumption), the setting sun aligns with the church’s west window over the front door; at approximately 6:00 PM a beam of light enters the door, travels slowly through the nave, and at 6:30 PM illuminates the floor at the cruciform directly under the dome while a second beam enters the west dome window and illuminates the face of the Virgin Mary above the main altar. This phenomenon has repeated every August 15 since 1749. It is a world-class photography event and requires planning months in advance.
  • Access: 807 Mission Rd, San Antonio, TX 78210. Open daily 9 AM–5 PM. Free admission (NPS). Photography 9:30 AM–4:30 PM year-round (professional/commercial with tripods requires NPS Special Use Permit; casual photography free and no permit needed). Parking: small free lot on site; street parking on Mission Road. VIA bus route 42 (Mission Trail) on weekends. The mission has no perimeter wall, meaning the exterior facade is visible and photographable from the street 24/7 — useful for pre-dawn/sunrise and late-evening shots from the public road.
  • Difficulty: Easy — flat grounds; church interior has uneven stone floor
  • Recommended settings: Sunrise Twin Towers: aperture: f/11, shutter: 1/30s, iso: 200, lens: 16-35mm, notes: From the grass park east of the church, face west toward the twin-towered facade in the 10–20 minutes after sunrise. The direct frontal light illuminates the warm ochre limestone and the surviving geometric fresco fragments visible on the towers. Include the old oak trees as natural framing. Bracket ±1 EV to handle the contrast between the bright facade and dark sky behind.  ·  August Solar Phenomenon: aperture: f/4, shutter: 1/60s, iso: 1600, lens: 24-70mm at 35mm, notes: Inside the church at approximately 6:15 PM on August 15: position on the north side of the nave facing south to capture the beam of light traveling across the floor toward the cruciform. Use a high ISO to render the dimly lit interior and the beam of light simultaneously. A tripod (requires NPS permit) or beanbag on a pew is ideal. Focus manually on the floor at the cruciform point to ensure sharpness on the light pool.  ·  Exterior Silhouette Sunset: aperture: f/11, shutter: 1/500s, iso: 200, lens: 70-200mm at 100mm, notes: From Mission Road to the east of the church at sunset, the twin towers become dramatic silhouettes against an orange-magenta sky. A telephoto from 200 feet east compresses the towers against the sky and eliminates the modern road and parking lot from the frame. Underexpose by 1–2 stops to deepen the silhouette contrast.  ·  Frescoed Interior: aperture: f/4, shutter: 1/15s, iso: 3200, lens: 24-70mm at 35mm, notes: Inside the sacristy (ask the ranger to open it), faint geometric frescoes in red, black, and blue survive on the vaulted ceiling and walls — among the oldest in North America. Use high ISO, no flash (prohibited), and brace against a wall for 1/15s hand-held. Focus manually on the fresco surface and shoot multiple frames to ensure at least one is sharp.

Shots to chase:

  • Dawn twin tower frontal: from the park east of the church, face west at sunrise with a 16mm — the twin bell towers appear to float above the grass park as golden light rakes across the ochre limestone, the oldest unrestored stone church in the United States in its purest photographic form
  • Solar beam phenomenon (August 15 only): inside the church at 6:30 PM, the famous beam of light travels across the stone floor to illuminate the cruciform under the dome — one of the most ancient and photogenic solar-alignment events in the Western Hemisphere, photographable in interior available light with a high-ISO camera
  • Twin tower silhouette at sunset: from Mission Road looking west, telephoto compression stacks the twin towers against a magenta sky in pure silhouette — the crenellated tops and the arched door visible as dark forms against the brightest part of the sky
  • Fresco detail macro: in the sacristy vault, use a macro or 50mm f/1.8 at high ISO to document the surviving geometric frescoes — layered octagons, stepped diamonds, and floral forms in terracotta red, charcoal, and faded blue — painted directly on limestone in the early 1700s
  • Open-air compound from above: from the top step of the church stairs, shoot across the open compound toward the ruined convento walls with the park’s live oaks creating dappled shade across the limestone — a living-history scene with no contemporary buildings visible in any direction

Pro tip: The August 15 solar phenomenon is a world-class photographic event that draws crowds — arrive at least two hours before 6 PM to claim your position inside the nave. Contact the NPS (210-534-8833) in advance as the church may set capacity limits for the event. The facade’s geometric polychrome frescoes (mostly faded) are best revealed in raking early-morning sidelight rather than direct frontal light — arrive at dawn and shoot from a south-angle position to see the surface texture. The park across Mission Road (no perimeter wall) gives public access to photograph the exterior facade at any hour — useful for pre-dawn blue-hour exterior shooting without needing NPS grounds access.

Common mistake to avoid: Shooting at midday when the east-facing facade is in full flat overhead shadow. Visiting only the exterior and skipping the interior, which contains the most historically significant surviving frescoes in Texas. Overlooking the ruined convento walls to the north of the church, which in late-afternoon backlight create one of the most atmospherically powerful ruin compositions in the four-mission trail.

6. San Fernando Cathedral — The Saga Light Show

San Fernando Cathedral (completed 1755; rebuilt 1873 with neo-Gothic additions) is the oldest continuously active Catholic church in the United States and the mother church of the Archdiocese of San Antonio. It served as a visual symbol of San Antonio for 270 years before the Alamo was constructed around its original chapel walls — in a sense, the Alamo’s Long Barrack was originally built as the convento of this very church. The Saga light show, created by French artist Xavier de Richemont, is one of the largest outdoor projection-mapping installations in North America — 7,000 square feet of animated light, color, and narrative music projected onto the 18th-century limestone facade to tell San Antonio’s history from indigenous roots to the present. The combination of a 270-year-old Gothic-influenced facade and state-of-the-art projection technology is visually unlike anything else in the United States.

  • GPS: 29.4244, -98.494
  • Elevation: 650 ft
  • Best time of day: 9:00 PM and 9:30 PM nightly (show times; vary seasonally with sunset) Tuesday–Sunday for The Saga light show; pre-dawn (5–6:30 AM) for the floodlit cathedral facade without crowds; mid-morning for the neo-Gothic interior in available light
  • Sun direction: San Fernando Cathedral faces west-southwest (toward Main Plaza), with the principal neo-Gothic facade and twin towers oriented at approximately azimuth 240–250°. At golden hour in late afternoon, the facade receives warm direct light from the west-southwest that illuminates the pale limestone towers and the rose window above the entrance. At sunset, the towers are fully frontlit and glow warm gold-orange against a deepening sky. Main Plaza spreads to the west and provides unobstructed sightlines to the cathedral from 150–300 feet away. The Saga projection mapping show (nightly, free) projects onto the full facade from projectors in the plaza, transforming the 7,000-square-foot stone surface into a 24-minute animated history of San Antonio — best photographed in full darkness (after astronomical twilight), though shooting during the blue-hour transition when the projection competes with a cobalt sky produces the most dramatic images. At pre-dawn, the cathedral is floodlit and the Main Plaza is typically empty — the best window for classical architectural photography of the exterior.
  • Access: 115 Main Ave, San Antonio, TX 78205. Cathedral open daily for visitors; free. The Saga light show: Tuesday–Sunday, nightly at 9:00 PM and 9:30 PM (times shift seasonally to after sunset; check mainplaza.org for current schedule). Free admission — spectators gather in Main Plaza with chairs, blankets, and standing areas. Arrive 30 minutes early to claim a front-row seated position. The show lasts approximately 24 minutes. Parking: Bexar County Courthouse garage and multiple meters on Dolorosa/Market streets (~$5–$12). VIA bus routes 3, 5, 7, 14 stop near City Hall/Main Plaza. Photography is freely permitted in Main Plaza 24/7.
  • Difficulty: Easy — flat Main Plaza; standing or seated viewing during the show
  • Recommended settings: Saga Projection Long Exposure: aperture: f/8, shutter: 2s, iso: 800, lens: 24-70mm at 35mm, notes: From the central front section of Main Plaza, brace your camera on a portable beanbag or monopod. A 2-second exposure blends the rapidly changing projection frames into a single luminous composite without motion blur on the static facade. The 2s exposure captures the color mix of consecutive frames — particularly effective during the rapidly cycling ‘fire of conquest’ sequences. Shoot in RAW for maximum shadow recovery in the dark Plaza foreground.  ·  Single Frame Projection Detail: aperture: f/4, shutter: 1/60s, iso: 3200, lens: 70-200mm at 100mm, notes: To freeze a single frame of the 24-minute show (e.g., the San Antonio skyline projection, the indigenous eagle sequence, or the human faces sequence), use 1/60s at f/4 ISO 3200. A telephoto lets you isolate individual scenes projected onto the tower and rose window from 200 feet away — revealing painterly projection-on-stone textures invisible to the naked eye.  ·  Pre Dawn Floodlit Facade: aperture: f/8, shutter: 8s, iso: 400, lens: 24-70mm or 16-35mm, notes: From Main Plaza at 5:30 AM, the cathedral is floodlit and completely deserted. Use a monopod braced at the plaza benches. 8 seconds at ISO 400 renders the warm floodlit limestone against a deep cobalt pre-dawn sky. Include a lamp post as foreground left or right for compositional depth and additional warm-light accent.  ·  Interior Available Light: aperture: f/2.8, shutter: 1/30s, iso: 3200, lens: 24-70mm at 24mm, notes: Inside the cathedral during off-mass hours (check schedule), the neo-Gothic nave and gilded altar receive natural light from the clerestory windows. Use f/2.8 and brace against a pew for 1/30s at ISO 3200. Focus on the altar for a central composition down the full nave length — the 80-foot barrel vault and painted columns create a powerful symmetrical corridor. No tripods or flash inside the church without permission.

Shots to chase:

  • The Saga 2-second blend: from Main Plaza center, a 2-second exposure during the fire and battle sequences blends multiple projection frames into a single swirling image of color and light on the facade — a long-exposure photography technique that transforms the 24-minute show into abstract color expressionism on stone
  • Twin tower projection telephoto: from the back of the plaza with a 135mm, isolate the Gothic twin towers as the show projects full-color narrative imagery onto them — the pale limestone acts as a perfect projection screen and telephoto compression makes the color gradients and illustrated figures appear hyper-detailed
  • Pre-dawn empty plaza: at 5:30 AM with the cathedral floodlit and plaza deserted, position at the Main Plaza’s west end for a symmetrical axis composition framing the full facade, the reflecting pavement, and the pre-dawn cobalt sky — photographically equivalent to the Alamo pre-dawn shot but in a fully Gothic idiom
  • Interior baroque-to-Gothic layering: from inside the nave facing the altar, a wide 16mm includes the neo-Gothic clustered columns and painted vault above while the gilded baroque retablo of the original 1755 altar anchors the far end — a 270-year visual dialogue compressed into one frame
  • Audience silhouette + projection: from behind the Main Plaza seating area, shoot back toward the cathedral so that the silhouetted audience heads and upraised phones appear as dark forms against the blazing, colorful projected facade — a vivid people-and-projection composition with a sense of communal gathering and light

Pro tip: Arrive 30–45 minutes before show time to secure a front-center position in the plaza seating area — later arrivals are pushed to the sides or stand behind seated rows. The show plays twice (9:00 and 9:30 PM); if you miss optimal camera position at 9:00, stay for 9:30 where you can reposition. For long-exposure work, bring a beanbag or a monopod — tripods are technically allowed in the open plaza but crowds make deployment awkward. Seasonal show times vary: in summer when sunset is after 8:30 PM, shows may be pushed to 9:30/10 PM; check mainplaza.org before traveling. The single best frame of the entire show is approximately 8 minutes in when the Alamo battle sequence projects the iconic Mission-era Alamo chapel across the entire facade — this iconic-within-iconic moment lasts approximately 40 seconds.

Common mistake to avoid: Shooting at 1/250s or faster to ‘freeze’ the projection — at fast shutters, only one video frame registers and the facade looks underlit and patchy. Slow exposures (1–4 seconds) blend multiple frames into rich, luminous composites. Positioning so far back in the plaza that the facade is too small in the frame — the ideal shooting distance for 35mm on a full-frame camera is 80–120 feet from the facade. Missing the pre-show setup as the projectors warm up and produce abstract test patterns on the facade — these warm-up minutes produce striking abstract images.

7. Japanese Tea Garden — Brackenridge Park

The Japanese Tea Garden is one of San Antonio’s most photogenic secrets — a former limestone quarry transformed in 1917 into a lushly planted sunken garden with koi ponds, stone footbridges, a 60-foot waterfall, a Japanese pagoda tea house, and winding paths through ferns, tropical palms, and bamboo. Built partly by Japanese-American immigrant Kimi Eizo Jingu and his family (forcibly displaced during WWII), the garden has a complex and poignant history visible in its restored stone structures. The vertical quarry walls create a completely enclosed visual world — standing in the center of the sunken garden, San Antonio’s skyline and streets have entirely disappeared; only sky, stone, water, plants, and the pagoda remain. This total environmental enclosure makes it one of the most dislocating and transporting photography locations in Texas: a tiny jungle in the heart of a 1.5-million-person city.

  • GPS: 29.4619, -98.4771
  • Elevation: 700 ft
  • Best time of day: Opening time (7 AM) for soft diffuse light, no crowds, and highest chance of still pond water; spring (March–April) for peak tropical plant color; fall for chrysanthemums; overcast days for deep color saturation in the sunken garden
  • Sun direction: The Japanese Tea Garden occupies a former limestone quarry, creating a sunken bowl approximately 20 feet below street level that functions as a natural light well. The quarry walls face multiple directions, but the central pond and pagoda complex face roughly south-southeast. In the morning (before 10 AM), the south-facing limestone walls catch early light while the sunken garden floor remains in soft shadow — ideal for the delicate balance of illuminated canopy and dark water reflections. The 60-foot waterfall on the west wall of the quarry is frontlit by morning light (east sun) through approximately 10 AM, and backlit with more dramatic shadowed depth in the afternoon. In the deep ‘canyon’ center of the garden, direct overhead sun only reaches the pond surface from approximately 11 AM–2 PM — outside this window, the pond reads as a dark mirror reflecting the overhanging bamboo and ferns. The pagoda at the garden’s center is best frontlit in morning (facing east-northeast). Overcast days eliminate all shadow issues and produce the richest green color saturation — the single best weather condition for this location.
  • Access: 3853 N St Mary’s St, Brackenridge Park, San Antonio, TX 78212. Open daily 7 AM–5 PM. Free admission. Free parking on site and adjacent hill. NOTE: All professional photography sessions (defined as planned, scheduled sessions using posing, professional equipment, or commercial intent) must be scheduled in advance through the San Antonio Parks Foundation (210-559-3148 or JTG@saparks.org). Casual personal photography with handheld cameras is welcome without advance notice. Tripods and drones require the formal booking process. The adjacent San Antonio Zoo and Witte Museum are paid attractions. VIA bus route 29 stops near the garden entrance.
  • Difficulty: Moderate — uneven stone paths, steep stone steps descending into the sunken garden; ADA access limited
  • Recommended settings: Dawn Pond Reflection: aperture: f/8, shutter: 2s, iso: 200, lens: 16-35mm or 24-70mm, notes: At 7 AM opening, the main koi pond is typically still. From the main stone footbridge, shoot down the pond’s axis toward the pagoda with a low angle — 2 seconds smooths any subtle water movement and creates a perfect mirror. Early diffuse light through the overhanging bamboo canopy gives even, shadowless illumination. Include stone bridge arch in foreground for depth.  ·  Waterfall Long Exposure: aperture: f/16, shutter: 4s, iso: 100, lens: 16-35mm, notes: The 60-foot waterfall on the west quarry wall is best with 4–8 seconds to create a silky-white water ribbon against the dark limestone cliff. Position at the base of the waterfall looking up to include the full height. An ND6 (1.8) filter maintains the 4-second exposure in morning light without blowing the waterfall highlights.  ·  Pagoda Portrait Environment: aperture: f/5.6, shutter: 1/125s, iso: 800, lens: 24-70mm at 50mm, notes: From the west side of the main pond, frame the Japanese pagoda tea house with the koi pond as foreground, overhanging palms as top framing, and the quarry walls as background — the total enclosure that makes this location unique. f/5.6 provides enough depth of field to keep the pagoda sharp while slightly softening the stone walls behind.  ·  Overcast Macro Detail: aperture: f/2.8, shutter: 1/500s, iso: 400, lens: 100mm macro or 70-200mm at 200mm, notes: The garden’s tropical plants — staghorn ferns, bird-of-paradise, lotus pads, and koi — photograph best on overcast days when diffuse light maximizes color saturation and eliminates specular glare from waxy leaf surfaces. Use a macro or telephoto in close to isolate single leaf textures or koi-under-water abstract compositions.

Shots to chase:

  • Pagoda pond reflection: from the main stone footbridge at 7 AM, shoot down the pond axis toward the pagoda with a 2-second exposure on a still morning — the pagoda, overhanging bamboo, and quarry walls all double perfectly in the dark mirror of the koi pond, creating a completely enclosed world with no urban visual references
  • Waterfall long exposure: from the base of the 60-foot west-wall waterfall, a 4-second exposure at f/16 renders the cascade as a continuous white ribbon against the dark basalt-limestone cliff face — include the small pool and stone steps at the base for foreground depth
  • Stepping stone path: on the series of flat stepping stones crossing the main pond, shoot at water level with a wide 16mm so the stone sequence creates a receding path through the composition with the koi just beneath the surface, pagoda in the background, and overhanging ferns framing the top
  • Koi school color abstraction: from the main bridge, shoot directly down into the pond with a telephoto at 1/500s to freeze the koi school in mid-turn — the deep orange, white, and black fish against the shadowed dark-green water create a purely graphic, Hokusai-style color composition
  • Dawn mist in the quarry: on humid mornings in late spring/early summer, thin mist sometimes collects in the sunken quarry bowl at opening time — shoot wide with backlighting from the east toward the pagoda, where mist creates atmospheric depth between the stone walls and the distant stone arches

Pro tip: Arrive exactly at 7 AM opening to photograph the pond before it gets stirred by visitors and koi feeding. The garden is at its least crowded on weekday mornings before 9 AM; by 10 AM on weekends the stone paths become congested and the pond too disturbed for reflections. The lotus plants flower in July–August and transform the main pond into a dense carpet of pink blossoms — a completely different visual season. The stone observation shelter at the east garden overlook (above the main quarry bowl) provides a semi-aerial view of the entire garden for mapping-style wide shots. Professional session bookings through the Parks Foundation include access to the garden before public opening for exclusive shooting windows — worth the coordination for commercial work.

Common mistake to avoid: Arriving mid-morning when direct overhead sun creates harsh, low-contrast flat light and the pond surface is already disturbed by koi feeding and visitor traffic. Shooting only the pagoda and missing the waterfall, stepping stones, tropical fern grottos, and carved stone archways that give the garden its full visual richness. Using flash in the enclosed garden (prohibited), which flattens the atmospheric depth that available light creates.

8. Pearl District — Hotel Emma Exterior and Brewery Complex

The Pearl Brewery (founded 1886) is the finest example of 19th-century German-American industrial architecture in San Antonio — a complex of red brick, limestone, and cast-iron buildings built by German immigrant brewers in a Victorian Gothic-industrial style completely unique in the Texas landscape. Hotel Emma (the 1894 Brewhouse, reimagined as a 146-room boutique hotel in 2015) is the architectural centerpiece: its Gothic cupolas, elaborate copper detailing, brick arches, and cast-iron brew kettles visible through the lobby windows create an experience that mixes luxury hospitality with industrial archaeology. The Pearl District’s transformation into San Antonio’s premier culinary and cultural neighborhood (with top restaurants, a James Beard Award-winning chef, a weekly farmers market, and a direct River Walk connection) means the campus is alive with photogenic human activity, market color, and culinary detail at every scale from architecture to food.

  • GPS: 29.4427, -98.4812
  • Elevation: 655 ft
  • Best time of day: Early morning golden hour (7–9 AM) for warm light on the Victorian brewery buildings and empty plazas; blue hour for the courtyard and Hotel Emma exterior illuminated against deep sky; weekend farmers market (Saturday 9 AM–1 PM) for market-life documentary
  • Sun direction: The Pearl Brewery complex occupies a north-south aligned campus along the San Antonio River, with the Hotel Emma (1894 Brewhouse building) facing roughly south-southeast into the main Pearl courtyard. At golden hour in the morning, warm east light rakes across the Hotel Emma’s Victorian Gothic industrial facade — red brick, metal window frames, limestone trim, copper cupolas — from the right (east) as you face the building from the courtyard, creating dramatic shadow-and-highlight contrast on the ornate industrial architecture. The main open plaza south of Hotel Emma is sunlit from the east in the morning and from the west in the afternoon. By blue hour (20–30 minutes after sunset), the Hotel Emma’s exterior lights activate, illuminating the copper cupolas and brick arches in warm tungsten glow against the cobalt sky — the single most photogenic condition for the building. The River Walk access path (Pearl section of Museum Reach) runs along the east edge of the campus — reflections of the Hotel Emma appear in the river at blue hour from this path.
  • Access: 136 E Grayson St, San Antonio, TX 78215. The Pearl campus is publicly accessible 24/7. Hotel Emma interior is a private hotel but the lobby is accessible to the public during normal hours; respectful photography of the common areas is generally permitted. The adjacent Pearl Farmers Market (Saturday 9 AM–1 PM; Sunday 10 AM–2 PM) is free and open to the public. Parking: Pearl garage on Grayson Street, ~$3–$10. VIA buses 9 and 550 express serve the Pearl area; the Museum Reach section of the River Walk connects the Pearl to downtown in approximately 25 minutes on foot. No permit required for personal photography in the public plaza areas.
  • Difficulty: Easy — flat campus; level River Walk path alongside
  • Recommended settings: Blue Hour Hotel Emma: aperture: f/8, shutter: 8s, iso: 400, lens: 24-70mm at 35mm, notes: From the south end of the Pearl courtyard at blue hour, face north toward the Hotel Emma’s main facade. The warm exterior lights activate at dusk, illuminating the copper cupolas and Victorian Gothic brickwork against the cobalt sky. At 8 seconds, any pedestrians in the plaza blur to ghosts while the architecture renders sharp. Use a monopod braced against the courtyard planters.  ·  Morning Golden Industrial Detail: aperture: f/8, shutter: 1/250s, iso: 200, lens: 70-200mm at 150mm, notes: At 8 AM, early golden light rakes east across the Hotel Emma’s brick facade, catching the brick texture and the ornate cast-iron ventilation details in high-relief shadow. A 150mm telephoto isolates the cupola detail against the sky — the copper caps and wrought-iron cresting render as jewel-like detail in raking light unavailable at any other time of day.  ·  Saturday Market Life: aperture: f/5.6, shutter: 1/500s, iso: 400, lens: 24-70mm at 35mm, notes: Saturday market (9 AM–1 PM) fills the Pearl plaza with colorful produce stands, flower stalls, local food vendors, and San Antonians in relaxed weekend mode. Use a 35mm equivalent for environmental documentary shooting — include the Hotel Emma or Brewhouse architecture as background context in every food and people shot to anchor the market within its unique historic setting.  ·  River Walk Museum Reach Reflection: aperture: f/8, shutter: 6s, iso: 400, lens: 16-35mm, notes: From the Museum Reach River Walk path (east side of the Pearl campus), face west at blue hour to capture the Hotel Emma’s illuminated cupolas and brick facade reflecting in the San Antonio River. The Museum Reach section is narrower and more intimate than the downtown River Walk. Position at river-level for maximum reflection depth.

Shots to chase:

  • Hotel Emma copper cupola skyline: from the main Pearl courtyard at golden hour, shoot straight up at the Hotel Emma’s roofline with a 16mm — the Victorian Gothic brick facade, copper-capped cupolas, and ornate ironwork cresting frame against a deep blue morning sky in a vertical composition that reads entirely differently from any other Texas architecture
  • Blue hour facade full-width: from the courtyard south end at blue hour, 24mm wide-angle frames the full Hotel Emma facade (77 feet wide) with warm exterior lights glowing on the brick, cobalt sky above, and plaza planters as foreground textural interest — the quintessential Pearl District nightscape
  • Saturday market color: from above the market on the upper courtyard level, a wide 16mm looking down on the flower and produce stands creates a kaleidoscopic top-down composition of market color — sunflowers, peppers, herbs, and heirlooms — with the Hotel Emma facade rising behind
  • Museum Reach bridge reflection: from the pedestrian bridge crossing the river at the Pearl campus edge, look north at blue hour — the San Antonio River becomes a dark mirror reflecting the Hotel Emma’s illuminated facade, a 30-second exposure flattening the water surface and intensifying the reflection symmetry
  • Cast-iron brew kettle interior: in the Hotel Emma lobby (accessible to public during hotel hours), the original 1894 copper brew kettles are preserved in place behind glass — a wide interior shot at 16mm with the kettles as foreground and the Gothic vaulted brewery ceiling above creates a space-time compression of 19th-century industry and 21st-century luxury

Pro tip: The Hotel Emma lobby is open to the public and respectful architectural photography is generally tolerated; ask at the front desk if you plan extended shooting. The River Walk Museum Reach connection (via the Pearl footbridge) offers the quietest and most reflective section of the entire 15-mile River Walk, making it ideal for nighttime water reflections without the restaurant foot traffic of the downtown loop. The Pearl’s rooftop bar (Southerleigh Fine Food & Brewery, upper level of Hotel Emma) opens in the evenings and provides a rarely visited elevated vantage of the campus and adjacent skyline — worth exploring for unique rooftop compositions.

Common mistake to avoid: Shooting only at midday when the Victorian brick architecture falls into flat, unhelpful light. Overlooking the Museum Reach River Walk section immediately east of the campus, which delivers the best exterior reflections of Hotel Emma in a quieter, more photogenic setting than the campus plaza itself.

Want this in your pocket on the street?
The full-resolution version of every spot above — with full-page hero photography, GPS maps with gold location pins, sun direction diagrams, multi-season tables, and a complete safety + packing checklist — is inside the San Antonio Ultimate Photographer’s Guide PDF ($47). Print it, save it offline, take it on the walk. Get the guide →

9. King William Historic District — Steves Homestead & Painted Victorians

King William Historic District — Steves Homestead & Painted Victorians San Antonio photography sampleSave
King William Historic District — Steves Homestead & Painted Victorians — cinematic reference from the San Antonio Photographer’s Guide PDF

The King William Historic District is the finest intact Victorian neighborhood in Texas — 25 blocks of German merchant-class mansions built between 1870 and 1920 in Second Empire, Greek Revival, Italianate, and Queen Anne styles by the German immigrant families who dominated San Antonio’s commerce in the Gilded Age. The street was so associated with German wealth that locals called it ‘Sauerkraut Bend.’ Unlike most American Victorian districts, King William was never torn down for urban renewal and survives largely intact, with canopied streets, original iron fencing, limestone curbs, and homes in graduated states of restored glory, active occupation, and romantic genteel decay. The Steves Homestead (1876), a three-story limestone mansion in Second Empire style with a mansard roof and decorative iron cresting, is the district’s flagship house museum and the photographic icon. The neighborhood’s mix of 150-year-old architecture, local art studios, hidden gardens, and the nearby San Antonio River creates the richest street-photography district in the city.

  • GPS: 29.414, -98.4967
  • Elevation: 630 ft
  • Best time of day: Golden hour morning (7:30–9:30 AM) for side-lighting on Victorian facades from the east; late afternoon (4–6 PM) for west-facing facades glowing warm; spring for blooming wisteria and pecan canopy
  • Sun direction: King William Street runs roughly north-south, with the historic mansions set back on large lots on both the east and west sides of the street. At sunrise and early morning, the east-facing facades of the houses on the west side of the street receive direct warm frontal light, while the west-facing facades of the east-side houses are lit in the afternoon. King William Street itself has a continuous canopy of mature pecan and live oak trees that filter morning and afternoon light into dappled patterns particularly attractive in spring and fall when the light angle is lower. The Steves Homestead (509 King William St) faces east — frontal light at sunrise through mid-morning. The 19th-century German and Greek Revival mansions (Guenther House area, Villa Finale block) face varying directions, requiring strategic walking along the 1.4-mile historic district to catch each facade in its optimal light. Blue hour reveals the district’s gaslight-style street lanterns creating warm amber pools on the shaded pavement between dark canopy silhouettes.
  • Access: King William Street, San Antonio, TX 78210 (primary street; 0.5 miles south of the downtown River Walk). The King William Historic District is a public neighborhood of private homes — all photography is from public streets and sidewalks. Steves Homestead (509 King William St): exterior freely accessible 24/7; interior tours for a small fee, check current status and hours (the property has had periodic closure periods for renovation — verify before visiting). Villa Finale Museum (401 King William St) is an NPS-affiliated museum open for tours. Parking: street parking on King William St and side streets is free but competitive; arrive early. VIA bus route 30 serves the King William area. The Blue Star Arts Complex (1414 S Alamo St) at the north end of the district is a useful anchor for parking.
  • Difficulty: Easy — flat sidewalks; 1.4-mile walkable district
  • Recommended settings: Steves Homestead Morning: aperture: f/11, shutter: 1/125s, iso: 200, lens: 24-70mm at 35mm, notes: From the King William Street sidewalk opposite the Steves Homestead at 8–9 AM, the east-facing limestone facade receives direct warm frontal light. Include the original wrought-iron fence and stone gate posts as foreground framing. A polarizer at 90° to the morning sun deepens the blue sky against the warm limestone and eliminates glare from the mansard roof’s slate tiles.  ·  Canopy Golden Hour Street: aperture: f/8, shutter: 1/250s, iso: 400, lens: 24-70mm at 24mm, notes: At 7:30 AM in spring/fall, the low east sun backlights the pecan and live oak canopy above King William Street, sending shafts of golden light through the leaves and onto the limestone facades and iron fences below. Shoot looking south down the street axis for maximum canopy-tunnel compression. This window lasts approximately 20 minutes before the sun rises too high.  ·  Painted Victorian Detail: aperture: f/8, shutter: 1/250s, iso: 200, lens: 70-200mm at 150mm, notes: Several restored Victorians on the adjacent Beauregard, Turner, and Washington streets have period-appropriate polychrome paint schemes (sage greens, ochres, burgundies, cream trims). Use a telephoto to isolate individual facade elements — gable ornaments, porch columns, painted stained glass transoms — in mid-morning direct light that reveals the full color range.  ·  Blue Hour Street Lanterns: aperture: f/8, shutter: 15s, iso: 400, lens: 24-70mm at 28mm, notes: At blue hour, the district’s vintage-style street lanterns activate, creating warm amber circles of light in the dark canopy tunnels. Use 15 seconds to balance the lantern glow with the deep blue sky above the tree line. Position in the middle of the street (check for traffic) looking south with the Steves Homestead as a mid-frame anchor and the lanterns creating leading-light depth.

Shots to chase:

  • Steves Homestead iron gate and facade: from the King William Street sidewalk at 8:30 AM, use a 50mm to frame the wrought-iron fence and gate posts in the foreground with the limestone Second Empire facade in direct morning light — the ornate ironwork creates a dark, graphic frame for the warm stone architecture behind
  • King William canopy street tunnel: from the center of King William Street looking south at 7:30 AM in spring, the mature pecan canopy creates a tunnel of backlit gold-green leaves converging to a vanishing point, with Victorian facades visible as warm forms on both sides — a uniquely Texan version of the classic ‘tree tunnel’ composition
  • Victorian polychrome facade telephoto: from across the street with a 135mm, isolate a single Victorian gable with its painted ornamental woodwork, bracket lights, and stained-glass transom in a tight architectural-detail study that works as a purely graphic color composition independent of context
  • San Antonio River back path: at the south end of the King William District near the Steves Homestead, a walking bridge crosses the San Antonio River — from the bridge at golden hour, look upstream (north) toward the downtown River Walk where the river curves through the green Mission Reach corridor, with Victorian rooflines visible through the pecan canopy above
  • Blue Star Arts Complex exterior murals: at the district’s north terminus, the Blue Star complex has large-scale painted murals on its exterior walls — use a 24mm at blue hour when the murals are illuminated by gallery lights and the sky holds enough blue to create a vivid mural-plus-sky composition

Pro tip: The single richest photography block is the 400–600 block of King William Street between E. Guenther and Adams Streets, where the most intact historic facades are concentrated on both sides. Walk the full 1.4-mile district once before shooting to identify which facades are in optimal light for your arrival time. The district’s back alleys (between King William and Turner Streets) are openly walkable and reveal carriage houses, hidden gardens, and less-restored architectural details that produce grittier, more personal images than the manicured street-front facades. The Guenther House (605 Guenther St), a mill complex and museum at the south end of the district, has a photogenic mill pond and race channel that adds a water element to the district loop.

Common mistake to avoid: Shooting only the Steves Homestead and leaving without walking the full district, missing the polychrome Victorians on Turner and Adams Streets. Arriving at midday when the canopy eliminates direct sunlight entirely and the facades fall into flat, contrasty dappled shadow. Not checking whether the Steves Homestead museum is currently open before planning a visit — it has had periodic closures for restoration work.

10. Hays Street Bridge

The Hays Street Bridge (1881; restored 2012) is one of the oldest surviving iron truss bridges in Texas and one of the most architecturally distinguished pedestrian bridges in the American South. It is a double-span viaduct: a 225-foot Whipple truss span (extremely rare in Texas; the Phoenix column variant found here is among fewer than 10 surviving examples in the United States) paired with a 130-foot Pratt truss span. The ornate Victorian ironwork — cast Phoenix columns, decorative lattice diagonals, original pin connections — creates a remarkably photogenic foreground-frame for the San Antonio skyline. As a pedestrian bridge repurposed from its original railroad crossing function, it offers a rare urban experience: a fully walkable iron truss structure from 1881 where pedestrians can touch the ironwork, walk within the trusses, and photograph directly through the lattice at the skyline beyond.

  • GPS: 29.4368, -98.4788
  • Elevation: 660 ft
  • Best time of day: Golden hour (sunrise and sunset) for raking light on the ironwork; blue hour for downtown skyline backdrop illuminated; morning for downtown skyline as backdrop looking west-southwest
  • Sun direction: Hays Street Bridge runs roughly east-west (azimuth ~90°), crossing the Union Pacific railroad tracks and Chestnut Street. The downtown San Antonio skyline is visible to the west-southwest from the bridge’s east end, with the Tower Life Building’s Gothic crown and the Frost Bank Tower identifiable at distances of approximately 1.5 miles. At sunrise (azimuth ~80–95° in spring/fall), the sun rises almost directly behind anyone standing on the bridge’s east end and looking west — creating a backlit silhouette of the downtown skyline framed through the Whipple truss ironwork. This is the primary skyline composition: the ornate bridge trusses in the foreground with the San Antonio towers in the distance. At sunset, the sun sets to the right-southwest of the skyline view and creates warm sidelight on the east-facing ironwork of the truss. The bridge deck runs at street level, providing a walking surface with the elegant 1881 Warren-Pratt truss ironwork overhead and on both sides.
  • Access: Hays Street over the Union Pacific Railroad, N Cherry St and Chestnut St, San Antonio, TX 78202 (east of downtown, near the Brooklyn Avenue / Eastside neighborhood). The bridge is a public pedestrian and bicycle bridge, open 24/7, free access. Parking: street parking on Hays Street and adjacent blocks (free). No formal transit connection — the bridge is approximately 1.3 miles from the nearest VIA hub. The Pearl District is a 12-minute walk north. No permit required for personal photography.
  • Difficulty: Easy — flat bridge deck, wide pedestrian path; no barriers between the photographer and the ironwork
  • Recommended settings: Sunrise Skyline Through Truss: aperture: f/11, shutter: 1/30s, iso: 200, lens: 16-35mm, notes: From the east end of the bridge looking west-southwest, position within the Whipple truss bay at sunrise. The rising sun at ~85° azimuth backlit the downtown skyline while the truss ironwork in the foreground is in deep shadow — creating a dark frame around a bright, warm skyline. At f/11 and 1/30s, the foreground truss retains shadow detail through HDR or shadow recovery in RAW. Bracket ±2 EV.  ·  Blue Hour Skyline Frame: aperture: f/8, shutter: 15s, iso: 400, lens: 24-70mm at 28mm, notes: From mid-bridge at blue hour (20–35 minutes after sunset), the downtown buildings illuminate against a cobalt sky while the bridge ironwork in the foreground is in near-darkness. A 15-second exposure renders both the dark ironwork and the lit skyline in the same frame. Include the street surface of the bridge deck as a leading-line element converging toward the skyline.  ·  Ironwork Raking Detail: aperture: f/8, shutter: 1/500s, iso: 200, lens: 70-200mm at 150mm, notes: At golden hour, raking light on the red-painted iron trusses reveals the texture of riveted joint plates, pin connections, and the Victorian lattice diagonals in high-relief shadow. Telephoto isolation of single truss bays against a blue sky — with the Phoenix columns as verticals — creates abstract industrial compositions that work independently of the skyline context.  ·  Under Bridge Railroad View: aperture: f/8, shutter: 1/125s, iso: 400, lens: 16-35mm, notes: From below the bridge (north side, on the Union Pacific right-of-way — check for public access), look up at the underside of the iron truss deck for a pure-structural composition of riveted iron beams converging to a vanishing point. Late afternoon backlight creates strong contrast between the dark iron and the bright sky visible between the beam flanges.

Shots to chase:

  • Truss-framed skyline at sunrise: from inside the Whipple truss on the east end, shoot west through the truss bays toward the downtown skyline — the Phoenix columns and lattice diagonals create a grid-like dark frame around the warm morning silhouette of the Tower Life Building and downtown cluster, a composition uniquely available in San Antonio
  • Blue hour skyline and iron: at blue hour from the mid-span deck, a 15-second exposure balances the cobalt sky, the illuminated downtown towers, and the dark silhouette of the Victorian truss ironwork overhead — a layered San Antonio history image (1881 iron meets 21st-century tower lights)
  • Railroad tracks leading lines: from the west end of the bridge looking down at the Union Pacific tracks crossing below, use a 16mm to capture the track geometry converging to a vanishing point under the bridge, with a passing freight train for kinetic energy and the downtown skyline visible above the track horizon
  • Ironwork portrait session: the bridge is increasingly popular as a portrait backdrop for quinceañeras, engagements, and families — the red iron lattice creates a vivid, uniquely Texan graphic backdrop for environmental portraiture without the tourism crowds of the Alamo or River Walk
  • Tower Life building telephoto from east end: use a 200mm from the east railing to isolate the Tower Life Building’s iconic 1929 Gothic crown against the sky with no foreground obstruction — the best clean telephoto shot of this San Antonio architectural landmark from any publicly accessible ground-level position

Pro tip: The bridge is at its most accessible and least crowded early in the morning (6–8 AM) and after 7 PM — at midday it attracts some foot traffic as a walking and cycling route. The Whipple truss span (east span) is the more photographically interesting section with its unusual Phoenix column design; most photographers concentrate only on the Pratt span (west) without examining the east span’s more complex ironwork. A wide-angle from within the truss provides the best skyline-through-iron compositions; a telephoto from the bridge approaches works best for isolated skyline shots. The bridge’s red paint (applied during 2012 restoration) reads strongly as a graphic element in black-and-white as well as color photography — consider monochrome processing for the ironwork close-ups.

Common mistake to avoid: Shooting only from the bridge deck looking along the span and missing the spectacular truss-framed-skyline composition visible only by positioning inside the truss bays. Arriving at midday when the light is flat and harsh on the iron. Not exploring the east Whipple truss span (the rarer, more historically significant section) because the approach from the Pearl District arrives at the west Pratt span first.

11. Market Square — El Mercado

Market Square is the largest Mexican market outside of Mexico — three blocks of color, noise, food, and folk art anchored by the historic 1901 Produce Row (now indoor vendor stalls) and anchored culturally by the legendary Mi Tierra Café y Panadería (open 24/7 since 1941), with its floor-to-ceiling paper flower displays and portraits of San Antonio mayors. For photographers, Market Square is a pure sensory overload environment: hand-painted talavera pottery stacked to the ceiling, embroidered textiles hanging from arcade columns, sugar skull Day of the Dead altars, mariachi music echoing through the arched corridors, and the perpetual energy of the only major outdoor market in San Antonio. The color intensity — saturated Mexican folk-art palette of vermillion, cobalt, chrome yellow, and emerald — is unmatched anywhere in Texas and creates images of pure chromatic joy.

  • GPS: 29.4244, -98.5006
  • Elevation: 655 ft
  • Best time of day: Morning (9 AM–noon) on weekends for market activity; golden afternoon (3–5 PM) for warm light on the colorful facade; evening (6–9 PM) for illuminated folk-art displays and the most atmospheric market interior
  • Sun direction: Market Square’s primary El Mercado building faces south along Commerce Street West, with the three-block outdoor plaza open to the north and east. At morning golden hour, the east-facing walls of the Produce Row sheds and the food vendor stalls catch warm frontal light that intensifies the reds, greens, yellows, and blues of the ceramic, textile, and folk-art merchandise. The covered arcades of El Mercado provide consistent shade throughout the day — inside the market’s vendor stalls, light comes from the arcade openings and is consistently soft, making the interior virtually immune to harsh midday sun effects. The outdoor plaza area between the market buildings receives full overhead sun from 10 AM–4 PM. The best light for the exterior tile work and the painted facades of the adjoining Mi Tierra restaurant is from the afternoon west-southwest, approximately 3–5 PM, when warm light angles across the building fronts.
  • Access: 514 W Commerce St, San Antonio, TX 78207. El Mercado / Market Square is open: Outdoor plaza 24/7; indoor markets generally 10 AM–6 PM Monday–Thursday, 10 AM–8 PM Friday–Sunday. Free to enter and browse. Parking: Market Square Parking Garage on Santa Rosa Ave (attached), $3–$8. VIA bus routes 30, 50 stop at Commerce/Santa Rosa, adjacent. Photography is freely permitted throughout the public plaza and market; no permit needed for personal photography. Interior vendor stalls: photograph respectfully and ask permission before close-up portraits of vendors.
  • Difficulty: Easy — flat paved plaza; covered indoor market aisles
  • Recommended settings: Vendor Stall Color Compression: aperture: f/5.6, shutter: 1/250s, iso: 800, lens: 50mm or 70-200mm at 85mm, notes: Inside the market arcades, compress a wall of stacked talavera pottery, embroidered blankets, or papel picado flags with an 85mm telephoto — the flat stacking and telephoto compression create a two-dimensional graphic composition of pure saturated color. Diffuse arcade light means no harsh shadow management needed. Use Matrix/Evaluative metering on the brightest element.  ·  Mi Tierra Interior Wide: aperture: f/5.6, shutter: 1/60s, iso: 1600, lens: 16-35mm at 16mm, notes: Inside Mi Tierra (open 24/7), the ceiling and walls are covered with paper flowers, painted murals, and framed portraits — a total-environment folk-art installation. At 16mm, capture the full visual density of the interior from a corner table. At 1/60s handheld at ISO 1600, available light from the overhead canopy lights renders warm and even. Visit at 6 AM when the restaurant is quietest.  ·  Morning Plaza Mariachi: aperture: f/5.6, shutter: 1/500s, iso: 400, lens: 24-70mm at 50mm, notes: On weekends, mariachi bands perform in the open plaza from approximately 11 AM onward. Position with the mariachis in the mid-ground and the El Mercado facade in the background — 1/500s freezes the musicians in mid-gesture while keeping background sharp. Morning light from the east illuminates the musicians directly. Ask permission before close-up single portraits.  ·  Evening Folk Art Glow: aperture: f/4, shutter: 1/30s, iso: 3200, lens: 35mm or 50mm, notes: After 6 PM when overhead sun is gone, the market’s pendant lights and under-arcade illumination create a warm, intimate glow on the folk-art merchandise. At ISO 3200 and f/4 with 1/30s (brace against an arcade column), the available light creates a natural, film-like quality without flash. The color temperature of the tungsten market lights adds orange warmth to the saturated folk-art palette.

Shots to chase:

  • Talavera pottery wall abstraction: from inside the market, face a floor-to-ceiling display of stacked talavera pottery and use an 85mm at f/5.6 — the telephoto compression flattens the multi-row pottery display into a two-dimensional mosaic of hand-painted blue-and-white geometric patterns, producing a pure abstract color study
  • Mi Tierra 24-hour magic: at 4 AM when the city sleeps, Mi Tierra is open and filled with night-shift workers, late-night revelers, and early bakers — a wide interior shot captures the folk-art ceiling, the counter culture, and the warm 24-hour glow that no other San Antonio location offers
  • Mariachi golden hour: on a Saturday at 11 AM, position with the mariachi trio backlit by the morning sun in the plaza — backlight creates rim-lit sombrero brims and guitar bodies against the dark market interior behind, and the sun-flare quality of the light adds visual energy matching the music
  • Papel picado sky: look straight up in the covered passage between El Mercado buildings where strings of papel picado (perforated tissue banners) are strung — a 16mm directly overhead creates a canopy of layered color and cutout pattern against the sky, a purely graphic abstract with zero ground reference
  • Color layers and depth: from the market entrance at 9 AM, shoot down the longest vendor aisle with the light coming from behind you — the successive layers of hanging textiles, ceramic shelves, and vendor booths create a 30-meter-deep color corridor receding to a warm vanishing point, a visual tunnel of pure Mexican folk-art palette

Pro tip: Mi Tierra Café’s panadería (bakery) section on the east end of the restaurant is a photographic world unto itself: racks of pan dulce in pastel colors, sugar skulls, and elaborately decorated Day of the Dead altar cakes are arranged within reach of photographers and change daily. Mariachi bands are most reliably present on Saturday and Sunday from 11 AM–2 PM in the plaza. The Día de los Muertos celebration (late October–early November) transforms Market Square into the most photographically intense event in San Antonio — elaborate public altars, face-painted participants, marigold carpets, and candlelight fill the plaza for multiple days. For vendor stall close-up photography, a 50mm f/1.8 prime is the most discreet and socially appropriate lens in the crowded aisles.

Common mistake to avoid: Arriving at midday in summer when the outdoor plaza becomes uncomfortably hot and the direct overhead sun creates harsh, washed-out light on the colorful merchandise. Not entering Mi Tierra, which is the most visually and culturally rich indoor photography environment in the complex. Using flash in vendor stalls without asking permission — it disturbs other customers and vendors may ask you to leave.

12. Mission San Juan — UNESCO World Heritage Site (Mission Reach Trail)

Mission San Juan (founded 1731, relocated from East Texas) is the most contemplative and least touristed of the four UNESCO missions — a quiet limestone compound set in the floodplain of the San Antonio River bend, surrounded by mature cottonwood and pecan trees and accessed by a branch of the Mission Reach Trail. The church is deliberately modest: a single-nave structure with thick plastered walls and the remarkable espadaña bell tower — a pure arcade of three bells open to the sky, with no containing structure, rising from the facade like an abstract sculpture. This simplicity, rare in the baroque-inclined San Antonio missions, gives San Juan a timeless quality that the more elaborate missions lack. The adjacent San Antonio River bend, cottonwood groves, and floodplain grasslands create the most photogenic natural landscape of any of the four missions and allow combined architecture-and-nature compositions unavailable at the urban sites.

  • GPS: 29.3328, -98.456
  • Elevation: 610 ft
  • Best time of day: Afternoon golden hour (3–5:30 PM, within NPS 4:30 PM exit) for the west-facing church to catch the setting sun from the side; morning for the smaller, more intimate compound to be frontlit from the east; sunrise and pre-dawn from Mission Reach Trail (exterior only) for solitude
  • Sun direction: Mission San Juan Capistrano’s compact church faces west-northwest (azimuth ~295°), meaning the facade catches afternoon and near-sunset light most dramatically. Unlike the larger missions, San Juan’s church is a simple one-nave structure with a characteristic open bell tower (an ‘espadaña’) rather than a bell tower building — the silhouette of this open arcade against the afternoon sky is the defining image of the site. At approximately 4–5 PM in spring and fall, warm afternoon light rakes across the church’s roughly-plastered white facade and illuminates the three bells visible through the espadaña openings. From the Mission Reach Hike-and-Bike Trail, which passes the mission’s east side, the setting sun backlit silhouettes of the church and espadaña are visible without entering the NPS grounds — this exterior viewpoint is accessible 24/7. The surrounding floodplain and San Antonio River bend adjacent to the mission add reflective water elements that none of the other three missions provide.
  • Access: 9102 Graf Rd, San Antonio, TX 78214. Open daily 9 AM–5 PM. Free admission (NPS). Photography 9:30 AM–4:30 PM year-round (professional/commercial with tripods/lighting requires NPS Special Use Permit; casual photography without permit). Parking: free lot on site. VIA Mission Trail bus on weekends. The Mission Reach Hike-and-Bike Trail passes directly alongside — cyclists and runners access the exterior without entering the NPS site. Mission San Juan is the most isolated and least-visited of the four UNESCO missions, offering a genuine 18th-century solitude rarely available at the other sites.
  • Difficulty: Easy to Moderate — flat grounds; Mission Reach Trail approach adds 2–4 miles of flat paved cycling/walking path
  • Recommended settings: Espadana Afternoon Silhouette: aperture: f/11, shutter: 1/500s, iso: 200, lens: 70-200mm at 150mm, notes: From the mission compound at 4 PM in spring/fall, face west toward the espadaña bell tower against the afternoon sky. Underexpose by 1.5 stops to render the church facade and espadaña as a clean silhouette against the warm sky. The three bells in their open arches are clearly identifiable as silhouettes — use a longer focal length to compress and enlarge the espadaña against the sky backdrop.  ·  Mission Reach Trail Approach: aperture: f/8, shutter: 1/250s, iso: 200, lens: 24-70mm at 35mm, notes: From the Mission Reach Trail 300 meters before the mission site at golden hour, the compound’s compound wall and espadaña are visible above the cottonwood tree line. Include the trail path, river vegetation, and the trees as layered foreground elements leading to the mission silhouette on the horizon — a composed ‘journey’ landscape combining the trail corridor and the historic landmark.  ·  Simple Church Frontal: aperture: f/11, shutter: 1/125s, iso: 200, lens: 24-70mm at 35mm, notes: From the courtyard directly in front of the church facade at mid-morning, the simple plastered white wall and espadaña against a blue Texas sky is a study in architectural minimalism. Include the flagstone path as a leading line. Use a polarizer to maximize the blue-sky and white-wall contrast. San Juan’s small courtyard and grassy forecourt make this the easiest mission for a clean, clutter-free full-facade composition.  ·  Riparian Landscape With Mission: aperture: f/11, shutter: 1/125s, iso: 200, lens: 24-70mm at 24mm, notes: From the river bank trail east of the mission, face west at golden hour — cottonwood trees frame the mission tower and espadaña above the river’s reed-lined bank. Include a section of the river surface as foreground. This is the only mission that provides a genuine wilderness-archaeology composition: ancient limestone and reed flats with zero contemporary urban references.

Shots to chase:

  • Espadaña bells against the sky: from the courtyard at 4:30 PM, a 150mm telephoto isolates the three bells in their open espadaña arches against a deep blue sky — a study in Spanish colonial architectural abstraction that is the visual signature of Mission San Juan
  • Mission Reach cottonwood approach: from the trail 500 meters out, a 24mm frames the long linear approach path with cottonwood trees creating a natural canopy-tunnel converging on the mission silhouette at the vanishing point — the quintessential ‘pilgrimage corridor’ composition connecting trail walker and sacred landmark
  • River bend and compound wall: from the San Antonio River bank immediately east of the mission at golden hour, the plastered compound wall and espadaña tower above native floodplain vegetation — a composition that looks unchanged from the 18th century and recalls the mission’s original role as an agricultural and spiritual outpost in the Texas frontier
  • Inside the compound at noon: at noon in summer, the direct overhead sun creates very short shadows at the base of the compound walls — walk the interior perimeter and look for the carved stone doorframes and original painted decoration fragments in raking light from above; the vertical walls are entirely in shadow while the courtyard grass is brilliantly lit
  • Espadaña sunset silhouette: from outside the NPS grounds on the Mission Reach Trail at sunset (after 4:30 PM NPS closure), the espadaña and church form a clean dark silhouette against an orange-magenta sky visible above the compound wall — a two-element pure-silhouette composition accessible for free without entering the NPS site

Pro tip: Mission San Juan is the least crowded of the four UNESCO missions by a significant margin — it is not uncommon to be the only visitor for 15–30 minute stretches on weekday mornings, a solitude inconceivable at the Alamo or Mission San José. The Mission Reach Trail makes a bicycle approach practical: cycling from downtown (approximately 7 miles) or from Mission San José (2 miles) along the paved river trail adds photogenic river-and-trail landscape to the mission visit. The adjacent acequia (irrigation canal) system and farm plots to the west of the mission compound are NPS-maintained active farm plots that provide authentic 18th-century landscape context for wide-angle compositions from the trail.

Common mistake to avoid: Visiting only Mission San José and Concepción and skipping San Juan because it is slightly farther south — the simpler, more contemplative architecture and natural riparian setting make it the best mission for landscape-architecture hybrid photography. Arriving after 4 PM and being refused entry by the NPS clock — plan NPS access earlier in the day and save the 4:30–6 PM golden hour for exterior/trail shooting after the grounds close.

When to photograph San Antonio: a year-round breakdown

San Antonio is photogenic every month of the year — but the conditions differ radically by season. Here is what to expect:

Spring (March–April) for blooming bluebonnets along the Mission Reach trail, fresh green canopy on the River Walk, mild temperatures and clear light with low humidity; Fall (October–November) for golden afternoon light on limestone mission facades, lower crowd density than summer, and the best conditions for Mission Concepción’s equinox-adjacent light phenomenon; Winter (December–February) for the Holiday River Walk lights (600,000+ LED lights on 2 miles of cypress trees), the San Fernando Cathedral Saga light show at its richest with long nights and thin winter air providing minimal atmospheric haze; Summer (June–August) for early-morning fog on the River Walk and dynamic thunderhead skies over the missions — though midday heat (95°F+) limits outdoor shooting windows to before 9 AM and after 6 PM

Photographer safety in San Antonio: read this

City photography has its own risks: gear visibility, neighborhood timing, traffic, weather. Read the briefing before you go.

  • Gear visibility: Use a discreet bag with no obvious camera branding. Keep a body strapped under a jacket on transit.
  • Neighborhood timing: Pre-dawn and post-sunset shoots reward early scouting. Cross-reference each location with current local guidance and choose well-lit transit routes.
  • Situational awareness: Headphones out. One eye in the viewfinder, one on the street.
  • Traffic: Bridges, medians, and bike lanes are not setup zones. Shoot from sidewalks and pedestrian areas only.
  • Weather: Summer storms move quickly; winter cold drains batteries. Layer up, keep gear dry, watch for ice on cobblestones at blue hour.

The complete safety briefing is inside the San Antonio Photographer’s Guide PDF.

Take this guide into the city

This post is the complete field reference. The San Antonio Ultimate Photographer’s Guide PDF is the field-deployable version: full-page resolution hero photography, GPS maps with gold pins for every location, multi-season shooting calendars, gear notes per location, sun-angle diagrams, the full city safety briefing, and a print-ready editorial layout in Framehaus black and gold. Save it offline. Print it. Take it on the walk.

San Antonio Ultimate Photographer’s Guide
Downloadable PDF · 12 GPS-mapped locations · Multi-season calendar · City safety briefing · Packing checklist

Get the San Antonio guide — $47

Combo Deal

Get the San Antonio Guide + Preset Pack

Photograph it. Edit it. Done.

$66
$54
Save $12
PDF Guide Every spot, GPS, golden hour
Preset Pack 20 Lightroom presets
Book your tours & experiences in San Antonio

All links go to Viator (a TripAdvisor company), the world’s largest marketplace for guided experiences. Tagged as affiliate per FTC.

Also on Amazon: gear that helps with this technique

Quick Amazon shortcuts to the gear most useful for this kind of shot. Use them if Prime shipping or Amazon credit makes more sense than B&H. As an Amazon Associate ShutYourAperture earns from qualifying purchases.

Take San Antonio home in your pocket.

Every shot location, every angle, every time of day worth shooting. Printable PDF + GPS-tagged map.

Instant download. Works on phone, tablet, and printed.

Continue reading

← Back to U.S. Cities Photography Guides

Related guides nearby

Three more photography guides within striking distance — perfect for combining into one trip.

Browse all 78 guides → · Open the map

Save your trip-planning hours

The complete San Antonio guide is $47

All vantage points above + 5 bonus secret spots, printable map, gear pack list, and editing recipes. One-time payment, instant download, lifetime updates.

Buy San Antonio PDF →

Common questions about the San Antonio guide

Is the San Antonio photography guide worth $47?

For most photographers, yes. The guide saves 8-12 hours of trip-planning research and prevents the most common mistake of San Antonio photography: shooting at the wrong time of day. If a single better frame is worth $47 to you, the guide pays for itself on day one. Buyers get every GPS coordinate, every golden-hour window, every cultural rule, and a printable shot list.

Does the San Antonio guide include GPS coordinates?

Yes — every vantage point in the guide has Google Maps-ready GPS coordinates so you can pin them before you fly. The guide also includes a printable map showing all locations clustered by walking distance, so you can build efficient half-day routes.

What's in the San Antonio PDF that isn't in this article?

The article shows the highlights. The PDF includes: 5 additional secret spots not published online, a 14-day itinerary with daily routes, the full camera-settings cheat sheet for every scenario in San Antonio, a printable gear packing list, post-processing recipes with screenshot examples, and a list of local guides we trust for portrait commissions.

Do I get the Lightroom presets too?

The $47 guide is the PDF only. The matching San Antonio preset pack is a separate $19 download — most buyers grab both as a bundle and save the editing time. Both are instant download, both work on Lightroom Classic and Lightroom Mobile.

Will the guide work for a San Antonio trip in 2026?

Yes. The guide is updated annually as fees, restrictions, and new vantage points change. All buyers get free lifetime updates. The 2026 edition includes the latest drone rules, museum photography policies, and seasonal light data for the year.

Get the San Antonio guide · $47