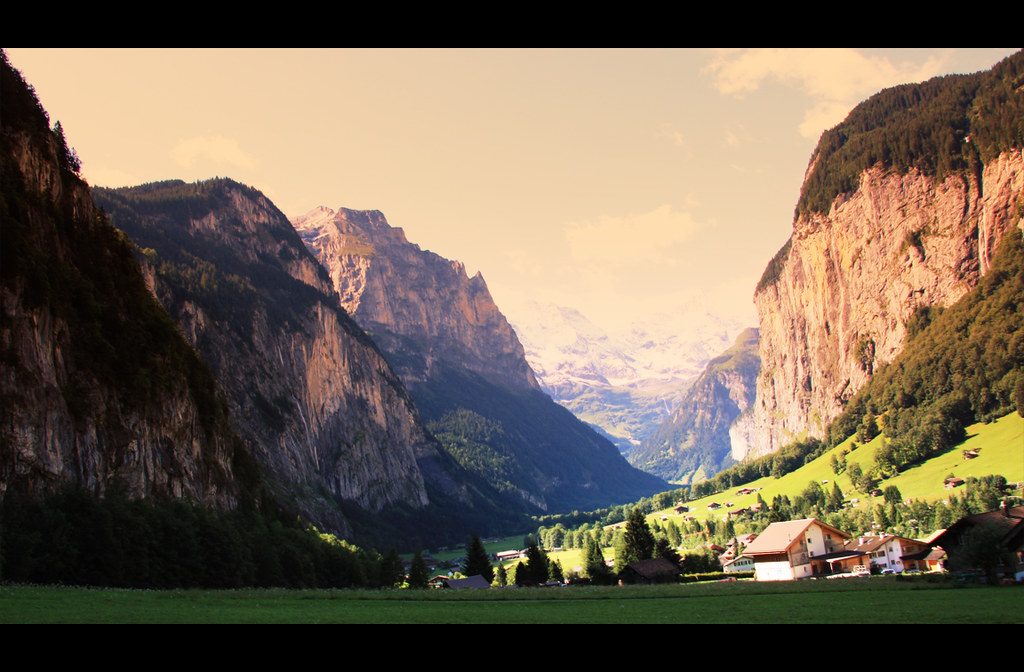
It’s 5:02 a.m. You’re standing at the edge of Sand Beach in Acadia National Park. The sky is pulling from navy to violet. You’ve got maybe 28 minutes before the color peaks and the direct sun blows out your sky. The Sony ZV-E10 II is in your hand, a Sony 10-20mm f/4 G lens on the front, and you realize you never verified your settings from last night’s shoot. What do you dive into first?
These ideas land harder once you’ve internalized the basics in our landscape photography guide.
That’s exactly what this guide covers. Not a dry table of numbers — a practitioner’s walkthrough you can follow in the dark, by muscle memory, before the light disappears. The ZV-E10 II is an unconventional choice for landscape work, but it’s a capable one if you set it up correctly and understand its constraints going in.
APS-C, No IBIS: What That Actually Means for Landscape Shooters
Before touching a single menu, let’s be honest about the hardware. The Sony ZV-E10 II is a 26MP APS-C sensor camera with Sony’s latest BSI CMOS design. That sensor delivers clean files at ISO 100 through roughly ISO 3200 — more than enough range for every scenario in this guide. The 1.5x crop factor means your 16mm prime becomes a 24mm equivalent, and your 10-20mm becomes a 15-30mm equivalent — still workable for wide vistas, but you will need to compose deliberately.
The big thing missing for landscape work is in-body image stabilization (IBIS). The ZV-E10 II has no IBIS. For landscape photography on a tripod, this is almost irrelevant — you’re using a remote shutter or the self-timer anyway. Where it matters: handheld blue-hour shots, hiking-to-the-trailhead carry shots, and the moments when you want to shoot without setting up sticks. Lean on a tripod and the absence of IBIS disappears as a constraint. For understanding how shutter speed interacts with camera shake, especially when you’re hand-holding at dusk, that fundamental knowledge matters more here than it does on a stabilized body.
One more note: the ZV-E10 II has no built-in viewfinder. You compose on the rear LCD, which tilts but does not fully articulate — relevant when shooting low-angle tripod work, covered in the gotchas section.
Pre-Shoot Menu Walkthrough
Run through this checklist the evening before a shoot — or at minimum at the trailhead before you start walking. Do it while you still have enough light to read the screen.
File Format: Compressed RAW
Go to Menu → Shooting → File Format → RAW and select Compressed RAW. Lossless Compressed gives you marginally more shadow headroom, but file sizes jump significantly. For bracket sequences of 3–5 frames, Compressed RAW keeps write speeds fast and your card from filling mid-session. Skip JPEG — landscape dynamic range clips a JPEG every time the sky is bright.
Image Size and Aspect Ratio
Set JPEG Image Size to L (26MP) and Aspect Ratio to 3:2. The ZV-E10 II embeds a JPEG preview for playback; full resolution lets you evaluate sharpness accurately on the rear LCD.
Shooting Mode: Manual or Aperture Priority
For most landscape scenarios, Manual (M) mode with the ISO set to 100 is the practitioner default. You control all three variables. The only exception is walking handheld during golden hour, where Aperture Priority (A) mode at f/8 with Auto ISO capped at 3200 keeps you shooting without fumbling dials. Understanding how aperture affects depth of field in landscape contexts — and why f/8 is typically the sweet spot rather than f/16 — is worth a full read before your first serious shoot.
Autofocus Mode: AF-S + Wide
Set Focus Mode to AF-S (single-shot AF) and Focus Area to Wide. In landscape work you’re rarely tracking a moving subject — you want the camera to lock once, confirm, and hold. Wide area lets the camera find the dominant near-field element (foreground rocks, a tree line, a waterfall base) and lock there. You’ll override with manual focus for astro and focus stacking, but for most terrain AF-S + Wide gets you sharp results with one half-press.
Picture Profile: Off for Stills
Make sure Picture Profile is set to Off when shooting stills. The ZV-E10 II’s Picture Profiles (including S-Log variants) are designed for video — they flatten the image to expand dynamic range for video grading. Applied to still RAW files they do nothing useful, and they do override the metered exposure display in confusing ways. Turn Picture Profile off, and use Creative Style (described below) for your stills baseline.
Creative Style
For landscape RAW files, Creative Style affects your in-camera JPEG preview and your LCD histogram, but not the RAW data itself. Set Creative Style to Standard or Landscape and pull Saturation down by -1. This gives you a preview that’s less over-cooked while still being readable in the field. Do not use Vivid — it saturates the preview to the point where you’ll misread your sky and underexpose to compensate.
White Balance
Shoot RAW and correct white balance in post. That said, setting a fixed WB in-camera gives you a consistent live view to evaluate exposure rather than dealing with the camera’s Auto WB shifting your preview between frames. For sunrise/sunset: Daylight (5500K). For blue hour: 4000K custom. For astro: 3900K to preserve the warm Milky Way core tone without overcooking it.
Drive Mode: Self-Timer + Bracket
Assign Drive Mode to the rear Fn menu. For tripod work, use the 10-second self-timer to eliminate shutter micro-vibration. For HDR, set Continuous Bracket at 3 or 5 frames, ±0.7 or ±1.0 EV steps — the camera fires all frames on a single shutter press.
Live Histogram and Zebras
Turn on the histogram overlay. Go to Menu → Setup → Display → Live View Display and enable the live histogram. For zebras, go to Menu → Exposure/Color → Zebra Display → Zebra Level: 100+. Zebras at 100+ show you pure clipping only — anything striped is blown to white with no recoverable data. This is more useful in landscape work than the default 70 setting, which fires zebras on bright sand and specular water reflections that aren’t actually a problem in RAW. For a deeper understanding of how ISO affects your histogram and noise floor, that knowledge translates directly into reading the live view correctly.
Scenario Settings Cookbook
These are field-verified starting points. Adjust for your actual conditions, but these numbers will get you a usable frame every time.
Sunrise and Sunset Wide Vista
| Setting | Value |
|---|---|
| Aperture | f/8–f/11 |
| Shutter Speed | 1/30s–1/250s (varies with light) |
| ISO | 100 |
| White Balance | Daylight 5500K |
| Drive Mode | 3-frame bracket ±1.0 EV |
| AF Mode | AF-S, Wide Area |
At f/8 to f/11 on the ZV-E10 II’s APS-C sensor, you get maximum depth of field with minimal diffraction. Stop past f/11 and the 26MP sensor starts showing soft edges from diffraction — f/16 on this body is a noticeable step back in corner sharpness. Shoot 3-frame exposure brackets at ±1.0 EV to cover the sky-to-shadow contrast range. Merge in Lightroom or Photoshop, or select the single best exposure for a clean sky. Use a NiSi True Color Variable ND filter to balance a bright sky against a darker foreground without bracketing, if you prefer a single-shot workflow.
Lens recommendation: the Sony E 10-20mm f/4 PZ G is the compact, weather-sealed choice for E-mount APS-C. If you want a faster aperture for flexibility at dusk, the Tamron 11-20mm f/2.8 Di III-A gives you an extra two stops of light without a significant size penalty. Both are fully reviewed in our best wide-angle lenses for landscape photography guide.
Blue Hour Long Exposure
| Setting | Value |
|---|---|
| Aperture | f/11 |
| Shutter Speed | 15–30 seconds (Bulb for longer) |
| ISO | 100 |
| ND Filter | 6-stop or 10-stop |
| White Balance | 4000K custom |
| Drive Mode | 10-second self-timer or wired remote |
| AF Mode | Manual Focus (pre-focused before ND) |
Blue hour is where the ZV-E10 II’s lack of IBIS stops mattering entirely — you’re on a carbon fiber travel tripod and the sensor is collecting photons for 15–30 seconds. Focus on your scene before attaching the ND filter, confirm sharpness with the Focus Magnifier (C2 button, see custom assignments below), then mount the filter and switch to MF to lock focus in place. The ZV-E10 II’s rear LCD brightness can fool you into thinking the scene is brighter than it is — trust your histogram rather than the live view preview during exposure review.
One note: cheaper variable ND filters introduce a magenta or green cast on long exposures. The NiSi True Color line minimizes this by design. Budget ND options trade price for time in post.
Astro and Milky Way
| Setting | Value |
|---|---|
| Aperture | f/1.4–f/2.8 (as wide as lens allows) |
| Shutter Speed | 15–20 seconds (500 Rule: 500 ÷ effective focal length) |
| ISO | 1600–6400 (start at 3200, adjust for scene) |
| White Balance | 3900K custom |
| Drive Mode | Single shot, 2-second self-timer |
| AF Mode | Manual Focus, focus at infinity or just short of it |
| Picture Profile | Off |
The 500 Rule on an APS-C body: divide 500 by your effective focal length (actual mm × 1.5). On a Sigma 16mm f/1.4 (the fastest E-mount APS-C prime for astro work), effective focal length is 24mm equivalent, so 500 ÷ 24 = ~20 seconds max before stars trail. The ZV-E10 II delivers usable Milky Way shots at ISO 3200 — there is noise, but modern noise reduction tools handle it well in post. Do not use NR in-camera on RAW files; apply it in Lightroom with full control.
Manual focus for astro: enable MF mode, zoom to 100% using the Focus Magnifier, then manually focus on the brightest star in the frame. When that star is a sharp point, not a smear, you’re there. Move the focus ring forward from infinity by the smallest perceptible amount — most E-mount lenses focus slightly past infinity and you’ll get soft stars if you slam the ring all the way back.
Waterfall Silk Effect
| Setting | Value |
|---|---|
| Aperture | f/11–f/16 |
| Shutter Speed | 1–4 seconds |
| ISO | 100 |
| Filter | Circular polarizer + ND if needed |
| Drive Mode | 10-second self-timer |
| AF Mode | AF-S, manual point on static rocks |
A circular polarizer on a waterfall shot does two things: it cuts reflections from wet rocks to reveal the color underneath, and it knocks 1.5–2 stops of light, which helps you reach the 1–4 second range even in dappled forest shade. Stack a 3-stop ND on top if you’re shooting at midday. At 4 seconds, water becomes fully silky. At 1 second, you can still see motion shape in the water — neither is wrong, but they produce different moods. Bracket at 1s, 2s, and 4s and pick in post.
Forest Detail and Close Focus
| Setting | Value |
|---|---|
| Aperture | f/5.6–f/8 |
| Shutter Speed | As needed for exposure |
| ISO | 100–400 |
| Drive Mode | Focus bracketing (if available) or manual focus stack |
| AF Mode | Manual focus, Focus Magnifier |
For forest floor and macro-style detail shots — ferns, moss, bark — you often want more depth of field than a single frame can deliver at any aperture without introducing diffraction. The solution is focus stacking: shoot a series of frames at f/5.6, manually advancing the focus point from foreground to background in small increments, then merge them in Photoshop or Helicon Focus. The ZV-E10 II doesn’t have a built-in focus bracketing mode for stills (it does for video), so advance focus manually between frames. Shoot from a solid tripod and do not bump the camera between frames.
Mountain Panorama
| Setting | Value |
|---|---|
| Aperture | f/8 |
| Shutter Speed | Fixed (lock exposure after first test shot) |
| ISO | 100 |
| White Balance | Fixed (Daylight, not Auto) |
| Overlap | 30–40% between frames |
| Orientation | Vertical frames (portrait orientation) for wider final image |
Shoot pano frames in vertical (portrait) orientation — rotating the camera 90 degrees using an L-bracket gives you a taller frame that, when merged, produces a panorama with more vertical coverage of sky and foreground. Lock your exposure in Manual mode before the sweep and keep White Balance on a fixed Kelvin value — Auto WB shifts between frames and creates banding in the merged result.
Focus at the hyperfocal distance: on a 16mm (24mm effective) lens at f/8, hyperfocal distance is approximately 2.5 meters. Everything from 1.2 meters to infinity will be acceptably sharp. Use an app like PhotoPills to calculate exact hyperfocal distances for your focal length and aperture combination before the shoot.
Autofocus for Landscape: When to Switch to Manual
The ZV-E10 II has Sony’s latest phase-detect AF system and it works well. But landscape photography has specific AF failure modes you need to know:
- Low-contrast surfaces: flat blue sky, gray granite, misty forest — AF hunts. Switch to MF and use Focus Magnifier at 100%.
- Through glass/filters: any strong ND filter or polarizer degrades AF contrast. Focus before mounting the filter.
- Astro: always MF. AF cannot find stars in darkness.
- Pre-dawn: AF-S will usually lock but verify at 100% magnification before committing to a bracket sequence.
- Precision foreground placement: when you need a specific rock or leaf at the exact edge of sharpness, single-point AF or MF with magnification is more reliable than Wide area.
Focus Peaking Setup
Enable Focus Peaking via Menu → AF → MF Assist → Peaking Color: Yellow, Peaking Level: High. Yellow shows up better against the mixed tones of landscape scenes than the default red. Confirm critical focus with the magnifier before releasing, especially for any shot you plan to print large.
Exposure Bracketing and HDR Workflows
The ZV-E10 II’s 26MP sensor has good dynamic range — roughly 13–14 stops — but a bright sky against a dark foreground at sunrise can span 18 stops of contrast. Bracketing is not optional for those scenes; it’s just how you work. The camera’s AEB (Auto Exposure Bracket) function is found under Drive Mode → Bracket: Cont.
For most HDR merges: 3 frames at ±1.0 EV is sufficient. For extreme contrast scenes (full sun, canyon shadows): 5 frames at ±1.0 EV or 3 frames at ±2.0 EV. In Lightroom, use HDR merge and check “Auto Align” — even on a solid tripod, slight vibration between frames benefits from alignment.
For focus stacking workflows, keep the camera at ISO 100, f/5.6, exposure fixed. Advance focus in precise increments between each frame, moving from the nearest element you want sharp to infinity. A wired remote shutter release eliminates any camera contact during the sequence.
Battery and Card Strategy
The NP-FW50 Cold Weather Problem
The ZV-E10 II uses the NP-FW50 (1020mAh) — the same cell Sony has shipped in APS-C bodies since 2010. Expect 200–250 shots per charge at room temperature, dropping 30–40% below 5°C and more in sub-zero conditions.
For a sunrise-to-mid-morning session with multiple bracket sequences, carry at least two batteries and keep spares against your body (warmth restores capacity). The Sony NP-FW50 OEM battery outperforms third-party cells in the cold — the price difference is worth it.
Memory Cards
The ZV-E10 II supports UHS-II SD cards and benefits from fast write speeds when shooting bracket sequences. Use a ProGrade Digital 128GB V90 UHS-II card (300 MB/s read, 250 MB/s write). At Compressed RAW file sizes of roughly 25–30MB per frame, a 5-frame bracket sequence hits 150MB. V90 cards clear the buffer without hesitation. Slower UHS-I cards introduce buffer stalls between bracket sets — you’ll miss light while waiting for the buffer to clear.
Custom Button Assignments for Landscape
The ZV-E10 II has five reassignable custom buttons plus the Fn menu. Here’s an optimized landscape layout:
| Button | Assigned Function | Why |
|---|---|---|
| C1 (top) | AF/MF Toggle | Instant switch between AF-S for most scenes and MF for astro/ND filter work |
| C2 (rear, top) | Focus Magnifier | One press to zoom in for focus confirmation at 100% |
| C3 (rear) | Drive Mode | Quick toggle between self-timer and bracket modes |
| Fn > Page 1 | White Balance, ISO, Bracket Settings, Histogram Display, Zebra Level | All landscape-critical settings accessible from one Fn page |
| Center Wheel | ISO | Turning dial to change ISO is faster than menu diving when light changes fast |
To reassign: Menu → Setup → Operation Customize → Custom Key/Dial Set. The ZV-E10 II uses the same Sony menu structure as the A6700.
Five ZV-E10 II Gotchas for Landscape Shooters
1. No Weather Sealing
The ZV-E10 II body has no weather sealing. The Sony 10-20mm f/4 G lens is sealed; the body is not. Waterfall mist and light rain are real risks. Use a rain cover when shooting near water — this is the single most significant practical constraint for landscape use.
2. Rolling Shutter in Video, Not in Stills
The ZV-E10 II’s improved BSI sensor significantly reduces rolling shutter versus the original. For stills at landscape shutter speeds, rolling shutter is not a practical concern. For video clips shot alongside stills, fast pans at wide focal lengths can still show mild skew.
3. The Screen Articulation and Tripod Conflict
The ZV-E10 II screen tilts (not fully articulates). This means when the camera is mounted on a tripod at low angles — shooting foreground rocks with a wide lens pointed down — you cannot flip the screen toward you cleanly the way you could on a fully articulating body. The screen only tilts up or down from the rear panel. For very low-angle work, use Sony’s Imaging Edge Mobile app to live-view the frame on your phone via Wi-Fi. It’s slower, but it solves the angle problem without buying a new camera.
4. No Built-in EVF Workflow Adjustment
There is no EVF on the ZV-E10 II. In bright midday sun the rear LCD can wash out even at maximum brightness. Shade the panel with your hand or use an LCD loupe for harsh-light composition. Plan for this during fast-changing blue-hour light.
5. Battery Door and L-Bracket Compatibility
Several popular L-brackets designed for the original ZV-E10 do not fit the Mark II’s body profile and may block the battery door. Verify fit and battery-door clearance before a shoot that depends on a quick swap.
Building Your Field Kit Around the ZV-E10 II
The body is just the start. Here’s the landscape-specific kit that makes the ZV-E10 II a complete system:
- Wide zoom: Sony E 10-20mm f/4 PZ G (weather-sealed, compact, constant f/4)
- Fast wide prime for astro: Sigma 16mm f/1.4 DC DN (f/1.4 captures the Milky Way with shorter exposures)
- Versatile wide zoom: Tamron 11-20mm f/2.8 Di III-A (f/2.8 across the zoom range, great for twilight shooting)
- Tripod: Peak Design Carbon Fiber Travel Tripod (packs into a carry-on, handles the lightweight ZV-E10 II body with no flex)
- Variable ND: NiSi True Color Variable ND (minimal color cast, hard stops to prevent X effect)
- Memory: ProGrade V90 128GB UHS-II (clears bracket sequences without stalling)
- Backup battery: Sony NP-FW50 (carry two minimum; three for full-day shoots in winter)
- L-bracket: Arca-Swiss compatible L-bracket (confirm ZV-E10 II fit before purchase)
- Remote shutter: wired USB-C remote shutter release (eliminates vibration for focus stacking and long exposures)
Putting It Together
Back at Sand Beach, with 25 minutes until color peaks: check that you’re in Manual mode, ISO 100, f/8. Confirm 3-frame bracket is active. Verify the live histogram is on and zebras are set to 100+. Get your focus locked with AF-S Wide on the mid-ground rocks, then switch to MF to hold it. Take one test shot, review the histogram — the sky should be placed at roughly 75% of the right edge with room to spare, and the shadow rocks should have some detail. If it’s right, let the bracket sequence run.
The ZV-E10 II is a deliberate camera for landscape work — it rewards preparation and planning rather than quick-reaction shooting. That is, in many ways, exactly what landscape photography demands. The APS-C sensor, the compact E-mount lens ecosystem, and the excellent 26MP image quality make it a serious tool for anyone serious about the discipline. For the fundamentals that make all of this context-make-sense, work through our complete landscape photography 101 guide — the light will be there; the question is whether your settings are ready for it.