Best Photography Spots in Cusco: 11 Locations With GPS

Tours & experiences disclosure: This guide includes affiliate links to Viator, the world’s largest tour and experiences marketplace. If you book through these links, ShutYourAperture may earn a small commission at no extra cost to you.

Cusco photography guide hero imageSave

Amazon Associates disclosure: ShutYourAperture is a participant in the Amazon Services LLC Associates Program. As an Amazon Associate we earn from qualifying purchases. Some links below go to Amazon (Store ID edinchavez01-20). Buying through these links costs you nothing extra and helps fund our free guides.
Skip the planning. Get the Cusco PDF. All locations, GPS coordinates, golden-hour times, gear tips. Instant download.

Cusco, Peru is one of the most photogenic cities in the world. If you have a camera and the patience to show up before dawn, Cusco will give you images that last a career — but only if you know where and when to point it.

This is the definitive field guide to the 11 best photography spots in Cusco, with GPS coordinates you can drop straight into Google Maps, exact camera settings tuned to Cusco’s unique light, precise timing for every location, and the access notes nobody else bothers to document. It mirrors the intel inside our Cusco Ultimate Photographer’s Guide ($47 PDF) — a downloadable field guide with full-page hero images, GPS maps, seasonal tables, a city safety briefing, and a complete photographer’s packing list. Get the guide →

Planning multi-city travel? See also: U.S. cities photography hub and the National Parks Photography Guides.

Cusco Ultimate Photographer’s Guide — $47
11 GPS-mapped locations · Exact camera settings · Multi-season shooting calendar · Free annual updates

Download the PDF guide →
Skip the planning

Get the Cusco Ultimate Photographer’s Guide

Every location below — pre-mapped with GPS, golden-hour timing, gear recommendations, cultural rules, and a 14-day itinerary. Downloaded by 200+ working photographers.

Get the PDF · $47
Instant download · Lifetime updates

Quick jump to the 11 spots

  1. Plaza de Armas — Cusco
  2. Sacsayhuamán Fortress — Sunrise
  3. San Blas Neighborhood — Bohemian Quarter
  4. Qorikancha — Sun Temple
  5. Cristo Blanco & Panoramic City Overlook
  6. Twelve Angled Stone — Hatunrumiyoc Street
  7. Pisac Ruins — Sacred Valley
  8. Ollantaytambo Ruins
  9. Moray — Circular Inca Terraces
  10. Maras Salt Flats — Salineras de Maras
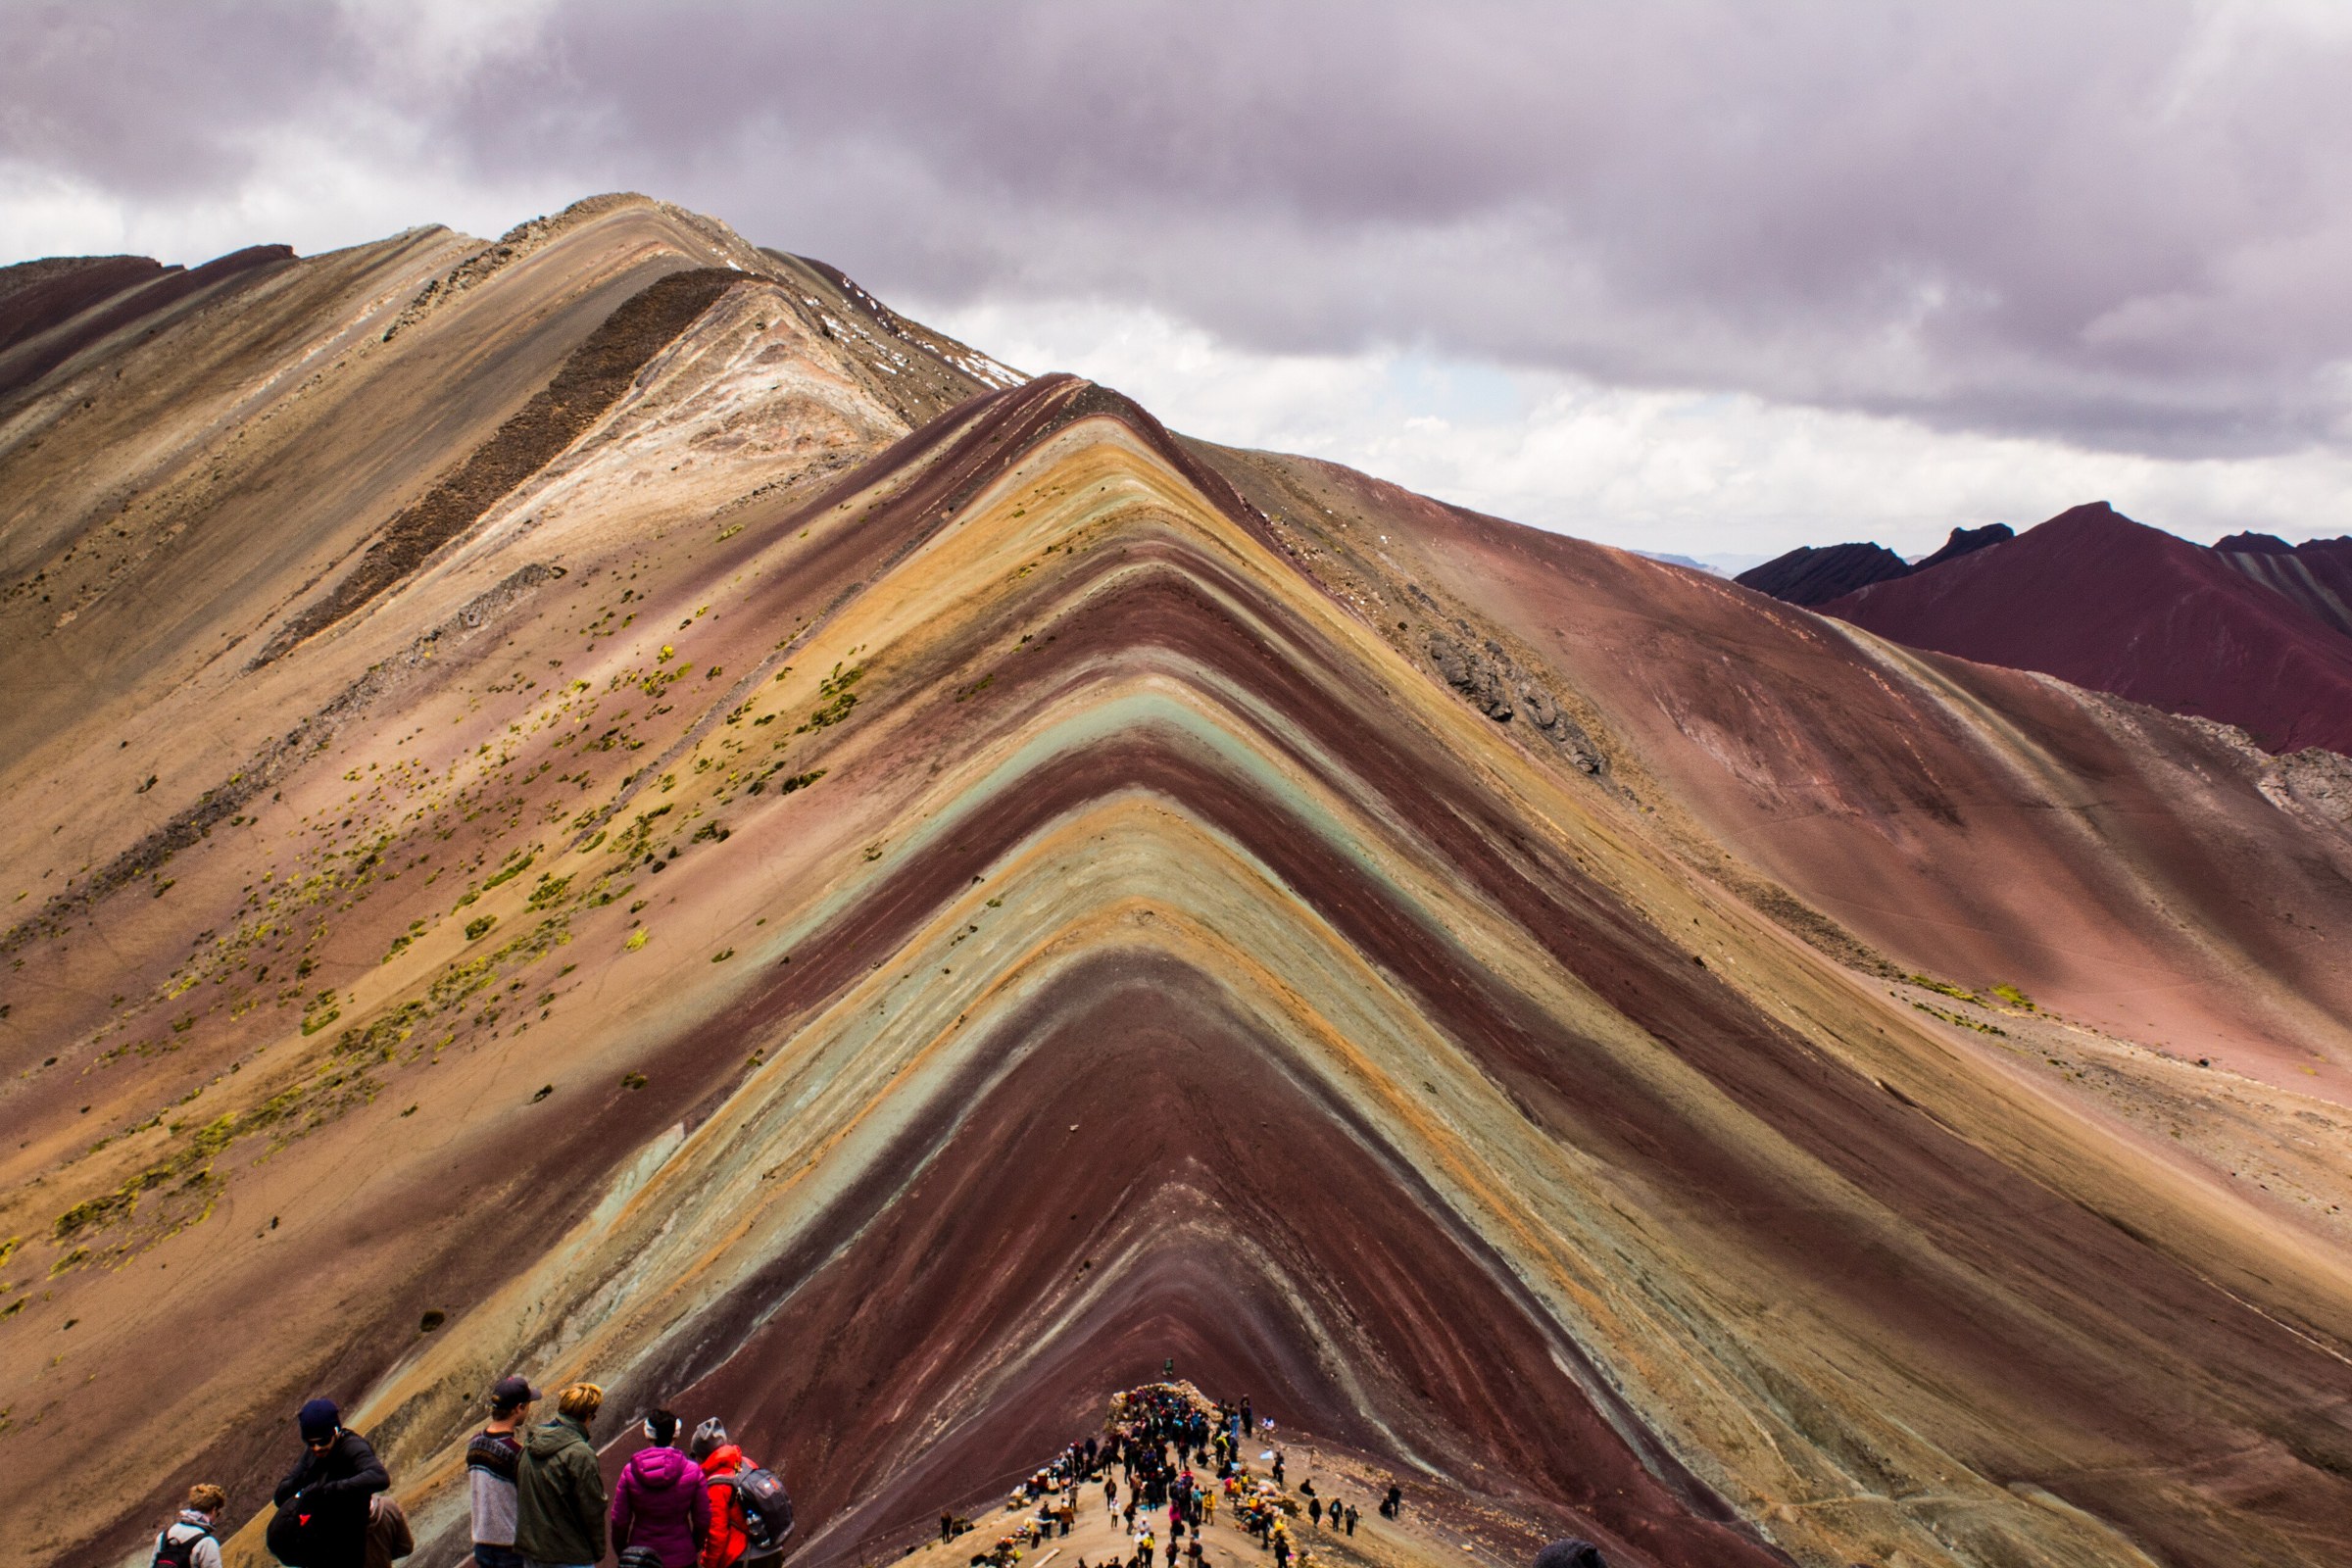
  11. Rainbow Mountain — Vinicunca

A look inside the Cusco Photographer’s Guide

Here are three of the actual shots you’ll find inside the PDF — cinematic full-page references for the exact spots, lenses, and lighting conditions documented in the guide. The full guide includes 11 locations, each with a hero image, GPS map, settings table, and a five-shot list.

Plaza de Armas — Cusco — from the Cusco Photographer's GuideSave
Plaza de Armas — Cusco — sample reference photo from the Cusco Photographer’s Guide PDF

Before you shoot Cusco: the essentials

  • Free public access: Plaza de Armas (public square, 24 hrs, free), Hatunrumiyoc Street / Twelve Angled Stone (free, pedestrian alley), San Blas neighborhood streets (free to walk), Cristo Blanco viewpoint (free), San Cristóbal Church viewpoint (free public terrace). Qorikancha/Santo Domingo temple: S/15 (~$4 USD) direct entry, not included in Boleto Turístico. Cusco Cathedral: ~S/25 (~$7 USD) direct entry, not included in Boleto Turístico. Maras Salt Flats: separate fee ~S/10 (~$3 USD) paid at entrance; not on Boleto Turístico. Rainbow Mountain Vinicunca: entry ~S/10 (~$3 USD) collected at trailhead by local community; tour cost extra (S/90–150). San Pedro Market: free entry.
  • Commercial permits: Personal and tourist photography is unrestricted throughout Cusco’s public spaces, streets, and archaeological sites covered by the Boleto Turístico. Interior photography in Cusco Cathedral requires a separate photography permit or is prohibited for flash; always confirm on arrival. Drones are prohibited over all UNESCO World Heritage sites including the Historic Centre, Sacsayhuamán, and Sacred Valley sites without prior authorization from the Ministry of Culture. No drones over Maras Salt Flats per local community rules. Commercial shoots in public heritage zones require coordination with the Regional Directorate of Culture (DDC Cusco).
  • Best photography seasons: May–October (dry season): blue skies, minimal rain, vivid colors, best for Rainbow Mountain and Sacred Valley sites. May and September are the sweet spots — reliable weather with lower crowds than peak June–August. April is a transitional month with occasional showers but lush greenery. Avoid December–March (heavy daily rain, muddy trails, obscured mountain views).
  • Blue hour notes: Cusco sits at 13.5°S latitude — the sun arc is nearly overhead at midday and rises/sets close to due east/west year-round. Sunrise is ~5:56 AM (May) to 6:16 AM (June); sunset ~17:33 (May) to 18:10 (November). Blue hour lasts 20–30 minutes. The thin high-altitude atmosphere means light transitions are abrupt — golden hour is brief and intense, with rapidly changing conditions. Plaza de Armas is lit by warm illumination after dark. Pack layers as temperatures drop sharply after sunset (to near-freezing in June–August).
  • Drone policy: Drone laws vary widely by country and city — many capital and tourist zones are no-fly. Verify the local civil aviation authority’s current rules before launching.
  • Local resource: Official visitor information

The full-resolution version of every map below — plus seasonal calendars, gear notes per location, sun-angle diagrams, and a complete photographer’s packing checklist — is inside the Cusco Photographer’s Guide PDF ($47).

1. Plaza de Armas — Cusco

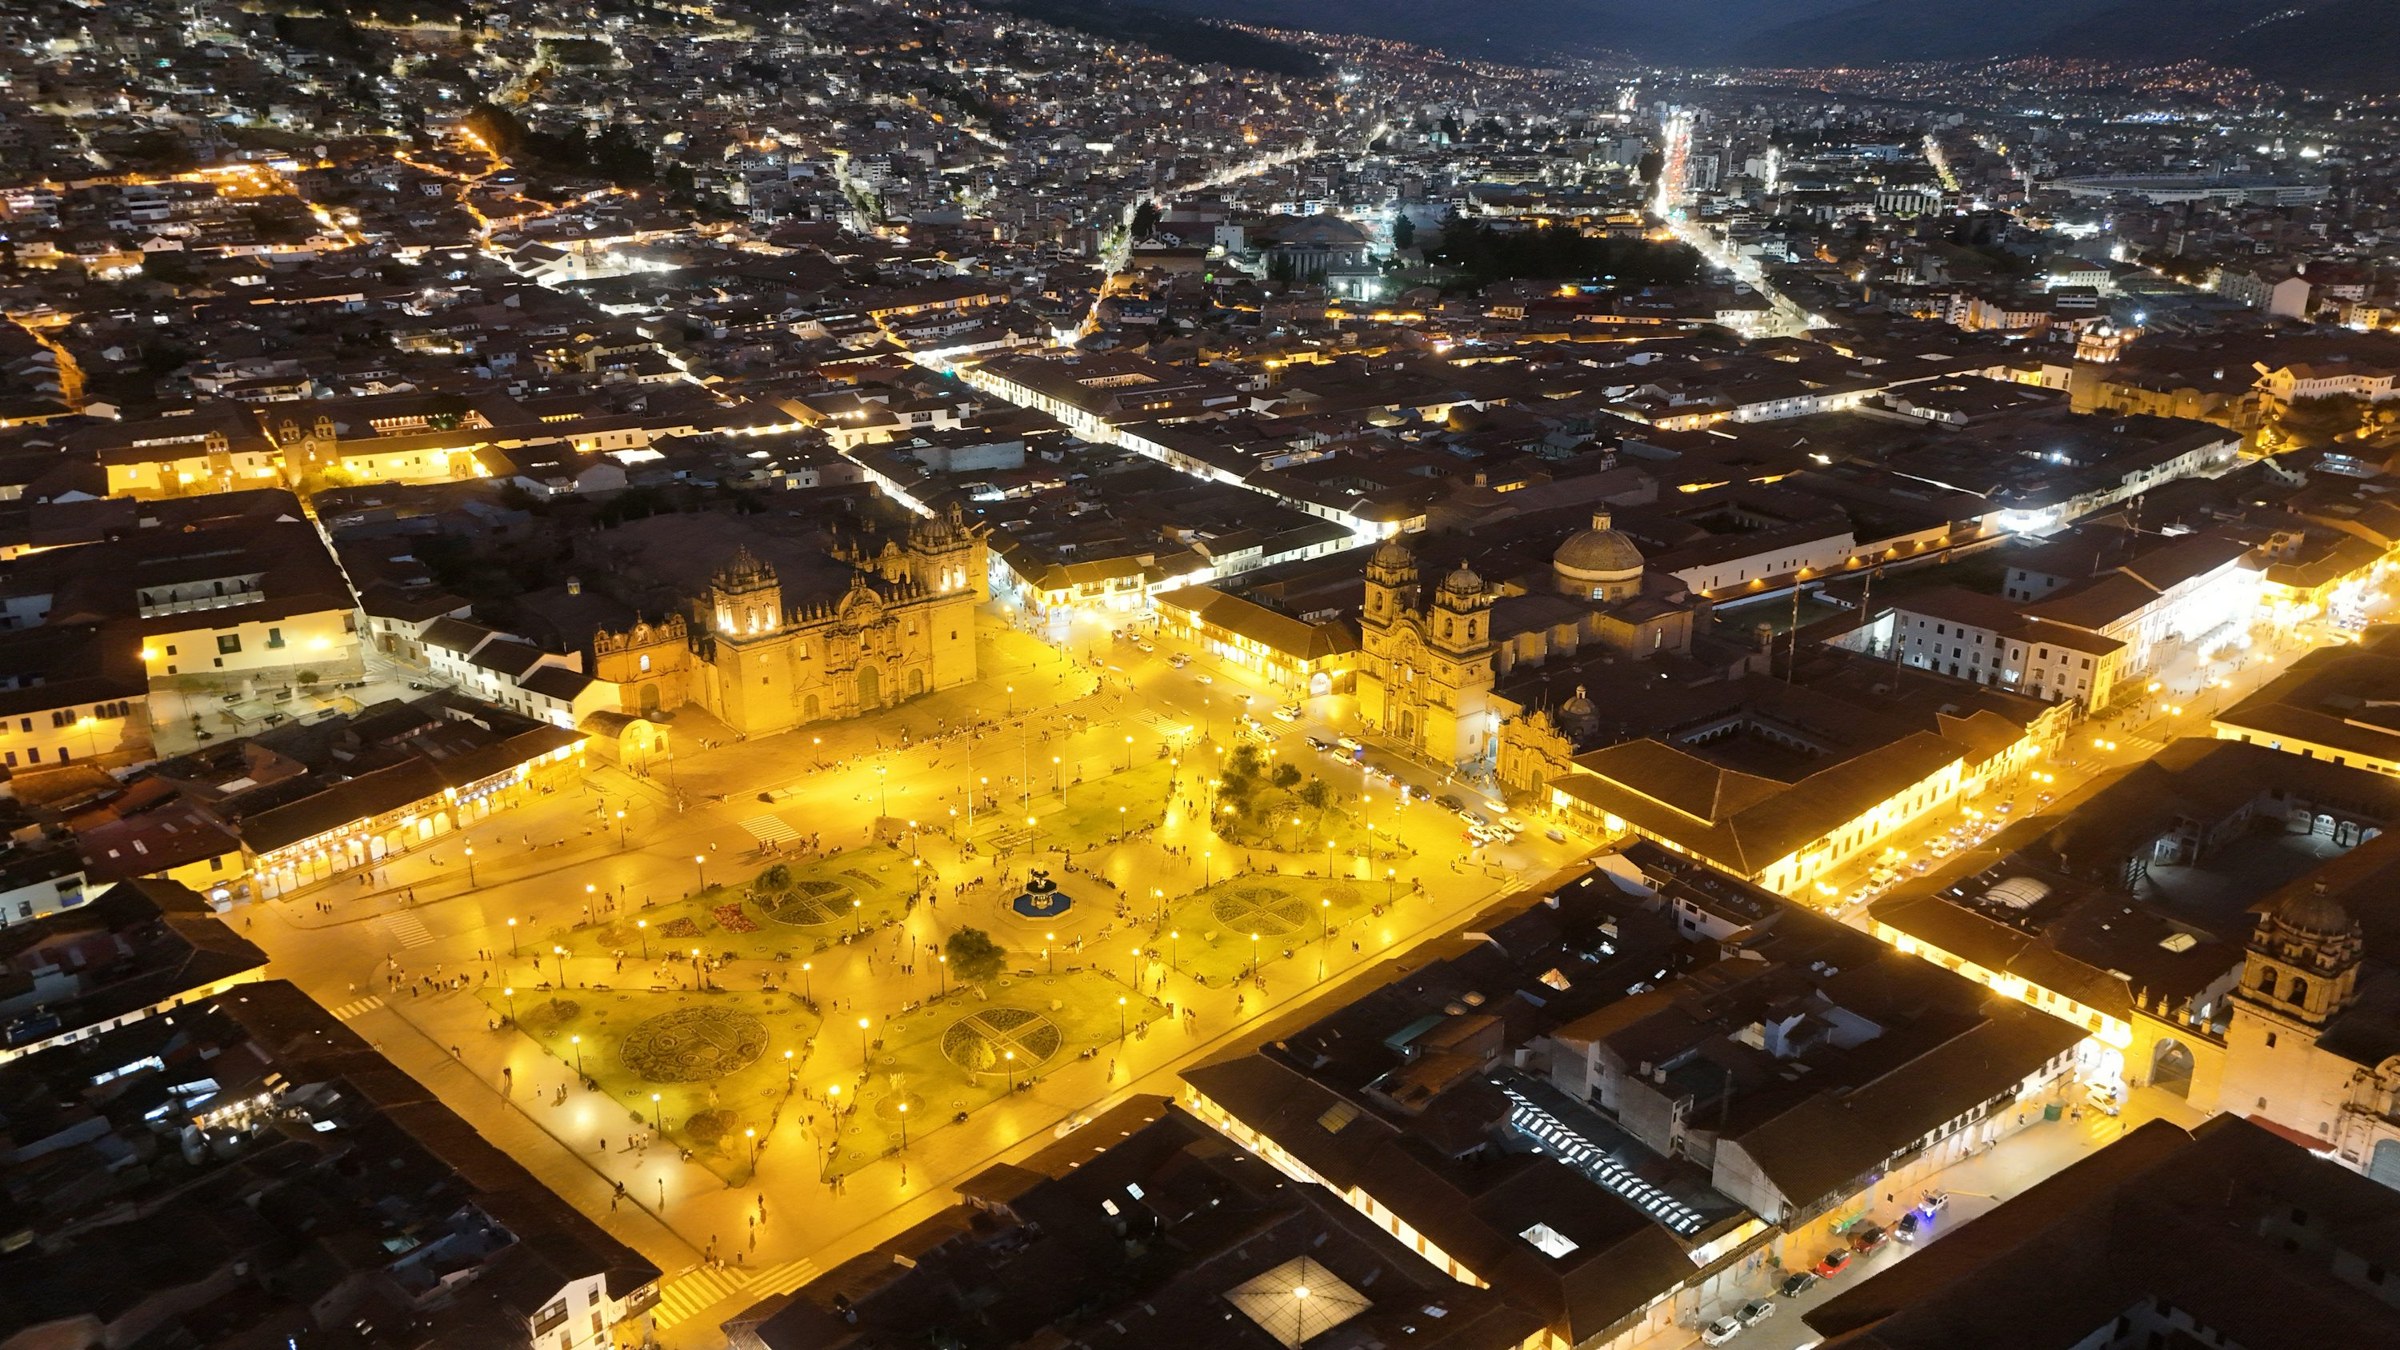
The Plaza de Armas is the literal center of Inca Cusco (known as Huacaypata) and the symbolic heart of the entire Inca Empire. It is framed on three sides by Spanish colonial arcades and on the northeast by two of the most impressive baroque churches in the Americas — the Cusco Cathedral (begun 1559, completed 1654) and the Iglesia de la Compañía de Jesús (1571). The unique Cusqueño baroque style fuses Inca stonework with Spanish ornament and Andean motifs, creating a visual language found nowhere else. The square is active at all hours — local life, festivals, and tourist energy converge here — and at night, the illuminated stone facades glow against the dark Andean sky in a scene of extraordinary drama.

  • GPS: -13.5167, -71.9788
  • Elevation: 11,165 ft
  • Best time of day: Blue hour (20–25 minutes after sunset) when the Cathedral and Iglesia de la Compañía de Jesús facades are fully illuminated against a deep cobalt sky; alternatively, pre-dawn (30 minutes before sunrise) when the square is empty and low mist sometimes drifts across the flagstones
  • Sun direction: Cusco is at 13.5°S — the sun rises nearly due east (azimuth ~75° in May) and sets nearly due west (~285°). The Cathedral and Compañía de Jesús occupy the northeast side of the square; they receive warm directional side-light from the east at sunrise and fall into shadow by mid-morning. The west and south arcades are front-lit in the afternoon. At golden hour before sunset (roughly 17:00–17:30 in May), the Cathedral’s stone facade catches warm orange raking light from the west. Post-sunset, both church facades are bathed in warm artificial illumination — the single best moment for city photography in Cusco.
  • Access: Centro Histórico, Cusco 08001. Walk from any central hotel; the Plaza is the hub of the historic district. Taxis from airport take 20–30 minutes. No entry fee — public square open 24 hours. Cathedral entry ~S/25 (~$7 USD), purchased at Cathedral north door; not included in Boleto Turístico. Iglesia de la Compañía de Jesús: ~S/10.
  • Difficulty: easy
  • Recommended settings: Blue Hour Long Exposure: f/11, 15–25 sec, ISO 100, 24mm, tripod — captures full square with smooth flagstones and cathedral glow  ·  Golden Hour Facade: f/8, 1/200 sec, ISO 200, 35mm — raking light on Cathedral stonework  ·  Night Handheld: f/2.8, 1/60 sec, ISO 3200, 24mm — ambient light from illuminated facades  ·  Overcast Even Light: f/8, 1/125 sec, ISO 400, 16mm — even diffused light reveals facade detail without harsh shadows

Shots to chase:

  • Long-exposure blue-hour composition from the center of the square with both the Cathedral and Compañía de Jesús in frame — use a 24mm lens at waist height for dramatic foreground stone pavement leading to the lit facades
  • Low-angle shot from the south arcade steps framing the Cathedral’s twin towers against the early morning sky before crowds arrive
  • Telephoto (200mm) from the upper balcony of a cafe on the west side compressing the arcaded buildings into a layered wall of colonial arches
  • Inti Raymi festival (June 24) — dramatic costumed processions fill the square with color and ceremonial life for Peru’s biggest Inca celebration
  • Night rain reflection shot: after light rain, wet flagstones mirror the illuminated facades in an abstract mosaic of color and light

Pro tip: Arrive at the square at 5:00 AM to find it empty — by 7:00 AM tour groups begin arriving and by 9:00 AM it becomes very crowded. For interior Cathedral photography, bring a fast prime (f/1.8 or f/2.8) as tripods and flash are prohibited; shoot during the late-afternoon Sunday masses when stained-glass light is best. The Compañía de Jesús interior is smaller and easier to photograph. Check the weekly schedule for festivals, as the square closes to vehicle traffic and fills with processions on major religious holidays.

Common mistake to avoid: Shooting the Cathedral from dead center of the square at midday produces flat, harsh light and a cluttered foreground of tourists. Using a focal length shorter than 20mm creates extreme keystoning of the towers. Forgetting that the altitude means you will feel breathless faster than expected — plan for shorter shoots and slower movements than you would at sea level.

2. Sacsayhuamán Fortress — Sunrise

Sacsayhuamán is one of the most astonishing feats of pre-Columbian engineering on Earth. The three zigzag terrace walls are built from limestone blocks weighing up to 125 tonnes, fitted together with sub-millimetre precision without mortar — a technique resistant to Cusco’s regular earthquakes. The largest block in the fortress stands 8.5 m (28 ft) tall. From the upper esplanade at 3,701 m, the full panorama of Cusco sweeps across the valley below, ringed by Andean peaks. The scale of the stones, the precision of the joinery, and the theatrical drama of the sunrise lighting make this the single most photographically powerful Inca site accessible without a long trek.

  • GPS: -13.5094, -71.982
  • Elevation: 12,142 ft
  • Best time of day: Sunrise (first 60 minutes of light) when the massive limestone zigzag ramparts are edge-lit in gold against a clear Andean sky, and the entire city of Cusco glows below in the valley; late afternoon (16:00–17:30) is the second-best window when raking light carves shadows across the megalithic stone joints
  • Sun direction: At Cusco’s latitude, the sun rises northeast in summer and nearly due east in winter (azimuth ~72–90°). Sacsayhuamán’s three massive terrace walls face roughly south-southeast, meaning they catch beautiful side-lighting in the first hour after sunrise. By mid-morning the walls are frontlit and lose contrast. In late afternoon the sun swings from the west (azimuth ~270–285°), bathing the upper terrace stones in warm sidelight from the left — ideal for revealing texture in the extraordinary megalithic joints. The panoramic viewpoint looks south directly over Cusco, making it excellent for city panoramas during golden hour with the sun at your back.
  • Access: 2 km north of Plaza de Armas. Walk uphill via Calle Suecia and Resbalosa (~35–40 min, strenuous at altitude) or take a taxi (S/10–15 from Plaza, 5 min). Entrance gate is signposted. Hours: 7:00 AM – 6:00 PM daily. Entry via Boleto Turístico (included in Circuit I, S/70, or Integral BTC S/130); individual entry S/30 (~$8 USD). Ticket office at Sacsayhuamán main gate; also purchasable at COSITUC office, Av. El Sol 103.
  • Difficulty: moderate
  • Recommended settings: Sunrise Golden Light: f/8, 1/250 sec, ISO 200, 24mm — warm sidelight on megalithic wall joints with city below  ·  Stone Texture Detail: f/11, 1/125 sec, ISO 100, 85mm — macro-ish detail of fitted stone joints in raking light  ·  Wide Panorama: f/11, 1/200 sec, ISO 100, 16mm — full terrace sweep with Cusco valley below  ·  Blue Hour Entry: f/5.6, 1/30 sec, ISO 1600, 24mm, tripod — pre-dawn silhouette of wall against twilight sky

Shots to chase:

  • Silhouette of the dramatic zigzag wall profile against the pre-dawn sky from the lower esplanade — arrive before the site opens and shoot through the fence, or be first through the gate at 7 AM
  • Wide-angle shot from the Rodadero (large smooth rock slide) looking back at the three terrace walls with the city of Cusco spreading into the valley in the background
  • Detail close-up of the famous 125-tonne ‘Wanka’ stone and its perfect joints — use a 50–85mm lens in raking morning light to emphasize the extraordinary fit
  • During Inti Raymi (June 24), the fortress hosts the main ceremony — thousands of costumed participants fill the esplanade for Peru’s most dramatic annual spectacle
  • Alpaca and llama portraits with the terrace walls as backdrop — animals graze freely on the upper esplanade in the morning

Pro tip: Buy the Boleto Turístico in advance at COSITUC (Av. El Sol 103) the day before — at 7 AM the site gate opens but ticket offices at the site may not be fully staffed yet. The walk uphill from Plaza de Armas is demanding at 3,700 m; allow extra time and walk slowly. Bring layers — at this elevation, sunrise temperatures in June–August regularly fall below 0°C. The Inti Raymi ceremony on June 24 draws enormous crowds; arrive extremely early or use a telephoto from the perimeter. A circular walk combining Sacsayhuamán → Cristo Blanco → Q’enqo → Tambomachay is the classic half-day excursion.

Common mistake to avoid: Arriving at 9–10 AM when tour buses have already deposited hundreds of visitors — the site is far better experienced alone at dawn. Trying to convey scale without a human figure in frame — the stones are so large that without context they look like any rough rock. Standing on the megalithic walls — prohibited by Peruvian law and dangerous. Underestimating the cold at altitude at dawn.

3. San Blas Neighborhood — Bohemian Quarter

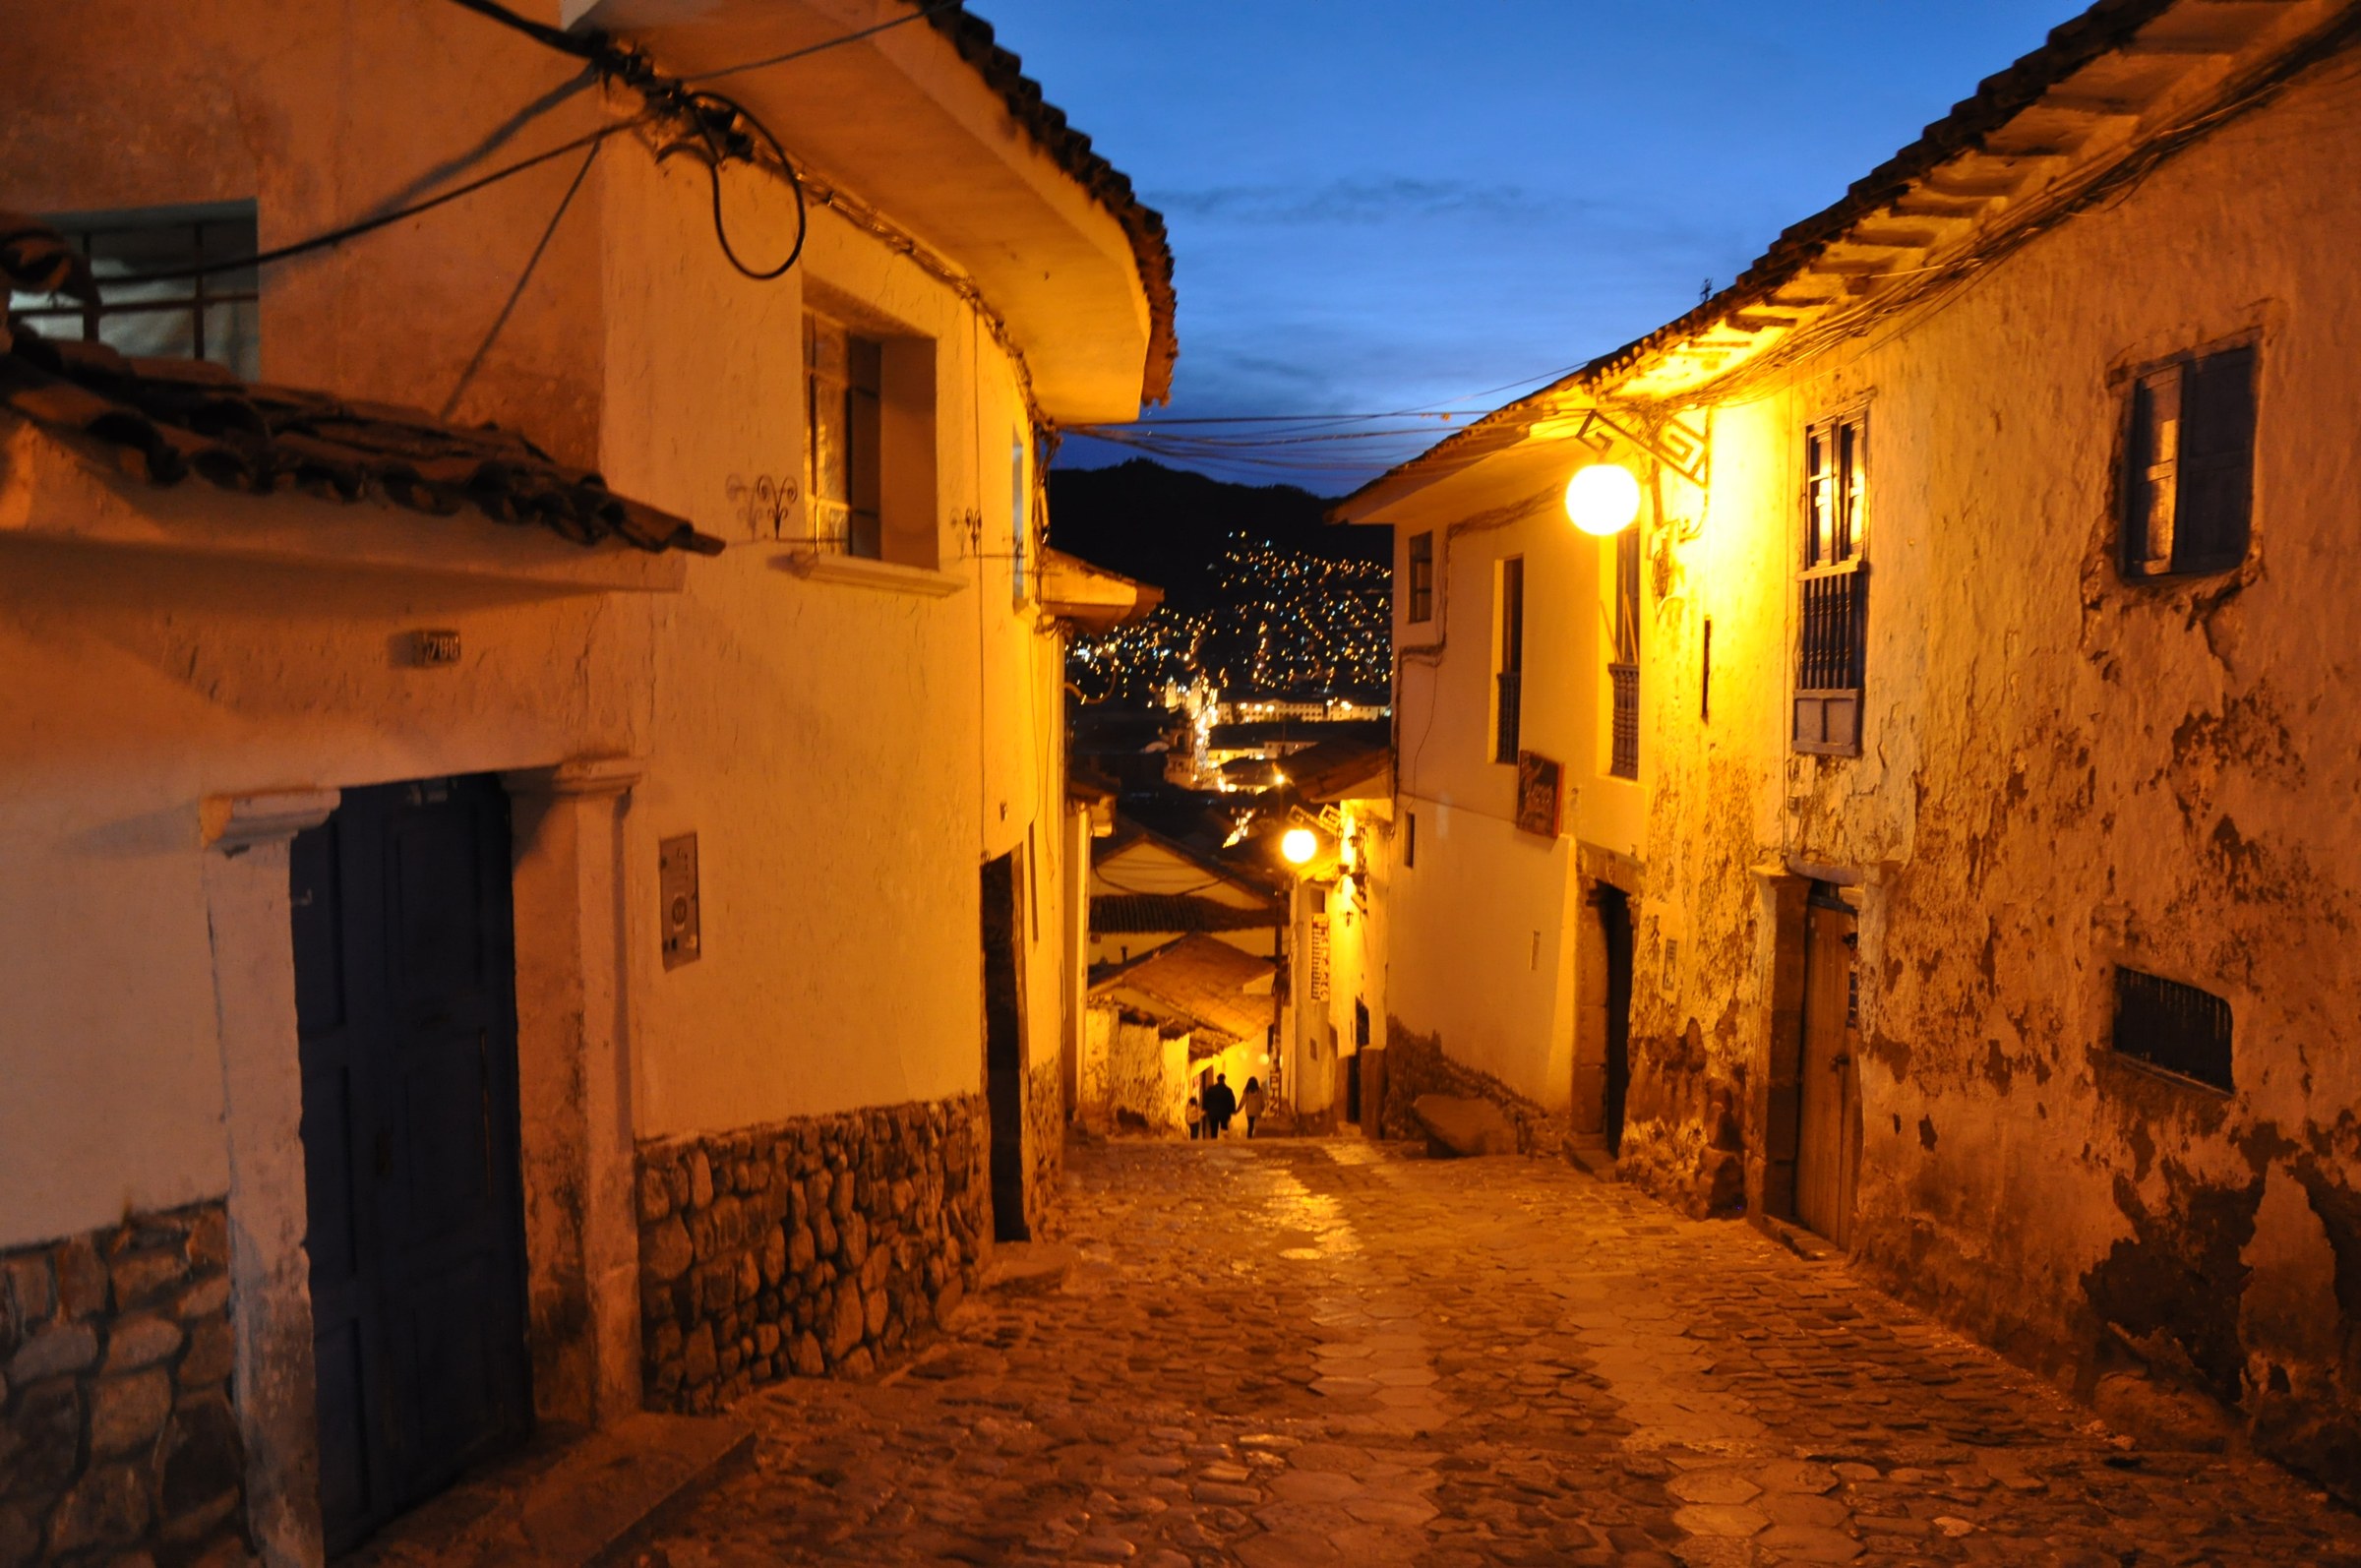
San Blas is Cusco’s artistic and bohemian quarter — a tightly packed hillside neighborhood of white adobe houses with vivid blue doors and carved wooden balconies, artisan workshops, ceramics studios, and art galleries, all built over original Inca stone foundations. The labyrinthine streets — Calle Carmen Alto, Siete Diablitos, Tanda Pata, Tocuyeros — offer an endless series of intimate alley shots: flower-draped doorways, weavers at looms, colonial fountains, red-tile rooftops receding to the mountains. The neighborhood earns its nickname ‘Balcony of Cusco’ at the Mirador on Kiskapata Street, which frames the full panorama of the historic center and Cathedral against the ring of Andean peaks.

  • GPS: -13.5149, -71.9743
  • Elevation: 11,385 ft
  • Best time of day: Late afternoon (15:00–17:30) when warm sidelight floods the narrow cobblestone alleys; the San Blas Mirador (Kiskapata Street, ~200 m from Plaza San Blas) is best at sunset when the Cathedral dome and terracotta rooftops catch golden light; evenings offer atmospheric candlelit cafes and street musicians
  • Sun direction: San Blas is northeast of the Plaza de Armas, climbing uphill on stepped cobblestone streets. The narrow alleys run roughly east-west and north-south; the east-west streets catch direct sun in mid-morning, while the north-south lanes remain partially shaded until late afternoon. The Mirador viewpoint faces southwest directly toward the Plaza de Armas and Cathedral — the ideal orientation for sunset photography with warm backlight on the photographic subject. Morning light is flat on the main viewpoints but excellent for alley textures.
  • Access: From Plaza de Armas, walk north on Calle Triunfo → Hatunrumiyoc Street → Cuesta San Blas (steep climb, ~10–15 min on foot). Alternatively via Cuesta del Almirante or Resbalosa Street. No entry fee — public neighborhood, all streets free to walk. San Blas Church interior: small donation requested. Mirador de San Blas (Kiskapata Street): free.
  • Difficulty: easy-moderate (steep cobblestones, significant uphill climb at altitude)
  • Recommended settings: Alley Golden Hour: f/5.6, 1/250 sec, ISO 400, 35mm — warm light channeled down narrow cobblestone alleys  ·  Mirador Sunset Panorama: f/11, 1/200 sec, ISO 100, 24mm — Cathedral dome and rooftops in warm sunset light  ·  Artisan Portrait: f/2.8, 1/250 sec, ISO 400, 85mm — shallow depth-of-field portrait of weaver or carver  ·  Night Street: f/2.0, 1/60 sec, ISO 3200, 35mm — candlelit cafe spill and string lights along Tanda Pata

Shots to chase:

  • View down Calle Carmen Alto at golden hour — blue balconies and flower pots flanking a cobblestone lane leading to the mountains; classic San Blas composition
  • Mirador panorama from Kiskapata Street at sunset: Cathedral dome and the tiled roofscape of the old city filling the middle ground, backed by the Andean ring — best shot in Cusco for a cityscape
  • San Blas Church white facade with its single stone bell tower and blue door in morning or late-afternoon sidelight — one of Cusco’s most photogenic colonial buildings
  • Intimate portrait of an artisan in their workshop on Calle Carmen Alto or the Hilario Mendivil Museum — always ask permission first
  • Night shot from Tanda Pata looking toward the illuminated Cathedral and city lights below — atmospheric long exposure with warm cafe glow in foreground

Pro tip: The Mirador (Kiskapata Street) is about 200 m beyond Plaza San Blas along Calle Tandapata — locals often miss it. Arrive 30–45 minutes before sunset to secure a position and capture the transition from golden hour through blue hour. The neighborhood is one of the safer areas of Cusco for evening photography but do not walk dark alleys alone after 21:00. Sundays see a small artisan market in Plaza San Blas. The narrow streets of San Blas are excellent for street photography with a 35mm or 50mm prime — wide angles distort the alley perspective.

Common mistake to avoid: Visiting only during midday when harsh overhead light creates deep black shadows in the narrow alleys. Skipping the Mirador — many visitors only reach Plaza San Blas and turn back, missing the best panoramic shot. Rushing the climb from Plaza de Armas — pace yourself at altitude, the uphill is genuinely demanding.

Want this in your pocket on the street?
The full-resolution version of every spot above — with full-page hero photography, GPS maps with gold location pins, sun direction diagrams, multi-season tables, and a complete safety + packing checklist — is inside the Cusco Ultimate Photographer’s Guide PDF ($47). Print it, save it offline, take it on the walk. Get the guide →

4. Qorikancha — Sun Temple

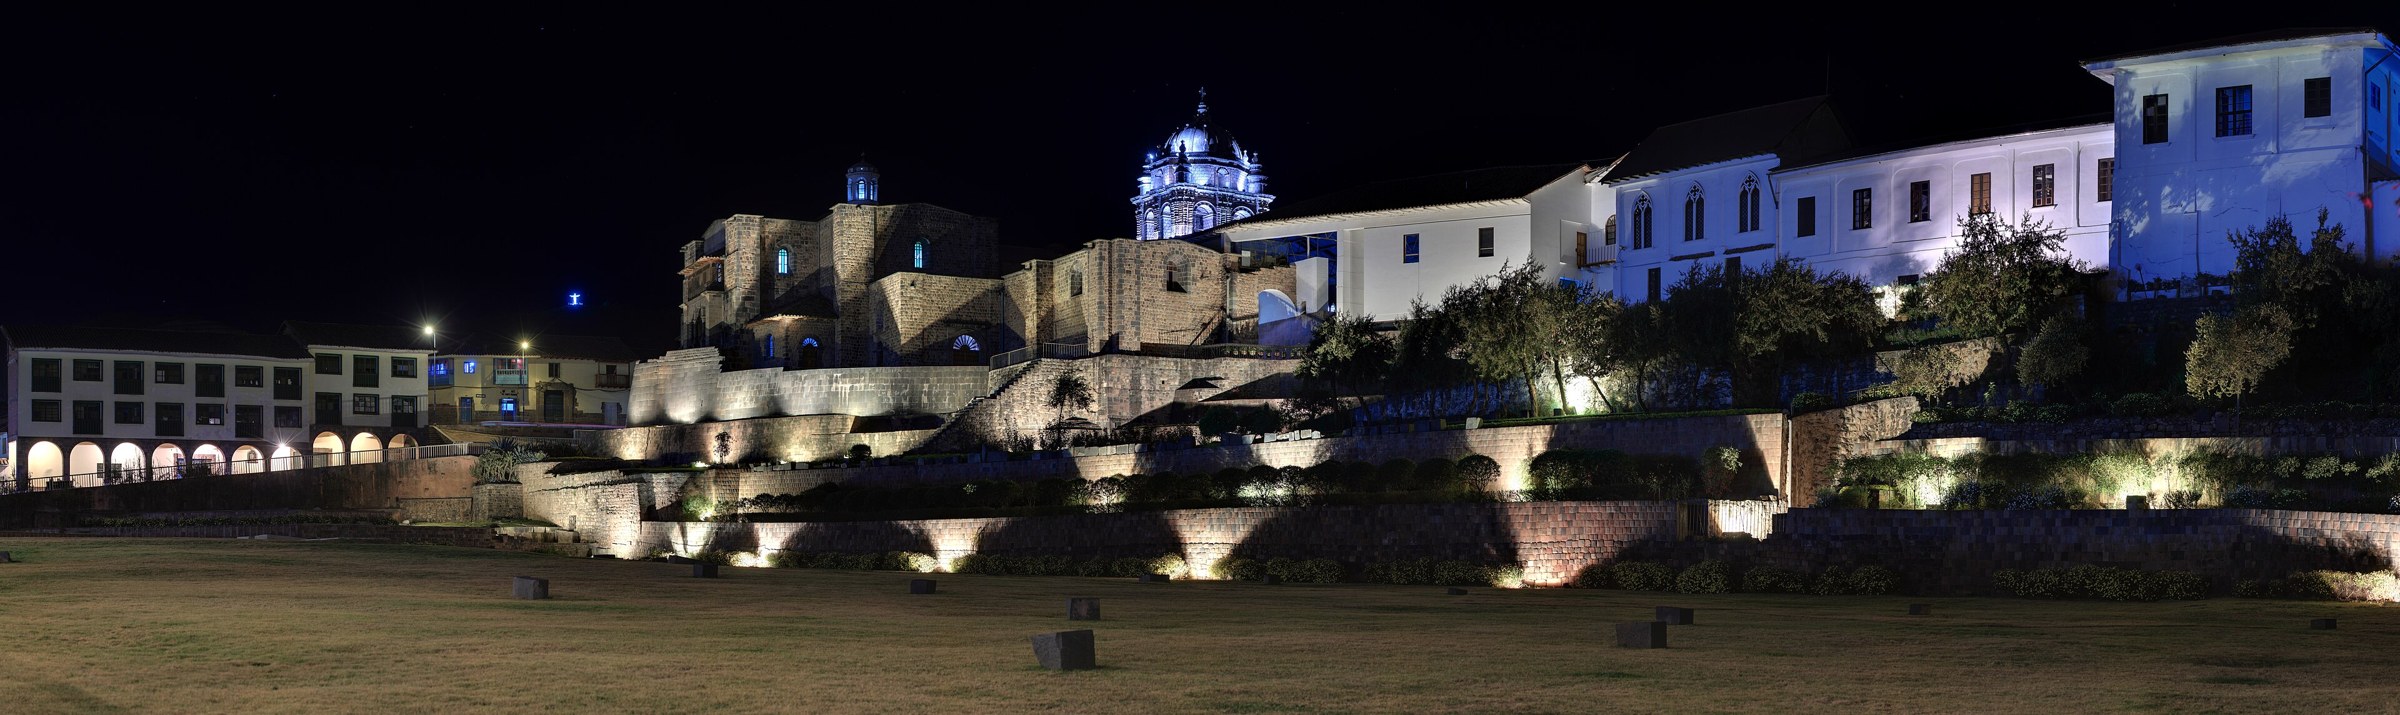
Qorikancha (Quechua: ‘Golden Courtyard’) was the holiest temple in the Inca Empire — its walls were once sheathed in 700 solid gold plates, and a golden representation of the Sun God Inti stood at its center. When the Spanish conquistadors arrived in 1533, they stripped the gold and built the Convent of Santo Domingo directly over the Inca foundations, making Qorikancha the most vivid collision of two civilizations in the Americas. The lower courses of stone — perfectly fitted, curved, earthquake-proof Inca masonry — contrast dramatically with the rough Spanish colonial walls above. The curved apse wall and trapezoidal niches represent Inca architecture at its most refined and are among the most-photographed stones in South America.

  • GPS: -13.52, -71.9756
  • Elevation: 11,184 ft
  • Best time of day: Mid-morning (9:00–11:00 AM) when sunlight enters the curved Inca stone courtyard and the contrast between the lower Inca precision masonry and the upper Spanish Dominican convent is clearly lit; the courtyard and curved apse wall are most photogenic in diffused soft light, while interior chambers with trapezoidal niches need midday light to reveal details
  • Sun direction: Qorikancha faces west-northwest on Av. El Sol, with its primary courtyard open to the sky. The curved western apse wall — the most iconic Inca stonework in Cusco — faces roughly west and catches warm afternoon light from 14:00–17:00. The trapezoidal niches inside the main chambers face east and are illuminated by morning light 9:00–11:00. The golden temple was aligned so that the winter solstice sunrise (June 21) light falls directly on the main altar — a detail worth capturing if visiting on or near that date.
  • Access: Corner of Av. El Sol and Santo Domingo Street, 2 blocks south of Plaza de Armas, Cusco 08000. Walk 5–7 minutes south from the Plaza. Direct entry: S/15 (~$4 USD) for foreign adults, S/8 for children under 10 free; not included in the Boleto Turístico. The Qorikancha Site Museum (adjacent, housed within the convent) IS included in Boleto Turístico Circuit II (S/70). Hours: Mon–Sat 9:00 AM–6:30 PM, Sun 2:00 PM–6:00 PM. Bell tower experience: S/5 separate admission.
  • Difficulty: easy
  • Recommended settings: Curved Apse Exterior: f/8, 1/250 sec, ISO 200, 24mm — full curved wall exterior on Av. El Sol in afternoon sidelight  ·  Interior Niches: f/5.6, 1/60 sec, ISO 800, 35mm — trapezoidal niches in diffused chamber light  ·  Courtyard Wide: f/11, 1/200 sec, ISO 100, 16mm — full courtyard with Inca lower courses and Spanish convent above  ·  Detail Stonework: f/8, 1/125 sec, ISO 200, 85mm — close-up of Inca stone joints and polished andesite surface

Shots to chase:

  • The iconic exterior curved apse wall from Av. El Sol — frame the perfectly joined curved stones with the Santo Domingo convent bell tower above, showing two civilizations in one frame
  • Interior courtyard composition looking up at the trapezoidal niches against the sky — the four aligned niches in each chamber are a signature of Inca architecture and photograph beautifully with a 24mm lens
  • Contrast study: frame a strip of smooth, precise Inca stonework alongside the rougher Spanish masonry directly above it — the boundary between cultures is physically visible in the wall
  • Bell tower viewpoint (S/5): panoramic view over Cusco from the Santo Domingo bell tower, a rarely-used but excellent elevated perspective over the city
  • Solar alignment shot on June 21 (winter solstice): the rising sun beams directly through the doorway of the Temple of the Sun into the main altar — requires pre-dawn arrival

Pro tip: Photography inside is permitted but flash is generally discouraged in the interior chambers. The exterior curved apse wall on Av. El Sol can be photographed freely from the street at any time — visit in the evening after closing time for a crowd-free shot. Bring a fast prime lens (f/1.8–f/2.8) for the dimly lit interior chambers where ISO will need to reach 800–1600 for handheld shots. The Qorikancha Site Museum (inside the convent, BTC Circuit II) has scale models showing the original gold-clad interior — useful context before shooting the ruins themselves.

Common mistake to avoid: Treating Qorikancha as a 20-minute stop — the fine masonry details reward slow, close observation and photography. Shooting only the exterior and skipping the interior courtyard. Missing the bell tower viewpoint (S/5 extra, very few visitors bother with it).

5. Cristo Blanco & Panoramic City Overlook

Cristo Blanco & Panoramic City Overlook Cusco photography sampleSave
Cristo Blanco & Panoramic City Overlook — cinematic reference from the Cusco Photographer’s Guide PDF

Cristo Blanco — a 8-metre white plaster statue of Christ donated by Palestinian immigrants to Cusco in 1945 — stands on Pukamoqo Hill directly above Sacsayhuamán, providing the highest easily accessible panoramic viewpoint over the entire city. From here, Cusco’s red-tile roofscape is visible in its full bowl-shaped Andean setting, surrounded on all sides by high peaks. On clear days, the 6,384 m snow-capped summit of Ausangate is visible to the southeast. The white statue against blue sky or with the city backdrop behind it makes a striking compositional anchor for both architecture and landscape photography.

  • GPS: -13.508, -71.979
  • Elevation: 11,729 ft
  • Best time of day: One hour before sunset (roughly 16:30–17:30 in May–September) when golden light from the west bathes the entire city panorama; the white 8-metre Christ statue is frontlit at this time and can be framed with the city backdrop in warm light; sunrise is the second option for mist-filled valley views with alpenglow on surrounding peaks
  • Sun direction: Cristo Blanco stands on Pukamoqo Hill at 3,575 m, immediately above Sacsayhuamán. The statue faces east-northeast and the primary viewpoint looks south over Cusco. At sunset, the sun sets in the west-northwest (azimuth ~285° in May), casting warm golden light across the entire city spread below — the photographer stands west of the statue shooting east, with the sun behind and to the left. At sunrise, the sun rises directly behind the photographer from the east, backlighting the distant mountains and bathing the city in first light from the photographer’s viewpoint facing south.
  • Access: 2 km north of Plaza de Armas, immediately above the Sacsayhuamán fortress entrance. On foot: 30–40 min walk from Plaza de Armas via Cuesta del Almirante and Resbalosa Street (strenuous climb at altitude). From Sacsayhuamán main gate: 15–20 min walk. By taxi: S/10–15 one-way from Plaza de Armas (~5 min). Free entry — open 24 hours, no ticket required. Well-lit at night from November to April.
  • Difficulty: moderate (steep uphill walk at 3,575 m)
  • Recommended settings: Sunset Panorama: f/11, 1/200 sec, ISO 100, 24mm — full city panorama in golden light  ·  Statue Portrait: f/8, 1/500 sec, ISO 200, 35mm — white statue against blue sky with city below  ·  Dawn Mist: f/8, 1/60 sec, ISO 400, 50mm — soft morning mist filling the valley below the statue  ·  Blue Hour Cityscape: f/8, 15 sec, ISO 200, 24mm, tripod — city lights beginning to glow at blue hour

Shots to chase:

  • Classic composition: low-angle wide-shot from below the statue looking up, with Cusco’s roofscape filling the background behind the white Christ figure and Andean peaks on the horizon
  • Pure cityscape: move to the left or right of the statue and use a 50–85mm lens to compress the layers of red rooftops, colonial towers, and mountain ridges into a dense, textured panorama
  • Blue-hour long exposure after sunset: city lights emerge while the sky transitions from gold to cobalt — one of the most atmospheric cityscapes in South America
  • On clear mornings in the dry season: Ausangate mountain (6,384 m, ~130 km southeast) is visible on the horizon — a 200mm+ telephoto compresses the snowy peak into the city roofscape dramatically
  • Combine with Sacsayhuamán: the fortress ruins are a 15-minute walk downhill, making Cristo Blanco the logical starting point for a downhill circuit through the ruins back into the city

Pro tip: The walk up from Plaza de Armas is genuinely demanding at this altitude — take a taxi for S/10–15 and walk back down through Sacsayhuamán for the best experience. Bring a warm jacket: the wind at 3,575 m can be intense, especially after sunset. Check wind forecasts if using a tripod for long exposures. After dark, take a taxi back — the walk down through Sacsayhuamán is unlit and not recommended solo.

Common mistake to avoid: Visiting at midday when harsh overhead light flattens the city panorama and the white statue becomes a featureless blob. Leaving right at sunset instead of staying for blue hour — the city lights at dusk are far more photogenic than the daylit panorama. Underestimating the cold at this elevation after sunset.

6. Twelve Angled Stone — Hatunrumiyoc Street

The Twelve Angled Stone is the most celebrated single block of Inca masonry in Cusco — a large green diorite boulder of approximately 2 metres width that fits seamlessly into the surrounding Inca wall with 12 precisely cut angles interlocking perfectly with 12 adjacent blocks, all without mortar. It was part of the palace of the sixth Inca, Inca Roca, and today forms the base of the Archbishop’s Palace. The entire wall of Hatunrumiyoc Street is itself extraordinary — 200+ metres of interlocking polished stone that survived 500 years and multiple earthquakes because the stones simply lock together under seismic pressure rather than fracturing. The street name means ‘the street of the great stone’ in Quechua.

  • GPS: -13.5159, -71.9757
  • Elevation: 11,286 ft
  • Best time of day: Late afternoon (15:00–17:00) when low sidelight from the west enters the narrow alley and rakes across the stone surface, dramatically revealing the 12 perfectly fitted angles; early morning (7:00–8:30 AM) before tourists arrive offers clean, uncrowded shots in soft diffused light
  • Sun direction: Hatunrumiyoc Street runs roughly north-south. The stone is set into the east-facing wall. Morning light (7:00–10:00 AM) comes from the east and hits the wall directly, providing front-lighting that reveals color and surface texture. In late afternoon, light enters the alley from the south-southwest and creates raking shadows across the stone joints — the single best light for emphasizing the extraordinary precision of the angles. At midday, direct overhead sun produces harsh highlights and deep shadows simultaneously.
  • Access: Hatunrumiyoc Street, Centro Histórico, Cusco — 4 minutes walk northeast from Plaza de Armas via Calle Triunfo. Stone is set into the right-hand (east) wall approximately halfway up the street. Free entry — publicly accessible pedestrian lane, open 24 hours. Look for a small COSITUC plaque and often a cluster of observers. Women in traditional Andean dress with llamas frequently pose nearby for photographs (small tip expected, always ask before photographing).
  • Difficulty: easy
  • Recommended settings: Raking Afternoon Sidelight: f/8, 1/125 sec, ISO 200, 50mm — afternoon sidelight revealing stone joint relief  ·  Full Wall Context: f/11, 1/160 sec, ISO 200, 24mm — the stone within the broader context of the complete Inca wall  ·  Extreme Closeup Detail: f/8, 1/125 sec, ISO 400, 85mm macro — individual joint detail showing millimetre-perfect fit  ·  Street Atmosphere: f/5.6, 1/250 sec, ISO 400, 35mm — wider view of the cobblestoned lane with the Inca wall and colonial buildings above

Shots to chase:

  • Tight framing of the 12 angles with afternoon sidelight: position at 45° to the wall surface to maximize the shadow-revealing effect of raking light on the precisely fitted stone joints
  • Wide context shot: step back to 24mm and frame the 12-angle stone as a relatively small detail within the full 10-metre-tall Inca wall, showing the scale and uniformity of the construction
  • Human scale reference: a single figure standing in front of the wall demonstrates the extraordinary height of the polished stone courses — ask a travel companion to stand aside as scale
  • Street atmosphere: from the bottom of Hatunrumiyoc, looking up the narrow cobblestone alley with the Inca wall on the right and colonial balconies overhead, framing a slice of clear sky at the top
  • Detail comparison: shoot the smooth, highly polished Inca stone alongside the rougher colonial Spanish masonry that begins above the original Inca wall level — two building traditions in one frame

Pro tip: This narrow street fills with tourist groups from about 9:30 AM — arrive before 8:00 AM for unobstructed shots. The stone is identified by a subtle COSITUC plaque and almost always has at least a few visitors near it. For the best raking light, return at 15:30–16:30 — the low afternoon sun enters the alley at a sharp angle and transforms the flat wall into a dramatically shadowed relief sculpture. A small LED panel (cold shoe mount) can supplement the raking light for close-ups if the alley is shaded.

Common mistake to avoid: Shooting at midday when flat overhead light eliminates all relief on the stone surface. Photographing only the 12-angle stone and ignoring the extraordinary full wall context. Using a very wide lens (14mm) at close range, which dramatically distorts the stone proportions.

7. Pisac Ruins — Sacred Valley

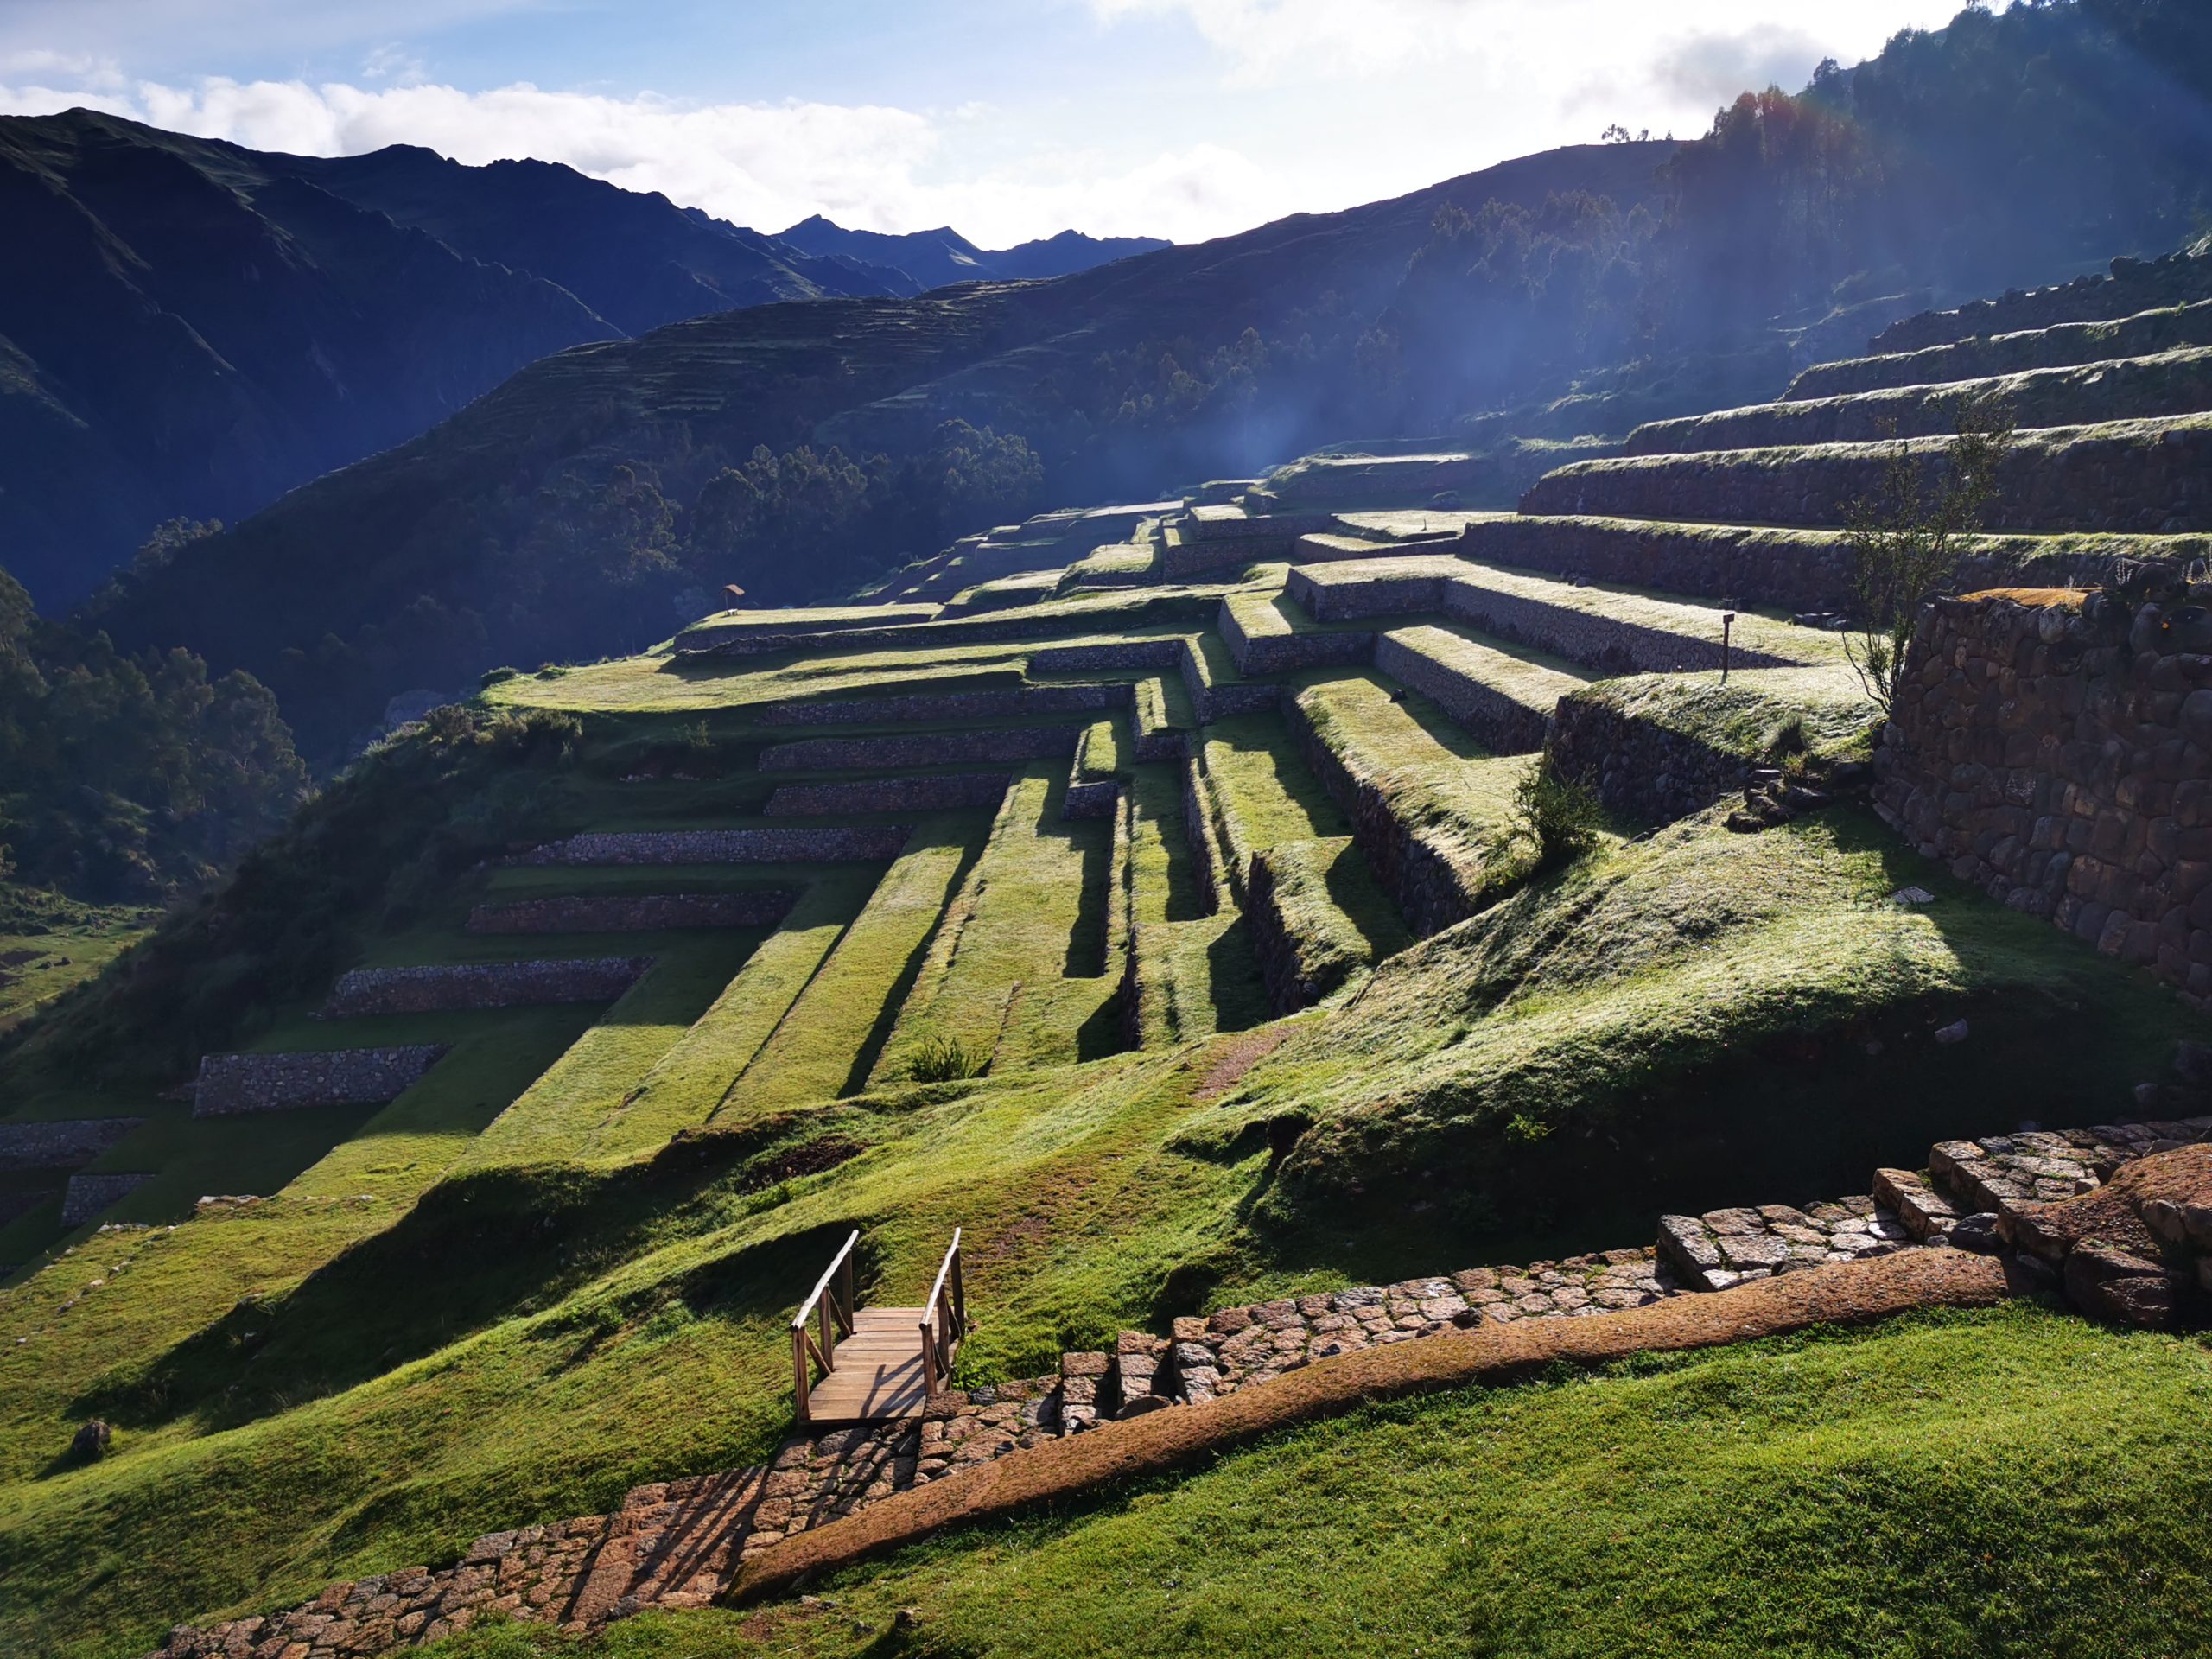
Pisac is the largest Inca archaeological site in the Sacred Valley and one of the most visually dramatic: an elongated mountain citadel stretching 1 km along a high ridge, combining a military fortress, royal palace, solar observatory, ceremonial complex, and a breathtaking system of perfectly maintained agricultural terraces cascading hundreds of metres down to the Sacred Valley floor. The Intihuatana solar hitching post and the massive semicircular terrace system visible from the Mirador Pisac viewpoint below are among the most photographically powerful compositions in Andean archaeology. The ruins are genuinely impressive at scale — comparable in scope to Machu Picchu but vastly less visited.

  • GPS: -13.4131, -71.8436
  • Elevation: 11,302 ft
  • Best time of day: First light at 7:00 AM (site opens) when alpacas roam freely through the terraces, mist may drift through the valley below, and the massive agricultural terracing is sidelit in gold; the Intihuatana mirador provides a panoramic 360° view best photographed in morning or late-afternoon light
  • Sun direction: Pisac ruins sit on a ridge at 3,300–3,514 m elevation above the Sacred Valley town of Pisac, 43 km northeast of Cusco. The main ceremonial complex (Intihuatana) faces roughly east toward the Sacred Valley. At sunrise, light comes from the east-northeast (azimuth ~72° in May) directly illuminating the terrace faces and the Sacred Valley below in warm golden tones. By 10 AM the terraces are in harsh overhead light. In late afternoon (15:30–17:30), the sun from the west provides dramatic raking light across the terrace terracing from the opposite side, creating strong shadow contrast in the tiered stone faces.
  • Access: 43 km northeast of Cusco; 33 km by road from Pisac town (20 min by taxi from Pisac, or 1.5–2 hr steep hike from the valley floor). From Cusco: colectivo from Terminal de Ruinas on Av. Puputi (~S/8–12 each way, 1.5 hr) or taxi (S/50–80 one-way). Upper entrance by taxi from Pisac town: S/20–30 one-way. Entry via Boleto Turístico Circuit III (S/70, 2-day validity) or Integral BTC (S/130); also purchasable at site entrance. Individual entry S/30 (~$8 USD). Hours: 7:00 AM – 5:30 PM daily.
  • Difficulty: moderate-strenuous (significant uphill if approaching from valley floor; relatively easy if starting from the upper entrance by taxi)
  • Recommended settings: Terraces Golden Hour: f/11, 1/250 sec, ISO 200, 24mm — terracing cascade in warm morning sidelight from the valley mirador  ·  Intihuatana Sunrise: f/8, 1/400 sec, ISO 200, 35mm — hitching post and ceremonial complex in first light  ·  Valley Panorama: f/11, 1/200 sec, ISO 100, 24mm — Sacred Valley far below with river meandering through the green floor  ·  Alpaca In Ruins: f/5.6, 1/400 sec, ISO 200, 85mm — shallow DOF portrait of grazing alpaca with Inca terracing behind

Shots to chase:

  • The definitive Pisac shot: from Mirador Pisac on the road below (ask taxi to stop), the full terrace system appears straight-on like a stone waterfall — vastly more dramatic than any view from within the ruins
  • Intihuatana hitching post from ground level looking up — a 24mm wide-angle close to the stone captures both the solar observatory and the vast Sacred Valley panorama beyond
  • Morning alpaca herd in the lower terraces — arrive at 7 AM and walk from the upper entrance down through the terraces toward town; the animals graze freely in the lower sections until about 9 AM
  • 360° panorama from the Mirador within the ruins: at the highest accessible point, a full circle of Andean peaks, Sacred Valley floor, and the Kitamayu and Chongo river canyons is visible
  • Inca cemetery niches (chullpas): hundreds of burial niches cut into the near-vertical cliff face above the terrace system — telephoto compression (200mm) from below creates an abstract grid of dark rectangles in pale stone

Pro tip: Take a taxi to the upper entrance (get there before 8 AM) and walk the 2–3 hour downhill circuit through all sections of the site back to Pisac town — the best way to see everything with photography time. The Sunday artisan market in Pisac town below is a separate and excellent photography subject (best 6–9 AM). Allow a full half-day minimum for the site; most tour buses only allow 1–1.5 hours which is completely inadequate. The steepest sections of the downhill circuit can be slippery — wear hiking shoes.

Common mistake to avoid: Arriving at 9–10 AM with tour groups rather than at opening — the early morning light and empty site are transformative. Visiting only the upper ceremonial zone and not descending through the full terrace system. Skipping the Mirador Pisac viewpoint on the road below, which provides the most photogenic overall composition of the entire site.

Want this in your pocket on the street?
The full-resolution version of every spot above — with full-page hero photography, GPS maps with gold location pins, sun direction diagrams, multi-season tables, and a complete safety + packing checklist — is inside the Cusco Ultimate Photographer’s Guide PDF ($47). Print it, save it offline, take it on the walk. Get the guide →

8. Ollantaytambo Ruins

Ollantaytambo is unique among Inca sites as a living Inca town — the original urban grid of canalized streets (collcas and streets channeling the Patacancha River) is still inhabited by local families, exactly as it was in Inca times. The fortress itself is the only known site where Inca forces successfully defeated a Spanish cavalry charge in 1537. The Sun Temple platform is approached by a soaring stone staircase flanked by massive terrace walls; at the top, six monolithic rose granite monoliths weighing up to 50 tonnes each stand as the partial remains of the Temple of the Sun, their surfaces marked with geometric Inca carvings. The view from the top platform looking down the Sacred Valley toward Cusco is one of the most dramatic in the Andes.

  • GPS: -13.2581, -72.2633
  • Elevation: 9,160 ft
  • Best time of day: 7:00–8:30 AM when the site opens nearly empty and morning light from the east illuminates the great terraced pyramid from the front; the massive Sun Temple platform stones catch warm sidelight from ~8:00 AM onward when the sun rises above the eastern canyon wall; afternoon (14:00–17:30) is ideal for the granary niches (colcas) visible across the valley, which are frontlit by the setting western sun
  • Sun direction: Ollantaytambo sits at 2,792 m in the Sacred Valley, 60 km northwest of Cusco. The primary fortress pyramid faces roughly east-southeast down the valley. At sunrise, the eastern canyon walls block direct light until approximately 7:30–8:00 AM when the sun rises above the ridge — creating an extraordinary moment of first light on the terraced stone pyramid. The main Sun Temple platform at the top of the stairs faces northwest, making it frontlit in the morning (8–11 AM) and sidelit in the afternoon. The famous colcas (granary niches) cut into the opposite cliff face across the valley face west and are best photographed from the ruins in late afternoon when they are frontlit.
  • Access: 60 km northwest of Cusco in the Sacred Valley; accessible by tourist bus (S/10–15 from Cusco), colectivo from Pavitos terminal (~S/10–12, 1.5–2 hr), or taxi (S/80–120 one-way). Site entrance 5 min walk from Plaza de Armas of Ollantaytambo town. Entry via Boleto Turístico Circuit III (S/70, 2-day validity) or Integral BTC (S/130); individual entry S/30. Hours: 7:00 AM – 6:00 PM daily.
  • Difficulty: moderate (many steep stone stairs within the site; altitude 2,792 m — lower than Cusco, making it easier to breathe)
  • Recommended settings: Pyramid Morning Frontlit: f/11, 1/400 sec, ISO 200, 24mm — full pyramid in morning light from the valley floor  ·  Temple Platform Stonework: f/8, 1/250 sec, ISO 200, 50mm — monolithic platform stones in raking morning light  ·  Valley View From Top: f/11, 1/300 sec, ISO 100, 24mm — Sacred Valley panorama from the Sun Temple level  ·  Colcas Telephoto: f/8, 1/400 sec, ISO 200, 200mm — granary niches across the valley, compressed and frontlit in afternoon

Shots to chase:

  • The entrance composition: from the town Plaza de Armas, the fortress pyramid fills the entire end of the valley street as a backdrop — a 50mm lens frames it as if the town street leads directly into the ancient citadel
  • Sun Temple platform stones: the six monolithic rose granite upright stones with their T-shaped carved surfaces are among the most enigmatic in Andean archaeology — shoot at f/11 in morning sidelight to reveal surface carvings
  • View from the top platform looking down the Sacred Valley: the Urubamba River glitters in the valley floor 200 m below, flanked by Andean ridges receding to the horizon in blue atmospheric haze
  • Colcas (granary niches) across the cliff face: from a mid-level terrace, use 200mm+ telephoto to compress the rows of storage niches dramatically against the vertical rock face in late-afternoon frontlight
  • Living Inca town: the original canalized streets of Ollantaytambo town below the fortress retain their Inca stone channels and grid — a 24–35mm morning walk through the town is excellent street photography

Pro tip: Arrive at 7 AM sharp for 30–45 minutes of solitude — by 8:30 AM, tour groups from Cusco and the train station begin arriving. The site is at 2,792 m (lower than Cusco by ~600 m) so altitude is less of a concern — the steep stairs are demanding but not dangerously breathless. No tripods are technically permitted inside the site (guard enforcement is inconsistent) — use a wider aperture for handheld low-light shots. The Inca town itself (below the fortress) requires no ticket and is free to explore — excellent early morning street photography before 8 AM.

Common mistake to avoid: Arriving mid-morning with tour groups. Spending all time on the main terraces and missing the Sun Temple platform at the top (the best photographic vantage point). Not walking through the Inca town streets below the fortress before or after the site visit.

9. Moray — Circular Inca Terraces

Moray — Circular Inca Terraces Cusco photography sampleSave
Moray — Circular Inca Terraces — cinematic reference from the Cusco Photographer’s Guide PDF

Moray is the most visually otherworldly site in the Sacred Valley — a series of 3–4 enormous circular bowl terraces (muyus in Quechua) cut into the high plateau, the largest descending 150 m (490 ft) through 12 concentric rings. Current archaeological consensus suggests these were Inca agricultural laboratories, where the 15°C temperature difference between the rim and the floor (created by the bowl’s microclimate) allowed different crop varieties to be cultivated at simulated altitudes — a sophisticated research station 600 years before modern agricultural science. The perfect geometric circles, unlike anything else in Andean archaeology, create compositions of extraordinary abstract beauty that photograph exceptionally well in overhead perspective.

  • GPS: -13.3242, -72.1909
  • Elevation: 11,483 ft
  • Best time of day: Mid-morning (9:30–12:00) when the sun is high enough to illuminate the entire circular depression without deep shadows in the bottom; midday provides the most even light for the geometric shapes; late afternoon (15:00–17:00) when long shadows from the terrace walls create dramatic depth lines emphasizing the concentric rings
  • Sun direction: Moray sits on a high plateau at 3,500 m, 50 km northwest of Cusco. The main circular depression (largest muyu) is roughly 150 m deep with concentric ring terraces. As the site is a bowl rather than a wall, lighting is complex: in early morning and late afternoon, the circular walls create partial shadow patterns that emphasize the geometric rings dramatically. At midday overhead sun illuminates the full bowl uniformly — best for revealing the true color and texture of the terracing. During the dry season, the concentric circles create visible shadow patterns that change dramatically hour by hour — a drone perspective or elevated shooting position from the rim captures this best.
  • Access: 50 km northwest of Cusco, near the town of Maras. Frequently combined with Maras Salt Flats on a single day trip. From Cusco: taxi round trip S/100–150, or Sacred Valley tour bus. Public transport: colectivo from Cusco to Urubamba (~S/8), then taxi from Urubamba/Maras to site (~S/20). Entry via Boleto Turístico Circuit III (S/70, 2-day validity) or Integral BTC (S/130). Hours: 7:00 AM – 5:30 PM daily.
  • Difficulty: easy (flat rim; stairs to descend inside are optional)
  • Recommended settings: Overhead Rim Wide: f/11, 1/250 sec, ISO 100, 16mm — full circular bowl from rim, emphasizing concentric geometry  ·  Midday Even Light: f/11, 1/400 sec, ISO 100, 24mm — full site with all ring colors visible in overhead light  ·  Shadow Pattern Afternoon: f/11, 1/300 sec, ISO 100, 50mm — late afternoon shadow stripes across the concentric rings  ·  Interior Looking Up: f/8, 1/200 sec, ISO 200, 24mm — from the bottom looking up at the concentric ring walls

Shots to chase:

  • The definitive overhead composition: from the rim at the site entrance, a 16–24mm wide-angle at the edge of the bowl captures the full concentric geometry of the main muyu against the Andean sky — the most reproduced Moray photograph
  • Late-afternoon shadow study: concentric shadow bands cast by each terrace wall create abstract geometric patterns that change every 15 minutes — shoot in burst mode from the rim for a time-lapse sequence
  • From inside the bowl looking up: descend to the bottom (5–10 min walk) and shoot upward with a 24mm wide-angle — the concentric terrace walls tower overhead in a vertiginous composition
  • Combine all three muyus: the secondary and tertiary circular depressions are slightly smaller but less visited — from a high point between them, all three circles are visible in a single 24mm composition
  • Telephoto of individual terrace stones (85–135mm): from the rim, compress the perfectly constructed terrace retaining walls to show the fine masonry detail of each individual ring

Pro tip: Moray and Maras Salt Flats are only 5 km apart and form the ideal half-day photo circuit — do Moray at mid-morning and Maras in late afternoon for the best light at each. Bring a polarizing filter to enhance the color contrast between the terrace stones and the sky. The plateau setting means wind can be strong — bring a windproof layer. If traveling in the wet season (December–March), the bowl can partially fill with water creating extraordinary reflective surfaces. Combining with Chinchero (a working Quechua weaving community) adds a cultural photography dimension to the circuit.

Common mistake to avoid: Visiting in early morning when the bottom of the bowl is in deep shadow. Shooting only from the standard entry point rim — walking 100 m along the rim in either direction reveals dramatically different compositions. Racing through Moray in 20 minutes to ‘tick it off’ — the changing shadow patterns over 1–2 hours are themselves a photography subject.

10. Maras Salt Flats — Salineras de Maras

The Salineras de Maras are one of the most visually extraordinary working landscapes in the world — approximately 4,500 individual salt evaporation ponds arranged in a terraced hillside mosaic that has operated continuously since pre-Inca times (confirmed archaeological evidence from ~1000 BC). Local Quechua families from the Maras and Pichingoto communities own individual ponds, harvesting salt using techniques unchanged for centuries: filling ponds from a single salt-water spring of mysterious underground origin, waiting 3–4 days for evaporation, then scraping crystallized salt by hand. The visual result — a tessellated hillside of squares ranging from snow-white crystallized salt to mirror-flat silver water to pale rose mineral-stained pools — is unlike anything else on Earth.

  • GPS: -13.3003, -72.1553
  • Elevation: 10,499 ft
  • Best time of day: Late afternoon golden hour (15:30–17:30) when the sun from the west turns every salt pond into a mirror of gold, rose, and amber; early morning (8:00–9:30 AM) before the first tour groups arrive also delivers beautiful soft light with minimal crowds; dry season (May–September) is essential — in the wet season (December–March) ponds fill with rain and turn brownish
  • Sun direction: Salineras de Maras is a hillside terraced system of ~4,500 salt evaporation ponds on the slopes of Qaqawiñay Hill at ~3,200 m, facing roughly south-southwest. The sun sets in the west-northwest, and in late afternoon (15:00–17:30) its low raking light enters from the southwest directly over the ponds — every water-filled pool becomes a golden mirror and the white salt crystals glow warm orange-pink. This is the single most spectacular photography moment at Maras. In the morning, sun from the east provides sidelight that emphasizes the terraced geometry of the ponds. Midday overhead light bleaches the colors but emphasizes the white-blue contrast.
  • Access: ~50 km northeast of Cusco in the Sacred Valley; frequently combined with Moray on day trips. From Cusco: private taxi round trip S/150–200 including wait time; Sacred Valley tour bus includes both Maras and Moray as standard stops. Public transport: bus from San Jerónimo terminal to Urubamba (S/5, 1 hr), shared taxi to Maras town (S/3–5), then taxi or 1-hour hike to salt ponds. Entry fee: ~S/10 (~$3 USD) per person, paid at the community entrance kiosk (cash only); NOT included in Boleto Turístico. Hours: 8:00 AM – 5:30 PM daily. No drones permitted over the salt flats per community rules.
  • Difficulty: easy (path is flat, but narrow walls between ponds require care)
  • Recommended settings: Golden Hour Mirror Ponds: f/11, 1/200 sec, ISO 100, 24mm — water-filled ponds as golden mirrors in late afternoon  ·  Salt Crystal Detail: f/8, 1/250 sec, ISO 200, 85mm — close-up of crystallized salt surface in raking sidelight  ·  Geometric Overview: f/11, 1/300 sec, ISO 100, 16mm — wide-angle overview of full terraced pond system  ·  Worker Portrait: f/4, 1/500 sec, ISO 200, 85mm — salt worker harvesting with mosaic backdrop (ask permission first)

Shots to chase:

  • Late-afternoon golden-mirror panorama: from an elevated viewpoint on the hillside above, every water-filled pond reflects the warm sky simultaneously — use a 24mm polarizer to cut glare and intensify color
  • Geometric abstraction from directly above: from the highest accessible viewpoint looking straight down, the tessellated mosaic of rectangles in white, silver, and pale rose is a pure abstract composition
  • Salt crystal close-up in raking light: get eye-level to a crystallized pond wall in morning or late-afternoon sidelight and photograph the jagged salt crystal structures at 85–100mm — otherworldly abstract texture
  • Salt worker in action: approach respectfully and ask permission; if granted, a worker scraping salt with a wooden tool against the mosaic backdrop is one of the most evocative ethnographic photos in the region
  • Rainy season (December–March) artistic option: water-filled ponds create perfect sky reflections — overcast dramatic skies doubling in the water surface — despite the color being less vibrant than dry season

Pro tip: Stick strictly to the designated paths between ponds — walking on the narrow dividing walls damages the ponds’ structural integrity and is strongly discouraged by the community. Do not step into any pond, even empty ones. Photography of the general landscape is encouraged; photograph individual workers only with explicit permission. Arrive before 9:30 AM or after 14:00 to avoid the main tour group rush. The community income from the S/10 entry fee directly supports salt farming families — respect the rules. Apply high-SPF sunscreen — the altitude (3,200 m) and salt reflection create intense UV exposure.

Common mistake to avoid: Visiting only during midday when the harsh light bleaches both colors and textures. Going in the wet season expecting white ponds — December–March produces muddy brown ponds with little photographic interest. Using a drone (explicitly prohibited by the community). Rushing the visit in under an hour — at least 2–3 hours allows properly exploring the full extent of the pond terracing and catching changing light.

11. Rainbow Mountain — Vinicunca

Vinicunca (‘Rainbow Mountain’ in Quechua) is one of the most visually dramatic natural landscapes in South America — a 5,200 m peak in the Ausangate massif whose flanks are striped in vivid bands of red (iron oxide), yellow (sulfur), green (chlorite), and purple (malachite and other minerals) created by hydrothermal mineral deposits revealed when the glaciers that covered this peak until the early 2000s retreated due to climate change. The colors are real and photographically accurate without enhancement — they are simply extraordinary. The Ausangate glacier rising behind the viewpoint adds a second photographic element of immense scale. The indigenous Quechua community of Pampachiri controls the site and receives 100% of the community entry fees.

  • GPS: -13.8702, -71.3029
  • Elevation: 17,060 ft
  • Best time of day: Before 9:00 AM at the viewpoint (requires leaving Cusco by 3:00–4:00 AM on a tour) when the low-angle morning sun from the east illuminates the mineral-color striations most vividly, crowds are minimal, and the Ausangate glacier to the west is visible as a dramatic backdrop; optimal season May–September (dry)
  • Sun direction: Rainbow Mountain (Vinicunca) sits at 5,036–5,200 m in the Vilcanota mountain range, 100 km southeast of Cusco. The main color-striped face runs roughly north-south. At sunrise, light comes from the east-northeast (azimuth ~72° in May) creating cross-lighting on the mineral stripes — the most dramatic angle for revealing the layered colors of red, yellow, green, and purple mineral deposits. By 10 AM, overhead light reduces color saturation noticeably. Late afternoon (14:00–17:00) provides cross-light from the opposite direction. The Ausangate glacier (6,384 m) looms behind and to the west of the viewpoint — include it in wide compositions at 24mm for maximum Andean drama.
  • Access: ~100 km southeast of Cusco via Pitumarca road (~3 hr drive). Almost exclusively visited on guided day tours departing Cusco at 3:00–4:00 AM (total tour 12–16 hrs). Tour cost: S/90–150 (~$25–40 USD) per person, including transport, local breakfast, and community entry fee. Community entry fee: ~S/10 (~$3 USD), collected at the trailhead by local Quechua families. Trailhead elevation: ~4,600 m. Horse rental available at trailhead for S/60–80 round trip. Note: no Boleto Turístico is valid here — separate community fee only.
  • Difficulty: strenuous (5–7 km round trip, 400 m elevation gain, trailhead at 4,600 m, summit at 5,200 m — requires serious acclimatization; do NOT attempt without at least 2–3 full days in Cusco first)
  • Recommended settings: Mineral Stripe Morning: f/8, 1/400 sec, ISO 200, 24mm — full mountain face with mineral stripes and Ausangate backdrop  ·  Side Lighting Detail: f/11, 1/500 sec, ISO 100, 50mm — raking morning light on individual mineral layer texture  ·  Wide Landscape: f/11, 1/400 sec, ISO 100, 16mm — panoramic Andes landscape with mountain in left third  ·  Raw Color Accuracy: Always shoot RAW — JPEG processing often desaturates or falsely shifts the extraordinary mineral colors; RAW provides maximum fidelity for the unique palette

Shots to chase:

  • The classic composition from the official viewpoint: Rainbow Mountain centered with the snow-capped Ausangate glacier visible to the left at 24mm — frame with a clear patch of deep blue Andean sky in the upper third
  • Telephoto compression (85–200mm): compress the mineral color bands into intense horizontal stripes, eliminating the sky entirely for a pure abstract mineral texture shot
  • Include the VINICUNCA sign at the summit — a human figure standing beside the elevation sign with the colored mountain filling the background provides scale and location context
  • Alpacas and llamas grazing on the colored slopes — use an 85mm to isolate an animal against the mineral-colored backdrop with a clean exposure that preserves the vivid colors
  • Red Valley side trip: 1 km beyond the main viewpoint, the Red Valley (Valle Rojo) offers an even more surreal landscape of deep red mineral slopes with fewer visitors — highly recommended for those with sufficient acclimatization

Pro tip: Book a tour that departs at 3:00 AM (not 5:00 AM) — arriving at the viewpoint by 8:00–9:00 AM gives you 30–60 minutes before the main crowd wave. Only visit after at least 2–3 full days acclimatizing in Cusco (3,400 m). Acetazolamide (Diamox) significantly reduces AMS risk — consult a doctor before departure. Polarizing filters are critical at this altitude for cutting the intense UV glare off the sky and maximizing color saturation. Shoot in RAW only — JPEG processing cannot capture the full dynamic range. Budget 12–16 hours for the full day including the 3-hour drive each way. July is the driest and coldest month — temperatures at the summit can be -10°C at dawn with wind chill.

Common mistake to avoid: Attempting Rainbow Mountain on day 1 or 2 in Peru without proper acclimatization — genuinely dangerous. Visiting during the wet season (November–April) when fog and clouds frequently obscure all colors entirely. Booking a cheap tour that leaves late and arrives at 11 AM with 500 other hikers. Over-editing photos to increase saturation — the natural colors of Vinicunca are extraordinary as shot, and excessive Lightroom adjustment makes the image look fake.

When to photograph Cusco: a year-round breakdown

Cusco is photogenic every month of the year — but the conditions differ radically by season. Here is what to expect:

May–October (dry season): blue skies, minimal rain, vivid colors, best for Rainbow Mountain and Sacred Valley sites. May and September are the sweet spots — reliable weather with lower crowds than peak June–August. April is a transitional month with occasional showers but lush greenery. Avoid December–March (heavy daily rain, muddy trails, obscured mountain views).

Photographer safety in Cusco: read this

City photography has its own risks: gear visibility, neighborhood timing, traffic, weather. Read the briefing before you go.

  • Gear visibility: Use a discreet bag with no obvious camera branding. Keep a body strapped under a jacket on transit.
  • Neighborhood timing: Pre-dawn and post-sunset shoots reward early scouting. Cross-reference each location with current local guidance and choose well-lit transit routes.
  • Situational awareness: Headphones out. One eye in the viewfinder, one on the street.
  • Traffic: Bridges, medians, and bike lanes are not setup zones. Shoot from sidewalks and pedestrian areas only.
  • Weather: Summer storms move quickly; winter cold drains batteries. Layer up, keep gear dry, watch for ice on cobblestones at blue hour.

The complete safety briefing is inside the Cusco Photographer’s Guide PDF.

Take this guide into the city

This post is the complete field reference. The Cusco Ultimate Photographer’s Guide PDF is the field-deployable version: full-page resolution hero photography, GPS maps with gold pins for every location, multi-season shooting calendars, gear notes per location, sun-angle diagrams, the full city safety briefing, and a print-ready editorial layout in Framehaus black and gold. Save it offline. Print it. Take it on the walk.

Cusco Ultimate Photographer’s Guide
Downloadable PDF · 11 GPS-mapped locations · Multi-season calendar · City safety briefing · Packing checklist

Get the Cusco guide — $47

Combo Deal

Get the Cusco Guide + Preset Pack

Photograph it. Edit it. Done.

$66
$54
Save $12
PDF Guide Every spot, GPS, golden hour
Preset Pack 20 Lightroom presets
Book your tours & experiences in Cusco

All links go to Viator (a TripAdvisor company), the world’s largest marketplace for guided experiences. Tagged as affiliate per FTC.

Also on Amazon: gear that helps with this technique

Quick Amazon shortcuts to the gear most useful for this kind of shot. Use them if Prime shipping or Amazon credit makes more sense than B&H. As an Amazon Associate ShutYourAperture earns from qualifying purchases.

Take Cusco home in your pocket.

Every shot location, every angle, every time of day worth shooting. Printable PDF + GPS-tagged map.

Instant download. Works on phone, tablet, and printed.

Continue reading

← Back to International Cities Photography Guides

Related guides nearby

Three more photography guides within striking distance — perfect for combining into one trip.

Browse all 78 guides → · Open the map

Save your trip-planning hours

The complete Cusco guide is $47

All vantage points above + 5 bonus secret spots, printable map, gear pack list, and editing recipes. One-time payment, instant download, lifetime updates.

Buy Cusco PDF →

Common questions about the Cusco guide

Is the Cusco photography guide worth $47?

For most photographers, yes. The guide saves 8-12 hours of trip-planning research and prevents the most common mistake of Cusco photography: shooting at the wrong time of day. If a single better frame is worth $47 to you, the guide pays for itself on day one. Buyers get every GPS coordinate, every golden-hour window, every cultural rule, and a printable shot list.

Does the Cusco guide include GPS coordinates?

Yes — every vantage point in the guide has Google Maps-ready GPS coordinates so you can pin them before you fly. The guide also includes a printable map showing all locations clustered by walking distance, so you can build efficient half-day routes.

What's in the Cusco PDF that isn't in this article?

The article shows the highlights. The PDF includes: 5 additional secret spots not published online, a 14-day itinerary with daily routes, the full camera-settings cheat sheet for every scenario in Cusco, a printable gear packing list, post-processing recipes with screenshot examples, and a list of local guides we trust for portrait commissions.

Do I get the Lightroom presets too?

The $47 guide is the PDF only. The matching Cusco preset pack is a separate $19 download — most buyers grab both as a bundle and save the editing time. Both are instant download, both work on Lightroom Classic and Lightroom Mobile.

Will the guide work for a Cusco trip in 2026?

Yes. The guide is updated annually as fees, restrictions, and new vantage points change. All buyers get free lifetime updates. The 2026 edition includes the latest drone rules, museum photography policies, and seasonal light data for the year.

Get the Cusco guide · $47