Best Photography Spots in Rio de Janeiro: 12 Locations With GPS
edinchavez01-20). Buying through these links costs you nothing extra and helps fund our free guides.
Rio de Janeiro, Brazil is one of the most photogenic cities in the world. If you have a camera and the patience to show up before dawn, Rio de Janeiro will give you images that last a career — but only if you know where and when to point it.
This is the definitive field guide to the 12 best photography spots in Rio de Janeiro, with GPS coordinates you can drop straight into Google Maps, exact camera settings tuned to Rio de Janeiro’s unique light, precise timing for every location, and the access notes nobody else bothers to document. It mirrors the intel inside our Rio de Janeiro Ultimate Photographer’s Guide ($47 PDF) — a downloadable field guide with full-page hero images, GPS maps, seasonal tables, a city safety briefing, and a complete photographer’s packing list. Get the guide →
Planning multi-city travel? See also: U.S. cities photography hub and the National Parks Photography Guides.
12 GPS-mapped locations · Exact camera settings · Multi-season shooting calendar · Free annual updates
Download the PDF guide →
Get the Rio de Janeiro Ultimate Photographer’s Guide
Every location below — pre-mapped with GPS, golden-hour timing, gear recommendations, cultural rules, and a 14-day itinerary. Downloaded by 200+ working photographers.
Quick jump to the 12 spots
- Christ the Redeemer — Corcovado Summit Platform
- Sugarloaf Mountain — Pão de Açúcar Summit
- Mirante Dona Marta
- Ipanema Beach + Arpoador Rock
- Copacabana Beach — Promenade and Fort
- Escadaria Selarón — Selarón Steps
- Lapa Arches — Arcos da Lapa
- Vista Chinesa
- Pedra Bonita — Summit Trail
- Parque Lage — Lage Park Mansion Courtyard
- Rio de Janeiro Botanical Garden — Jardim Botânico
- Santa Teresa Neighborhood + Bonde Tram
A look inside the Rio de Janeiro Photographer’s Guide
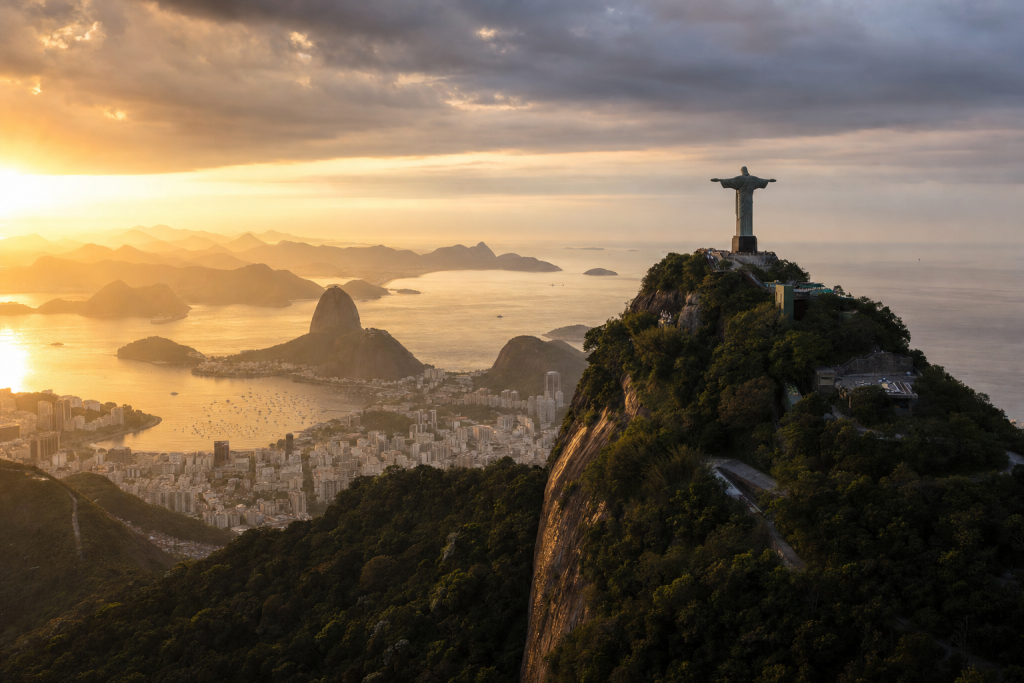
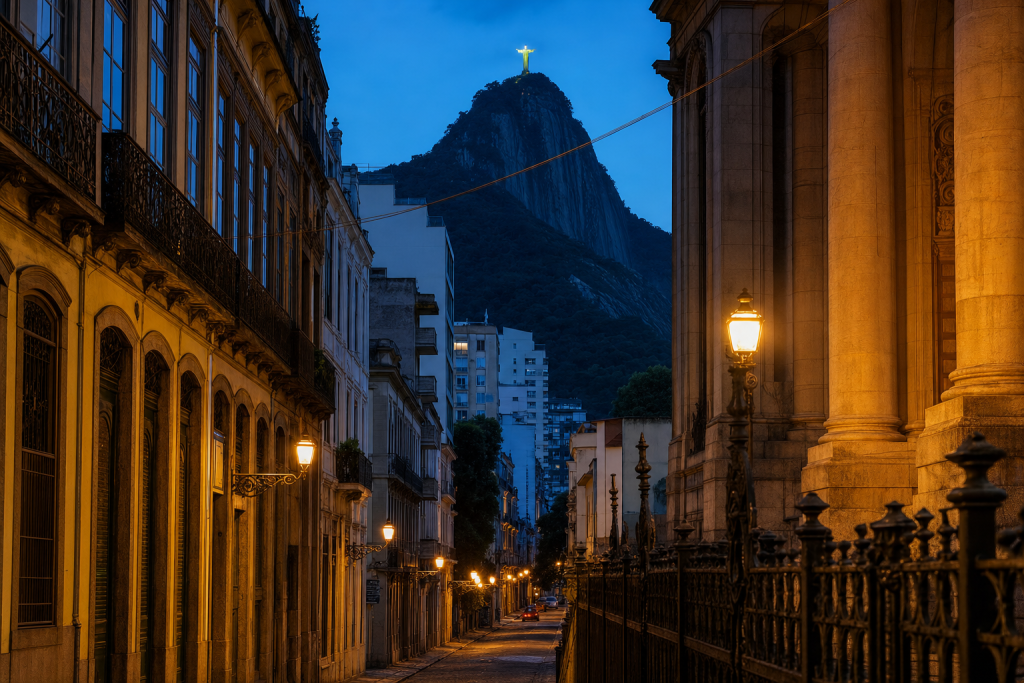
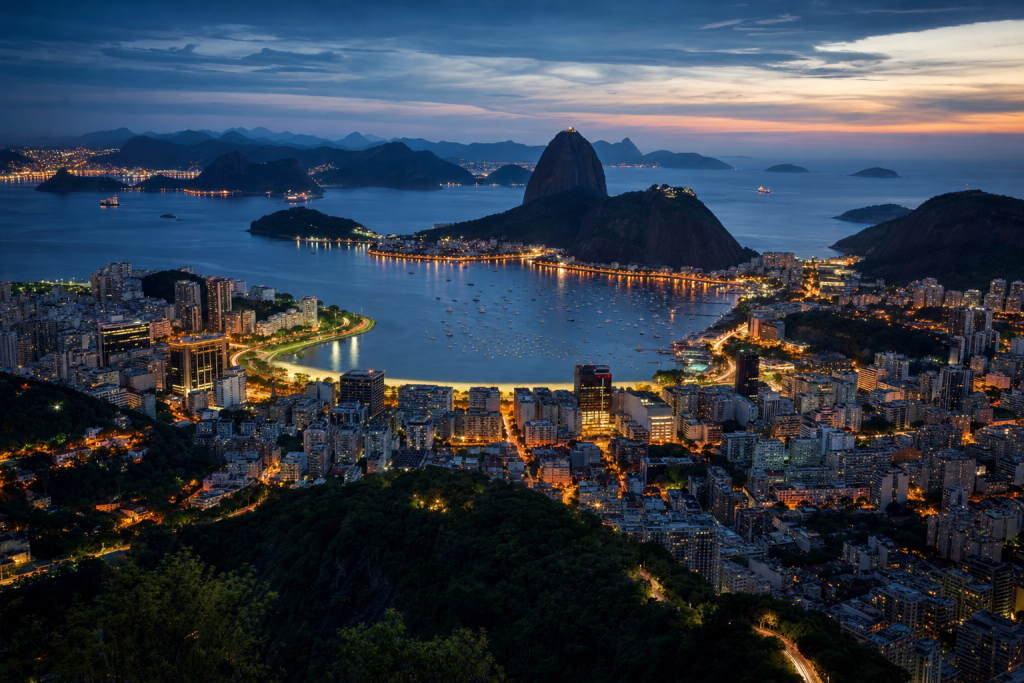
Here are three of the actual shots you’ll find inside the PDF — cinematic full-page references for the exact spots, lenses, and lighting conditions documented in the guide. The full guide includes 12 locations, each with a hero image, GPS map, settings table, and a five-shot list.
Save
Before you shoot Rio de Janeiro: the essentials
- Free public access: Copacabana and Ipanema beaches are free public spaces open 24 hours. Selarón Steps (Escadaria Selarón), Lapa Arches (Arcos da Lapa), and the Santa Teresa neighborhood streets are all free. Mirante Dona Marta viewpoint is free (no admission fee, free parking). Pedra Bonita trailhead is free. Parque Lage is free (R$10 fee to access the rooftop terrace only). Vista Chinesa is free to visit. The Maracanã stadium self-guided entry tour is R$130 (guided tour R$94). Botanical Garden (Jardim Botânico): R$80 for foreign visitors (from July 14, 2025), R$40 for Brazilian residents, children under 5 free. Sugarloaf cable car (Bondinho Pão de Açúcar): R$255/adult standard ticket at bondinho.com.br. Corcovado train + Christ the Redeemer: R$134/adult via official tremdocorcovado.rio (van option R$95–115).
- Commercial permits: Personal and tourist photography in all public spaces, beaches, streets, and public parks is unrestricted in Rio de Janeiro. Commercial shoots require permits from municipal authorities (Prefeitura do Rio). Drone flights are regulated by ANAC (Brazil’s aviation authority) and are prohibited over crowded beaches, Parque Nacional da Tijuca (which contains Vista Chinesa, Pedra Bonita, and Corcovado), and within controlled airspace zones; ANAC pre-authorization is required. Tripods are permitted in most outdoor public spaces; inside Christ the Redeemer’s viewing platform and Sugarloaf, tripod use during peak hours may be restricted by staff. Maracanã permits photography during stadium tours with no flash in museum zones.
- Best photography seasons: April–June (dry season begins, soft morning light, moderate heat, lower humidity) and August–October (clearest skies, best visibility from hilltop viewpoints, comfortable temperatures)
- Blue hour notes: Rio de Janeiro sits at 22.9°S — the sun arc is high and crosses steeply overhead. Blue hour lasts 15–25 minutes after sunset (shorter than at higher latitudes). Sunset times range from approximately 5:30 PM in June (winter solstice) to 7:30 PM in December–January (summer solstice). The most dramatic blue-hour scenes are from elevated viewpoints — Mirante Dona Marta, Sugarloaf summit, and the Corcovado platform — when the warm glow of the city’s streetlights and the deep indigo sky balance perfectly over the bay and beaches. Sugarloaf’s west-facing summit is the single best blue-hour city viewpoint in Rio.
- Drone policy: Drone laws vary widely by country and city — many capital and tourist zones are no-fly. Verify the local civil aviation authority’s current rules before launching.
- Local resource: Official visitor information
The full-resolution version of every map below — plus seasonal calendars, gear notes per location, sun-angle diagrams, and a complete photographer’s packing checklist — is inside the Rio de Janeiro Photographer’s Guide PDF ($47).
1. Christ the Redeemer — Corcovado Summit Platform
Standing at 710 m above sea level (base of Corcovado mountain) and towering 30 m tall, Christ the Redeemer is both a UNESCO World Heritage Site and one of the New Seven Wonders of the World. The summit platform offers a 360° panorama of unprecedented richness: Guanabara Bay to the north, Copacabana and Ipanema beaches curving south, the Tijuca Forest canopy in all directions, and Sugarloaf Mountain visible to the east across the bay. The statue’s outstretched arms — 28 m span — and the Art Deco soapstone facade provide an extraordinary sculptural subject that transforms completely under different lighting conditions. No other photography destination in the Americas combines monumental architecture, spiritual symbolism, and a panoramic cityscape backdrop of this caliber.
- GPS: -22.9519, -43.2106
- Elevation: 2,310 ft
- Best time of day: sunrise (first train ~8:30 AM) or late afternoon from 3:30 PM onward — early morning gives the softest diffused light on the white soapstone, minimal crowds, and frequent low mist rolling through the Atlantic rainforest canopy below the statue; golden hour from 4 PM creates dramatic directional shadows across the outstretched arms
- Sun direction: Christ the Redeemer faces east at azimuth ~90°, so the statue’s front is fully illuminated at sunrise when the sun rises from the Atlantic (azimuth ~75°–100° depending on season). By mid-morning the face is lit; midday sun is directly overhead creating harsh shadows in the arm folds. Late afternoon (3:30 PM+) the low western sun side-lights the statue and casts long shadows across the viewing platform. At Rio’s latitude of 22.9°S, the sun passes overhead near the zenith in summer (December), making late-afternoon golden hour (after 4:30 PM in December) the best window for dramatic statuary light.
- Access: Rua Cosme Velho, 513 – Cosme Velho, Rio de Janeiro. Official Trem do Corcovado (cog railway): adult R$134, child (7–11) R$107, senior (60+ Brazilian) R$70, children under 7 free; time-slot booking mandatory at tremdocorcovado.rio; trains operate Mon–Fri 8 AM–5 PM, Sat–Sun until 6 PM. Van alternative (Paineiras–Corcovado): R$95–115/adult, via paineirascorcovado.com.br. Nearest metro: Cosme Velho (no metro; take bus 583 or 584 from Botafogo metro station to Rua Cosme Velho, then walk to station). Advance online booking is essential — walk-up tickets frequently sold out. No private vehicles permitted up the mountain.
- Difficulty: easy (train/van handles all ascent); moderate if hiking the Corcovado trail (~3.8 km each way)
- Recommended settings: Sunrise Statue Front: f/8, 1/500 sec, ISO 200, 16–24mm wide-angle to capture full statue with city below · Golden Hour Sidelit: f/8, 1/250 sec, ISO 200, 35mm — side-lighting reveals soapstone texture · Blue Hour Illuminated: f/11, 6 sec, ISO 100, 24mm, tripod — statue LED illumination vs deep blue sky · Mist In Forest: f/8, 1/125 sec, ISO 400, 50mm — telephoto compression of mist layers below statue
Shots to chase:
- Classic ultra-wide upward shot from the base of the pedestal with the statue filling the frame and Rio’s skyline visible over the outstretched arms
- Silhouette shot from the outer platform edge at blue hour with the illuminated statue behind and the city grid glowing in the valley below
- Close-up detail of the soapstone mosaic tiles on the robe in raking side light at golden hour (50–100mm lens)
- Standing visitor with arms outstretched mimicking the statue’s pose — telephoto compression (200mm) from the far edge of the platform makes this work without looking crowded
- Early-morning mist shot: timed exposure with Atlantic rainforest cloud bank rolling around the base of the mountain while the statue rises clear above
Pro tip: Book the earliest available train slot (currently 8 AM) on a weekday — by 10 AM crowds are oppressive and the midday sun kills the light. Check the Corcovado webcam at tremdocorcovado.rio the night before: cloud cover at the summit is common and ruins the view. The viewing platform has two levels — the lower level (around the statue’s feet) is less crowded and better for dramatic upward compositions; the upper balcony level is best for panoramic city shots. Misting rain can create rainbow opportunities on clear mornings — bring a lens cloth.
Common mistake to avoid: Using a normal or telephoto lens from the lower platform misses the scale of both the statue and the cityscape — a 16–24mm wide-angle is essential at this distance. Arriving at midday when harsh overhead light flattens all detail in the white soapstone. Overlooking the western-facing platform: most photographers crowd the eastern side for city views, but the west offers the Tijuca Forest canopy and rarely-photographed mountain ridgelines.
2. Sugarloaf Mountain — Pão de Açúcar Summit
Sugarloaf is Rio’s most complete panoramic viewpoint — 360° from a genuine granite peak rising directly from the sea at the entrance to Guanabara Bay. The view encompasses the entire sweep of the city: Copacabana Beach’s arc, the Dois Irmãos peaks framing Ipanema, Christ the Redeemer on Corcovado, downtown Rio’s skyline, Niterói across the bay, and the open Atlantic. The cable car gondolas themselves are a compelling photographic subject — their glass cabins glide between the two peaks on a single cable, and a long exposure from either peak captures dramatic light trails against the dark void of the bay below.
- GPS: -22.9494, -43.1567
- Elevation: 1,299 ft
- Best time of day: sunset and blue hour — the west-facing summit receives golden light on the Atlantic Ocean and Copacabana while Christ the Redeemer on Corcovado glows in the background; also excellent at night for long-exposure city light compositions
- Sun direction: Sugarloaf sits at the mouth of Guanabara Bay facing roughly east-northeast. The summit platform faces 360°. At sunrise (east/northeast), the first light hits the bay and the city behind you — shooting east captures sunrise over the bay and Niterói bridge; shooting west at sunrise silhouettes Christ the Redeemer on Corcovado against the brightening sky. At sunset (west-northwest in summer), the sun drops behind the mountains to the west, bathing Copacabana Beach and the city’s South Zone in warm light — the most prized shot. The cable cars (gondolas) run on a roughly east-west line; a long exposure from the summit captures car light trails crossing the void below.
- Access: Av. Pasteur, 520 – Urca, Rio de Janeiro. Cable car (Bondinho) standard ticket: R$255/adult (from official bondinho.com.br); half-price for students, seniors 60+, persons with disabilities. Children under a certain age/height free (check current policy at bondinho.com.br). Cable car runs from Praia Vermelha station daily; first departure approximately 8 AM, last ride up around 9 PM (times vary seasonally). Two stages: Praia Vermelha to Morro da Urca (first peak, 220 m), then Morro da Urca to Pão de Açúcar summit (396 m); each segment takes ~3 minutes. Nearest bus: Lines 107, 512, 513 to Urca or Praia Vermelha. No metro directly; take metro to Botafogo and bus/taxi from there.
- Difficulty: easy (cable car provides full access); trail up the rocky face of Urca Hill (separate free route via Circuito Natureza) is strenuous
- Recommended settings: Sunset Panorama: f/11, 1/500 sec, ISO 200, 24mm — captures full color sky and city · Blue Hour City: f/11, 15 sec, ISO 100, 24mm, tripod — city grid lights and bay reflections · Cable Car Light Trails: f/11, 30 sec, ISO 100, 24mm, tripod — gondola motion blur between peaks · Telephoto Christ Redeemer: f/8, 1/500 sec, ISO 400, 200–400mm — compress distance to Corcovado
Shots to chase:
- Sunset wide-angle from the summit railing with Copacabana Beach’s curved arc in the foreground and Christ the Redeemer on the mountain behind — Rio’s quintessential two-icon composition
- 30-second long exposure after dark capturing light trails of cable car gondolas streaking across the black void of the bay
- Sunrise composition facing east with the Niterói–Rio bridge spanning the bay and the first light turning the water gold
- Morro da Urca (first peak) telephoto shots of the summit cable car arriving against the rocky peak face — back-lit in morning
- Night shot from Morro da Urca with the illuminated summit silhouetted above and the full city grid spread below
Pro tip: Buy tickets online at bondinho.com.br — walk-up queues can exceed 90 minutes in peak season (December–February). The Morro da Urca intermediate stop is frequently overlooked but offers dramatic ground-level views of the granite face of Pão de Açúcar rising overhead — excellent for dramatic upward compositions with city behind. Arrive 90 minutes before sunset and stay through blue hour. Bring a tripod: without it, the 15+ second exposures needed for cable car light trails or city blue-hour shots are impossible. For sunset, position on the western side of the summit for the city shot; the eastern rim faces the open bay and Niterói.
Common mistake to avoid: Arriving mid-morning and leaving before sunset — the midday light is flat and harsh; Sugarloaf at sunset and blue hour is transformative. Overlooking Morro da Urca as ‘just a stop’; it has equally valid compositions and is far less crowded than the summit. Shooting only to the west (city side) and missing the bay and Niterói bridge on the east side of the platform.
3. Mirante Dona Marta
Mirante Dona Marta sits at 360 m on the Tijuca Forest ridge directly above the Botafogo and Flamengo neighborhoods. It delivers the single best postcard view of Sugarloaf Mountain in existence — the rock formation rises from the bay in perfect profile with the city of Rio fanning out below and Niterói across the water. Unlike Sugarloaf itself (which looks outward from the peak), Dona Marta looks across at Sugarloaf with the full urban and natural landscape as context. It is also the clearest location from which to see Christ the Redeemer on Corcovado in the background, creating a shot containing both icons simultaneously. The viewpoint is free and low-traffic compared to other Rio attractions.
- GPS: -22.9422, -43.1879
- Elevation: 1,181 ft
- Best time of day: sunrise — Mirante Dona Marta is widely regarded as the top sunrise photography spot in Rio; the orange glow of dawn illuminates Sugarloaf Mountain in the foreground, the bay, and Niterói beyond in a single layered composition; also excellent at night for long-exposure city light compositions
- Sun direction: The main viewpoint faces roughly northeast, with Sugarloaf Mountain visible at azimuth ~80° and Guanabara Bay stretching from north to east. The sun rises behind the camera position at summer solstice (azimuth ~60°) and further south in winter (azimuth ~110°). At sunrise, the low eastern sun rim-lights Sugarloaf’s granite peak from behind the bay, creating a glowing orange halo on clear mornings. The helipad area slightly to the west of the main platform faces more toward Copacabana and offers a slightly different angle. By midday, the sun is overhead and contrast is harsh; late afternoon from 4 PM the sun moves to the west, back-lighting the mountains and creating dramatic rim-light on the Tijuca ridge.
- Access: Estrada Dona Marta, Santa Marta / Botafogo, Rio de Janeiro. Free admission; free parking lot at the viewpoint. No metro access — Uber or taxi from Botafogo neighborhood (~15 min drive). Note: there is no cell signal at the top, so book your return Uber before arriving or arrange a pickup. Alternatively, take the organized community elevator up the Santa Marta favela and walk up (guided tours available). The road up is paved and drivable; also walkable (~2 hours uphill from Botafogo) but not recommended alone.
- Difficulty: easy (by car/Uber); moderate hike from Botafogo (~2 hours each way)
- Recommended settings: Sunrise Sugarloaf: f/11, 1/250 sec, ISO 200, 70–200mm — telephoto compression pulls Sugarloaf closer and layers the bay · Blue Hour Cityscape: f/11, 20 sec, ISO 100, 24mm, tripod · Golden Hour Wide: f/8, 1/500 sec, ISO 200, 35mm · Night City Lights: f/11, 30 sec, ISO 200, 24mm, tripod
Shots to chase:
- Classic telephoto (100–200mm) sunrise composition: Sugarloaf’s peak glowing amber at the right third of frame, bay gold, Niterói bridge faint in the left background
- Wide-angle shot from the helipad area including the helicity railing as a foreground frame with the full panorama behind
- Night long-exposure (30 sec) showing the city grid, bay reflections, and illuminated Sugarloaf as a single glowing monolith
- Two-icon shot: position at the far left of the platform where both Sugarloaf (right foreground) and Cristo Redentor (left background on Corcovado) appear in the same 70mm+ frame
- Dawn pre-sunrise: deep blue and purple sky over the city grid with Sugarloaf silhouetted — 10-stop ND filter for extended exposure to smooth any light streaks from aircraft
Pro tip: Arrive 45 minutes before official sunrise for full pre-dawn light sequence. Book your Uber before going up — there is no cell signal at the top and you will be stranded without a pre-arranged return. The helipad area (walk along the parking lot to the west) offers a slightly different angle with Copacabana visible at the bottom — explore both platforms. A 70–200mm lens is the workhorse here; wide-angle is useful for night shots but telephoto compresses Sugarloaf beautifully against the bay layers.
Common mistake to avoid: Arriving at midday or early afternoon when the scene is flat and often hazy; Dona Marta is primarily a dawn and night location. Forgetting to arrange transportation back — there is genuinely no cell signal at the viewpoint, making app-based rideshares impossible to book on arrival. Standing only at the main platform and missing the alternative helipad angle.
4. Ipanema Beach + Arpoador Rock
Arpoador is the most celebrated natural viewpoint for sunset on a Rio beach — a flat granite promontory that juts into the Atlantic at the corner where Ipanema and Copacabana beaches meet. When the sun aligns with the saddle between the Dois Irmãos peaks (Morro Dois Irmãos, 533 m), it creates one of the most dramatic urban sunset frames in the world. Cariocas have made sunset-applause at Arpoador a daily ritual — the crowd spontaneously applauds the sun as it vanishes beneath the horizon, a genuine cultural moment impossible to witness elsewhere. To the east, Copacabana Beach and Sugarloaf are visible; to the west, the full 3.4 km arc of Ipanema and Leblon with Dois Irmãos as a backdrop.
- GPS: -22.9875, -43.1953
- Elevation: 6 ft
- Best time of day: sunset from Arpoador rock — the sun sets directly into the ocean between the Dois Irmãos peaks and Pedra da Gávea, framed by the full arc of Ipanema and Leblon beaches; arriving 60–90 minutes early is essential in summer when the sun drops into the sea (June–August sunsets are more southerly and hit Dois Irmãos directly)
- Sun direction: Arpoador rock sits at the eastern end of Ipanema Beach, facing west-southwest. At sunset, the sun drops toward the open Atlantic and in winter (June/July) its azimuth (~240°–250°) aligns nearly perfectly with the gap between the Dois Irmãos twin peaks — the Dois Irmãos ‘sunset portal’ effect. In summer (December/January), the sunset azimuth shifts northward (~280°–290°), setting over the open ocean north of Ipanema, less dramatic but still beautiful with long Copacabana reflections. Morning at Arpoador: sunrise illuminates the surrounding rock formations in warm orange; the light falls on Sugarloaf visible to the north.
- Access: Pedra do Arpoador, Francisco Bering Avenue (at the junction of Av. Vieira Souto and Rua Francisco Otaviano), Ipanema, Rio de Janeiro. Free public space; open 24 hours. Metro: General Osório (Line 1), then 15-minute walk along the beach. Lifeguard Post 7 (Posto 7) is located here with toilets and showers. Bike lanes run along the full Ipanema shoreline. Limited street parking on Av. Francisco Otaviano; private parking at Rua Francisco Otaviano 61.
- Difficulty: easy
- Recommended settings: Sunset Wide: f/11, 1/250 sec, ISO 200, 24–35mm — full arc of Ipanema to left, rock face to right · Sunset Telephoto Dois Irmaos: f/11, 1/1000 sec, ISO 400, 200mm — sun between the two peaks · Golden Hour Portraits: f/2.8, 1/1000 sec, ISO 200, 85mm — people watching sunset with warm backlight · Beach Morning: f/8, 1/1000 sec, ISO 100, 24mm — surfers and reflections in wet sand at sunrise
Shots to chase:
- Telephoto (150–200mm) shot of the sun dropping between the Dois Irmãos peaks with the crowd on the rocks silhouetted in the foreground — timing critical, happens over ~5 minutes in June/July
- Wide-angle from the rock’s eastern tip with Copacabana Beach and Sugarloaf on the right, breaking waves on the rocky shore below, and the golden sky above
- Crowd-applause moment: a 50mm shot of the crowd on the rocks facing west with arms raised, backlit by the last sunlight — a uniquely Brazilian cultural document
- Pre-sunrise surfers: low-angle shot from the sand at Arpoador beach with surfers emerging from the waves against the pink sky
- Reflective wet sand at golden hour on Ipanema beach looking toward Dois Irmãos — low-angle with puddle reflections of the mountain
Pro tip: Use sunsethunter or timeanddate.com to identify the exact days in June/July when the sun sets between the two Dois Irmãos peaks — this happens for only about 6 weeks per year and is the most spectacular Arpoador shot. Arrive 90 minutes early in summer (December–February) as the rock fills completely. Bring a telephoto lens for the Dois Irmãos alignment and a wide-angle for context; switching between them during golden hour maximizes compositions. The rocks themselves are slippery — wear flat-soled shoes.
Common mistake to avoid: Visiting in summer (December–January) and expecting the classic Dois Irmãos portal sunset — the alignment only occurs in June/July. Coming without a telephoto lens (the peak is distant; 100–200mm is essential for the twin-peak framing). Staying only on the rock and missing the equally beautiful Ipanema beach shoreline looking west from the sand at golden hour.
Want this in your pocket on the street?
The full-resolution version of every spot above — with full-page hero photography, GPS maps with gold location pins, sun direction diagrams, multi-season tables, and a complete safety + packing checklist — is inside the Rio de Janeiro Ultimate Photographer’s Guide PDF ($47). Print it, save it offline, take it on the walk. Get the guide →
5. Copacabana Beach — Promenade and Fort
Save
Copacabana is one of the most photographed beaches in the world — a 4.5 km arc of golden sand backed by a continuous Art Deco and modernist building facade, with Sugarloaf Mountain rising dramatically at the southern end. The iconic sinusoidal wave pattern in black and white Portuguese cobblestone on the promenade was designed by Roberto Burle Marx and is itself a photographic subject of international renown. The beach is a living gallery of Carioca culture: beach football (futevôlei), bikini culture, ice-cream vendors, and elderly residents doing calisthenics at dawn — all photogenic. The Copacabana Palace Hotel’s white Art Deco facade at the center of the promenade is an architectural landmark.
- GPS: -22.9711, -43.1822
- Elevation: 10 ft
- Best time of day: sunrise for the full 4.5 km beach arc with Sugarloaf rising at the southern end in warm light; also the wave-pattern Portuguese stone promenade is most graphic in early morning with low-angle sidelight; night for long-exposure mosaic reflections under streetlights
- Sun direction: Copacabana faces south-southeast, so it receives no direct beach sunrise light — the sun rises behind the hillside to the east. However, at sunrise the sky over the ocean (south) lights up and the north end of the beach catches early golden light. The classic promenade mosaic (black-and-white Portuguese stone wave pattern) is best photographed in early morning or late afternoon when low-angle sidelight creates shadow texture in the raised stones. By midday, all texture is lost to overhead light. Sunset on Copacabana is not over the ocean (the beach faces south, not west) — go to Arpoador for sunsets.
- Access: Avenida Atlântica, Copacabana, Rio de Janeiro. Free public beach; open 24 hours. Metro: Cardeal Arcoverde (Line 1), Siqueira Campos (Line 1), or Cantagalo (Line 1), all within walking distance of the beach. Praia de Leme (northern end) is accessible from Leme metro station. Forte de Copacabana at the southern end is open Tue–Sun 10 AM–6 PM; museum entry R$6 (view of the beach arc from the fort ramparts is free from the exterior walkway). Numerous bus lines along Av. Atlântica.
- Difficulty: easy
- Recommended settings: Sunrise Beach Arc: f/11, 1/500 sec, ISO 200, 24mm — full beach arc with Sugarloaf at far end · Promenade Mosaic: f/11, 1/250 sec, ISO 200, 35mm — low sidelight raking across wave pattern · Night Promenade: f/8, 15 sec, ISO 100, 24mm, tripod — streetlight reflections on wet cobblestone · Beach Candids: f/2.8, 1/2000 sec, ISO 200, 85–135mm — compressed telephoto of beach life
Shots to chase:
- Ultra-wide (16mm) shot from the Fort Copacabana ramparts at sunrise, encompassing the full beach arc with the Dois Irmãos peaks visible at the far end
- Low-angle promenade mosaic shot at dawn with the mosaic pattern receding to infinity and the Copacabana Palace in the background
- Compressed telephoto (200mm) from Fort Copacabana showing dense parasol and sunbather patterns at peak afternoon
- Futevôlei players in action at golden hour — backlit silhouettes against the ocean (1/2000 sec to freeze the kick)
- Night long-exposure from the median of Av. Atlântica: headlights of passing traffic as light trails with the illuminated Copacabana Palace reflected in wet cobblestones
Pro tip: For the complete beach-arc shot showing Sugarloaf at the south end, position yourself at the northern end of the beach near Leme — a 24–35mm lens captures the full arc from this point. Fort Copacabana’s exterior ramparts (accessible without paying) give you the most elevated vantage point at the southern tip looking north along the beach. Arrive at sunrise on weekdays when the beach is sparsely populated and the light is golden; by 9 AM the promenade fills with vendors and walkers.
Common mistake to avoid: Expecting a classic ocean sunset — Copacabana faces south and sunsets occur behind the mountains, not over the water (use Arpoador for sunsets). Shooting only the water and forgetting the promenade mosaic pattern, which is uniquely Copacabana and architecturally significant. Visiting in December–February when New Year’s Eve parties and summer tourists create extraordinary crowds that dominate the visual space.
6. Escadaria Selarón — Selarón Steps
Jorge Selarón, a Chilean-born artist who settled in Rio, began covering the 215 steps (125 m long) in colorful ceramic tiles in 1990 as a personal tribute to the Brazilian people, eventually incorporating over 2,000 tiles from 60 different countries. He worked on it until his death in 2013, making it one of the most personal and obsessively maintained public art works in the world. The steps connect the bohemian Lapa nightlife district to the hillside neighborhood of Santa Teresa and are one of the most photographed locations in South America. Each tile is unique — sourced from demolished buildings, foreign donations, and Selarón’s own collections — making the stairs an endlessly detailed subject.
- GPS: -22.9154, -43.1794
- Elevation: 115 ft
- Best time of day: early morning 6:00–8:00 AM on weekdays — the steps are crowd-free, the warm morning sidelight rakes across the tile surfaces at a low angle creating rich color and texture; avoid midday (direct overhead sun creates harsh shadows and the area is most crowded)
- Sun direction: The steps run roughly south-to-north, ascending from Rua Joaquim Silva (bottom, Lapa side) to Rua Manuel Carneiro (top, Santa Teresa side). The steps face roughly east, so morning sun (from the east) strikes the tiles at a low angle and creates ideal sidelit color rendition — each tile’s raised surface catches warm light while its edge falls into shadow, revealing texture. By mid-morning (10 AM+) the sun is high and washes out the saturated tile colors. Late afternoon the sun is to the west and back-lights the steps creating a more graphic, high-contrast scene.
- Access: Rua Joaquim Silva (bottom entrance) / Rua Manuel Carneiro (top entrance), Lapa / Santa Teresa, Rio de Janeiro. Free, open 24 hours. Metro: Cinelândia or Glória (Line 1), then 10-minute walk. Alternatively, metro to Carioca and walk south. The Lapa Arches (Arcos da Lapa) are visible one block away to the west — a useful orientation landmark. No facilities at the steps; nearest toilets at nearby bars.
- Difficulty: easy
- Recommended settings: Empty Steps Morning: f/8, 1/250 sec, ISO 200, 24–35mm — shoot from bottom center looking up · Tile Detail: f/2.8, 1/500 sec, ISO 200, 85mm macro — individual tile close-ups at eye level · Crowded Scene: f/8, 1/500 sec, ISO 400, 35mm — street photography of vendors and visitors · Top Down: f/11, 1/250 sec, ISO 200, 50mm — from top step looking down the full staircase
Shots to chase:
- Classic bottom-up symmetrical shot: center yourself on the lowest step and compose the full staircase receding to the blue-and-white wall at the top — best done at 6 AM when empty
- Top-down from the highest step: compress the full tile surface into a graphic pattern with no visible endpoint
- Tight detail of individual tiles — national flags, faces, animal motifs — with a 85mm lens at f/2.8 to isolate texture and bokeh the background tiles
- Climb to the top and turn right at the Brazilian flag for a less-visited angle showing a sparser section of steps with a view of the Santa Teresa hillside behind
- Wide-angle shot including the yellow-and-blue painted building facade at the side of the steps as a compositional anchor
Pro tip: Arrive before 7 AM on weekdays for genuinely crowd-free steps. The most photographed view (bottom-up shot) has a ‘best position’ three steps up from the lowest step, centered on the staircase axis — from here the perspective lines converge cleanly. Tripods are difficult to use during busy hours but useful at dawn. The upper section of the stairs (above the mid-level landing) is slightly less visited and has some of the most intricate tile combinations. Note that the surrounding Lapa neighborhood requires standard urban caution, particularly after dark.
Common mistake to avoid: Visiting between 10 AM–4 PM when crowds are densest and overhead light drains the tile colors. Shooting only from the bottom looking up and missing the reverse view, the detail shots, and the ambient street life that surrounds the steps. Using flash, which completely neutralizes the warm tile colors and the ambient light quality that makes the steps special.
7. Lapa Arches — Arcos da Lapa
Built in 1750 by the Portuguese colonial authorities to supply water to Rio de Janeiro, the Arcos da Lapa (formally Aqueduto da Carioca) is composed of 42 Roman-style double arches rising 17.6 m high and spanning 270 m — the largest and most important colonial construction remaining in Brazil. Since 1896, the aqueduct’s top has served as the trackway for the yellow Bonde de Santa Teresa tram, making it simultaneously a colonial monument and a functioning piece of public infrastructure. The combination of Roman-scale engineering, colonial whitewash, and a rattling vintage tram crossing overhead is photographically irreplaceable.
- GPS: -22.9119, -43.1795
- Elevation: 95 ft
- Best time of day: early evening (5–7 PM) for golden-hour sidelight on the white arches; also excellent at night when the arches are lit and the Santa Teresa tram (Bonde) runs across the top — long exposure captures the tram as a light trail crossing the aqueduct
- Sun direction: The Arcos da Lapa run roughly east-west. The arches face north and south. In the morning, the south face of the arches is in shadow while the north face catches morning sun — best for photographing the arch details from the north. Late afternoon, the sun moves to the west and provides warm sidelight along the full length of the aqueduct from the Av. Mem de Sá end. Blue hour and early night are exceptional: the arches are illuminated by warm uplighting, and the tram line on top is lit as a travel corridor — a 30-second exposure after dark captures tram light trails crossing the aqueduct while the foreground Praça Cardeal Câmara square glows with bar life.
- Access: Praça Cardeal Câmara, Lapa / Centro, Rio de Janeiro. Free; open 24 hours (exterior structure). Metro: Cinelândia (Line 1) then 8-minute walk, or Carioca (Lines 1/2) then 10-minute walk. Tram station (Estação Carioca for the Bonde tram) is on Rua Lélio Gama, 2 — two minutes from the arches. The neighborhood around Lapa is vibrant at night with bars and live samba music; exercise standard urban awareness.
- Difficulty: easy
- Recommended settings: Blue Hour Arches: f/11, 20 sec, ISO 100, 24mm, tripod — arch uplighting vs blue sky · Tram Light Trails: f/11, 30 sec, ISO 100, 24mm, tripod — tram crossing in long exposure · Architectural Detail: f/8, 1/250 sec, ISO 200, 50mm — individual arch keystones and texture · Golden Hour Wide: f/8, 1/500 sec, ISO 200, 16–24mm — full aqueduct length
Shots to chase:
- Long exposure (25–30 sec) from Rua Mem de Sá looking east with the full aqueduct lit up and the tram as a glowing streak of yellow light crossing the top
- Symmetrical shot from below, centered under a single arch looking straight up at the double-arch framing the sky and tram rail above
- Wide-angle from Praça Cardeal Câmara showing the aqueduct’s full length on the left and the Selarón steps visible in the background to the right (these are only 100 m apart)
- Golden-hour compression: telephoto (70–200mm) shot of the arches receding into the distance with the Santa Teresa hillside behind
- Tram mid-crossing: position across the street and use a telephoto to capture the yellow Bonde tram passing over the arch with the night sky above
Pro tip: The Bonde tram runs Tue–Sun 8 AM–5 PM from the Estação Carioca — time your visit to catch the tram crossing. For long-exposure tram light trails at night, the tram does not run after 5–6 PM, but the arches themselves are beautifully lit at night for pure architectural blue-hour shots. From Rua Mem de Sá (western approach) you get the full aqueduct length in one shot; from the eastern side (Praça Cardeal Câmara) you can frame the arches with the Selarón Steps entrance in the background. Combine both locations in one session.
Common mistake to avoid: Visiting only from the street directly below the arches and missing the longer perspective shots from Rua Mem de Sá 100 m to the west. Not checking tram operating hours before planning a night tram shot — the tram stops running by early evening. Ignoring the interior ground-level space between the arch footings which offers unusual architectural framing.
8. Vista Chinesa
Vista Chinesa is one of Rio’s most underrated viewpoints — a Chinese-style stone pagoda built in 1909 to honor the Chinese workers who cultivated tea in the region during the 19th century, set within the dense Atlantic rainforest of Tijuca National Park. At 346 m, the viewpoint offers one of the clearest overlooks of Rio’s entire South Zone: the Rodrigo de Freitas Lagoon in the middle ground, Ipanema and Leblon beaches, the Dois Irmãos peaks, and Sugarloaf in the distance. The combination of an Oriental architectural ornament in a tropical rainforest with a sweeping urban panorama is found nowhere else.
- GPS: -22.9721, -43.2471
- Elevation: 1,135 ft
- Best time of day: clear mornings (9–11 AM) or late afternoon — the pagoda and viewpoint face northeast over the city; morning light illuminates the full South Zone panorama including Lagoa Rodrigo de Freitas, Ipanema, Leblon, and Guanabara Bay; clear days only (check forecast — cloud cover at altitude is common)
- Sun direction: Vista Chinesa faces northeast from 346 m elevation on the Tijuca Forest ridge. The viewpoint looks out over the southern half of Rio, with Lagoa Rodrigo de Freitas (the lagoon) prominent in the middle ground, Ipanema and Leblon beaches visible beyond, and Guanabara Bay and Sugarloaf on the right (east). The sun rises to the east-northeast in summer — at sunrise, the entire panorama is lit by warm frontal light. By midday the sun passes overhead and the scene is flat. Late afternoon, the sun moves to the west-northwest, creating warm sidelight on the city grid and dramatic shadows in the mountain valleys. Sunset is behind you at Vista Chinesa (looking northeast), so golden hour is the prime window before sunset.
- Access: Estrada da Vista Chinesa, Parque Nacional da Tijuca, Alto da Boa Vista, Rio de Janeiro. Free admission. No public transport reaches the viewpoint; access is by car, Uber/taxi (from Jardim Botânico neighborhood ~5 km, approx. R$15 Uber), bicycle (steep climb), or on foot via a 9 km trail from Parque Lage. Small parking area at the viewpoint. No toilets or food stalls on site — bring water. Check weather before going: the road into Tijuca Forest can close in heavy rain.
- Difficulty: easy to moderate (by car); strenuous (by trail from Parque Lage, 9 km each way)
- Recommended settings: Morning Panorama: f/11, 1/500 sec, ISO 200, 24mm — full panorama including lagoon and beaches · Pagoda With City: f/8, 1/250 sec, ISO 200, 24–35mm — pagoda in foreground, cityscape behind · Telephoto Sugarloaf: f/8, 1/500 sec, ISO 400, 200mm — Sugarloaf compression from this angle · Forest Detail: f/2.8, 1/500 sec, ISO 200, 85mm — Atlantic rainforest flora at the viewpoint edge
Shots to chase:
- Pagoda framing: position behind and slightly to the side of the Chinese pagoda structure and use it as a foreground element with the city panorama spreading below
- Telephoto (200mm) compression of the Lagoa Rodrigo de Freitas with Dois Irmãos peaks behind, shot from the right side of the platform
- Wide-angle (16mm) encompassing the pagoda roof on the left, full panorama on the right, and forest tree canopy in the foreground corners
- Aerial-feeling morning shot: position low (kneel) looking over the railing with the forest canopy immediately below and the city far in the valley
- Wildlife photography: toucans, marmosets, and tropical birds regularly visit the viewpoint platform — bring a 300–500mm telephoto
Pro tip: Go on a weekday morning after a clear night — the air is at its clearest and crowds are minimal (the location is relatively unknown to package tourists). Visibilidade (visibility) is everything at Vista Chinesa; a hazy day gives you a washed-out scene. The Jardim Botânico trail connects Vista Chinesa, Parque Lage, and the Botanical Garden — combine all three in a single half-day itinerary. The pagoda structure has no interior access but serves as a perfect compositional anchor.
Common mistake to avoid: Visiting on a cloudy or humid afternoon when the city is obscured by haze or low cloud — the forest sits in a cloud zone and mist moves in quickly. Overlooking the wildlife — the viewpoint’s edge forest is habitat for marmosets and tropical birds that create unique wildlife-with-cityscape compositions. Going without a telephoto lens: while the wide panorama is impressive, the best detailed shots of the lagoon and peaks require 100–200mm.
Want this in your pocket on the street?
The full-resolution version of every spot above — with full-page hero photography, GPS maps with gold location pins, sun direction diagrams, multi-season tables, and a complete safety + packing checklist — is inside the Rio de Janeiro Ultimate Photographer’s Guide PDF ($47). Print it, save it offline, take it on the walk. Get the guide →
9. Pedra Bonita — Summit Trail
Save
Pedra Bonita (693 m) offers the most spectacular panoramic views in Rio for the least physical effort — less than 1.5 km of easy-moderate trail on a well-maintained path through Tijuca Forest leads to a bare granite summit with 270° views. The panorama encompasses São Conrado beach directly below (the hang-glider landing zone), Ipanema and Leblon beaches curving north, Pedra da Gávea’s massive granite face to the right, the open Atlantic, and on clear days the Serra dos Órgãos mountains in the interior. The adjacent Pedra da Gávea (the largest coastal monolith in Brazil at 844 m) looms to the south and is itself a dramatic photographic subject from this angle.
- GPS: -22.9857, -43.2791
- Elevation: 2,274 ft
- Best time of day: afternoon (1–4 PM) for the best light on the east-facing panorama looking over São Conrado, Ipanema, and the Atlantic; early morning for cooler temperatures and softer shadows but the main view faces east and receives frontal backlight in the morning
- Sun direction: Pedra Bonita’s summit faces roughly east-southeast, overlooking São Conrado, Pedra da Gávea, Ipanema, and the Atlantic coastline. Morning sun rises directly toward the camera from the ocean — ideal for backlit silhouettes of hikers against glowing sky but difficult for detail shots. By afternoon (1 PM+), the sun has moved to the northwest and provides directional sidelight across the Atlantic coastline — the beaches, ocean, and São Conrado neighborhood glow with warm light. Late afternoon golden hour (4–5 PM) is the sweet spot: warm sidelight with dramatic shadow play in the mountain valleys below. The hang-glider launch ramp sits at the summit and the landing beach (São Conrado) is visible below.
- Access: Trailhead: GPS -22.9857, -43.2791 (parking area at Parque Nacional da Tijuca, São Conrado sector). Free entry. Nearest bus: take buses from Barra da Tijuca or São Conrado neighborhood to the ‘Pedra Bonita’ or ‘Parque Nacional’ stop. By Uber/car: drive to the parking area at the trailhead; limited parking available. Trail: 1.5 km each way, approximately 200 m elevation gain, rated easy-moderate; 45–60 minutes to summit. Small café/bar at the trailhead. No water on trail — bring at least 1 liter. Insect repellent strongly recommended.
- Difficulty: easy-moderate (1.5 km trail, 200 m gain, no technical sections)
- Recommended settings: Afternoon Panorama: f/11, 1/500 sec, ISO 200, 24mm — full sweep from São Conrado to Leblon · Hang Gliders: f/8, 1/2000 sec, ISO 400, 200mm — freeze hang-gliders against the ocean · Pedra Da Gavea: f/8, 1/500 sec, ISO 200, 70–200mm — neighboring monolith in golden light · Forest Trail: f/2.8, 1/500 sec, ISO 800, 35mm — dappled light through Tijuca canopy
Shots to chase:
- Classic summit panorama: 24mm wide-angle from the highest point of the granite face with São Conrado beach below, Atlantic extending to the horizon, and Pedra da Gávea filling the right side of the frame
- Hang-gliders launching and soaring from the ramp: telephoto (200–300mm) to isolate a glider against the beach or ocean below
- Silhouette of hikers on the exposed granite face in afternoon backlight looking toward the ocean
- Pedra da Gávea in golden hour: position to the north of the summit with the massive granite face filling the frame in warm sidelight
- Long-exposure at dusk (tripod required): smooth ocean surface, glowing sky, and the city lights beginning to appear in São Conrado below
Pro tip: The best time for photos looking east (toward the ocean and beaches) is afternoon — morning light comes directly from behind the view, creating backlit/silhouette conditions useful for certain shots but challenging for detailed landscapes. Apply insect repellent before entering the trail — the forest floor has significant mosquito activity. The trailhead café is unreliable in terms of hours; bring your own water and snacks. For the hang-glider shots, check with the operators at the summit whether flying is happening that day (dependent on wind).
Common mistake to avoid: Going in the morning expecting the best light on the main east-facing view — the view is backlit in AM. Wearing flip-flops or sandals; the granite can be slippery, especially on the steep sections of the trail. Underestimating insect repellent need — mosquito and fly activity on this trail is intense.
10. Parque Lage — Lage Park Mansion Courtyard
Parque Lage contains the ruins and partially restored mansion of the Lage family (19th century), set within 50 hectares of Atlantic rainforest at the foot of Corcovado Mountain. The mansion’s central Italianate courtyard — with a central reflecting pool, colonnaded arches, and a café — frames Christ the Redeemer perfectly on the mountain above. This courtyard is one of the most reproduced architectural-landscape images in Rio: the neoclassical columns and pool reflection in the foreground, green rainforest canopy rising behind, and the 30-meter statue on the rocky summit watching over the scene. The park also contains caves, waterfalls, streams, and diverse tropical wildlife.
- GPS: -22.9706, -43.2196
- Elevation: 200 ft
- Best time of day: mid-morning (9–11 AM) when the courtyard pool reflects sunlight from the east and Christ the Redeemer is visible on the mountain behind with the morning light on the statue; also excellent at golden hour on clear afternoons when the light warms the neoclassical courtyard columns and the Corcovado mountain glows
- Sun direction: The Lage mansion faces north, with its central courtyard and reflection pool open to the sky. Christ the Redeemer on Corcovado is visible to the northeast from the pool at azimuth ~40°. Morning sun rises to the east and enters the courtyard from the right, creating sidelit reflections in the pool and illuminating the courtyard arches. By midday, the sun passes overhead and the courtyard fills with even light — good for architecture but not dramatic. Late afternoon (3 PM+), the sun to the west back-lights the Corcovado mountain, creating a silhouette of Christ the Redeemer — dramatic if the statue is cloud-free.
- Access: Rua Jardim Botânico, 414 – Jardim Botânico, Rio de Janeiro. Free entrance (terrace/rooftop: R$10/person). Open daily 8 AM–5 PM. Bus lines 170, 172, 584 along Rua Jardim Botânico. From Ipanema/Leblon: ~3 km north; accessible by bicycle on Rua Jardim Botânico bike lane. No metro directly nearby; Uber recommended from South Zone hotels. Café-bar inside the mansion courtyard. The Botanical Garden (Jardim Botânico) is a 10-minute walk east from Parque Lage.
- Difficulty: easy
- Recommended settings: Courtyard Reflection: f/11, 1/250 sec, ISO 200, 24mm — pool reflection with Christ visible above arch · Telephoto Christ: f/8, 1/500 sec, ISO 400, 200–400mm — statue compressed against forest from pool edge · Arch Framing: f/8, 1/250 sec, ISO 200, 35mm — statue framed through a single colonnade arch · Wildlife: f/5.6, 1/1000 sec, ISO 800, 300mm — toucans and marmosets in forest canopy
Shots to chase:
- Classic courtyard reflection: position at the pool’s south edge and use a wide-angle (24mm) to capture the colonnaded arches with Christ the Redeemer visible at the top center of the composition and the arch reflected in the still water below
- Single arch framing: move to the north colonnade and shoot through a single arch, using it to frame the green hillside and the statue above
- Telephoto (300–400mm) from the pool edge compresses the distance dramatically — Christ appears much closer and larger against the forest canopy
- Rooftop terrace (R$10 entry): higher vantage above the treetops with the statue prominent and Guanabara Bay visible in the distance on clear days
- Wildlife in the park: toucans, sloths, and marmosets inhabit the forest — walk the trail behind the mansion toward the waterfall
Pro tip: Arrive at park opening (8 AM) on a clear weekday morning for the best light in the courtyard and lowest crowds. Check that Corcovado mountain is cloud-free before going — the statue is frequently hidden by low cloud in the morning. The pool reflection is most mirror-like on still mornings before the wind picks up. Bring a telephoto lens; the statue is ~1.5 km away from the courtyard, and a 200–400mm dramatically improves the composition compared to wide-angle. The park trail to the forest interior (behind and above the mansion) leads to waterfalls and is excellent for tropical wildlife photography.
Common mistake to avoid: Visiting on a cloudy day expecting to see Christ the Redeemer — the mountain summit is cloud-covered approximately 40% of days. Using only a wide-angle lens and ending up with a tiny statue barely visible above the trees. Staying only in the courtyard and missing the forest trails, caves, and waterfalls that make Parque Lage photographically rich.
11. Rio de Janeiro Botanical Garden — Jardim Botânico
Founded in 1808 by Prince Regent Dom João VI, the Rio Botanical Garden covers 140 hectares at the foot of Corcovado Mountain and contains over 6,500 plant species — including 900 varieties of palms. The centerpiece is the Avenue of Royal Palms: a double row of Imperial palms (Roystonea oleracea) reaching 30–40 m in height, planted in 1809, creating one of the most breathtaking natural architectural perspectives in South America. Beyond the avenue, the garden contains a bromeliad section, orchidarium (with 1,500 orchid varieties), Japanese garden, carnivorous plant house, historic 19th-century greenhouse, and freshwater habitats with giant Victoria water lilies. Wildlife is abundant: toucans, coatis, marmosets, and over 140 bird species.
- GPS: -22.9675, -43.2239
- Elevation: 33 ft
- Best time of day: weekday morning 8–10 AM — the Avenue of Royal Palms (Alameda das Samambaias / Alameda das Palmeiras) is at its most atmospheric in soft angled morning light before crowds arrive; also excellent at golden hour on late afternoons (close at 5 PM; arrive no later than 4 PM)
- Sun direction: The iconic Avenue of Royal Palms (roughly 750 m long) runs north-south through the garden. Morning sun from the east provides low-angle sidelight across the palm trunks, creating deep shadows and warm texture on the bark — ideal for the classic receding avenue shot. Midday sun is directly overhead and light is flat and harsh, washing out the green foliage. Late afternoon sun from the west provides warm golden backlight through the palm fronds. The garden sits at the foot of Corcovado Mountain (to the north), so on clear afternoons Christ the Redeemer is visible above the palm canopy from certain angles within the garden.
- Access: Rua Jardim Botânico, 1008 – Jardim Botânico, Rio de Janeiro. Entry fee: R$80 for foreign visitors, R$40 for Brazilian residents (as of July 14, 2025); children under 5 free; seniors 60+, students, people with disabilities pay half-price. Cash only for entry fees at the gate. Open Mon, Tue, Thu, Fri, Sat, Sun: 8 AM–5 PM; Wed: 11 AM–5 PM. Bus: Lines 170, 572, 584 on Rua Jardim Botânico. Parking available at the garden entrance (fee applies). The Botanical Garden and Parque Lage are a 10-minute walk apart — combine in one visit.
- Difficulty: easy
- Recommended settings: Palm Avenue Morning: f/11, 1/250 sec, ISO 200, 35mm — receding perspective with sidelit trunks · Orchid Macro: f/2.8, 1/500 sec, ISO 400, 100mm macro — individual orchid detail · Bird Telephoto: f/5.6, 1/2000 sec, ISO 800, 300–500mm — toucans and parrots in canopy · Victoria Lily: f/11, 1/250 sec, ISO 200, 35mm — giant lily pads on pond surface with morning light
Shots to chase:
- Avenue of Royal Palms leading-line shot: stand at the southern entrance and use a 35–50mm lens with the palm trunks receding symmetrically to the vanishing point — classic and powerful
- Low-angle shot from beneath the palm canopy looking straight up through the interlocking fronds at the sky
- Toucan in the garden canopy: patient telephoto work (300–500mm) near the areas known for bird feeding; early morning is most productive
- Japanese Garden bridge reflection on a still morning: symmetrical arch reflected in calm water with tropical foliage
- Macro detail of bromeliad or orchid interior: f/2.8 at minimum focus distance isolates intricate floral geometry
Pro tip: The Avenue of Royal Palms is most impressive from the southern entry gate looking north — the full length of the avenue (nearly 750 m) is visible on a clear morning. Arrive at 8 AM on a weekday (Wednesday openings are delayed to 11 AM — check before going). Bring insect repellent; the humid tropical environment has mosquitoes. A macro lens is worth carrying for the bromeliad and orchid sections. Entry fees are cash only at the gate — have Brazilian Reais ready. The adjacent Parque Lage is free; visiting both in sequence makes an excellent half-day photography itinerary.
Common mistake to avoid: Arriving on Wednesday before 11 AM when the garden is closed. Forgetting cash for entry fees. Visiting mid-afternoon in summer (December–February) when temperatures exceed 38°C and light quality is poor — the morning session is essential. Rushing through the garden in 30 minutes; allow 2–3 hours minimum to explore the bromeliad house, orchidarium, and Japanese garden beyond the palm avenue.
12. Santa Teresa Neighborhood + Bonde Tram
Santa Teresa is Rio’s most bohemian neighborhood — a Victorian-era hillside enclave above downtown that survived the 20th century largely intact, preserving colonial and neoclassical mansions, cobblestone lanes, and a strong community of artists, musicians, and craftspeople. The canary-yellow Bonde de Santa Teresa is the last surviving electric tram in Rio; it climbs from Largo da Carioca station, crosses the 18th-century Arcos da Lapa aqueduct on its tracks, and winds through the neighborhood’s steep streets. The view from the tram as it crosses the arches — 17 m above the street, with a sweeping panorama of downtown Rio, Guanabara Bay, and the distant mountains — is unique in Brazilian urban photography. The neighborhood contains street murals, intimate feiras (markets), and Parque das Ruínas, a garden within a partially ruined 19th-century mansion with rooftop Sugarloaf views.
- GPS: -22.922, -43.1889
- Elevation: 230 ft
- Best time of day: late morning to early afternoon (10 AM–2 PM) on weekdays — the Bonde tram runs actively, cobblestone streets are lit by directional light through the hillside trees, and the neighborhood’s artist ateliers and open-air bars provide street life; also excellent at sunset from Parque das Ruínas viewpoint within the neighborhood
- Sun direction: Santa Teresa is a hillside neighborhood facing northeast-to-east. The tram line crosses the Lapa Arches and then winds uphill through the cobblestone streets. Morning sun (east) provides frontal warm light on the Arcos da Lapa when viewed from the tram on the aqueduct crossing. The neighborhood streets are narrow with buildings on both sides — light quality is often soft and diffuse, making early afternoon practical for street photography even without golden-hour timing. Parque das Ruínas viewpoint within Santa Teresa faces roughly north toward Guanabara Bay and Sugarloaf — best at sunset (sun to the west, lighting the bay and Sugarloaf in warm tones).
- Access: Estação Carioca tram station: Rua Lélio Gama, 2 – Centro, Rio de Janeiro (2-minute walk from Carioca metro station, Lines 1/2). Bonde tram ticket: R$20/person one-way (cash or card at station). Operating hours: Tue–Sun 8 AM–5 PM; closed Mondays. Trams depart every 15–20 minutes; capacity 32 passengers — arrive early on weekends. From Santa Teresa, explore on foot; cobblestone streets are hilly. Parque das Ruínas (free panoramic viewpoint): Rua Murtinho Nobre, 169 – Santa Teresa.
- Difficulty: easy (tram ride); easy-moderate (walking the steep cobblestone streets)
- Recommended settings: Tram Crossing Arches: f/8, 1/500 sec, ISO 400, 24–50mm — tram on the aqueduct from street level below · Tram Interior Motion: f/2.8, 1/500 sec, ISO 800, 35mm — handheld from inside tram, city blurring through open windows · Cobblestone Streets: f/8, 1/250 sec, ISO 200, 35mm — street scene with tram tracks receding · Parque Das Ruinas View: f/11, 1/500 sec, ISO 200, 50mm — Sugarloaf framed by ruined walls at golden hour
Shots to chase:
- Tram-on-arches: position on Rua Mem de Sá or Rua dos Arcos directly below the aqueduct and photograph the yellow tram crossing the arch silhouetted against the sky
- From aboard the tram as it crosses the Lapa Arches: shoot from the open side toward the panorama of downtown Rio with the arch rail as foreground
- Street scene at Largo do Guimarães (main Santa Teresa square): cobblestones, the tram tracks, colorful colonial facades, and outdoor café life
- Parque das Ruínas viewpoint: position between the ruined stone walls with Sugarloaf in the background framed by the irregular window opening
- Tram in motion through the narrow Rua Almirante Alexandrino: 1/30 sec pan to blur the tram against sharp cobblestone foreground
Pro tip: Sit on the right side of the tram when going uphill (toward Santa Teresa) for the best open views as the tram crosses the Lapa Arches. Book your return tram early — the last tram descends around 5–6 PM and the stop fills. The best tram photo from street level is from Rua Mem de Sá facing east with the aqueduct running left-to-right above you. Parque das Ruínas (Rua Murtinho Nobre, 169) is free and its rooftop garden contains one of the best views in Santa Teresa — do not skip it. For portraits and street photography in the neighborhood, the residential streets behind Largo do Guimarães are quieter and more characterful than the main tram route.
Common mistake to avoid: Visiting on Monday when the tram does not operate. Not budgeting enough time — Santa Teresa deserves 3–4 hours minimum to walk the streets, visit the viewpoints, and ride the tram both ways. Trying to photograph the tram interior while standing on the running boards — it’s not safe and staff will redirect you; photograph from seated positions inside.
When to photograph Rio de Janeiro: a year-round breakdown
Rio de Janeiro is photogenic every month of the year — but the conditions differ radically by season. Here is what to expect:
April–June (dry season begins, soft morning light, moderate heat, lower humidity) and August–October (clearest skies, best visibility from hilltop viewpoints, comfortable temperatures)
Photographer safety in Rio de Janeiro: read this
City photography has its own risks: gear visibility, neighborhood timing, traffic, weather. Read the briefing before you go.
- Gear visibility: Use a discreet bag with no obvious camera branding. Keep a body strapped under a jacket on transit.
- Neighborhood timing: Pre-dawn and post-sunset shoots reward early scouting. Cross-reference each location with current local guidance and choose well-lit transit routes.
- Situational awareness: Headphones out. One eye in the viewfinder, one on the street.
- Traffic: Bridges, medians, and bike lanes are not setup zones. Shoot from sidewalks and pedestrian areas only.
- Weather: Summer storms move quickly; winter cold drains batteries. Layer up, keep gear dry, watch for ice on cobblestones at blue hour.
The complete safety briefing is inside the Rio de Janeiro Photographer’s Guide PDF.
Take this guide into the city
This post is the complete field reference. The Rio de Janeiro Ultimate Photographer’s Guide PDF is the field-deployable version: full-page resolution hero photography, GPS maps with gold pins for every location, multi-season shooting calendars, gear notes per location, sun-angle diagrams, the full city safety briefing, and a print-ready editorial layout in Framehaus black and gold. Save it offline. Print it. Take it on the walk.
Rio de Janeiro Ultimate Photographer’s Guide
Downloadable PDF · 12 GPS-mapped locations · Multi-season calendar · City safety briefing · Packing checklist
Get the Rio de Janeiro guide — $47
Get the Rio de Janeiro Guide + Preset Pack
Photograph it. Edit it. Done.
All links go to Viator (a TripAdvisor company), the world’s largest marketplace for guided experiences. Tagged as affiliate per FTC.
Quick Amazon shortcuts to the gear most useful for this kind of shot. Use them if Prime shipping or Amazon credit makes more sense than B&H. As an Amazon Associate ShutYourAperture earns from qualifying purchases.
Take Rio de Janeiro home in your pocket.
Every shot location, every angle, every time of day worth shooting. Printable PDF + GPS-tagged map.
Instant download. Works on phone, tablet, and printed.
Continue reading
- International Cities Photography Guides — every city, mapped
- U.S. Cities Photography Hub
- National Parks Photography Guides
- Travel photography destinations
- Travel photography pillar
- How to shoot golden hour like a pro
- Blue hour photography settings and locations
← Back to International Cities Photography Guides
Related guides nearby
Three more photography guides within striking distance — perfect for combining into one trip.
- Buenos Aires 1962 km away · city · Argentina
- Cusco 3208 km away · city · Peru
- Cartagena 5116 km away · city · Unknown
The complete Rio de Janeiro guide is $47
All vantage points above + 5 bonus secret spots, printable map, gear pack list, and editing recipes. One-time payment, instant download, lifetime updates.
Common questions about the Rio de Janeiro guide
Is the Rio de Janeiro photography guide worth $47?
For most photographers, yes. The guide saves 8-12 hours of trip-planning research and prevents the most common mistake of Rio de Janeiro photography: shooting at the wrong time of day. If a single better frame is worth $47 to you, the guide pays for itself on day one. Buyers get every GPS coordinate, every golden-hour window, every cultural rule, and a printable shot list.
Does the Rio de Janeiro guide include GPS coordinates?
Yes — every vantage point in the guide has Google Maps-ready GPS coordinates so you can pin them before you fly. The guide also includes a printable map showing all locations clustered by walking distance, so you can build efficient half-day routes.
What's in the Rio de Janeiro PDF that isn't in this article?
The article shows the highlights. The PDF includes: 5 additional secret spots not published online, a 14-day itinerary with daily routes, the full camera-settings cheat sheet for every scenario in Rio de Janeiro, a printable gear packing list, post-processing recipes with screenshot examples, and a list of local guides we trust for portrait commissions.
Do I get the Lightroom presets too?
The $47 guide is the PDF only. The matching Rio de Janeiro preset pack is a separate $19 download — most buyers grab both as a bundle and save the editing time. Both are instant download, both work on Lightroom Classic and Lightroom Mobile.
Will the guide work for a Rio de Janeiro trip in 2026?
Yes. The guide is updated annually as fees, restrictions, and new vantage points change. All buyers get free lifetime updates. The 2026 edition includes the latest drone rules, museum photography policies, and seasonal light data for the year.
Visiting more than Rio de Janeiro?
Bundle multiple destination guides and save planning time across the trip:
- Buenos Aires Photographer’s Guide ($47)
- Mexico City Photographer’s Guide ($47)
- Cartagena Photographer’s Guide ($47)
- Cusco Photographer’s Guide ($47)
Or get all 60+ destinations in one bundle: Photo Atlas — every guide, every map, $97.