Best Photography Spots in Chicago: 12 Locations With GPS

Tours & experiences disclosure: This guide includes affiliate links to Viator, the world’s largest tour and experiences marketplace. If you book through these links, ShutYourAperture may earn a small commission at no extra cost to you.

Chicago photography guide hero imageSave

Amazon Associates disclosure: ShutYourAperture is a participant in the Amazon Services LLC Associates Program. As an Amazon Associate we earn from qualifying purchases. Some links below go to Amazon (Store ID edinchavez01-20). Buying through these links costs you nothing extra and helps fund our free guides.
Skip the planning. Get the Chicago PDF. All locations, GPS coordinates, golden-hour times, gear tips. Instant download.

Chicago, Illinois is one of the most photogenic cities in the United States. If you have a camera and the patience to show up before dawn, Chicago will give you images that last a career — but only if you know where and when to point it.

This is the definitive field guide to the 12 best photography spots in Chicago, with GPS coordinates you can drop straight into Google Maps, exact camera settings tuned to Chicago’s unique light, precise timing for every location, and the access notes nobody else bothers to document. It mirrors the intel inside our Chicago Ultimate Photographer’s Guide ($47 PDF) — a downloadable field guide with full-page hero images, GPS maps, seasonal tables, a city safety briefing, and a complete photographer’s packing list. Get the guide →

Planning multi-city travel? See also: U.S. cities photography hub and the National Parks Photography Guides.

Chicago Ultimate Photographer’s Guide — $47
12 GPS-mapped locations · Exact camera settings · Multi-season shooting calendar · Free annual updates

Download the PDF guide →
Skip the planning

Get the Chicago Ultimate Photographer’s Guide

Every location below — pre-mapped with GPS, golden-hour timing, gear recommendations, cultural rules, and a 14-day itinerary. Downloaded by 200+ working photographers.

Get the PDF · $47
Instant download · Lifetime updates

Quick jump to the 12 spots

  1. Cloud Gate (The Bean) – Millennium Park
  2. Navy Pier – Centennial Wheel
  3. Chicago Riverwalk – DuSable Bridge
  4. Adler Planetarium – Skyline View
  5. Lakefront Trail – North Avenue Beach
  6. Wrigley Field – Exterior
  7. Tribune Tower & Wrigley Building – Michigan Avenue
  8. Chicago Theatre – State Street Marquee
  9. 360 Chicago Observation Deck
  10. Lincoln Park Conservatory
  11. Chinatown Square – Murals & Architecture
  12. Buckingham Fountain – Grant Park

A look inside the Chicago Photographer’s Guide

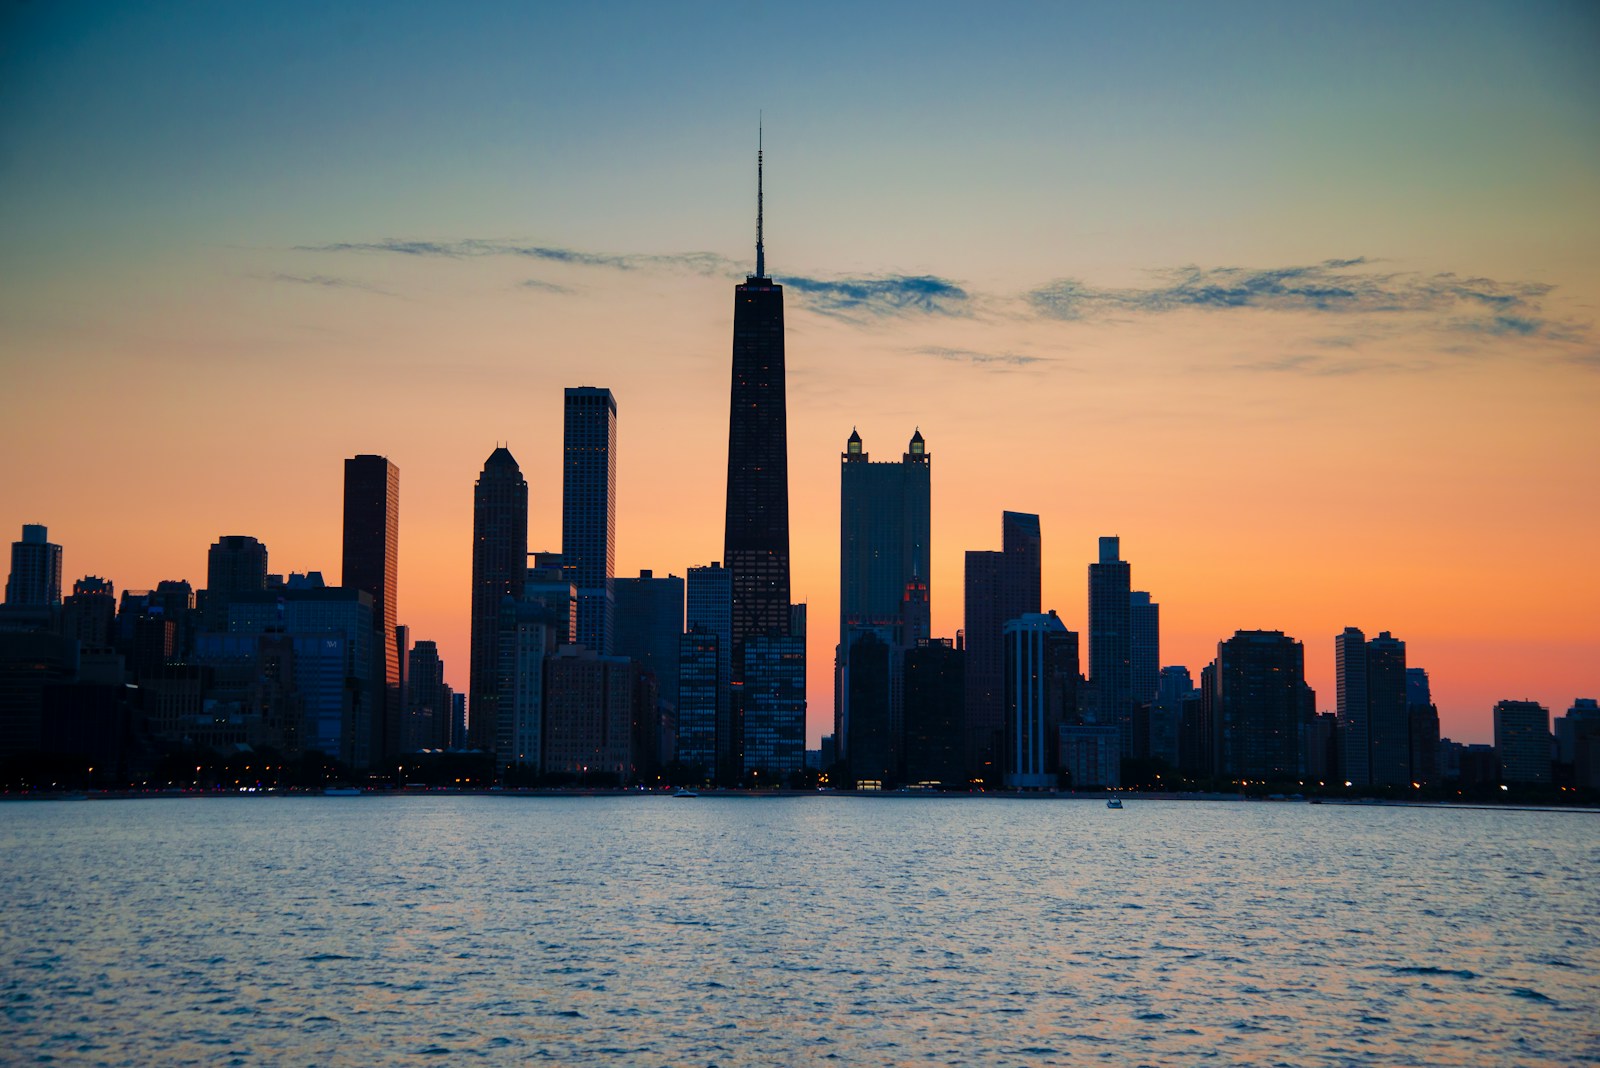
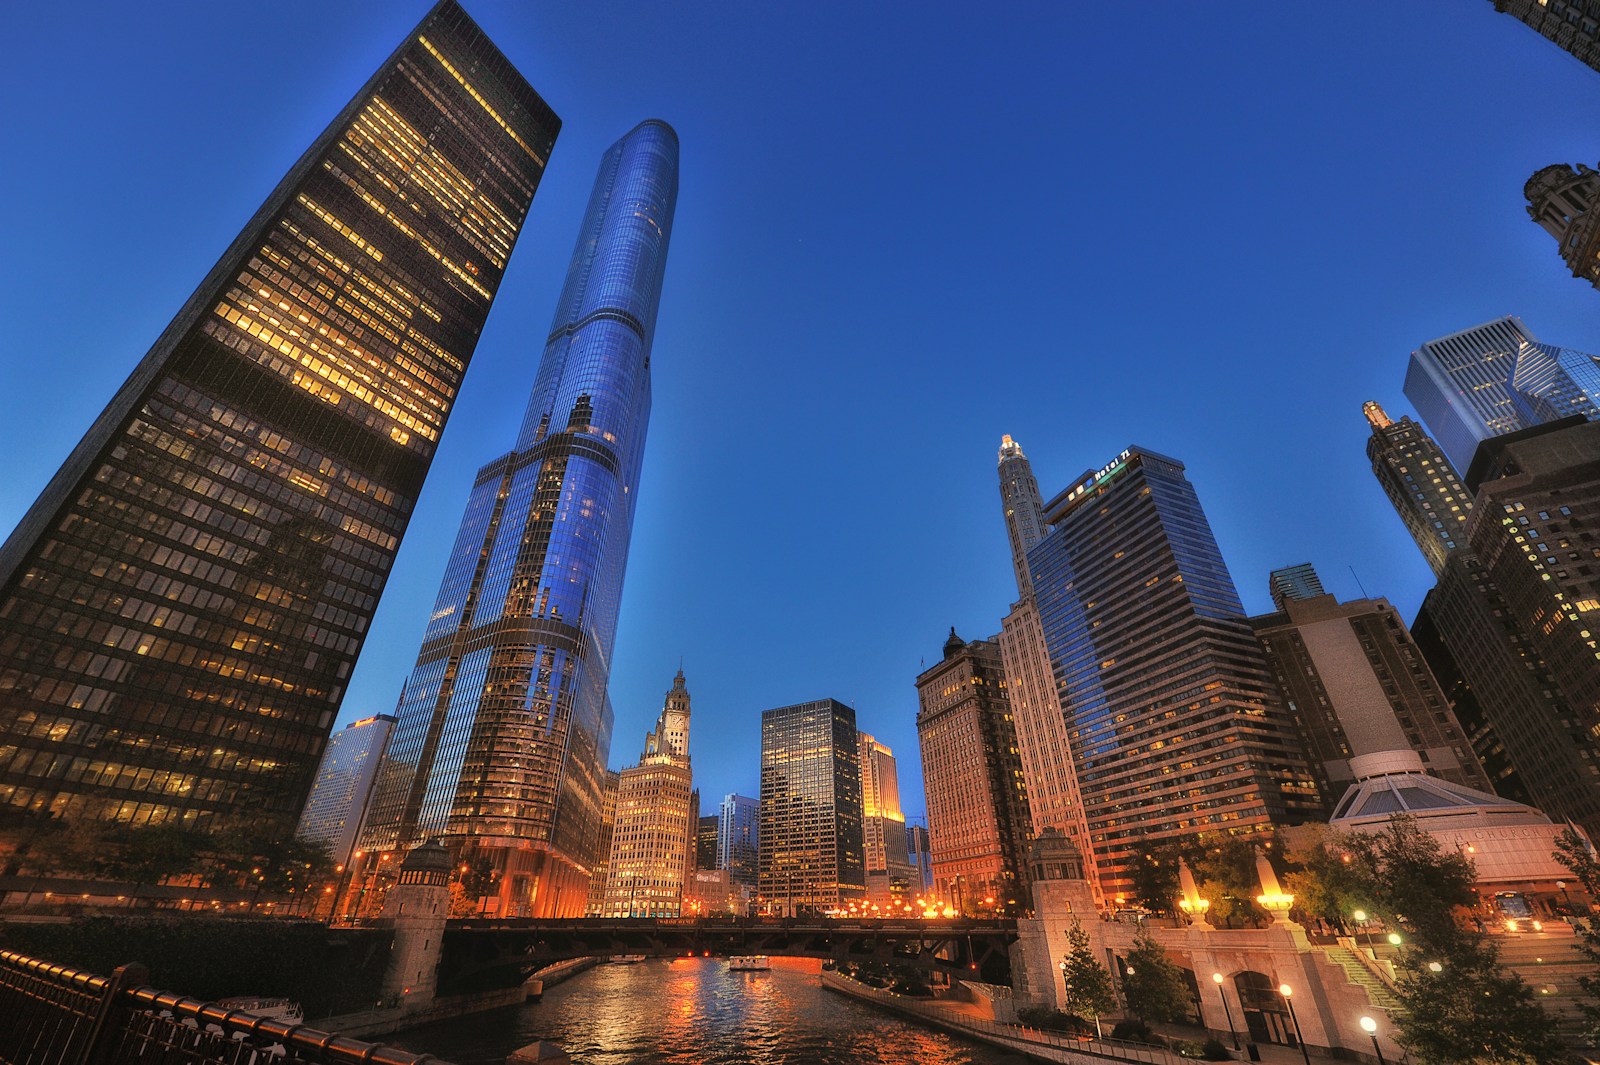
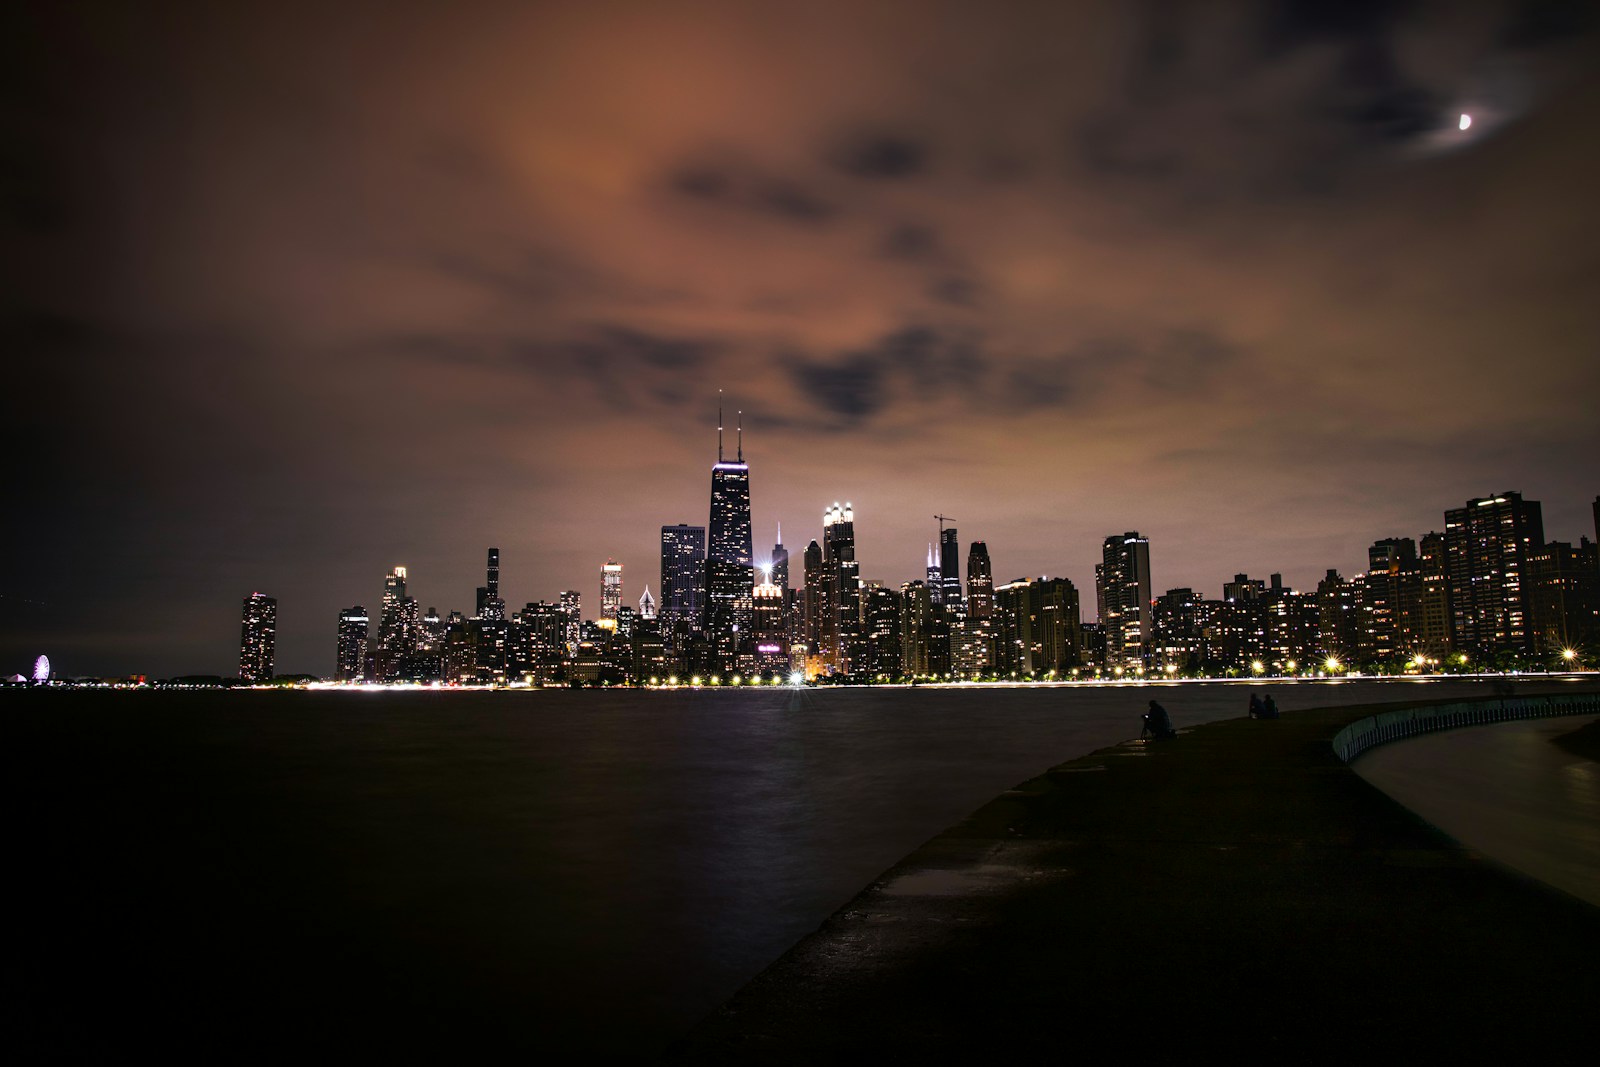
Here are three of the actual shots you’ll find inside the PDF — cinematic full-page references for the exact spots, lenses, and lighting conditions documented in the guide. The full guide includes 12 locations, each with a hero image, GPS map, settings table, and a five-shot list.

Cloud Gate (The Bean) – Millennium Park — from the Chicago Photographer's GuideSave
Cloud Gate (The Bean) – Millennium Park — sample reference photo from the Chicago Photographer’s Guide PDF

Before you shoot Chicago: the essentials

  • Free public access: Most outdoor landmarks — Millennium Park, Riverwalk, Buckingham Fountain, Adler Peninsula grounds, Lakefront Trail, Chinatown Square, Wrigley Field exterior — are free. Lincoln Park Conservatory is free. Paid admission at 360 Chicago (~$30–$37) and Chicago Theatre tours (~$20).
  • Commercial permits: Commercial and tripod photography requires a Chicago Park District permit for most parks. The Riverwalk does not require a permit for personal/non-commercial photography. Lincoln Park Conservatory requires a permit for professional shoots. Millennium Park enforces commercial permit rules; tripods are generally tolerated for amateur photographers at off-peak hours.
  • Best photography seasons: Spring (April–May) and Fall (September–October) for mild weather, vivid foliage, and lower crowds; Summer for lakefront energy and longer golden hours
  • Blue hour notes: Chicago’s blue hour lasts 20–40 minutes just before sunrise and after sunset. Best blue-hour spots are the Adler Planetarium (north side for skyline), the Riverwalk under DuSable Bridge, and Buckingham Fountain (light show begins at dusk). Use PhotoPills or The Photographer’s Ephemeris to time exact windows by season.
  • Drone policy: Most major U.S. cities restrict drone flight in airspace and via local ordinances. Check FAA + city rules before launching.
  • Local resource: Official visitor information

The full-resolution version of every map below — plus seasonal calendars, gear notes per location, sun-angle diagrams, and a complete photographer’s packing checklist — is inside the Chicago Photographer’s Guide PDF ($47).

1. Cloud Gate (The Bean) – Millennium Park

The 110-ton polished stainless steel sculpture distorts reflections of the Chicago skyline and visiting crowds into surreal, fish-eye panoramas. The concave underside — the ‘omphalos’ — creates a kaleidoscopic ceiling of infinite sky and city reflections.

  • GPS: 41.8826, -87.6233
  • Elevation: 595 ft
  • Best time of day: Sunrise (5:30–6:30 AM) or pre-sunrise blue hour to avoid crowds and capture mirror reflections with soft light
  • Sun direction: Sun rises over Lake Michigan to the east, striking the east face of the sculpture first at sunrise with warm tones. By midday the sculpture is front-lit from the south. Golden hour before sunset illuminates the western face with warm amber light from the Loop skyline direction.
  • Access: Free entry 24/7; Millennium Park gates officially open 6 AM–11 PM. CTA Red/Blue Line to Monroe, then walk east. Street parking garages on E. Monroe St and E. Randolph St (~$20–$30/day). No tripods without permit during park hours; security may ask you to move.
  • Difficulty: easy
  • Recommended settings: Sunrise Reflection: f/8, 1/60 sec, ISO 400, 24mm  ·  Blue Hour Long Exposure: f/11, 8 sec, ISO 100, 16mm (tripod required)  ·  Midday Crowd Abstract: f/5.6, 1/500 sec, ISO 200, 35mm  ·  Tight Reflection Detail: f/7.1, 1/250 sec, ISO 400, 70mm

Shots to chase:

  • Wide-angle shot from underneath the arch capturing the city reflected in the curved ceiling
  • Low-angle ground-level reflection with the skyline distorted symmetrically on both flanks
  • Blue-hour long exposure with light trails from passing pedestrians ghosting through frame
  • Tightly framed partial reflection isolating just the Willis Tower in the polished surface
  • Environmental portrait with a subject small against the giant silver form and full skyline behind

Pro tip: Arrive before 6 AM in summer — the park security often allows entry at 5:45 AM and you’ll have the Bean largely to yourself for the first 30 minutes of sunrise light. Shoot from the west side for the most dramatic skyline reflection. Stop down to f/22 for starburst effects on reflected city lights.

Common mistake to avoid: Shooting at midday when harsh overhead light flattens the sculpture’s curves and crowds obscure reflections. Forgetting that autofocus can struggle on the mirror surface — use manual focus or focus-lock on a distinct point in the reflection.

2. Navy Pier – Centennial Wheel

The 196-foot Centennial Wheel is the focal point of Chicago’s most-visited attraction, framed against the shimmering waters of Lake Michigan and the downtown skyline. At night, its programmable LED system creates multicolored light rings that contrast beautifully with the dark lake.

  • GPS: 41.8917, -87.6076
  • Elevation: 581 ft
  • Best time of day: Blue hour and night — the Centennial Wheel’s LED lights activate at dusk and create dramatic color rings against a darkening sky
  • Sun direction: The pier extends east into Lake Michigan; at sunrise the sun rises directly behind the wheel from the east, creating a glowing backlit silhouette. Golden hour sunsets illuminate the downtown skyline to the west from the pier’s end. Blue hour gives balanced exposure between wheel lights and sky.
  • Access: Navy Pier grounds are free and open daily 10 AM–10 PM (Sunday–Thursday) and 10 AM–midnight (Friday–Saturday). Centennial Wheel ride tickets ~$19. CTA Bus 29 (State) and 65 (Grand) serve the pier. Limited surface parking on-site (~$25/day). The far east end of the pier offers the best skyline vantage.
  • Difficulty: easy
  • Recommended settings: Blue Hour Wheel Lit: f/8, 2 sec, ISO 400, 24mm (tripod)  ·  Night Long Exposure: f/11, 15 sec, ISO 200, 16mm (tripod for light-trail effect on wheel)  ·  Sunset Skyline From Pier End: f/9, 1/200 sec, ISO 200, 35mm  ·  Daytime Detail: f/7.1, 1/500 sec, ISO 200, 50mm

Shots to chase:

  • Long-exposure night shot of the spinning wheel creating a full circle of light trails against the dark lake
  • Blue-hour wide shot from the pier’s south edge framing the wheel with the lit skyline behind
  • Sunrise silhouette of the wheel’s spokes against a warm eastern horizon over the lake
  • Ground-level perspective looking up through the wheel’s gondola structure with sky above
  • Telephoto compression of the wheel against the skyline from the lakefront path to the north

Pro tip: Shoot from the south side of the pier for a clean composition with the wheel in the left third and the skyline filling the background. A 10-stop ND filter during the day can extend exposures to blur the wheel mid-spin. Wednesday and Saturday evenings in summer feature fireworks — arrive early to scout a spot on the pier end.

Common mistake to avoid: Underexposing the foreground while trying to capture the bright wheel against a dark sky — use exposure bracketing or graduated ND filters. Shooting only from the pier entrance when the pier’s far east end offers vastly cleaner skyline-to-lake compositions.

3. Chicago Riverwalk – DuSable Bridge

The DuSable Bridge sits at the confluence of Magnificent Mile and the Chicago River, flanked by the Wrigley Building and Tribune Tower — framing an architectural corridor that defines downtown Chicago. The river’s glassy surface mirrors the canyon of skyscrapers in still conditions.

  • GPS: 41.8889, -87.6244
  • Elevation: 578 ft
  • Best time of day: Golden hour (sunset) and blue hour — warm light reflects off glass towers while bridge and lamp lights activate
  • Sun direction: At sunset the sun descends toward the southwest, casting warm golden tones down the river canyon from behind the shooter when facing west. Sunrise illuminates the upper floors of east-facing glass towers with pink-amber light. The river runs east–west here, so midday light bounces off both north and south building faces.
  • Access: Free and open daily 6 AM–11 PM. Walking distance from Millennium Park (10 min). CTA Red/Brown/Green/Orange/Purple/Pink Line to State/Lake or Grand. Street parking garages on E. Wacker Dr. No permit required for personal photography. Bridge deck vibrates under vehicle and CTA train crossings — time long exposures between traffic.
  • Difficulty: easy
  • Recommended settings: Golden Hour River Reflection: f/8, 1/100 sec, ISO 400, 24mm  ·  Blue Hour Long Exposure: f/11, 4 sec, ISO 100, 16mm (tripod)  ·  Night Light Trails: f/11, 20 sec, ISO 100, 24mm (tripod)  ·  Boat Passing Motion Blur: f/8, 1/4 sec, ISO 400, 35mm

Shots to chase:

  • Looking west from the bridge center at golden hour with both Wrigley Building towers flanking the river corridor
  • Low-angle from the Riverwalk level with the bridge arch framing the lit skyscraper canyon above
  • Symmetrical long-exposure reflection of both tower facades in the still river surface at blue hour
  • Wide-angle from the Riverwalk walkway beneath the bridge with pedestrian life and light spilling from bars
  • St. Patrick’s Day shoot when the river is dyed bright green — a uniquely Chicago spectacle

Pro tip: The Riverwalk level (below street) gives a dramatically different perspective — walk down and frame the bridge arch overhead against the skyline. In winter after a snowfall, the quiet icy river and snow-dusted bridge rails create moody, rarely-seen compositions. Bring a cable release for long exposures to avoid bridge vibration blur.

Common mistake to avoid: Shooting only from street level and missing the elevated-looking-down angle or the under-bridge Riverwalk perspective. Not checking for passing CTA trains on the nearby elevated tracks, which can add interesting motion blur or frustrating shake.

4. Adler Planetarium – Skyline View

The Adler’s north terrace is widely regarded as the single best free outdoor location for a full Chicago skyline panorama. Positioned on a peninsula jutting into Lake Michigan, it provides an unobstructed, wide-angle view of the downtown skyline across the water with no foreground clutter.

  • GPS: 41.8664, -87.6067
  • Elevation: 580 ft
  • Best time of day: Sunrise — the unobstructed north-facing terrace gives the city’s most iconic skyline composition at first light when lake mist and warm tones merge
  • Sun direction: The skyline faces northwest from the Adler’s north terrace. Sunrise light coming from the east over the lake creates a dramatic side-lighting effect on the Willis Tower, Tribune Tower, and surrounding skyscrapers. Blue hour (15–20 min before sunrise) gives deep indigo skies with lit building windows. Golden hour at sunset is behind the buildings, creating silhouettes.
  • Access: Grounds and terrace are free and accessible daily. Planetarium admission is separate (~$14 adult). Easily accessible by CTA Bus 130 (Museum Campus) or the free Museum Campus trolley from downtown. Limited free parking in Museum Campus lots (metered on weekends). The north terrace is always open and is the primary photography vantage.
  • Difficulty: easy
  • Recommended settings: Sunrise Skyline Panorama: f/8, 1/60 sec, ISO 400, 24mm  ·  Blue Hour Long Exposure: f/11, 10 sec, ISO 100, 24mm (tripod)  ·  Foggy Morning Atmosphere: f/5.6, 1/100 sec, ISO 800, 70mm  ·  Golden Hour Silhouette: f/11, 1/500 sec, ISO 200, 35mm

Shots to chase:

  • Pre-sunrise blue-hour panoramic stitch with all skyline towers lit against a deep cobalt sky
  • Reflection of the skyline in the shallow puddles on the terrace pavement after rain
  • Sunrise sequence from dark predawn through full golden light illuminating the entire skyline
  • Telephoto compression of Willis Tower and neighboring supertalls against a clear blue sky
  • Winter shot with frozen Lake Michigan in the foreground and the gleaming skyline above

Pro tip: Arrive 25–30 minutes before sunrise to set up — the light shifts rapidly once the sun clears the lake horizon. Bring a wide-angle lens (16–24mm) for the full panorama but also a 70–200mm for compressed telephoto shots isolating individual towers. The pavement is wet and can be slippery near the lake edge; use anti-slip footwear in pre-dawn darkness.

Common mistake to avoid: Arriving too late after sunrise when harsh east light washes out the skyline’s dimensionality. Shooting only from the standard terrace without exploring the south-side staircase areas where the planetarium building itself can be incorporated as a foreground.

Want this in your pocket on the street?
The full-resolution version of every spot above — with full-page hero photography, GPS maps with gold location pins, sun direction diagrams, multi-season tables, and a complete safety + packing checklist — is inside the Chicago Ultimate Photographer’s Guide PDF ($47). Print it, save it offline, take it on the walk. Get the guide →

5. Lakefront Trail – North Avenue Beach

Lakefront Trail – North Avenue Beach Chicago photography sampleSave
Lakefront Trail – North Avenue Beach — cinematic reference from the Chicago Photographer’s Guide PDF

North Avenue Beach offers a rare combination of an expansive sandy beach, the Art Deco steamship-shaped beach house, the gleaming Lake Michigan shoreline, and a distant Chicago skyline backdrop. The lakefront path here is one of the most photographed recreational stretches in the country.

  • GPS: 41.9142, -87.6245
  • Elevation: 584 ft
  • Best time of day: Sunrise — the sun rises over the lake directly to the east, lighting the beach and water with intense warm colors before crowds arrive
  • Sun direction: Sun rises directly east over Lake Michigan and hits the beach face-on at sunrise, creating long warm shadows across the sand and brilliant water sparkle. By midday the light is overhead with limited interest. Golden hour at sunset lights the skyline to the south with warm amber tones, visible from the beach shoreline.
  • Access: Free and open 24/7. CTA Red Line to North/Clybourn, then walk east (~15 min). Bus 72 (North) stops near the beach entrance. Metered street parking on Stockton Dr and Lake Shore Dr (limited in summer). Seasonal lifeguard hours June–Labor Day. The iconic steamship-shaped beach house is a photogenic landmark at the beach’s north end.
  • Difficulty: easy
  • Recommended settings: Sunrise Beach Golden Light: f/8, 1/250 sec, ISO 200, 24mm  ·  Long Exposure Water Silky: f/16, 6 sec, ISO 100, 16mm (tripod, ND filter)  ·  Skyline From Beach: f/7.1, 1/400 sec, ISO 200, 35mm  ·  Stormy Dramatic Sky: f/9, 1/500 sec, ISO 400, 24mm

Shots to chase:

  • Sunrise long-exposure with silky water and golden sky reflections on wet sand
  • Wide shot of the Art Deco beach house with the skyline visible in the far southern background
  • Telephoto shot of city skyline compressed from the shoreline with Lake Michigan in the foreground
  • Summer aerial-style composition from the top of the beach house steps looking down the crowded sand
  • Winter icescape with Chicago skyline visible through frozen lake formations and snow-covered sand

Pro tip: Walk north to the concrete pier extending into the lake for a slightly elevated view of the beach and skyline. A polarizing filter dramatically cuts lake glare and saturates the water’s teal-blue color on sunny days. Come in late October–November for dramatic overcast skies and a deserted, moody beach.

Common mistake to avoid: Shooting into the sun at sunrise without managing the blown-out sky — use graduated ND filters or HDR bracketing. Ignoring the beach house itself as a foreground subject, instead pointing only toward the skyline.

6. Wrigley Field – Exterior

Wrigley Field’s 1914 red-brick exterior and iconic hand-operated scoreboard make it one of America’s most photogenic ballparks. The ivy-covered outfield walls, manual scoreboard, and neon marquee at Clark and Addison make virtually every angle a classic baseball postcard.

  • GPS: 41.9483, -87.6557
  • Elevation: 600 ft
  • Best time of day: Golden hour before a day game — warm light illuminates the vintage marquee and red brick facade; also excellent at night under stadium lights on game evenings
  • Sun direction: Main marquee faces north on Addison Street; morning light (from the east) grazes the east-facing side facade while the marquee is in shade. Afternoon light from the southwest illuminates the marquee front directly during the 2–3 hours before a typical 1:20 PM or 3:05 PM game. Night games under floodlights create warm rim-lit scenes.
  • Access: Exterior and surrounding streets free 24/7. CTA Red Line to Addison (30 min from Loop). Street parking in Wrigleyville neighborhood. No permit needed for exterior photography. The best vantage points are the Addison/Clark corner (front marquee) and the Sheffield/Waveland avenue side (ivy-covered outfield wall visible over the bleacher seats).
  • Difficulty: easy
  • Recommended settings: Golden Hour Marquee: f/5.6, 1/500 sec, ISO 400, 35mm  ·  Night Under Lights: f/2.8, 1/250 sec, ISO 1600, 35mm  ·  Wide Corner Establishing: f/8, 1/500 sec, ISO 200, 16mm  ·  Detail Brickwork Ivy: f/4, 1/500 sec, ISO 400, 85mm

Shots to chase:

  • Classic corner shot at Clark and Addison with the marquee centered and surrounding streetscape in the frame
  • Night game scene with the stadium lights glowing above the brick facade and crowd noise energy
  • Close-up of the ivy-covered outfield wall visible over the Sheffield Avenue bleachers
  • Pregame street scene with Cubs fans in blue jerseys streaming past the iconic entrance marquee
  • Detail shot of the hand-operated scoreboard visible above the left-field bleachers from Waveland Ave

Pro tip: The Clark/Addison corner captures the most iconic front-on marquee shot. For the ivy wall, walk up Sheffield Avenue where gaps above the bleachers reveal the famous green ivy. Game days bring the best atmospheric street energy; arrive 90 minutes before first pitch for the pre-game crowds and warm light.

Common mistake to avoid: Shooting the marquee from too far back without a telephoto to compress street depth. Missing the Sheffield Avenue angle entirely, which provides a unique behind-the-outfield-wall perspective unavailable at any other MLB park.

7. Tribune Tower & Wrigley Building – Michigan Avenue

The Wrigley Building (1924) and Tribune Tower (1925) face each other across Michigan Avenue at the Chicago River, forming one of America’s most iconic architectural pairings. The Wrigley Building’s white glazed terracotta glows brilliantly at night, while Tribune Tower’s neo-Gothic spires reference European cathedrals.

  • GPS: 41.8904, -87.6237
  • Elevation: 580 ft
  • Best time of day: Blue hour and golden hour — the white terracotta Wrigley Building luminescence and neo-Gothic Tribune Tower are dramatically lit at dusk and dawn
  • Sun direction: Both buildings face west across Michigan Avenue. Sunrise creates dramatic backlit silhouettes of the towers against the eastern sky. Late afternoon and golden hour sun illuminates the west-facing facades directly with warm orange-gold light. Blue hour produces the most dramatic balance between lit tower windows and sky tones.
  • Access: Exterior always accessible from public sidewalks on Michigan Avenue, N. Wacker Drive, and the DuSable Bridge. CTA Red Line to Grand or Chicago. Street parking on N. Wacker Dr or E. Wacker Dr. The view from the south side of the DuSable Bridge looking south at both towers simultaneously is the classic composition.
  • Difficulty: easy
  • Recommended settings: Blue Hour Towers Lit: f/8, 2 sec, ISO 200, 24mm (tripod)  ·  Golden Hour Facade: f/7.1, 1/200 sec, ISO 400, 35mm  ·  Night Building Glow: f/8, 5 sec, ISO 200, 24mm (tripod)  ·  Detail Gothic Spires: f/5.6, 1/500 sec, ISO 400, 200mm

Shots to chase:

  • Blue-hour composition from the DuSable Bridge with both towers lit above the glowing river surface
  • Looking north up Michigan Avenue with the Wrigley Building’s illuminated clock tower centered in the frame
  • Detail shot of Tribune Tower’s stone base embedded with fragments of world-famous landmarks
  • Telephoto compression of both towers framed through the DuSable Bridge lamppost arms
  • Night reflection of the Wrigley Building’s warm white glow in the Chicago River surface below

Pro tip: The embedded rock fragments at Tribune Tower’s base (from Notre Dame, the Berlin Wall, the Taj Mahal, etc.) make for compelling macro detail shots — bring a 50mm or 100mm lens. For the best towers-plus-river composition, position yourself on the south walkway of the DuSable Bridge. The Wrigley Building exterior floodlights turn on at dusk year-round.

Common mistake to avoid: Shooting only from street level and missing the slightly elevated bridge angle that includes the river as a leading line. Overlooking the Tribune Tower’s stone artifact collection at base level — one of the most under-photographed details in Chicago.

8. Chicago Theatre – State Street Marquee

Built in 1921 in a French Baroque style, the Chicago Theatre’s vertical red-neon ‘CHICAGO’ sign towering over State Street is one of the most recognized symbols of the city. The ornate terracotta facade and ornamental arch entrance create a Hollywood golden-age aesthetic rarely found in modern city architecture.

  • GPS: 41.8853, -87.6278
  • Elevation: 580 ft
  • Best time of day: Blue hour and night — the giant vertical marquee sign blazes in red neon and the ornate facade is dramatically lit against the darkening sky
  • Sun direction: The theatre faces west on North State Street; the facade receives afternoon and golden-hour sunlight directly. At blue hour (after sunset), the marquee neon and facade floodlights create a warm-red glow against the deep blue sky — the most sought-after composition. Morning light is from behind the building, creating interesting rim-lit architecture.
  • Access: Exterior photography from the public sidewalk on N. State Street is always free. CTA Red/Blue Line to Washington (State/Lake stop, 2 min walk). Interior tours available (~$20). The ideal composition angle is from the middle of N. State Street looking north-northwest toward the marquee — use caution with vehicle traffic. Bus stops along State Street provide a populated foreground on busy evenings.
  • Difficulty: easy
  • Recommended settings: Blue Hour Neon Marquee: f/8, 1.5 sec, ISO 400, 24mm (tripod)  ·  Night Full Facade: f/8, 3 sec, ISO 200, 16mm (tripod)  ·  Golden Hour Facade Detail: f/7.1, 1/200 sec, ISO 400, 35mm  ·  Neon Sign Close Detail: f/4, 1/100 sec, ISO 800, 85mm

Shots to chase:

  • Classic blue-hour shot from the State Street sidewalk center with the full vertical CHICAGO sign and lit marquee
  • Upward perspective from the base of the facade showing the full ornamental arch with neon above
  • Rainy night scene with neon reflections of the marquee rippling across the wet State Street pavement
  • Telephoto shot from a block south compressing the red neon sign against the surrounding office towers
  • Interior lobby tour shots of the ornate French Baroque chandelier and grand staircase (requires entry)

Pro tip: After light rain, the State Street pavement creates mirror reflections of the red neon marquee — some of the most spectacular Chicago night photography is captured in this condition. Shoot from multiple distances: wide at 16mm for the full street scene and 50–85mm for compressed marquee detail shots. A 10-15 second exposure at f/8 after sunset produces balanced neon-to-sky tones.

Common mistake to avoid: Not waiting for blue hour and shooting in full darkness, losing the sky detail. Standing too close and missing the full vertical sign — position yourself at least 80 feet back on the sidewalk for the complete composition.

Want this in your pocket on the street?
The full-resolution version of every spot above — with full-page hero photography, GPS maps with gold location pins, sun direction diagrams, multi-season tables, and a complete safety + packing checklist — is inside the Chicago Ultimate Photographer’s Guide PDF ($47). Print it, save it offline, take it on the walk. Get the guide →

9. 360 Chicago Observation Deck

360 Chicago Observation Deck Chicago photography sampleSave
360 Chicago Observation Deck — cinematic reference from the Chicago Photographer’s Guide PDF

The 360 Chicago deck at 875 N Michigan Avenue (formerly John Hancock Center) is on the Magnificent Mile and uniquely positioned north of the main downtown cluster, providing an unobstructed south view toward Willis Tower and the full Loop skyline. Unlike Skydeck, it includes a bar and open sightlines in all directions from a single enclosed deck.

  • GPS: 41.899, -87.6233
  • Elevation: 1,630 ft
  • Best time of day: Sunset into blue hour — golden-hour light catches the skyline below before city lights fully ignite; the TILT experience is best mid-day for visibility
  • Sun direction: At 1,030 feet on the 94th floor, the deck faces in all four directions. The west-facing windows give dramatic sunset views over the city grid extending to the horizon. North-facing windows offer Lake Shore Drive and Lincoln Park views. East-facing windows look out over Lake Michigan. The deck glass may cause internal reflections — press your lens against the window and block light with your jacket.
  • Access: 875 N Michigan Avenue, 94th floor. Admission ~$30–$37 general, free for members. Hours 9 AM–11 PM daily (last entry 10 PM). CTA Red Line to Chicago (0.3 mi walk). Valet and garage parking available nearby. Tripods are generally not permitted; use a beanbag, jacket against the glass, or a GorillaPod. TILT attraction (tilting glass boxes) requires separate ticket (~$7).
  • Difficulty: easy
  • Recommended settings: Sunset Cityscape Handheld: f/10, 20 sec, ISO 64, 24mm (camera braced against glass)  ·  Blue Hour City Lights: f/8, 8 sec, ISO 200, 24mm (camera against window)  ·  Night Full City Grid: f/9, 15 sec, ISO 100, 16mm (braced)  ·  Telephoto Street Detail: f/5.6, 1/60 sec, ISO 1600, 135mm

Shots to chase:

  • South-facing view at blue hour showing the full Loop skyline with Willis Tower dominant in the frame
  • Long-exposure light trails of Lake Shore Drive curving along the lakefront far below
  • East-facing shot over Lake Michigan with the lakefront park ribbon between city and water
  • Night grid pattern looking straight down onto the illuminated street network of the Magnificent Mile
  • TILT experience photo of a person hanging over the street far below in the tilting glass pod

Pro tip: Press your lens hood firmly against the window glass to eliminate interior reflections — bring a rubber lens hood for best contact. Arrive 30 minutes before sunset and stay for the full transition from golden hour to blue hour to night for three distinct lighting scenarios. Visit mid-week when the deck is less crowded and window access is easier.

Common mistake to avoid: Shooting during full daylight when interior ceiling lights create intense reflections in the glass. Not arriving early enough for sunset — the transition window from golden to blue hour lasts only 30–40 minutes.

10. Lincoln Park Conservatory

Built in 1890, the Victorian-era glass greenhouse houses four permanent display rooms: the Palm House (towering tropical palms), the Fernery (lush prehistoric ferns), the Cactus House (desert succulents), and the Show House (rotating seasonal floral displays). The ornate wrought-iron and glass architecture itself is a photographic subject.

  • GPS: 41.924, -87.6353
  • Elevation: 594 ft
  • Best time of day: Morning (9–11 AM) on overcast days for diffused light through the glass ceiling — hard sunlight creates excessive contrast inside the greenhouse rooms
  • Sun direction: The conservatory faces south, with natural light entering through the glass ceiling vaults throughout the day. Overcast days produce the most even, flattering light for flora and macro photography inside. Morning hours avoid afternoon crowding from visitors and wedding parties. The outdoor formal garden on the south side receives warm golden-hour light in late afternoon.
  • Access: Free admission; open daily 9 AM–5 PM. 2391 N Stockton Drive, Lincoln Park. CTA Red Line to Fullerton, walk east (15 min). Bus 151 along Stockton Drive stops at the conservatory. Street parking on Stockton Dr and Fullerton Pkwy. A Chicago Park District permit is required for professional/commercial photography inside. Personal photography welcome without permit.
  • Difficulty: easy
  • Recommended settings: Interior Flora Overcast: f/4, 1/100 sec, ISO 800, 50mm  ·  Palm House Wide: f/5.6, 1/60 sec, ISO 1600, 16mm  ·  Macro Flower Detail: f/2.8, 1/250 sec, ISO 400, 100mm macro  ·  Exterior Glass Architecture: f/8, 1/500 sec, ISO 200, 24mm

Shots to chase:

  • Wide upward shot inside the Palm House with towering palms filling the frame against the glass vault ceiling
  • Macro close-up of exotic tropical blooms in the Show House with shallow-depth bokeh background
  • Symmetrical leading-lines shot down the central aisle of the Fernery with prehistoric ferns arching overhead
  • Exterior architectural shot of the Victorian glass-and-iron facade from the south garden at golden hour
  • Rainy day exterior of the misty greenhouses with condensation on the glass panes creating atmospheric texture

Pro tip: Visit in winter (December–March) for the Christmas/holiday floral show — the conservatory fills with poinsettias and seasonal arrangements against the snow-covered outdoor park, creating a stark color contrast. Macro photographers should focus manually — autofocus hunts on fine leaf and petal detail. A monopod is helpful for stability in the low-light interior rooms.

Common mistake to avoid: Shooting on bright sunny days when harsh directional light through the glass creates blown-out highlights and deep shadows. Not checking the seasonal show schedule — special exhibitions rotate and the standard rooms can be closed for installation.

11. Chinatown Square – Murals & Architecture

Chinatown Square’s large-scale Centennial Murals (2016, by Andy Bellomo, Bernard Williams, and Roman Villarreal) depict 100 years of Chinese-American history in vibrant detail, while the surrounding architecture of red-and-gold pagoda styling, dragon motifs, and hanging lanterns creates a richly layered cultural photographic environment unique in Chicago.

  • GPS: 41.8529, -87.6319
  • Elevation: 581 ft
  • Best time of day: Mid-morning (9–11 AM) for even side-lighting on the murals; avoid harsh midday overhead light that flattens mural colors
  • Sun direction: Chinatown Square is a two-story outdoor mall with murals on the south and west walls. Morning light from the east lights the east-facing mural panels. The Centennial Murals on the south wall receive direct afternoon light (1–4 PM west sun). The pagoda-style architectural elements and red-and-gold lanterns photograph best with soft overcast or late-afternoon light.
  • Access: Free and open 24/7 (outdoor plaza); shops open approximately 10 AM–9 PM. Address: 2133 S China Place, Chicago IL 60616. CTA Red Line to Cermak-Chinatown (0.4 mi walk north). Bus 62 (Archer) serves Wentworth Ave. Street parking along Archer Ave and Cermak Road. The Centennial Murals are along the west and south exterior walls of the square.
  • Difficulty: easy
  • Recommended settings: Mural Even Light: f/7.1, 1/250 sec, ISO 200, 24mm  ·  Architectural Detail: f/8, 1/500 sec, ISO 200, 50mm  ·  Lantern Close Up: f/2.8, 1/500 sec, ISO 200, 85mm  ·  Street Scene Documentary: f/5.6, 1/500 sec, ISO 400, 35mm

Shots to chase:

  • Wide shot of the full Centennial Mural panel with the pagoda roofline above and street life below
  • Detail crop of the mural’s Chinese calligraphy and historical portrait sections with a 70mm lens
  • Street-level shot looking up at hanging red lanterns framing the blue sky above the square
  • Documentary-style candid of vendors and community members against the mural backdrop
  • Lunar New Year (Jan–Feb) festive scene with dragon decorations and crowds filling the square

Pro tip: Visit during the Lunar New Year festival (January–February) when the square transforms with lion dances, fireworks, and elaborate decorations — the most photogenic and energetic time of year. The Chinese American Museum of Chicago nearby (238 W 23rd St) has an exterior mural by Rich Lo (Chinese Opera mural) that offers a different artistic style to contrast with the Centennial Murals.

Common mistake to avoid: Arriving in the middle of the day when overhead light creates flat, washed-out mural tones. Not exploring beyond the main square to the adjacent Wentworth Avenue district, which has numerous smaller signs and architectural details.

12. Buckingham Fountain – Grant Park

The Clarence Buckingham Memorial Fountain (1927) is one of the largest fountains in the world, shooting its center jet 150 feet into the air. Modeled after the Latona Fountain at Versailles, its nightly light and music show with multi-colored jets is a quintessential Chicago summer experience, set against the skyline backdrop.

  • GPS: 41.8756, -87.6196
  • Elevation: 585 ft
  • Best time of day: Dusk and night — the nightly light and music show (dusk to 10 PM, on the hour) transforms the fountain into a spectacular illuminated spectacle with 150-foot water jets lit in color
  • Sun direction: The fountain occupies the center of Grant Park and is lit from all sides at night. During the day, morning light from the east gives soft directional light on the east-facing shell sculptures. Late afternoon sun from the west illuminates the fountain’s west face. The best natural-light compositions integrate the distant skyline to the north with the fountain as a foreground.
  • Access: Free outdoor access, open 8 AM–11 PM daily from early May through mid-October (seasonal — fountain is off November–April). 301 S Columbus Drive, Grant Park. CTA Red/Blue Line to Jackson or Adams/Wabash, then walk east. Parking garages at E. Monroe St or Grant Park North (metered). The light show runs at dusk every hour on the hour for 20 minutes through 10 PM.
  • Difficulty: easy
  • Recommended settings: Night Light Show: f/8, 4 sec, ISO 200, 24mm (tripod)  ·  Dusk Fountain Skyline: f/8, 1 sec, ISO 400, 24mm  ·  Daytime Wide Establishing: f/9, 1/500 sec, ISO 200, 16mm  ·  Detail Water Jets: f/7.1, 1/1000 sec, ISO 400, 100mm (freeze water)

Shots to chase:

  • Night long-exposure during the light show with colorful water jets against the illuminated skyline
  • Blue-hour dusk shot with the fountain silhouetted against the last red-orange glow on the horizon
  • High-shutter-speed shot freezing the 150-foot center jet in crisp detail against a bright blue sky
  • Symmetrical front-on composition from the main walkway axis with the skyline framed above the fountain
  • Abstract long-exposure at night with slow shutter capturing water as luminous silk ribbons around the basin

Pro tip: Arrive 10 minutes before the top of any hour between dusk and 10 PM to secure a front-center position for the light show — it draws crowds quickly. Bring a sturdy tripod and cable release; the light show lasts 20 minutes giving ample time to experiment with 2–8 second exposures. Come back on rainy summer evenings when the crowds thin but the show continues.

Common mistake to avoid: Shooting only the fountain in isolation without including the Chicago skyline as a backdrop — step back to 150+ feet north on the central axis to include both. Using too fast a shutter speed at night (underexposed) or too slow with a moving fountain (blown-out jets) — bracket at 2, 4, and 8 seconds to find the ideal balance.

When to photograph Chicago: a year-round breakdown

Chicago is photogenic every month of the year — but the conditions differ radically by season. Here is what to expect:

Spring (April–May) and Fall (September–October) for mild weather, vivid foliage, and lower crowds; Summer for lakefront energy and longer golden hours

Photographer safety in Chicago: read this

City photography has its own risks: gear visibility, neighborhood timing, traffic, weather. Read the briefing before you go.

  • Gear visibility: Use a discreet bag with no obvious camera branding. Keep a body strapped under a jacket on transit.
  • Neighborhood timing: Pre-dawn and post-sunset shoots reward early scouting. Cross-reference each location with current local guidance and choose well-lit transit routes.
  • Situational awareness: Headphones out. One eye in the viewfinder, one on the street.
  • Traffic: Bridges, medians, and bike lanes are not setup zones. Shoot from sidewalks and pedestrian areas only.
  • Weather: Summer storms move quickly; winter cold drains batteries. Layer up, keep gear dry, watch for ice on cobblestones at blue hour.

The complete safety briefing is inside the Chicago Photographer’s Guide PDF.

Take this guide into the city

This post is the complete field reference. The Chicago Ultimate Photographer’s Guide PDF is the field-deployable version: full-page resolution hero photography, GPS maps with gold pins for every location, multi-season shooting calendars, gear notes per location, sun-angle diagrams, the full city safety briefing, and a print-ready editorial layout in Framehaus black and gold. Save it offline. Print it. Take it on the walk.

Chicago Ultimate Photographer’s Guide
Downloadable PDF · 12 GPS-mapped locations · Multi-season calendar · City safety briefing · Packing checklist

Get the Chicago guide — $47

Combo Deal

Get the Chicago Guide + Preset Pack

Photograph it. Edit it. Done.

$66
$54
Save $12
PDF Guide Every spot, GPS, golden hour
Preset Pack 20 Lightroom presets
Book your tours & experiences in Chicago

All links go to Viator (a TripAdvisor company), the world’s largest marketplace for guided experiences. Tagged as affiliate per FTC.

Also on Amazon: gear that helps with this technique

Quick Amazon shortcuts to the gear most useful for this kind of shot. Use them if Prime shipping or Amazon credit makes more sense than B&H. As an Amazon Associate ShutYourAperture earns from qualifying purchases.

Take Chicago home in your pocket.

Every shot location, every angle, every time of day worth shooting. Printable PDF + GPS-tagged map.

Instant download. Works on phone, tablet, and printed.

Continue reading

← Back to U.S. Cities Photography Guides

Related guides nearby

Three more photography guides within striking distance — perfect for combining into one trip.

Browse all 78 guides → · Open the map

Save your trip-planning hours

The complete Chicago guide is $47

All vantage points above + 5 bonus secret spots, printable map, gear pack list, and editing recipes. One-time payment, instant download, lifetime updates.

Buy Chicago PDF →

Common questions about the Chicago guide

Is the Chicago photography guide worth $47?

For most photographers, yes. The guide saves 8-12 hours of trip-planning research and prevents the most common mistake of Chicago photography: shooting at the wrong time of day. If a single better frame is worth $47 to you, the guide pays for itself on day one. Buyers get every GPS coordinate, every golden-hour window, every cultural rule, and a printable shot list.

Does the Chicago guide include GPS coordinates?

Yes — every vantage point in the guide has Google Maps-ready GPS coordinates so you can pin them before you fly. The guide also includes a printable map showing all locations clustered by walking distance, so you can build efficient half-day routes.

What's in the Chicago PDF that isn't in this article?

The article shows the highlights. The PDF includes: 5 additional secret spots not published online, a 14-day itinerary with daily routes, the full camera-settings cheat sheet for every scenario in Chicago, a printable gear packing list, post-processing recipes with screenshot examples, and a list of local guides we trust for portrait commissions.

Do I get the Lightroom presets too?

The $47 guide is the PDF only. The matching Chicago preset pack is a separate $19 download — most buyers grab both as a bundle and save the editing time. Both are instant download, both work on Lightroom Classic and Lightroom Mobile.

Will the guide work for a Chicago trip in 2026?

Yes. The guide is updated annually as fees, restrictions, and new vantage points change. All buyers get free lifetime updates. The 2026 edition includes the latest drone rules, museum photography policies, and seasonal light data for the year.

Get the Chicago guide · $47