Best Photography Spots in Seattle: 12 Locations With GPS
shutyouraperture-20). Buying through these links costs you nothing extra and helps fund our free guides.
Seattle, Washington is one of the most photogenic cities in the United States. If you have a camera and the patience to show up before dawn, Seattle will give you images that last a career — but only if you know where and when to point it.
This is the definitive field guide to the 12 best photography spots in Seattle, with GPS coordinates you can drop straight into Google Maps, exact camera settings tuned to Seattle’s unique light, precise timing for every location, and the access notes nobody else bothers to document. It mirrors the intel inside our Seattle Ultimate Photographer’s Guide ($47 PDF) — a downloadable field guide with full-page hero images, GPS maps, seasonal tables, a city safety briefing, and a complete photographer’s packing list. Get the guide →
Planning multi-city travel? See also: U.S. cities photography hub and the National Parks Photography Guides.
12 GPS-mapped locations · Exact camera settings · Multi-season shooting calendar · Free annual updates
Download the PDF guide →
Get the Seattle Ultimate Photographer’s Guide
Every location below — pre-mapped with GPS, golden-hour timing, gear recommendations, cultural rules, and a 14-day itinerary. Downloaded by 200+ working photographers.
Quick jump to the 12 spots
- Kerry Park Skyline Viewpoint
- Pike Place Market — Original Sign & Fish Throw
- Gas Works Park Skyline Reflection
- Chihuly Garden and Glass — Glasshouse Interior
- Olympic Sculpture Park
- Smith Tower Observation Deck
- Pioneer Square — Iron Pergola & Tlingit Totem Pole
- Ballard Locks (Hiram M. Chittenden Locks)
- Discovery Park — West Point Lighthouse
- Fremont Troll Under Aurora Bridge
- Volunteer Park Conservatory
- Alki Beach — West Seattle Skyline
A look inside the Seattle Photographer’s Guide
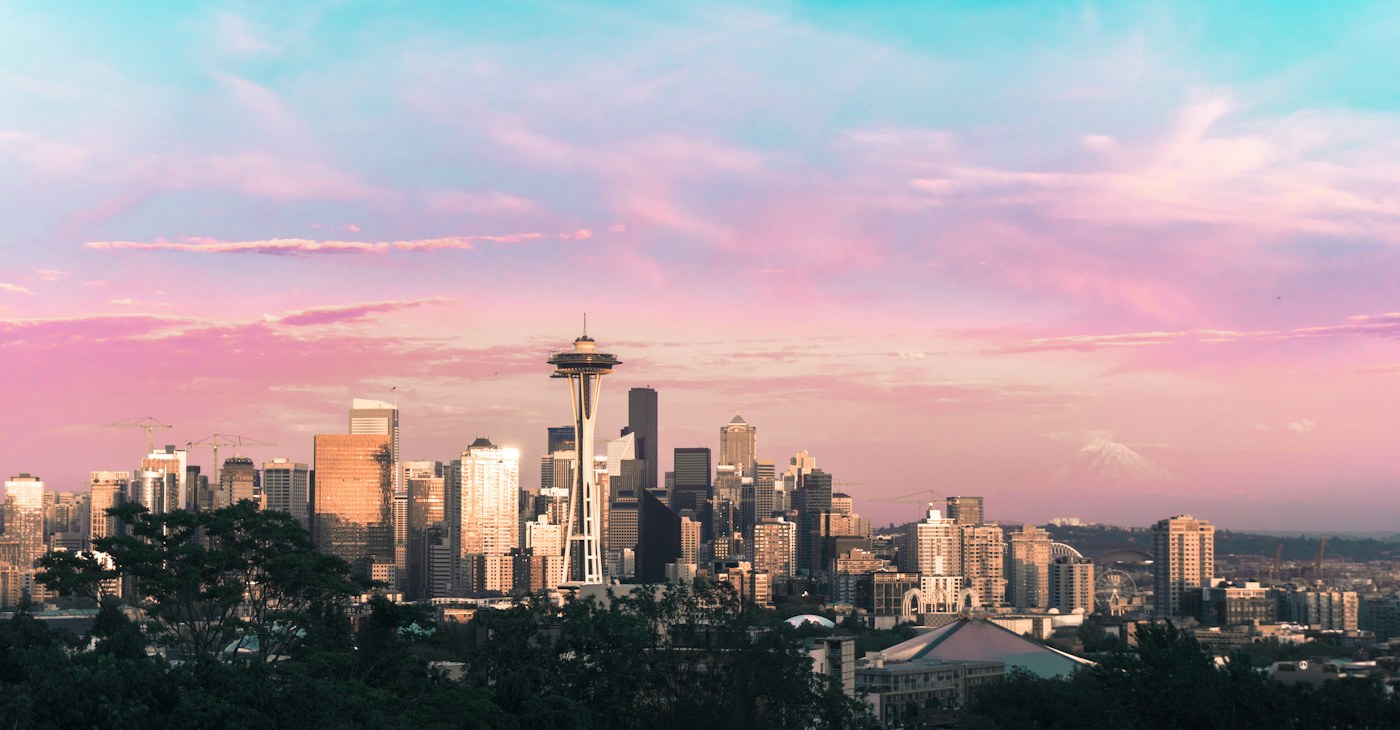
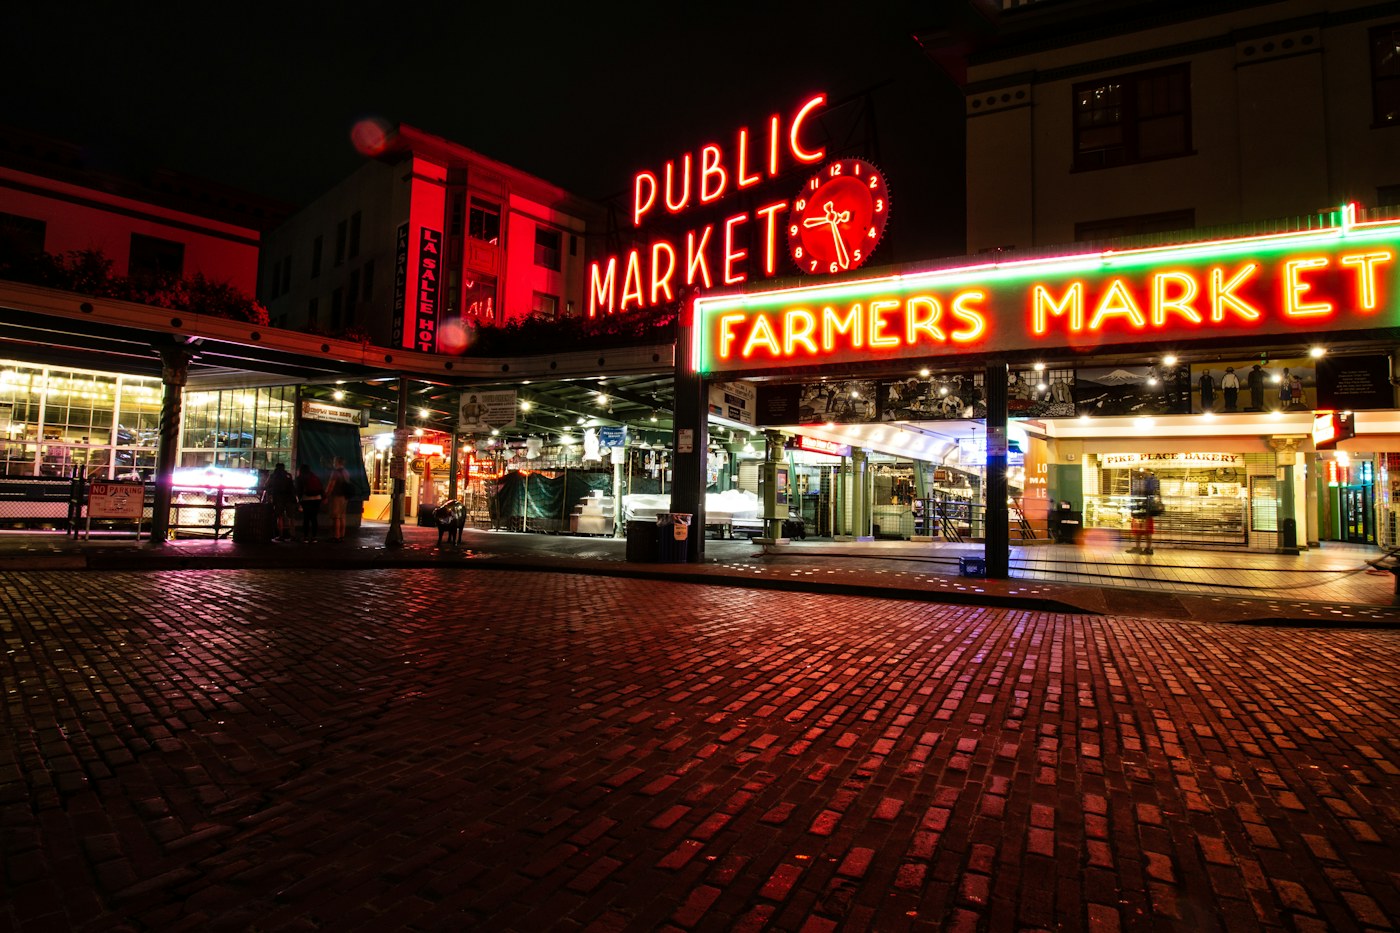
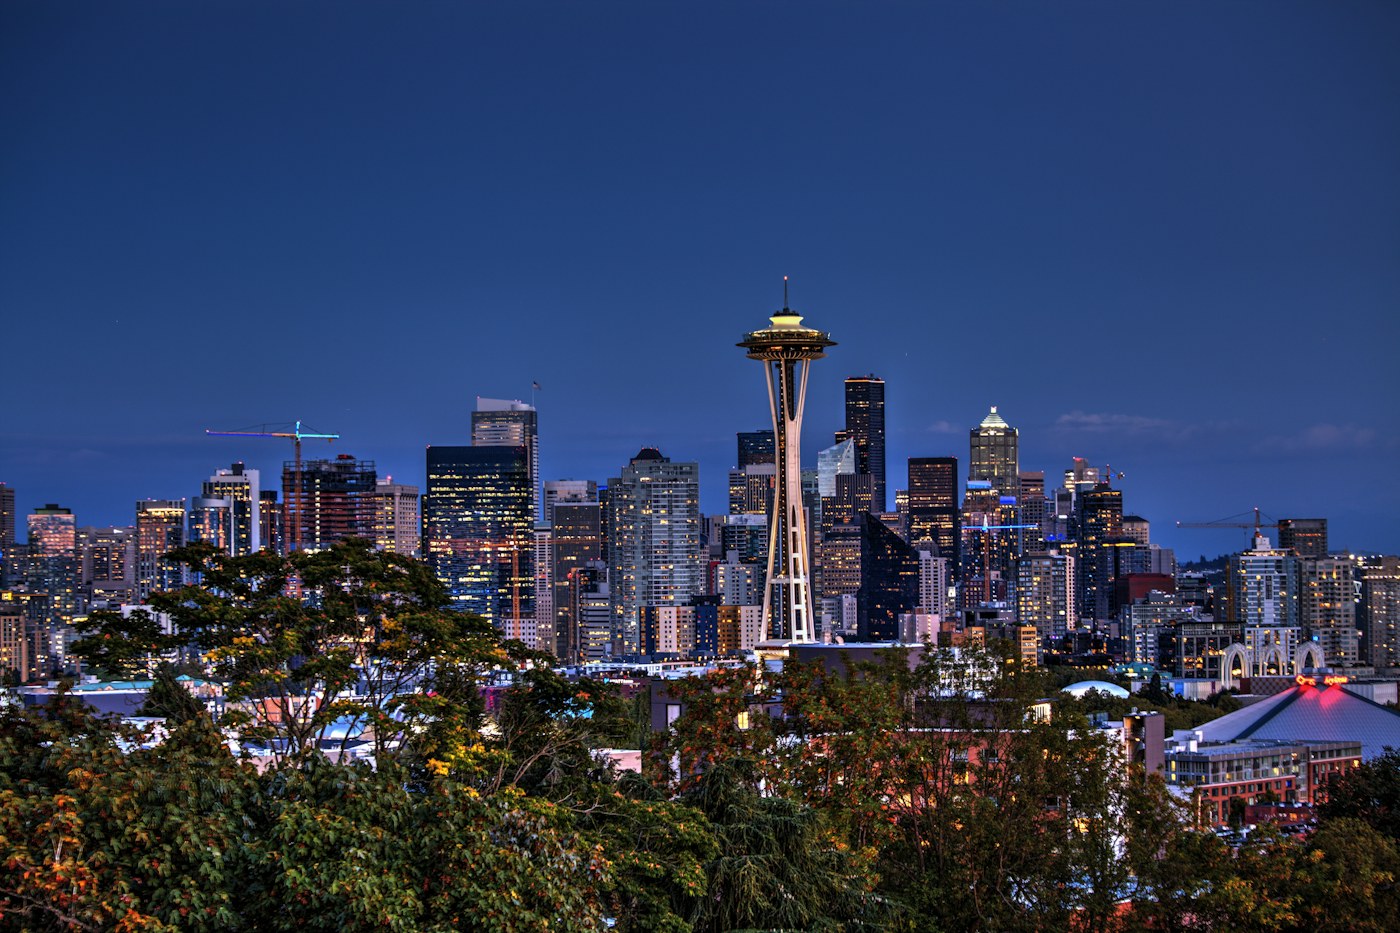
Here are three of the actual shots you’ll find inside the PDF — cinematic full-page references for the exact spots, lenses, and lighting conditions documented in the guide. The full guide includes 12 locations, each with a hero image, GPS map, settings table, and a five-shot list.
Save
Before you shoot Seattle: the essentials
- Free public access: Kerry Park, Gas Works Park, Olympic Sculpture Park, Fremont Troll, Alki Beach, Discovery Park, and Pioneer Square are all free and open to the public. Pike Place Market is free to enter; vendors sell produce and goods. Ballard Locks grounds are free.
- Commercial permits: Commercial and professional photography in Seattle City Parks (including Volunteer Park Conservatory interiors and Gas Works Park structures) requires a Seattle Parks and Recreation permit. Contact SPRevents@seattle.gov or (206) 684-4080 x2.
- Best photography seasons: Spring (Apr–Jun) for blooms and clear Rainier views; Summer (Jul–Sep) for long golden hours and ferry activity; Autumn (Oct–Nov) for vivid foliage and dramatic skies
- Blue hour notes: Best blue-hour windows run 20–35 min after sunset from waterfront and hilltop spots. Kerry Park and Alki Beach face west toward the Olympics for dramatic twilight glow. Gas Works Park reflects city lights in Lake Union, ideal for long exposures from 10–25 min post-sunset.
- Drone policy: Most major U.S. cities restrict drone flight in airspace and via local ordinances. Check FAA + city rules before launching.
- Local resource: Official visitor information
The full-resolution version of every map below — plus seasonal calendars, gear notes per location, sun-angle diagrams, and a complete photographer’s packing checklist — is inside the Seattle Photographer’s Guide PDF ($47).
1. Kerry Park Skyline Viewpoint
The single most iconic Seattle vantage: the full Space Needle rises above a dense downtown skyline with Elliott Bay behind and, on clear days, the 14,411-ft volcanic cone of Mt. Rainier floating in the distance — all from a compact free overlook on Queen Anne Hill. The foreground railing gives a natural leading line for wide-angle compositions.
- GPS: 47.6295, -122.3601
- Elevation: 335 ft
- Best time of day: golden hour to blue hour — 30 min before sunset through 35 min after; sunrise for Mt. Rainier clarity and quiet
- Sun direction: Viewpoint faces due south-southwest. Sunset light from the northwest side-lights the Space Needle and towers beautifully. At sunrise the sky glows behind Mt. Rainier to the southeast. Midday sun is overhead and flat; avoid 10 a.m.–3 p.m.
- Access: Free, open 24 h. Street parking on W Highland Dr fills fast on evenings and weekends; take Metro Bus 2 or 13 from downtown to Highland Dr / Queen Anne Ave N stop, then walk two blocks west. No restrooms.
- Difficulty: easy
- Recommended settings: Golden Hour Handheld: f/5.6, 1/125 sec, ISO 200, 24–35mm · Blue Hour Tripod: f/8, 4–8 sec, ISO 100, 24mm · Sunrise Rainier: f/8, 1/250 sec, ISO 400, 50–70mm · Night Long Exposure: f/11, 15–25 sec, ISO 100, 24mm
Shots to chase:
- Classic wide-angle frame with the Space Needle centered, downtown towers receding to the right, and Elliott Bay glittering behind — shot at blue hour with the skyline lights balanced against a deep cobalt sky
- Telephoto compression at 200mm pulling Mt. Rainier close behind the Space Needle on a clear spring or fall morning
- Long-exposure light trails from Queen Anne Ave N in the lower foreground, framing the skyline in warm amber and steel blue at twilight
- Silhouette of visitors leaning on the railing against a vivid sunset sky over the Olympic Mountains
- Wide-angle hyperfocal shot in winter snow showing the park bench and frost-covered hedge with the illuminated skyline beyond
Pro tip: Arrive 45–60 min before sunset to claim the center railing section; tripods line the rail by golden hour on any clear evening. Use a remote shutter release and disable image stabilization when the camera is on a tripod. On overcast days, shoot in the 30 min window just after rain stops — wet pavement creates foreground reflections and the sky often has dramatic texture.
Common mistake to avoid: Shooting at midday produces flat, hazy results with the skyline washed out. Many photographers forget to check Mt. Rainier visibility before committing to the hike up — use the NWS Seattle forecast or a live webcam. Avoid using flash at night; it destroys the ambient exposure balance.
2. Pike Place Market — Original Sign & Fish Throw
Operating continuously since 1907, Pike Place is one of the oldest farmers markets in the USA — the giant red neon ‘Public Market Center’ clock-and-sign on the corner of Pike St and Pike Place is among the most photographed urban signs in the Pacific Northwest. Inside, Pike Place Fish Company’s theatrical whole-salmon throws happen through the day and deliver kinetic action shots.
- GPS: 47.6092, -122.3421
- Elevation: 45 ft
- Best time of day: blue hour (30 min after sunset) for neon sign glow; early morning (7–9 a.m.) for fish-throw action with soft light and thin crowds
- Sun direction: The famous neon ‘Public Market Center’ sign faces east on Pike Place at the Pike St intersection. Morning light from the east illuminates the sign face directly. By afternoon, the sign is back-lit and better photographed in exposure-balanced ambient light or at dusk when the neon glows against a dark blue sky.
- Access: Free to enter. Open daily 7 a.m.–6 p.m. (most vendors), restaurants until late; closed Thanksgiving and Christmas. Street parking on 1st Ave and Pike St is metered; Pike Place itself is pedestrian-only 10 a.m.–4 p.m. Several garages within two blocks. Take light rail to Westlake Station and walk 5 min downhill.
- Difficulty: easy
- Recommended settings: Neon Sign Blue Hour: f/8, 2–4 sec, ISO 200, 35mm (tripod) · Fish Throw Action: f/2.8, 1/500 sec, ISO 1600, 85mm · Interior Market Ambient: f/2.8, 1/60 sec, ISO 3200, 24mm · Sign With Crowd: f/5.6, 1/125 sec, ISO 400, 24–28mm
Shots to chase:
- Low-angle shot looking up at the red neon sign with the clock and bronze pig in the foreground during blue hour when the neon pops against the dark sky
- Peak-action frame of the fish mongers mid-throw with the whole salmon airborne — use continuous burst mode at 1/500 sec or faster
- Tight portrait of flower vendors arranging fresh dahlia buckets in the stall early morning with warm stall lighting
- Wide-angle view down the lower Pike Place arcade with vendors, crowds, and Elliott Bay glinting at the far end
- Reflection of the neon sign in the wet cobblestones after rain — kneel or go low-angle for the best mirror effect
Pro tip: Arrive at 7 a.m. on weekdays for nearly empty stalls and gorgeous directional light before the market fills. The fish throw at Pike Place Fish Co. happens unpredictably as orders are placed, so station yourself for 10–15 min with a 70–200mm lens to guarantee the catch. For the sign reflection shot, a rain day is your best friend — the cobblestones become perfect mirrors.
Common mistake to avoid: Weekend afternoons bring crowds so dense that compositions are nearly impossible; midday light is harsh and creates deep shadows inside the arcade. Using a flash on the fish-throw will freeze action but blast out the warm market ambiance — keep ISO high and avoid flash. Tripods are not allowed in the main market during open hours.
3. Gas Works Park Skyline Reflection
A former gas plant converted into a public park, Gas Works offers a sweeping south-facing panorama of Lake Union with the Seattle skyline and Space Needle perfectly reflected in still water — one of the best skyline-reflection shots in the Pacific Northwest. The rusting industrial gas towers in the foreground add a unique industrial-to-urban contrast unavailable at any other Seattle vantage.
- GPS: 47.6456, -122.3343
- Elevation: 20 ft
- Best time of day: sunrise for mirror-calm Lake Union reflections; blue hour for city lights doubled in the water
- Sun direction: The park faces due south across Lake Union toward downtown. At sunrise the low sun comes from the east-southeast, painting the skyline and Space Needle in warm gold. At sunset, the sun sets to the west behind the viewpoint, so the skyline is front-lit with warm side light. Blue hour after sunset offers the classic downtown reflection.
- Access: Free, open 4 a.m.–11:30 p.m. Parking lot at 2101 N Northlake Way (paid meters). Bike path from South Lake Union and Fremont. No restrooms after dark.
- Difficulty: easy
- Recommended settings: Sunrise Reflection: f/11, 2–6 sec, ISO 100, 24mm (tripod on waterline) · Blue Hour Cityscape: f/8, 5–15 sec, ISO 200, 24–35mm (tripod) · Golden Hour Handheld: f/5.6, 1/125 sec, ISO 400, 35mm · Industrial Foreground: f/8, 1/60 sec, ISO 800, 14–16mm
Shots to chase:
- Classic wide-angle sunrise reflection: camera at water level near the park’s north shore, Space Needle and skyline mirrored perfectly in glassy Lake Union under pastel skies
- Include the rusting orange gas-treatment towers as textural foreground against a blue-hour skyline and deep cobalt sky
- Long-exposure at dusk with seaplane taxi lines creating light trails across the reflection
- Vertical panoramic stitched from the hilltop kite-flying area showing 180° of skyline arc with Aurora Bridge to the right
- Autumn morning mist rising off the lake with the skyline emerging above the fog layer — best October through November
Pro tip: Position yourself at the water’s edge on the southwest tip of the park for the cleanest reflection angle on the Space Needle. Shoot within 10 minutes of civil twilight for the sweet spot where city lights are on and the sky still holds detail. Wind is the enemy of reflections — still conditions occur most often in the hour before sunrise.
Common mistake to avoid: Coming mid-afternoon produces harsh light and no reflections; the park is a popular picnic area and the water is choppy. Missing the ‘sweet spot’ of blue hour by arriving late — the window narrows to 15 min in winter. Shooting from the hilltop only misses the lake reflection that makes this location special; always descend to water level.
4. Chihuly Garden and Glass — Glasshouse Interior
The world’s most comprehensive permanent collection of Dale Chihuly’s blown-glass work fills eight interconnected galleries plus a Glasshouse with a suspended 100-ft explosion of color that changes character entirely from day to night. The outdoor garden integrates glass sculptures among living plantings, with the Space Needle visible over the fence — allowing a unique composition of art, nature, and Seattle’s icon in one frame.
- GPS: 47.6206, -122.3506
- Elevation: 36 ft
- Best time of day: night or early evening (after 6 p.m.) when the illuminated glass glows against a dark interior; alternatively at dusk in the outdoor garden when glass is lit and sky still holds color
- Sun direction: The Glasshouse faces south toward the Space Needle. During the day, sunlight streams through the glass ceiling and interacts dramatically with the 100-ft suspended sculpture. In the afternoon, west-facing galleries receive warm side light. The outdoor garden shows glass best when front-lit (afternoon to early evening) or fully illuminated at night.
- Access: Admission required. General adult ~$35–39, youth (4–12) ~$19; combo tickets with Space Needle available and recommended. Open daily; hours vary by season (roughly 10 a.m.–5 p.m. winter, 9 a.m.–8 p.m. summer — check chihulygardenandglass.com). 305 Harrison St, Seattle Center; free re-entry same day. No tripods, monopods, or selfie sticks inside galleries; handheld only.
- Difficulty: easy
- Recommended settings: Dark Gallery Handheld: f/1.8–2.8, 1/60 sec, ISO 6400, 24–50mm · Glasshouse Daylight: f/4, 1/250 sec, ISO 400, 16–24mm · Outdoor Garden Dusk: f/4, 1/30 sec, ISO 1600, 35mm · Close Up Glass Detail: f/2.8, 1/125 sec, ISO 3200, 85mm macro
Shots to chase:
- Wide upward shot inside the Glasshouse of the entire 100-ft suspended sculpture canopy filling the frame with orange, red, and gold tendrils against the glass roof — best at dusk when interior and exterior light balance
- Low-angle detail in the Persian Ceiling room: lie on your back and shoot straight up through the kaleidoscopic colored glass panels
- Outdoor garden twilight frame: Chihuly glass tower in the foreground with the illuminated Space Needle rising behind the fence line
- Macro exploration of individual glass forms — the organic textures, air bubbles, and color gradients within a single blown sphere or twisted reed
- Reflection compositions using the black-glass display platforms as mirrors to double glass sculptures beneath artificial spotlights
Pro tip: Ticket holders can leave and return the same day — a smart strategy is to visit the galleries in daylight to understand the layout, then return at dusk for the outdoor garden when the glass is at its most dramatic. Keep camera and lens at least 12 inches from any glass sculpture; the no-tripod rule is strictly enforced. High-ISO performance on a modern mirrorless camera (Sony A7 series, Nikon Z, Fuji X) produces excellent gallery results wide open.
Common mistake to avoid: Forgetting to expose for the glass artwork rather than the ambient room: auto-exposure will underexpose the bright glass objects. Using flash is prohibited and would flatten the magical directed lighting. Rushing through the Mille Fiori installation without exploring its depth — walk around for angles where clusters of glass rods recede to a vanishing point.
Want this in your pocket on the street?
The full-resolution version of every spot above — with full-page hero photography, GPS maps with gold location pins, sun direction diagrams, multi-season tables, and a complete safety + packing checklist — is inside the Seattle Ultimate Photographer’s Guide PDF ($47). Print it, save it offline, take it on the walk. Get the guide →
5. Olympic Sculpture Park
Save
Nine acres of reclaimed industrial waterfront transformed by the Seattle Art Museum into an outdoor sculpture collection where monumental works by Alexander Calder, Richard Serra, Louise Bourgeois, and Jaume Plensa stand amid sweeping views of Puget Sound and the Olympic Mountains. The terraced Z-path descends from city-level to a restored pebble beach, offering constantly shifting perspectives and the rare combination of urban skyline, mountain range, open water, and large-scale art in a single free public space.
- GPS: 47.6164, -122.3553
- Elevation: 30 ft
- Best time of day: golden hour at sunset facing west over Elliott Bay; early morning for soft light and minimal crowds
- Sun direction: The park faces west-northwest toward Elliott Bay and the Olympic Mountains. Sunset light dramatically backlights sculptures on the lower terraces and paints the mountain range behind them in pink and orange. Morning light from the east side-lights the upper sculptures with soft warmth. The zigzag Z-path transitions from east-facing to west-facing as you descend, offering varied light angles.
- Access: Free and open daily, 30 min before sunrise to 30 min after sunset. Part of Seattle Art Museum; no admission to park. Located at 2901 Western Ave, Belltown. Street parking on Western Ave and Broad St; First Hill Streetcar connects to downtown. Elliott Bay Trail (bike/walk) passes through.
- Difficulty: easy
- Recommended settings: Sunset Golden Hour: f/8, 1/200 sec, ISO 200, 24–50mm · Sculpture Detail: f/4, 1/125 sec, ISO 400, 85–135mm · Water Long Exposure: f/11, 5–10 sec, ISO 100, 24mm (tripod at beach) · Cloudy Overcast: f/5.6, 1/60 sec, ISO 800, 24mm
Shots to chase:
- Alexander Calder’s bright red ‘Eagle’ sculpture silhouetted against a vivid orange-pink sunset sky over Elliott Bay
- Richard Serra’s ‘Wake’ — steel walls curving and converging with human figures for scale, creating a sense of claustrophobic grandeur in black-and-white
- Jaume Plensa’s ‘Echo’ (white resin kneeling figure) with the Olympic Mountains reflected in a calm Puget Sound behind her at golden hour
- Long exposure from the Pocket Beach at dusk, with smooth water, driftwood in the foreground, and the city skyline glowing to the south
- Wet-pavement reflection of a sculpture after rain, with city buildings and gray sky doubling below
Pro tip: The best light for the water-level views faces west — arrive 45 min before sunset and work your way down the Z-path so you reach the beach right at golden hour. The ‘Wake’ sculpture is best photographed in overcast light, which eliminates harsh contrast on the curved steel surfaces. Bring a polarizing filter to cut haze on water views toward the Olympics.
Common mistake to avoid: Shooting the sculptures from too far away — the scale only registers when you include human figures or get close enough to reveal texture. Missing the pebble beach at the bottom of the park, which provides the best long-exposure water compositions. Coming only for the art and ignoring the mountain-and-water views, which are among the finest unobstructed Puget Sound vistas in Seattle.
6. Smith Tower Observation Deck
Built in 1914, Smith Tower was Seattle’s first skyscraper and the tallest building west of the Mississippi for decades — its ornate terra-cotta facade and vintage cage elevator with a human operator make it the most atmospheric observation experience in Seattle. At 462 ft the 35th-floor open-air deck is lower than the Space Needle but offers unobstructed 360° views including the Space Needle in the foreground, allowing shots the Space Needle itself cannot provide.
- GPS: 47.6019, -122.3325
- Elevation: 462 ft
- Best time of day: golden hour — arrive 60 min before sunset for a drink at the prohibition-era bar while awaiting the light; shoot through the open-air deck during golden and blue hour
- Sun direction: The open-air 35th-floor wrap-around deck faces all four directions. Looking northwest, the Space Needle appears mid-distance with the Puget Sound behind it — best lit in late afternoon with the sun from the west. The south and east faces overlook stadiums, the International District, and Beacon Hill; the east catches warm morning light. The northwest corner is the sweet spot for Space Needle shots.
- Access: Paid admission ~$22 adults, ~$18 youth/students, ~$21 seniors/military. Open Mon–Sun 12 p.m.–7 p.m. (Thu–Sat until 8–9 p.m.; check smithtower.com for current hours). 506 2nd Ave, Pioneer Square. Limited street parking; Pioneer Square garages nearby. Tripods are allowed on the open-air deck.
- Difficulty: easy
- Recommended settings: Golden Hour: f/5.6, 1/200 sec, ISO 200, 35–85mm · Blue Hour Tripod: f/8, 5–15 sec, ISO 100, 24–50mm · Through Ornamental Arch: f/8, 1/125 sec, ISO 400, 28mm · Space Needle Telephoto: f/5.6, 1/250 sec, ISO 400, 200mm
Shots to chase:
- Frame the Space Needle and Mt. Rainier from the northwest corner of the open deck using the ornate white terra-cotta arch as a natural foreground frame
- Long exposure of Elliott Bay and the waterfront at blue hour with ferry light trails crossing the dark water
- Include the copper cupola and ‘Dragon Lady’ weathervane in a wide shot with the city stretching behind
- Looking straight down onto Pioneer Square’s red-brick rooftops, totem pole, and Iron Pergola — a purely vertical urban texture shot
- Telephoto compression of the snowcapped Olympic Mountains horizon above the Elliott Bay ferry terminal at dusk
Pro tip: The northwest corner of the deck gets crowded; arrive at opening for the widest choice of angles. The prohibition-era Chinese Room bar on the same floor serves cocktails — a 30-min wait with a drink is a civilized way to track the light. Tripods are permitted but space is limited; a compact travel tripod is easier to maneuver than a full-size one.
Common mistake to avoid: Coming for the view of the Space Needle and finding it partially obscured by the building on the west side — always check the northwest corner first. Underexposing blue-hour shots by trusting auto-exposure from behind glass (there is open-air access, so use it). Not allocating time for the vintage elevator experience and historical exhibits on the lower floors.
7. Pioneer Square — Iron Pergola & Tlingit Totem Pole
Seattle’s oldest neighborhood preserves Romanesque-revival red-brick buildings from the 1889 rebuilding after the Great Seattle Fire, anchored by the ornate cast-iron Victorian pergola (1909) and a 50-ft Tlingit totem pole — one of the most photographed street-level historic tableaux in the Pacific Northwest. Cobblestone alleys, the cobalt-glass canopy of Occidental Square, and layers of iron, brick, and carved cedar make every block a compositional study in architectural texture.
- GPS: 47.6005, -122.3332
- Elevation: 43 ft
- Best time of day: golden hour (late afternoon) for warm light on red brick; overcast for even, shadow-free illumination of the ornate cast-iron pergola
- Sun direction: Pioneer Square sits at the corner of 1st Ave and Yesler Way, oriented northeast-southwest. Morning light from the east hits the brick facades on the west side of 1st Ave. Afternoon sun (west) illuminates the Iron Pergola and the totem pole face — best from roughly 3–5 p.m. in summer. The pergola’s metalwork casts dramatic repeating shadows on surrounding pavers under directional light.
- Access: Free, always open. Metered street parking on 1st Ave and S Washington St; Pioneer Square and International District/Chinatown Link station one block away. Historic Underground Tour departs from nearby (paid). No restrooms unless using a nearby café.
- Difficulty: easy
- Recommended settings: Golden Hour Street: f/5.6, 1/125 sec, ISO 200, 28–50mm · Overcast Architecture: f/8, 1/60 sec, ISO 400, 24mm · Totem Pole Detail: f/5.6, 1/250 sec, ISO 200, 85–135mm · Cobblestone Alley: f/4, 1/60 sec, ISO 800, 24mm
Shots to chase:
- Low-angle wide shot of the cast-iron Victorian pergola from below, its ornate metalwork canopy filling the frame with the 1889 brick Pioneer Building beyond
- The 50-ft Tlingit totem pole at Occidental Square silhouetted against an overcast silver sky to emphasize its carved form
- Tight compression shot down First Ave S using the receding facades of Romanesque-revival brick buildings as converging lines
- Occidental Square’s London Plane trees in autumn: yellow leaves filtering light through the canopy onto stone pavers with the totem poles standing below
- The pergola and totem pole together in one frame from the corner of 1st Ave and Yesler Way — morning light produces the cleanest, least-obstructed angle
Pro tip: Visit on a Tuesday–Thursday morning when foot traffic is minimal and the light is cleanest on the pergola face. The cobblestones become reflective mirrors after rain — wet mornings are prime for low-angle pergola reflection shots. The Klondike Gold Rush National Historical Park (free, inside nearby Cadillac Hotel) provides historical context and also makes for interesting interior photography.
Common mistake to avoid: Coming on game days when CenturyLink Field (now Lumen Field) and T-Mobile Park events flood the neighborhood with pedestrians. Shooting the totem pole from too close results in heavy vertical distortion; back up to at least 50 ft and use a 50–85mm lens. Overlooking Occidental Square’s covered walkways and totem installations two blocks south, which offer richer compositions than the main Pioneer Place plaza.
8. Ballard Locks (Hiram M. Chittenden Locks)
The busiest lock system in the USA fills and drains tens of thousands of vessels annually, creating a choreographed spectacle of sailboats, fishing trawlers, kayaks, and mega-yachts rising and falling 26 ft between Puget Sound and Lake Union. The adjacent fish ladder’s underwater viewing window puts you eye-to-eye with Chinook, Coho, and sockeye salmon swimming upstream — a uniquely cinematic documentary subject.
- GPS: 47.6656, -122.3972
- Elevation: 26 ft
- Best time of day: golden hour on summer afternoons for boat traffic and warm light; mid-morning for fish ladder viewing (salmon migration July–November)
- Sun direction: The locks run east-west with the viewing area on the south bank. Late afternoon sun from the west illuminates boats in the lock chamber from the front as they transit westbound. Morning light from the east backlights incoming vessels. The Carl S. English Jr. Botanical Garden on the north side faces south, making the flower beds well-lit in midday to afternoon light.
- Access: Free. Grounds open daily 7 a.m.–9 p.m. Fish ladder viewing room open 7 a.m.–8:45 p.m. Visitor Center Wed–Sun 10 a.m.–3 p.m. (Oct–Apr) or 10 a.m.–6 p.m. (May–Sep); closed Mon–Tue. 3015 NW 54th St, Ballard. Parking $2/hr (max 3 hrs). Bus 44 from UW to Market St / 32nd Ave NW.
- Difficulty: easy
- Recommended settings: Boat Transit Action: f/5.6, 1/500 sec, ISO 400, 70–200mm · Lock Chamber Wide: f/8, 1/125 sec, ISO 200, 24–35mm · Fish Ladder Glass: f/2.8, 1/60 sec, ISO 3200, 50–85mm · Botanical Garden: f/4, 1/250 sec, ISO 200, 85mm macro
Shots to chase:
- Compressed telephoto shot of a colorful sailboat mast against an open lock gate with the Ballard Bridge in the soft background
- Underwater fish ladder: sockeye salmon mid-lunge at the viewing window, caught at 1/500 sec in the murky green light (Aug–Oct peak season)
- Overhead view from the central walkway looking straight down into the lock chamber as water fills, with boats clustered at different heights
- Golden hour: fishing trawler transiting the lock with Ballard neighborhood homes and evergreens glowing amber behind it
- Botanical garden macro: seasonal blooms in the Carl S. English Jr. Garden framing the lock infrastructure as a green-industrial juxtaposition
Pro tip: Check usace.army.mil vessel schedule or visit in July–August summer evenings when recreational boat traffic peaks — transits happen continuously. For salmon: Chinook peak is late August, Coho peaks late September; arrive early on weekday mornings when viewing window crowds are thinner. Bring a fast prime lens for the fish ladder (f/1.8 or f/2.8 to compensate for low glass light).
Common mistake to avoid: Visiting on Monday or Tuesday when the visitor center is closed and interpretive signage is limited. Using a wide-angle lens from the main overlook produces tiny boats that convey no drama — a 70–200mm is essential for lock photography. Expecting instantaneous lock transitions; a full transit takes 10–25 minutes, so patience and a focal length change while waiting pays off.
Want this in your pocket on the street?
The full-resolution version of every spot above — with full-page hero photography, GPS maps with gold location pins, sun direction diagrams, multi-season tables, and a complete safety + packing checklist — is inside the Seattle Ultimate Photographer’s Guide PDF ($47). Print it, save it offline, take it on the walk. Get the guide →
9. Discovery Park — West Point Lighthouse
Save
Established in 1881, the West Point Lighthouse is one of 18 active navigational aids in Washington State and the only lighthouse within Seattle city limits — surrounded by restored dune-grass shoreline, driftwood-strewn beaches, and sweeping views of the Olympic Mountains across Puget Sound. The 1.8-mile forest hike to reach it creates a feeling of wilderness inside a major city, with bald eagles and harbor seals frequently visible from the beach.
- GPS: 47.6617, -122.4356
- Elevation: 10 ft
- Best time of day: golden hour at sunset for warm light on the white lighthouse tower against Puget Sound; sunrise for soft pastel skies over the Olympics
- Sun direction: The West Point Lighthouse sits on the westernmost tip of the Magnolia peninsula, surrounded by water on three sides. Sunset light comes from the southwest, illuminating the lighthouse face and gilding the Olympic Mountains directly behind it. Morning light from the east side-lights the red-roofed tower and reflects off the Sound. Overcast conditions reduce glare and produce even, contrasty light on the white structure.
- Access: Free. Discovery Park open daily 4:30 a.m.–11 p.m. Driving to West Point requires a limited-issue accessibility pass; otherwise hike 1.8 miles (one-way) from the Environmental Learning Center on Discovery Park Blvd. Alternatively take the South Beach Trail (~45 min walk through forest). Bus 33 from downtown to Government Way. 3801 Discovery Park Blvd, Seattle, WA 98199.
- Difficulty: moderate
- Recommended settings: Golden Hour Wide: f/8, 1/200 sec, ISO 200, 24–35mm · Lighthouse Portrait: f/5.6, 1/250 sec, ISO 200, 50–85mm · Long Exposure Shore: f/11, 10–20 sec, ISO 100, 24mm (tripod) · Wildlife Telephoto: f/5.6, 1/1000 sec, ISO 800, 400mm+
Shots to chase:
- Classic lighthouse portrait: white tower with red roof and keeper’s house, glowing golden against the darkening Olympic Mountains at dusk
- Long-exposure beach shot with driftwood in the foreground, silky Puget Sound water receding, and the lighthouse standing in the middle distance
- Aerial-style vertical composition from the beach looking north: lighthouse point jutting into the shimmering Sound with Mount Baker faintly on the horizon
- Seattle skyline behind you (face east) with the lighthouse framed against the city across the mouth of Elliott Bay
- Bald eagle soaring over the waterline in front of the lighthouse — 400mm+ recommended; eagles are regularly seen here year-round
Pro tip: The 1.8-mile South Beach Trail walk is actually a plus for photography — the forest canopy creates dramatic light shafts in early morning and the open meadow above the bluff offers an additional elevated view of the Sound. Bring a robust tripod for shore long-exposures; the wind off Puget Sound is near-constant. Pack water and wear layers as the exposed point is significantly colder and windier than the rest of the park.
Common mistake to avoid: Arriving late in the day for a sunset shot only to discover the hike takes 45 minutes each way — plan to be at the lighthouse 90 min before sunset. The lighthouse interior is closed to the public due to lead paint hazards. Shooting only the lighthouse itself and missing the sweeping panoramic views of Puget Sound, ferries, and the Olympics to the west.
10. Fremont Troll Under Aurora Bridge
Created in 1990 by four local artists for a community contest, the 18-foot concrete troll gripping a real VW Beetle Volkswagen Beetle is the defining icon of Seattle’s quirky Fremont neighborhood — self-proclaimed ‘Center of the Universe.’ The sculpture’s massive scale, the drama of the bridge looming overhead, and the Volkswagen detail (with a time capsule inside) make it one of the most photographed pieces of public art in the Pacific Northwest and a perfect subject for conceptual scale-comparison and environmental portrait photography.
- GPS: 47.651, -122.3476
- Elevation: 60 ft
- Best time of day: overcast daylight (any season) for even, shadow-free illumination; early weekday morning for empty surroundings; dusk for ambient lighting from bridge overhead
- Sun direction: The troll is tucked under the north end of the Aurora Bridge (George Washington Memorial Bridge) at N 36th St. The bridge creates permanent shade over the sculpture, making direct sun impossible and rendering overcast days ideal — the diffuse light eliminates harsh contrast between the troll and the brightly-lit area outside the bridge opening. On sunny days, expose for the troll and accept blown-out sky areas beyond.
- Access: Free, open 24 h. Very limited street parking on N 36th St and Troll Ave N (residential area). Bus 5 or 28 from downtown to N 36th St. The troll is 15 min on foot from Gas Works Park via the Burke-Gilman Trail.
- Difficulty: easy
- Recommended settings: Overcast Full Troll: f/5.6, 1/125 sec, ISO 400, 24–28mm · Scale Portrait: f/4, 1/125 sec, ISO 400, 35mm (person next to troll) · Close Up Face Detail: f/4, 1/60 sec, ISO 800, 50–85mm · Ambient Dusk: f/2.8, 1/30 sec, ISO 3200, 24mm (handheld)
Shots to chase:
- Classic scale shot: a single person posing dramatically in the troll’s open hand or next to the Volkswagen to convey the 18-ft height
- Ultra-wide-angle (14–16mm) from right underneath the troll looking up: the concrete face and the bridge structure converge overhead for a vertiginous perspective
- Overcast detail portrait: tight face crop of the troll’s single silver hubcap eye and textured concrete skin with the Aurora Bridge piers in background
- Looking down Troll Ave N from behind the troll: the Aurora Bridge’s concrete supports form a repeating colonnade receding to the street
- Dusk/evening ambient: LED street lights and passing car headlights illuminate the troll’s concrete surfaces with warm-cool contrast; hand-hold at high ISO or use a mini-tripod on the adjacent concrete barrier
Pro tip: Arrive on weekday mornings before 9 a.m. to photograph without competing tourists — the Troll draws weekend crowds year-round. An ultra-wide lens exaggerates the scale dramatically; a 14–20mm focal length is more effective here than a standard zoom. The VW Beetle detail can be photographed separately as an abstract: shoot the chrome bumper and headlight against the concrete troll hand from below.
Common mistake to avoid: Shooting on a bright sunny day which creates an unworkable contrast ratio between deep bridge shadow and full sun outside — metering for the troll overexposes the surroundings, and metering for outside renders the troll nearly black. Staying only at standing-eye-level produces the most ordinary image; go very low (ground level) or very close to find uncommon perspectives. Street parking is extremely limited — plan to walk 5–10 min from a garage on N 34th St.
11. Volunteer Park Conservatory
Built in 1912 and listed on the National Register of Historic Places, the Volunteer Park Conservatory is a rare surviving Victorian-era glass greenhouse featuring five interconnected rooms of tropical, cactus, and bromeliad collections — a lush green sanctuary that is dramatically photogenic regardless of weather. The white cast-iron-and-glass exterior is architecturally unique in Seattle, and the surrounding Olmsted-designed park adds ponds, a century-old water tower, and seasonal magnolia and bluebell blooms as supplementary subjects.
- GPS: 47.6301, -122.3147
- Elevation: 345 ft
- Best time of day: midday to early afternoon (11 a.m.–2 p.m.) when natural light floods the greenhouse panels; exterior best at golden hour with the Victorian glass-and-steel facade glowing
- Sun direction: The conservatory faces west with its ornate Victorian entrance on the west facade. Afternoon light from the west floods the main entry hall through clear glass panels. The exterior white painted cast-iron frame against evergreen trees is best photographed in the 2–4 p.m. window on sunny days when the facade glows white against a blue sky. Interior plant rooms are naturally lit from above throughout the day.
- Access: Paid admission for interior (small fee, check volunteerparkconservatory.org; first Thursday of month is free; first Saturday free for ages 12 and under). Open Tue–Sun 10 a.m.–4 p.m., closed Mondays. 1247 15th Ave E, Capitol Hill. Street parking on 15th Ave E. No tripods permitted inside. Bus 10 or 49 from downtown to 15th Ave E and E Prospect St.
- Difficulty: easy
- Recommended settings: Interior Handheld: f/2.8, 1/60 sec, ISO 1600, 24–35mm · Tropical Detail: f/2.8, 1/125 sec, ISO 800, 100mm macro · Exterior Golden Hour: f/8, 1/200 sec, ISO 200, 35mm · Cactus Room Contrasty: f/5.6, 1/125 sec, ISO 400, 50mm
Shots to chase:
- Interior wide-angle looking down the main central hall: lush tropical fronds framing the Victorian iron arches with diffuse skylight filtering down from above
- Macro of a single bromeliad or pitcher plant in the tropical room, isolating it against the soft bokeh of glass panes and hanging greenery
- Exterior portrait of the white Victorian conservatory facade framed by cherry blossom or magnolia branches in spring — the glass reflects the pale blossoms
- Cactus room geometric study: spines, form, and shadow in high-contrast natural light from the glass ceiling
- Wide golden-hour exterior: the full glasshouse building glowing against a blue sky with Volunteer Park’s evergreen canopy behind it — a distinctly Pacific Northwest scene
Pro tip: Photography for personal use is welcome inside (handheld only — tripods strictly prohibited). The interior is temperature-controlled at 70–75°F year-round, making it ideal for photography in Seattle’s gray winters when no outdoor light cooperates. Visit on a rainy overcast day — flat diffuse light filters through the glass panels perfectly, and there are no harsh shadows or blown-out glass areas.
Common mistake to avoid: Bringing a tripod into the conservatory and having to leave without using it — read the policy before visiting. Shooting only the iconic exterior and skipping the richly photogenic interiors, which are uniquely lush. In summer the greenhouse overheats — early morning opening time (10 a.m.) is the most comfortable and least crowded.
12. Alki Beach — West Seattle Skyline
The founding site of Seattle — European settlers landed here in 1851 — Alki Beach is the only point in Seattle where you photograph the entire city skyline as a panoramic reflection across open Elliott Bay water with the Space Needle visible in the right-center of the composition. On clear evenings, the Cascades glow pink behind downtown while Washington State ferries cross the frame as natural moving elements. The beach path stretches over a mile, providing countless compositional positions.
- GPS: 47.5791, -122.4113
- Elevation: 5 ft
- Best time of day: blue hour to night — 20 min after sunset through full dark — when the Seattle skyline mirrors in Elliott Bay and city lights are at full saturation; sunset golden hour for ferry silhouettes
- Sun direction: Alki Beach faces due east across Elliott Bay toward downtown Seattle and the Space Needle — providing one of the few angles in Seattle where the city skyline appears to the east and sunrise light (from behind the viewer looking west) would back-light the skyline. The prime shooting direction is eastward toward downtown; the sun sets behind the photographer to the west (over the Olympics), causing the skyline to be front-lit at golden hour — warm, beautifully saturated colors on every building face.
- Access: Free, open 24 h. Street parking along Alki Ave SW; fills fast in summer evenings — arrive early or use the West Seattle Water Taxi (foot ferry) from Downtown Seattle’s Pier 50 (~$6, 10 min). Walk west along the Alki Beach path for varied angle and crowd avoidance. 2665 Alki Ave SW, West Seattle.
- Difficulty: easy
- Recommended settings: Blue Hour Reflection: f/8, 5–15 sec, ISO 100, 24–35mm (tripod) · Golden Hour Handheld: f/5.6, 1/125 sec, ISO 200, 35–50mm · Ferry Light Trail: f/11, 20–30 sec, ISO 100, 24mm (tripod) · Telephoto Skyline: f/5.6, 1/250 sec, ISO 400, 200–300mm
Shots to chase:
- Classic blue-hour long exposure: full Seattle skyline and Space Needle reflected as a shimmering mirror strip across Elliott Bay, with warm city lights balanced against deep cobalt sky
- Telephoto compression at 200–300mm pulling the Space Needle and Columbia Center tower tight against each other with the water glittering in the foreground
- Washington State Ferry mid-crossing: silhouette of the white ferry against the lit skyline at dusk, using a 20–30 sec exposure for a light trail in its wake
- Low tide beach reflection: when tidal pools form on the pebble foreshore, kneel or go prone for a ground-level reflection of the skyline in a shallow water mirror
- Night panorama stitched from 4–6 frames at 35mm showing the full arc from West Seattle bridge lights on the south to the Smith Cove port cranes on the north
Pro tip: Walk south along the beach path (away from the lifeguard station) for increasingly unobstructed compositions and fewer people in the frame after dark. Use a telephoto (70–200mm) rather than a wide angle for the most impactful skyline images — the distance across the bay (about 2.5 miles) means a wide-angle produces a tiny cityscape. The West Seattle Water Taxi is worth it on summer evenings: the bike path from the ferry dock to Alki is 1.5 miles along the waterfront.
Common mistake to avoid: Shooting at sunset facing west (toward the Olympics and sun) when the prime subject is to the east — always face east toward downtown for skyline shots. Summer weekends bring families and volleyball games that crowd the beach until 9 p.m.; the best photography window is weekdays after 8 p.m. in summer. Forgetting that wind off the water creates chop that destroys reflections — arrive early in calm mornings when reflections are mirror-perfect.
When to photograph Seattle: a year-round breakdown
Seattle is photogenic every month of the year — but the conditions differ radically by season. Here is what to expect:
Spring (Apr–Jun) for blooms and clear Rainier views; Summer (Jul–Sep) for long golden hours and ferry activity; Autumn (Oct–Nov) for vivid foliage and dramatic skies
Photographer safety in Seattle: read this
City photography has its own risks: gear visibility, neighborhood timing, traffic, weather. Read the briefing before you go.
- Gear visibility: Use a discreet bag with no obvious camera branding. Keep a body strapped under a jacket on transit.
- Neighborhood timing: Pre-dawn and post-sunset shoots reward early scouting. Cross-reference each location with current local guidance and choose well-lit transit routes.
- Situational awareness: Headphones out. One eye in the viewfinder, one on the street.
- Traffic: Bridges, medians, and bike lanes are not setup zones. Shoot from sidewalks and pedestrian areas only.
- Weather: Summer storms move quickly; winter cold drains batteries. Layer up, keep gear dry, watch for ice on cobblestones at blue hour.
The complete safety briefing is inside the Seattle Photographer’s Guide PDF.
Take this guide into the city
This post is the complete field reference. The Seattle Ultimate Photographer’s Guide PDF is the field-deployable version: full-page resolution hero photography, GPS maps with gold pins for every location, multi-season shooting calendars, gear notes per location, sun-angle diagrams, the full city safety briefing, and a print-ready editorial layout in Framehaus black and gold. Save it offline. Print it. Take it on the walk.
Seattle Ultimate Photographer’s Guide
Downloadable PDF · 12 GPS-mapped locations · Multi-season calendar · City safety briefing · Packing checklist
Get the Seattle guide — $47
All links go to Viator (a TripAdvisor company), the world’s largest marketplace for guided experiences. Tagged as affiliate per FTC.
Quick Amazon shortcuts to the gear most useful for this kind of shot. Use them if Prime shipping or Amazon credit makes more sense than B&H. As an Amazon Associate ShutYourAperture earns from qualifying purchases.
Take Seattle home in your pocket.
Every shot location, every angle, every time of day worth shooting. Printable PDF + GPS-tagged map.
Instant download. Works on phone, tablet, and printed.
Continue reading
- U.S. Cities Photography Guides — every city, mapped
- National Parks Photography Guides
- Travel photography destinations
- Travel photography pillar
- How to shoot golden hour like a pro
- Blue hour photography settings and locations
← Back to U.S. Cities Photography Guides
Related guides nearby
Three more photography guides within striking distance — perfect for combining into one trip.
- Glacier 649 km away · national park · USA
- Yellowstone 964 km away · national park · USA
- Grand Teton 1003 km away · national park · USA
The complete Seattle guide is $47
All vantage points above + 5 bonus secret spots, printable map, gear pack list, and editing recipes. One-time payment, instant download, lifetime updates.
Common questions about the Seattle guide
Is the Seattle photography guide worth $47?
For most photographers, yes. The guide saves 8-12 hours of trip-planning research and prevents the most common mistake of Seattle photography: shooting at the wrong time of day. If a single better frame is worth $47 to you, the guide pays for itself on day one. Buyers get every GPS coordinate, every golden-hour window, every cultural rule, and a printable shot list.
Does the Seattle guide include GPS coordinates?
Yes — every vantage point in the guide has Google Maps-ready GPS coordinates so you can pin them before you fly. The guide also includes a printable map showing all locations clustered by walking distance, so you can build efficient half-day routes.
What's in the Seattle PDF that isn't in this article?
The article shows the highlights. The PDF includes: 5 additional secret spots not published online, a 14-day itinerary with daily routes, the full camera-settings cheat sheet for every scenario in Seattle, a printable gear packing list, post-processing recipes with screenshot examples, and a list of local guides we trust for portrait commissions.
Do I get the Lightroom presets too?
The $47 guide is the PDF only. The matching Seattle preset pack is a separate $19 download — most buyers grab both as a bundle and save the editing time. Both are instant download, both work on Lightroom Classic and Lightroom Mobile.
Will the guide work for a Seattle trip in 2026?
Yes. The guide is updated annually as fees, restrictions, and new vantage points change. All buyers get free lifetime updates. The 2026 edition includes the latest drone rules, museum photography policies, and seasonal light data for the year.
Visiting more than Seattle?
Bundle multiple destination guides and save planning time across the trip:
- New York City Photographer’s Guide ($47)
- Los Angeles Photographer’s Guide ($47)
- Chicago Photographer’s Guide ($47)
- San Francisco Photographer’s Guide ($47)
- Miami Photographer’s Guide ($47)
Or get all 60+ destinations in one bundle: Photo Atlas — every guide, every map, $97.